Introduction
Foam is a versatile material that is commonly used in a wide range of industries, including automotive, construction, and arts and crafts. Gluing foam can be a challenging task, especially if you are unfamiliar with the process. However, by choosing the right glue and following a few simple steps, you can achieve a strong and durable bond that will last for years to come. In this guide, we will provide you with a comprehensive overview of how to glue foam, including the types of glue to use, how to prepare the surface, and techniques for applying the glue correctly. So let’s get started and explore the world of foam bonding!
What is Foam?
Foam is a versatile and widely used material for various applications, including upholstery, insulation, packaging and crafting. It is made from polyurethane, polystyrene, polyethylene, or by blending these materials together. Foam can come in different forms such as rigid foam, flexible foam, and foam sheets.
Rigid foam is solid and sturdy, making it an ideal choice for insulation and construction projects. It is commonly used in walls, roofs, and foundation insulation.
Flexible foam is pliable and soft, and is used for cushioning and padding. It can be found in furniture, mattresses, and automotive interiors.
Foam sheets are thin, flat pieces of foam that are used for various crafts and DIY projects. They can be easily cut into different shapes and sizes, making them ideal for a range of applications.
Foam is a lightweight and durable material that is easy to work with and can be glued to almost any surface. Whether you are working with foam sheets for crafting or upholstery foam for furniture, understanding what foam is and its different forms can help you choose the right glue and techniques for your project.
To learn how to glue foam to different surfaces, check out our related articles on gluing ribbon, tacky glue uses, and stiffening felt with glue.
Choosing the Right Glue
One of the most important factors in successfully gluing foam is choosing the right type of glue for your project. Not all glues are created equal, and using the wrong type of glue can result in poor adhesion, weakened foam, or even damage to the foam itself. Understanding the different types of glue available and the factors to consider when making your selection is crucial to ensuring a long-lasting and effective bond. So, before diving into the gluing process, let’s take a closer look at the options available and what you should keep in mind when choosing the right glue for your foam project.
Types of Glue for Foam
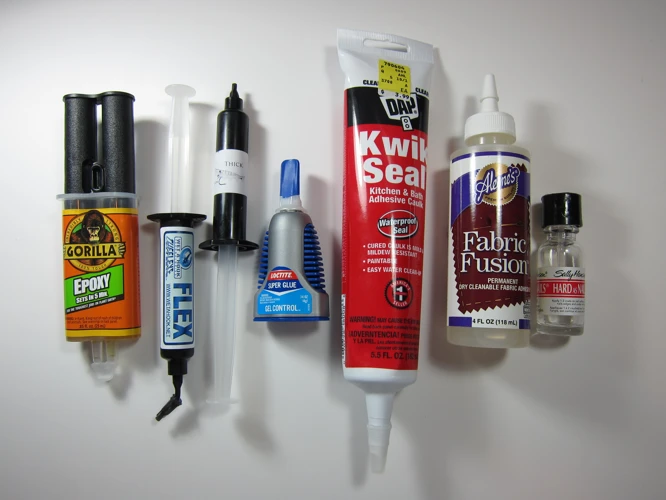
When it comes to choosing the right glue for foam, there are a few types that are commonly used. Each type has its own unique qualities, and it’s important to choose the right one for your specific project. Some types of glue for foam include:
- Polyurethane glue: This type of glue is known for creating a strong, permanent bond. It works well on both porous and non-porous surfaces and is ideal for bonding foam to wood, metal, or plastic. However, it’s important to note that polyurethane glue can expand as it dries, so it’s best to use it sparingly to avoid any mess.
- Silicone-based adhesive: This type of adhesive is often used when you need a flexible bond that will withstand movement and stress. It’s also ideal for use with foam because it won’t dry out or become brittle over time. However, it’s important to note that silicone-based adhesive can take a long time to dry, sometimes up to 24 hours.
- Epoxy: Epoxy is a two-part adhesive that creates a strong bond and dries quickly. It’s ideal for use with foam because it can be sanded or painted over once it’s dry. However, it’s important to mix the two parts carefully to ensure a proper cure.
- Craft glue: Craft glue, such as Mod Podge, is a popular choice for those who are working on smaller projects or who want an easy-to-use glue that dries clear. It’s not as strong as some of the other types of glue mentioned above, but it’s great for use with foam sheets or projects that don’t require a lot of movement or stress.
It’s important to note that not all types of glue are suitable for all types of foam. For example, some types of foam may be more porous than others, which means they may require a specific type of glue or primer to ensure a proper bond. Additionally, some types of foam may be sensitive to certain types of glue, so it’s always best to test a small area first before committing to a full project.
If you’re still unsure about which type of glue to use, consider consulting a professional or doing some research online. You may also find it helpful to read reviews or watch tutorials to get a better idea of the pros and cons of each type of glue. As you become more experienced with working with foam, you’ll likely develop your own preferences and techniques for gluing it.
If you’re interested in learning more about gluing different materials together, check out our article on how to glue fabric to wood letters.
Factors to Consider
When choosing the right glue for foam, there are several factors to consider to ensure the bond is strong and long-lasting. These include:
- Strength: Depending on the project, you may need to consider the strength of the bond. For heavier materials or frequent use, it’s important to choose a strong adhesive like epoxy or contact cement.
- Drying Time: Different glues have varying drying times, so it’s important to choose one that fits the needs of your project. Some adhesives, like hot glue, dry quickly, while others like white glue may take longer.
- Flexibility: Foam is a flexible material that may be subject to movement and bending, so it’s important to choose an adhesive that is flexible once it’s dry. For this purpose, silicone-based adhesives work well.
- Compatibility: It’s essential to choose a glue that is compatible with the type of foam you’re working with. Some adhesives may melt foam or cause it to dissolve.
- Water Resistance: If your project is going to be exposed to water or moisture, it’s important to choose an adhesive that is waterproof. PVA glues perform well against moisture.
Considering these factors before choosing the glue will ensure that the bond between the foam and any other materials being used will be sturdy and long-lasting. If you are unsure which adhesive to use, test a small patch of foam with a few different options before committing to the full project.
Preparing the Foam Surface
Before applying any glue to foam, it is important to properly prepare the surface first. This step is crucial as it can greatly affect the strength and longevity of the bond. Cleaning the surface is the first step in preparing foam for gluing. If there are any dust, dirt, or debris on the surface, it can weaken the bond and reduce its effectiveness. It is recommended to use a damp cloth or sponge to wipe down the surface and remove any debris. For stubborn dirt or stains, a mild soap solution can also be used. Want to learn how to use glue for watercolors, check out our guide on How to Paint with Watercolors, Glue, and Salt.
Cleaning the Surface
Cleaning the surface is an essential step in gluing foam. Before applying the glue, it is necessary to make sure that the surface is free of any grease, oil, dust, or dirt. Any impurities on the foam surface might interfere with the bonding process and weaken the adhesive. Follow these steps to clean your foam surface:
1. Use a Soft Damp Cloth
Using a soft, damp cloth gently wipe the foam surface. Make sure the cloth is not too wet as excess water may lead to damage the foam’s texture. Also, avoid using hot water as it can melt or deform the foam. If the foam has deep ridges, use a soft-bristled brush or even a toothbrush to scrub gently.
2. Dry the Foam
After cleaning the foam surface with a damp cloth, leave it to dry completely. You can leave it in a well-ventilated area or use a dry cloth to pat it dry. However, do not use a hairdryer or any other heat source as it can warp or damage the foam.
3. Inspect for Impurities
Once the foam surface is dry, inspect it to ensure that no dirt or debris remains. If you find any impurities, repeat the cleaning process from the beginning.
4. Apply a Primer (Optional)
Some types of foam require a primer coat for better adhesion, and it is especially necessary when working with porous foam. However, it is not necessary for all types of foam. If you do need a primer, apply a thin layer on the foam surface and let it dry before applying the glue.
Remember that a clean surface is crucial for proper bonding. Avoid shortcuts and do not use any chemical cleaning agents that can damage the foam. Following these steps ensures that your foam surface is well-prepared for gluing, and the bonding process is optimally successful.
For more tips and tricks on gluing and crafting, check out these helpful links:
How to Make Starch Glue
How to Stiffen Crochet with Glue
What Glue to Use for Scrapbooking
How to Use Glue Gun on Fabric
How to Glue Photos to Canvas
Use of a Primer
Before applying the glue to the foam surface, it’s important to consider using a primer beforehand. A primer can help to better prepare the foam for gluing and improve the strength and durability of the bond. Here are a few things to keep in mind when it comes to using a primer:
- Choose the right primer. Not all primers are created equal, and you’ll want to make sure you select the right one for the type of foam you’re working with. Look for a primer that is specifically designed for the type of foam you’re using.
- Prepare your work area. Before applying the primer, be sure to clean the foam surface thoroughly and make sure it’s dry. Use a clean, dry cloth to wipe away any dust or debris that may be present.
- Apply the primer evenly. Use a soft-bristled brush or roller to apply the primer evenly to the foam surface. Be sure to follow the manufacturer’s instructions when it comes to application, as the process can vary depending on the specific product you’re using.
- Allow the primer to dry completely. This may take anywhere from an hour to several hours depending on the specific primer you’re using, so be sure to give yourself enough time.
- Once the primer is dry, you can apply the glue using the techniques discussed in the previous section.
It’s worth noting that using a primer is not always necessary, and sometimes you may be able to achieve a strong bond without it. However, in cases where you need to ensure maximum durability and strength, using a primer can be a helpful step in the process. Just be sure to choose the right product and follow the instructions carefully for best results.
Applying the Glue
Now that we have chosen the right glue and prepared the foam surface, it’s time to apply the glue. This step requires some careful attention to detail to ensure a strong bond between the foam pieces. Before you start applying the glue, it’s important to have a clear understanding of the techniques and mistakes to avoid. Let’s take a closer look at the application process and how to achieve the best results.
Techniques for Applying Glue
When applying glue to foam, it is important to use the right techniques to ensure a strong and secure hold. Here are some techniques to keep in mind:
| Technique | Description |
|---|---|
| Rolling | Using a foam roller, apply an even coat of glue to the foam surface. This technique is great for larger surface areas. |
| Spraying | Using a spray adhesive, apply a light and even coat of glue to the foam surface. This technique is easy to control and effective for hard-to-reach areas. |
| Brushing | Using a foam brush, apply an even coat of glue to the foam surface. This technique is great for smaller surface areas and allows for precision. |
| Spot Application | Apply small amounts of glue to specific areas of the foam surface, using a toothpick or cotton swab. This technique is great for intricate designs and small details. |
No matter which technique you choose, it is important to apply the glue evenly and avoid using too much glue, as this can cause the foam to become oversaturated and weaken the bond. Additionally, make sure to work in a well-ventilated area and wear protective gloves to avoid skin irritation. By following these techniques, you can successfully glue foam with a strong and lasting bond.
Mistakes to Avoid
When it comes to gluing foam, there are some mistakes that you want to avoid to ensure a successful bonding process. Here are some common mistakes to watch out for:
- Using too much glue: Applying a thick layer of glue may seem like a good idea, but it can actually weaken the bond. Use a thin, even layer of glue for the best results.
- Not letting the glue dry: It can be tempting to start using the foam item right away after gluing, but this can compromise the bond. Make sure to let the glue dry completely before using the foam item.
- Not applying enough pressure: Proper pressure is crucial for a strong bond. Use clamps or weights to apply even pressure to the foam as it dries.
- Using the wrong type of glue: Not all glue is created equal, and using the wrong type of glue for your foam can result in a weak bond. Make sure to choose a glue specifically designed for foam.
- Using an old or expired glue: Glue can lose its effectiveness over time, so make sure to check the expiration date before using it.
- Not preparing the foam surface: Properly cleaning and priming the foam surface before gluing can make a big difference in the strength of the bond. Skipping this step can result in a weak bond that doesn’t hold up over time.
By avoiding these common mistakes, you can ensure a successful gluing process and create a strong bond between your foam items.
Gluing Techniques for Specific Foam Types
When it comes to gluing foam, not all types are created equally. Each foam material has its own unique properties and requires specific techniques for successful bonding. In this section, we will explore the gluing techniques that are most effective for specific foam types: EVA foam, PE foam, and polyurethane foam. With these tips in mind, you can confidently tackle any foam project knowing that you are using the proper adhesive and application method for the job.
EVA Foam
When it comes to gluing EVA foam, it’s essential to choose the right glue that will work best for this specific type of foam. EVA foam is often used in a variety of crafting projects such as making costumes, props, and even mats. To ensure a successful bonding result, there are specific techniques for applying glue and precautions to follow.
Types of Glue for EVA Foam
EVA foam is a type of closed-cell foam that is non-porous, which means some glues might not work well with it. Here are the recommended types of glue to use for EVA foam:
| Type of Glue | Description |
|---|---|
| Hot Glue | A popular choice among crafters for bonding EVA foam together. It has a quick drying time and is relatively easy to work with. |
| Barge All-Purpose Cement | Barge cement is a strong adhesive that can bond EVA foam to itself and other materials. It dries clear and creates a flexible bond. |
| Super Glue | Super glue or cyanoacrylate glue can work on bonding EVA foam together, but it may not be as strong as other adhesive types, and it can turn yellow over time. |
| 3M Super 77 | This spray adhesive can bond EVA foam to other materials like fabric and wood. It dries quickly and forms a permanent bond. |
Techniques for Applying Glue to EVA Foam
Before applying any glue, the EVA foam surface must be clean and dry. Here are some techniques to follow for applying glue to EVA foam:
– Apply glue to both surfaces that need to be bonded.
– Use a brush or spatula to spread the glue evenly.
– Gently press the surfaces together, starting from the center and smoothing outward.
– Use clamps or tape to secure the bond until the glue has fully dried.
Mistakes to Avoid When Gluing EVA Foam
When working with EVA foam and glue, some mistakes are common and can lead to bonding failure. Here are the mistakes to avoid when gluing EVA foam:
– Using too much glue can cause bubbling or uneven surfaces.
– Not waiting for the glue to dry completely before handling the bonded surfaces can lead to separation.
– Applying the glue to a dirty or damp surface can weaken the bond.
– Choosing the wrong type of glue can cause bonding failure.
Now that you know the techniques and tips for gluing EVA foam, you can proceed with your DIY crafting project with confidence.
PE Foam
When it comes to gluing PE foam, you need to follow certain steps to ensure the best bonding possible. Here are some tips to keep in mind:
- Choose the right glue: PE foam is a low surface energy material, so you need a glue that is designed specifically for this type of material. Opt for a cyanoacrylate or epoxy glue for the best results.
- Prepare the surface: Sanding the surface with fine-grit sandpaper can help to create more surface area for the glue to adhere to. Use a dry cloth to wipe away any dust or debris from the sanding process.
- Apply the glue: When working with cyanoacrylate glue, only a small amount is needed as it sets quickly. Using a spreader or toothpick can help control the amount you apply. With epoxy glue, mix the two components together and apply a thin layer to the surface.
- Join the pieces: Align the pieces of foam and press them firmly together. Use clamps to hold them in place while the glue dries.
- Allow time for drying: It’s important to let the glue dry completely before handling the glued foam. Follow the manufacturer’s recommended drying time for the specific glue you’ve chosen.
By following these tips and choosing the right glue, you can successfully bond PE foam. Remember, take your time and be patient during the process for the best results.
Polyurethane Foam
Polyurethane foam is a commonly used type of foam in various applications, from insulation to upholstery. When it comes to gluing polyurethane foam, there are a few things to keep in mind for a successful bonding process.
Choosing the Right Glue:
Polyurethane foam requires a specific type of glue that is compatible with its unique composition. One of the best options for gluing polyurethane foam is a contact adhesive. This type of glue creates an instant bond and is ideal for large surfaces like upholstery foam. Another option is a spray adhesive which can be used for bonding thin or small pieces of foam.
| Types of Glue for Polyurethane Foam | Best Suitable For |
|---|---|
| Heat- activated glue | Bonding foam to fabric or wood |
| Hot-Melt adhesive | Attaching foam to foam |
| Urethane adhesives | Permanent bond for outdoor use |
Preparing the Foam Surface:
Cleaning the surface of the polyurethane foam before applying glue is crucial for a successful bond. Make sure to remove any dirt, dust, or debris that may affect the adhesive’s strength. Additionally, it’s recommended to lightly sand the foam surface to create a better texture for the glue to adhere to.
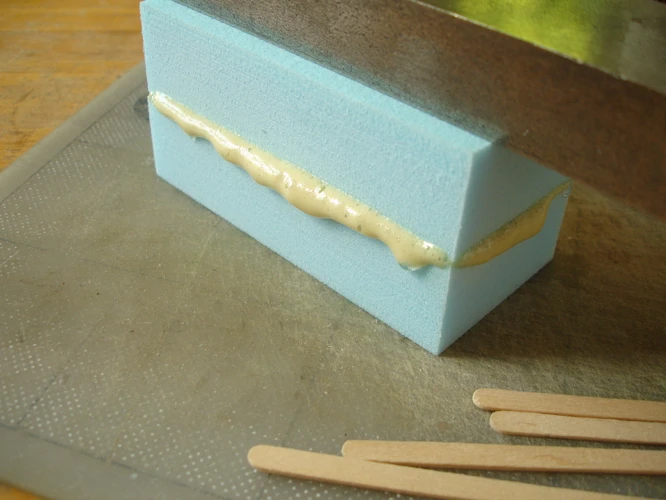
Applying the Glue:
When applying the glue to the polyurethane foam surface, it’s important to follow the instructions provided by the manufacturer. It’s recommended to apply the glue to both surfaces and wait for a few minutes to allow the glue to set before joining the surfaces together. When bonding two large pieces of foam, it’s recommended to use a roller tool to ensure an even application of the glue.
Mistakes to Avoid:
To avoid any issues during the bonding process, it’s essential to avoid making common mistakes. Overusing glue can cause the foam’s surface to warp, and can also create a weak bond. Additionally, applying too much pressure when joining two pieces of foam together can cause the foam to deform.
By following these tips, the process of gluing polyurethane foam can be made much more successful. Remember, always choose the appropriate glue for the specific foam type, prepare the foam properly, and follow the manufacturer’s guidelines for optimum results.
Tips for a Successful Gluing Process
When it comes to gluing foam, every little detail can make a big difference in the end result. While we’ve covered the types of glue and techniques for application, there are still some tips and tricks worth knowing to ensure a successful gluing process. From managing temperature and humidity to handling clean-up and storage, this section will provide the additional knowledge you need to make your foam gluing project a success. So let’s dive into the specific tactics you can use to ensure your foam pieces stay firmly in place.
Temperature and Humidity
The success of your foam gluing project can be heavily influenced by temperature and humidity. These factors can affect the performance and drying process of the glue, as well as the strength and durability of the bond. Here are some important considerations to keep in mind:
- Temperature: Optimal temperatures for gluing foam are typically between 70-85°F (21-29°C). Temperatures outside of this range can affect the glue’s viscosity, the time it takes to dry, and the final strength of the bond. If the temperature is too high, the glue may dry too quickly, leading to a weaker bond. If the temperature is too low, the glue may take too long to dry, which can compromise the bond or cause the foam to warp or shrink.
- Humidity: High humidity can also affect the drying time and strength of the bond. Excess moisture in the air can slow down the evaporation of the adhesive, leading to longer drying times and potentially weakening the bond. To combat high humidity, it’s best to work in a well-ventilated area or use a dehumidifier to reduce moisture in the air. On the other hand, low humidity can cause the foam to dry out too quickly, leading to a weaker bond or cracking of the foam. If you’re working in a dry environment, consider using a humidifier to maintain a more optimal level of moisture.
By paying attention to temperature and humidity levels during the gluing process, you can ensure that your bond is strong and durable, leading to a successful foam project.
Clamping and Drying
Once you have applied glue to your foam surface, you need to clamp the two surfaces together to ensure a strong bond. This process will typically involve holding the foam pieces together using your own hand pressure or some other type of clamp. The amount of time you need to keep the pieces together will depend on the type of glue you are using, as well as the type of foam you are working with.
Clamping your foam materials together is essential during the gluing process. It helps to keep the surfaces in contact with each other, which in turn creates a stronger bond. Clamping can be done in a variety of ways depending on the size and shape of your foam pieces. For smaller pieces, you can use your own hand pressure to hold the two surfaces together. For larger pieces, you might need to use a set of clamps.
It’s important to note that you should never apply too much pressure on your foam materials. Doing so can cause the foam to deform, which will weaken the overall bond. Instead, aim for a consistent, even pressure that will ensure the surfaces are in contact with each other.
Drying is another important step in the gluing process. You need to give the glue ample time to dry completely before removing the clamps and handling the foam materials. The drying time will vary depending on the type of glue you are using, the temperature, and humidity levels.
A general rule of thumb is to wait at least 24 hours before handling the foam again. This waiting period will ensure that the glue has had enough time to cure and create a strong bond. However, you should always refer to the manufacturer’s instructions for specific drying times.
| Tip: | Try not to move or disturb the foam pieces while they are drying. This can disrupt the bond and cause the two surfaces to separate. |
|---|---|
| Tip: | Before removing the clamps, check to see if the glue is dry by gently pressing on the foam surfaces. If the foam feels sticky or tacky, then the glue hasn’t fully dried yet. |
By following these clamping and drying techniques, you can ensure a successful gluing process that results in a strong and lasting bond between your foam materials.
Clean-Up and Storage
After the gluing process is complete, it is important to properly clean up and store your materials to avoid any damage or accidents. Here are some tips for cleaning up and storing your foam and glue:
- Clean-up: Use a damp cloth to clean any excess glue from the surface of the foam. If necessary, non-acetone nail polish remover can also be used to remove any stubborn glue residue.
- Disposing of glue: Be sure to dispose of any glue and glue containers properly according to your local regulations. Do not pour glue down the drain as it can cause blockages and damage to your plumbing system.
- Storage: Store your foam and glue in a cool, dry place away from direct sunlight and any heat sources. Choose a location that is easily accessible and labeled properly to avoid confusion or accidents.
- Protective measures: To prevent your glue from drying out or your foam from becoming brittle, consider adding a small amount of water to the glue bottle or storing the foam in a plastic bag with a damp cloth.
- Safety: Always remember to wear gloves and protective eyewear when handling glue to avoid any skin irritations or eye injuries.
By following these clean-up and storage tips, you can prolong the life of your materials and ensure a safe and successful gluing process.
Conclusion
In conclusion, gluing foam may seem like a daunting task, but with the proper tools and techniques, it can be easily accomplished. Remember to choose the right glue for your foam type, properly prepare the foam surface, and apply the glue with care. Taking the time to understand the specific properties of the foam you are working with will also lead to better results.
It is important to note that temperature and humidity can greatly affect the success of your gluing process, so consider these factors when selecting your workspace. Clamping and drying are also key steps that should not be rushed, as they will ensure a strong bond between the foam pieces.
Lastly, always remember to properly clean up and store your tools and materials. This will not only extend their lifespan but also keep your workspace organized and safe. With these tips and tricks in mind, you’ll be able to successfully glue foam for all your crafting and DIY needs. Happy crafting!
Frequently Asked Questions
What is the best glue for foam?
There are many options, including contact cement, glue gun, foam glue, and more. Ultimately, the best glue will depend on the specific type of foam you are working with, as well as the intended use.
How should I clean the foam surface before gluing?
You should use a clean, dry cloth to wipe away any dust or debris. If there is any dirt or residue that won’t come off, consider using a mild soap and water solution to gently clean the surface.
Do I need to use a primer before gluing?
Using a primer is not strictly necessary, but it can help to create a stronger bond between the glue and the foam surface. This is especially true for porous or uneven surfaces.
How long does it take for glue to dry on foam?
The drying time will depend on the type of glue you are using, as well as factors like temperature and humidity. This can range from a few minutes to several hours. Follow the manufacturer’s instructions for best results.
What are some mistakes to avoid when gluing foam?
Avoid using too much glue, as this can result in an uneven surface or visible residue. Additionally, be careful not to let the glue dry too quickly, as this can prevent a strong bond from forming.
Can I use hot glue on foam?
Yes, hot glue can be used on some types of foam, such as EVA foam. However, it may not be the best choice for foam that is thin or easily damaged by heat.
How do I know if the glue has dried completely?
You can usually tell if the glue has dried by simply touching it. If it feels completely dry and does not leave any residue on your fingers, it should be ready.
What is the difference between closed-cell and open-cell foam?
Closed-cell foam is a type of foam that has tiny, tightly packed cells. This makes it more dense and resistant to water absorption. Open-cell foam has larger, loosely packed cells that make it more flexible and lighter.
Can I use regular glue on foam?
Regular glue may not be strong enough to create a lasting bond on foam. It is best to use a glue that is specifically designed for foam, or to choose a glue based on the recommendations of the foam manufacturer.
What should I do if the glue doesn’t stick to the foam?
If the glue is not sticking, it may be because the foam surface is too smooth or has a coating that is preventing the glue from adhering. In this case, consider roughing up the surface with sandpaper or trying a different type of glue.