Crochet is one of the most popular crafts in the world, and it’s no surprise that millions of people enjoy the relaxing and creative experience of crocheting. However, sometimes you may want to take your crochet projects to the next level by stiffening them. Whether it’s to add structure to a small figurine or to create a dramatic effect in a larger piece, stiffening crochet can be a great way to enhance your work. In this comprehensive guide, we will explore the most effective way to stiffen crochet – with glue! We will outline the benefits of stiffening crochet, the types of glue that are suitable for the job, and provide a step-by-step guide on how to stiffen your crochet project with glue. So let’s get started and learn how to create beautifully structured crochet pieces that will impress and delight.
Why Stiffen Crochet?
Stiffening crochet can be a crucial step in many crochet projects. There are numerous reasons why you may want to stiffen your finished crochet project. Firstly, stiffening your project can provide structure and support to your work, allowing it to hold its shape better. Additionally, it can also help to prevent stretching and sagging over time. Strengthening your crochet project with glue can also help to make it more durable, especially if it is going to be used or handled frequently.
Stiffening crochet can also enhance its aesthetic appeal, giving it a more polished and professional look. Certain crochet projects, such as doilies or ornaments, require stiffness to enable them to stand up on their own, or to perform the function they were intended for. Also, you can use stiffening to improve the look of embellishments such as bows and flowers. Stiffened crochet can be painted or decorated with glitter as well, and it will retain its shape and style much better than unstiffened crochet.
Stiffening crochet is a crucial step that can significantly increase the durability, aesthetic appeal, and functionality of your crochet projects. Whether you are making a decorative item, a practical object, or anything in between, stiffening with glue can enhance the finished product. There are many types of glue that can be used for stiffening crochet, and choosing the right one will depend on the project and materials involved, which we will explore further in the subsequent sections of this article.
Benefits of Stiffening Crochet
Stiffening crochet projects can have a variety of benefits, depending on the item being created. For instance, when making stuffed animals or sculptures, stiffening the crochet can help the item maintain its shape without collapsing or sagging. Similarly, creating baskets or bowls out of crochet can be made sturdier by using a stiffening agent. Stiffening can also make crocheted lace or doilies more durable and less likely to fray or lose their shape.
Using glue to stiffen crochet adds an extra layer of durability, as it can help protect the item from damage or wear and tear. Glue can also add a certain level of water resistance, which can be particularly useful for items like coasters or pot holders. Additionally, stiffened crochet can be easier to clean and maintain, as it is less likely to snag or become damaged during the washing process.
Another benefit of stiffening crochet is that it can open up a wider range of crochet projects to explore. For example, crocheted jewelry can be made stiffer to create bangles, pendants, and other accessories. Similarly, hats or hair accessories can be stiffened to maintain their shape and structure. With the right technique and materials, almost any crocheted item can be stiffened and made more durable.
By stiffening crocheted items, crafters can create pieces that are not only more visually appealing, but also more functional and long-lasting. With just a bit of glue and a little bit of patience, you can take your crochet projects to the next level and enjoy them for years to come.
Crochet Projects That May Need Stiffening
Crochet Projects That May Need Stiffening
While some crochet projects have a natural stiffness or structure to them due to the type of yarn used or the stitch pattern, others may require additional stiffening. One such project that may need to be stiffened is a crochet doily. Doilies are often created with cotton crochet thread, which can be too delicate to hold its shape on its own. By stiffening the doily, it can maintain its shape and add a decorative element to your home decor.
Another crochet project that may need to be stiffened is a crochet basket. Crocheted baskets can be made in a variety of stitch patterns and with a variety of materials, but can sometimes lose their shape and structure over time. Stiffening the basket can help it to maintain its shape and ensure that it remains functional as a home storage solution.
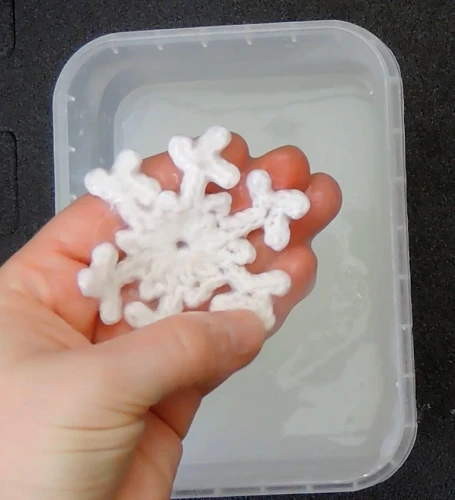
Crochet coasters, snowflakes, and ornaments may also benefit from stiffening, especially if they are meant to retain their shape for decorative purposes. By stiffening these small crochet projects, you can ensure that they hold up to daily use and remain a beautiful and functional part of your home decor.
To stiffen these crochet projects, you can use a mixture of glue and water. The mixture will seep into the fibers of the crochet and create a stiff, shell-like structure when it dries. Be sure to choose the right type of glue for your project. If you’re uncertain about which glue to use, check out our article on what fabric glue to use for more information.
Types of Glue That Can Be Used to Stiffen Crochet

Stiffening crochet projects can be done with different types of glue. The type of glue you use will depend on the desired stiffness and finish of your project. Regular craft glue is a popular choice for stiffening crochet. It is easily accessible, dries clear, and has a glossy finish. However, it may not provide a very strong hold and may not be suitable for washing.
If you want a stronger hold and waterproof finish, you can use a waterproof fabric glue. This type of glue is commonly used in upholstery and should hold up to washing and handling.
Another option is to use a starch-based glue or cornstarch mixture. This is a natural and inexpensive option for stiffening crochet. It is also ideal for those who are sensitive to chemical odors. However, this option may not provide the same level of stiffness as other glues and may not be waterproof.
For those who prefer a more flexible finish, white glue (also known as school glue) can be used to stiffen crochet. It dries flexible and can be used to provide some stiffness to the material without making it too stiff.
While some glue types may not be suitable for all crochet projects, it is important to choose the right type of glue for the desired effect. When in doubt, test a small area of the project with the glue to make sure it has the desired effect and does not damage the material. It is also important to follow the manufacturer’s instructions when using any type of glue.
If you are unsure about which glue to use for a particular type of fabric or material, you can check out other articles on what glue to use for upholstery or how to glue cloth for more information.
Overview of Different Types of Glue
When it comes to stiffening crochet with glue, it is important to choose the right type of glue for the job. Here are some of the most commonly used types of glues for this purpose:
White Glue: White glue, also known as school glue or PVA glue, is a water-based adhesive that dries clear and flexible. This type of glue is widely available and is a popular choice for stiffening crochet projects because it is easy to find and relatively inexpensive.
Mod Podge: Mod Podge is a brand of craft glue that can be used for a variety of projects, including stiffening crochet. It dries clear and can be used as both a glue and a sealer, making it a versatile option. Mod Podge comes in several different formulas, including gloss, matte, and satin.
Sugar Starch: Sugar starch is a natural alternative to traditional commercial glues and can be made at home with just sugar and water. This glue is safe, non-toxic, and easy to wash out of crochet projects. However, it may not provide the level of stiffness that some projects require.
Cornstarch Glue: Cornstarch glue is another natural alternative to commercial glues that can be made at home with cornstarch, water, and vinegar. It is safe, non-toxic, and can be washed out of crochet projects. However, like sugar starch, it may not provide the level of stiffness that some projects require.
Stiffy: Stiffy is a brand of fabric stiffener that is specifically designed for use with crochet and other fabric projects. It dries clear and stiff and can be applied with a brush or spray bottle. However, it is more expensive than other types of glue and may be harder to find in stores.
When choosing a glue to stiffen your crochet project, it is important to consider factors such as availability, cost, stiffness level, and ease of application. Experimenting with different types of glue can help you find the best option for your specific project. If you need further information about what types of glue or adhesive to use for other applications, please check our article for alternatives to fabric glue.
Comparison of Glue Types for Stiffening Crochet
Comparison of Glue Types for Stiffening Crochet
There are several types of glue that can be used to stiffen crochet projects, each with their own pros and cons. Here are some of the most popular options:
1. White glue (PVA glue): This type of glue is popular for stiffening crochet because it dries clear and doesn’t yellow over time. However, it can take longer to dry than other types of glue.
2. Cornstarch and Water: A mixture of cornstarch and water can also be used as a natural option for stiffening crochet. This method requires heating the mixture over the stove until it thickens, and may not be as effective as other types of glue.
3. Sugar Water: A mixture of sugar and water can also be used to stiffen crochet, and is a popular traditional method. However, this method may attract bugs and other pests to your crochet project.
4. Mod Podge: Mod Podge is a popular crafting glue that can also be used to stiffen crochet. It dries clear and can be easily painted over. However, it may not be as effective as other types of glue for stiffening larger crochet projects.
5. Spray starch: Spray starch is an easy-to-use option for stiffening small crochet projects. However, it may not be as effective for larger projects and can be more expensive than other types of glue.
When selecting a glue to stiffen your crochet project, consider the size of the project, the level of stiffness desired, and any potential allergy concerns. It’s also important to read the manufacturer’s instructions for proper usage and application.
It’s not recommended to use inappropriate types of glue for stifffening crochet, such as hot glue or super glue, which can damage the fibers of your crochet. If you’re looking for more information on different types of glue, check out our articles on what glue sticks are and how to glue paper to plastic for more insight.
Materials Needed
When it comes to stiffening crochet with glue, you don’t need a long list of materials. In fact, you probably already have most of the items on hand. Here are the basic supplies you’ll need:
Crochet project: Of course, you will need the crochet project you want to stiffen. It can be anything from a doily to a hat, as long as it’s made of crochet.
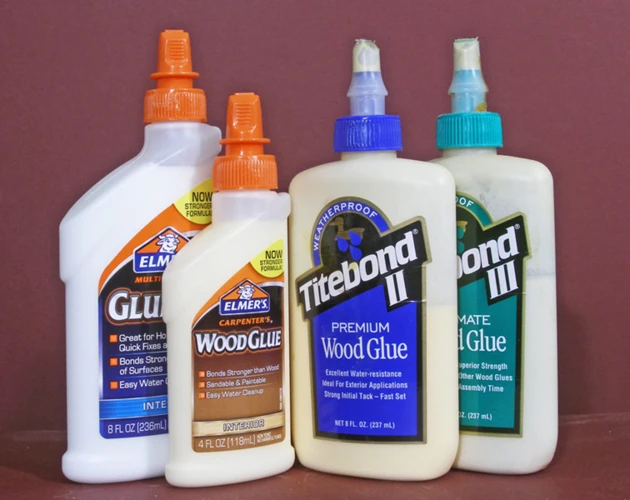
Glue: You will need glue to stiffen your crochet project. There are different types of glue you can use, such as white glue, fabric glue or liquid starch. One popular option is Aleene’s Fabric Stiffener & Draping Liquid, which is known for its ability to stiffen crochet quickly and effectively.
Bowl or container: You will need a bowl or container to mix your glue solution. Make sure it’s large enough to hold the solution and your crochet project.
Water: You will need water to mix with your glue. The ratio of glue to water will vary depending on the glue you use and the level of stiffness you want to achieve.
Measuring cups: Depending on the glue you use, you may need measuring cups to ensure you mix the right amounts of glue and water.
Spoon or stirrer: You will need a spoon or stirrer to mix your glue and water together.
Towel or cloth: You will need a towel or cloth to soak up any excess glue solution as you apply it to your crochet project.
Having the right materials on hand will make the stiffening process much easier. With the above-listed supplies, you’ll be well on your way to achieving a perfectly stiffened crochet project.
As a tip, make sure to work in a well-ventilated area when working with glue. If you accidentally spill or get glue on your work surface, you can head over to “How to Glue Canvas” article for useful tips on how to clean up the mess.
Step-by-Step Guide to Stiffening Crochet Projects with Glue
Stiffening crochet with glue can be an effective way to give your project the desired shape and structure. Here is a step-by-step guide on how to stiffen crochet projects with glue.
Step 1: Prepare Your Work Area
Before you begin, it’s essential to prepare your work area. Cover your working surface with a plastic sheet or old newspapers to protect it from glue stains. Make sure your surface is clean and dry before placing your crochet project on it.
Step 2: Mix Your Glue Solution
The next step is to mix your glue solution. Different types of glue have different mixing ratios. Refer to the manufacturer’s instructions to get the right ratio for your chosen glue. As a general guideline, mix three parts of glue and one part of water to make the solution.
Step 3: Apply the Glue Solution to Your Crochet Project
Using a paintbrush or sponge, apply the glue solution to your crochet project evenly. Make sure to reach all the edges and corners to ensure that your project is stiffened uniformly. Be careful not to use too much glue to avoid soaking your project; the right amount is essential.
Step 4: Mold Your Crochet Project into Shape
Once you have applied the glue solution, mold your crochet project into the desired shape. You can use pins or clips to hold the project in place while it dries. Press and hold the edges and corners to ensure that they maintain the shape you’re going for.
Step 5: Allow Your Crochet Project to Dry
Allow your crochet project to dry overnight or for at least six hours. The drying time may depend on the type of glue you used, so make sure to check the manufacturer’s instructions. Avoid touching your project until the glue is completely dry.
It’s important to note that different types of crochet projects may have different stiffening needs. Smaller and lightweight projects may only need a light layer of glue, while larger, heavier projects may need several layers. Make sure to adjust your glue solution accordingly.
Tips and Tricks
To achieve a glossy finish, use a glue solution with a small amount of white vinegar. You can also mix a small amount of glitter with the glue solution to add some sparkle to your crochet project.
Common Mistakes to Avoid
One common mistake is using too much glue, which can result in a lumpy and uneven finish. Another mistake is using the wrong type of glue, which can damage your project or leave stains. Make sure to choose a glue that is safe for your particular project.
Stiffening crochet with glue is a great way to give your project structure and shape. By following these steps and considering the tips and tricks, your finished project will look impressive and professional.
Step 1: Prepare Your Work Area
Step 1: Prepare Your Work Area
Before beginning to stiffen your crocheted project with glue, it is important to make sure your work area is clean and safe. It’s best to work on a flat surface covered with a protective layer, such as plastic or newspaper, to avoid damaging any surfaces. For easy cleanup, consider using a non-stick mat like those used for baking.
If you’re working with a delicate project, like lace crochet, consider using a foam board or a soft surface like a towel to avoid stretching the fabric. You should also make sure to have all the necessary materials within reach, saving time and effort during the process.
To minimize the risk of accidentally gluing your project to the work surface, you can use masking tape to secure the edges of your project to your work surface. This will also allow you to keep the desired shape of your project, preventing it from shifting during the stiffening process.
Keep in mind that different types of glue can have different drying times and instructions for proper use. If you’re new to crafting, it’s best to read the instructions carefully or seek guidance from someone with more experience.
Now that you’ve prepared your work area, you’re ready to begin the process of stiffening your crocheted project with glue.
Step 2: Mix Your Glue Solution
To stiffen crochet with glue, the next step after preparing your work area is to mix your glue solution. This step is crucial in achieving the desired result for your crochet project. Any type of white glue can be used, like Elmer’s Glue or PVA Glue.
How to Mix Your Glue Solution
First, take a small bowl and add a desired amount of glue into it. You can dilute the glue with water, depending on the desired stiffness of your project. Be sure to mix it thoroughly until it reaches a smooth and consistent texture. A good proportion to follow is three parts water to one-part glue, but the ratio of glue to water may vary depending on the brand of glue you use.
If you want your project to dry clear, mix in a few drops of water with some Mod Podge or clear glue. Dilute the glue to a consistency that is easy to work with, and be careful not to make it too watery as it may not adhere and stiffen your crochet project.
It is suggested to use a brush to mix the glue solution thoroughly, making sure that all the glue particles have been dissolved in the water. You can also mix the extra glue solution for future use, as long as it’s stored in an airtight container.
Internal link: If you need to glue a patch on a hat and want to learn how to do it properly, check out our step-by-step guide to glueing a patch on a hat for some useful tips.
Remember to mix glue solution to the right consistency to avoid over-saturating or under-saturating your crochet project. The right balance is key to ensuring that your project maintains its shape and stiffness while also avoiding any damage to the crochet.
Step 3: Apply the Glue Solution to Your Crochet Project
Now that you have mixed your glue solution, it is time to apply it to your crochet project! Take your crochet project and gently dip it into the bowl of glue. Alternatively, you can use a paintbrush or sponge to apply the glue solution to your crochet piece. Make sure that you cover every part of the piece with glue so that it will stiffen evenly.
However, you don’t want to oversaturate your crochet with glue because it could damage the material. It’s essential to find the right balance of glue when applying it. If you used the paintbrush or sponge method, wring out any excess glue before applying it to your crochet project.
Be sure to pay close attention to delicate areas. Use a small, clean paintbrush to apply glue to intricate or small pieces of crochet to avoid over-saturating these sections.
Remember that different types of glue will have different consistencies. You may need to adjust your application method accordingly. Some glues may be thicker than others, so you might need to thin them out slightly before use or use a thicker brush to apply them.
Once you have covered your crochet project in glue, use your hands to gently work it in, ensuring that it is evenly distributed. If you want a stiffer result, you can add extra layers of glue.
Keep in mind that some types of glue dry clearer than others. If you’re using a colored glue, keep in mind that the color may appear lighter or darker when it dries. Additionally, some glues may cause the crochet material to yellow over time. If you want to avoid this, choose a clear glue.
Applying the glue solution to your crochet project should be a straightforward process. Just start by ensuring you have the right amount of glue and take your time applying it. For more tips on using different types of glue for creative projects, check out our articles on what glue to use for collage and how to make a sock puppet without hot glue.
Step 4: Mold Your Crochet Project into Shape
After applying the glue solution to your crochet project, you’ll need to mold it into shape. This is the step in the process that will ultimately determine the final outcome of your project, so it’s important to take your time and pay attention to the details.
Start by identifying the shape you want your crochet project to have. Look at your pattern or design and decide which areas need to be more structured. Then, use your fingers to gently shape those areas into the desired shape.
For more complex shapes, you may need to use a mold or form. This could be as simple as using a ball or balloon to shape a round object, or as intricate as creating a custom form out of foam or cardboard. Make sure the shape you’re using matches the size and dimensions of your crochet project, and that it will hold its shape throughout the drying process.
Use pins or clips to hold your project in place as it dries. Once you’ve shaped your crochet project, use pins or clips to hold it in place as it dries. Be sure to place the pins or clips in inconspicuous areas, as they may leave small marks on the finished project. If you’re using a mold or form, the pins or clips may not be necessary.
Re-shape your project as needed while it’s still wet. If you notice any areas that need more shaping or adjustment, you can make these changes while the project is still wet. This will give you more flexibility and control over the final outcome.
Be patient and allow your project to dry completely before handling it. This can take anywhere from a few hours to a full day, depending on the size and complexity of your project. Avoid handling your project until it is completely dry, as this can cause it to lose its shape or become distorted.
Once your project is dry, gently remove any pins or clips and admire your newly stiffened crochet creation! It should now be able to hold its shape and have a more structured appearance, thanks to the glue stiffening solution.
Step 5: Allow Your Crochet Project to Dry
Once you have molded your crochet project into shape, the next step is to allow it to dry completely. It’s important to exercise patience during this stage as rushing through it could ruin all the previous hard work. Air-drying is the recommended method as it’s the safest and also the most natural way to dry off the glue.
To dry your crochet project, place it on a flat surface and leave it to air dry for a minimum of 24 hours. Ensure that it’s completely dry before handling it to avoid creating dents or marks on the surface. The drying time may vary depending on the thickness of your crochet project and the type of glue used, so be sure to check that it’s fully dry before proceeding.
Another important factor to consider is the temperature and humidity of the room. Keep the room well-ventilated and try to maintain a temperature of around 70°F (21°C) for optimal drying conditions. Avoid placing the crochet project near a source of direct heat such as radiators or sunlight, as this may cause the glue to dry unevenly and could lead to cracking.
If you’re in a hurry and need your crochet project to dry faster, consider using a fan to improve air circulation around the room. Alternatively, use a hairdryer on the lowest setting to carefully and evenly dry off the glue. However, be careful not to expose the crochet project to too much heat as this can cause the glue to melt and deform the project.
To sum up, allowing your crochet project to dry is an important final step when stiffening with glue. Air drying it for at least 24 hours in a well-ventilated room will ensure that it dries evenly, without any damage to the project. By following these guidelines, you’ll be able to successfully stiffen your crochet project, giving it the desired shape and form.
Tips and Tricks
When it comes to stiffening crochet with glue, there are a few tips and tricks that can help you to achieve the best results.
Tip #1: Experiment with different types of glue to determine which one works best for your specific project. Some crocheters swear by white glue, while others prefer clear-drying PVA glues or fabric stiffeners.
Tip #2: If you’re working with a delicate or intricate crochet project, consider using a spray bottle to apply the glue solution. This can help to ensure that you distribute the glue evenly without damaging the project.
Tip #3: When shaping your crochet project, use your fingers or a soft-bristled paintbrush to gently mold the project into shape. Avoid using excessive force or pressure, as this can cause the project to stretch out of shape.
Tip #4: If you’re working with a larger crochet project, consider using a wooden or foam block to help shape and support the project as it dries. This can help to prevent the project from sagging or losing its shape.
Tip #5: Consider adding additional layers of glue to your crochet project if you want to achieve a stiffer finish. To do this, simply allow the first layer of glue to dry completely before adding additional layers.
Tip #6: Always follow the manufacturer’s instructions when working with glue, and avoid using glue that is past its expiration date.
Remember, stiffening crochet with glue can take some practice to get right. Don’t be discouraged if your first project doesn’t turn out perfectly – with patience and persistence, you’ll be able to achieve the results you’re looking for!
Common Mistakes to Avoid
When it comes to stiffening crochet with glue, there are some common mistakes that can be easily avoided with a little bit of knowledge and preparation.
Using the Wrong Type of Glue
One of the biggest mistakes that people make when it comes to stiffening crochet with glue is using the wrong type of glue. It is crucial to use a glue that is specifically designed for fabric or yarn, such as fabric glue or Aleene’s Original Tacky Glue. Using a glue that is not designed for use with yarn can cause the fibers to stiffen in an undesirable manner, making the final result look stiff and unnatural.
Not Diluting the Glue
Another common mistake is not diluting the glue. Many people make the mistake of using glue straight out of the bottle, which can be too thick and leave a sticky residue on the crochet. It is important to dilute the glue with water according to the manufacturer’s instructions in order to create a solution that will be easy to apply to the crochet without leaving unwanted residue.
Applying Too Much Glue
When it comes to stiffening crochet, less is often more. It is important to apply glue to the crochet sparingly, as applying too much glue can cause the fibers to clump together and create an unnatural and stiff appearance. Instead, it is better to apply a thin layer of glue and then mold the crochet into shape with your hands.
Not Allowing Enough Drying Time
Another common mistake is not allowing enough drying time. Once you have applied the glue to your crochet, it is important to allow sufficient time for it to dry completely before handling the project. This can take several hours or even overnight, depending on the type of glue used and the size of the project. Trying to handle the crochet before it has dried completely can cause the fibers to shift and create an uneven texture.
Skipping the Blocking Step
Blocking is an important step in the stiffening process that should not be skipped. Once you have applied the glue and allowed it to dry completely, it is crucial to block the crochet into the desired shape while it is still damp. Skipping this step can cause the crochet to lose its shape and become uneven or lumpy.
By avoiding these common mistakes, you can achieve a beautifully stiffened crochet project that looks natural and professional. Remember to use the correct type of glue, dilute the glue properly, apply it sparingly, allow sufficient drying time, and block your project for the best results.
Conclusion
In conclusion, stiffening crochet with glue can be a great way to add structure and durability to your projects. Whether you’re working on a functional item like a coaster or a decorative piece like a doily, stiffening can help your crochet maintain its shape and last longer.
By using the right type of glue and following the step-by-step guide outlined in this article, you can achieve great results with this technique. Remember to prepare your work area, mix your glue solution, apply the glue evenly to your project, mold it into shape, and allow it to dry completely.
It’s important to choose the right type of glue for your project depending on the desired level of stiffness, texture, and color. Through testing and experimenting with different glues, you can find the best option for your project.
Lastly, be sure to avoid common mistakes such as over-saturating your project with glue or using too little glue, which can lead to uneven stiffening. Follow the tips and tricks provided in this article to ensure that your project turns out beautifully.
Overall, stiffening crochet with glue can be a fun and rewarding technique to make your crochet projects stand out. Give it a try and see the difference it can make in the final result. Happy stiffening!
Frequently Asked Questions
Can I use any glue to stiffen my crochet project?
No, not all glues are suitable for stiffening crochet. Some glues take longer to dry and can leave a sticky residue on your crochet. It is best to use a glue that dries clear and flexible like white craft glue, fabric glue, or stiffening solution.
How long does it take for the glue to dry?
The drying time varies depending on the type of glue you use, the thickness of your crochet project, and the humidity level in the air. As a general rule, most glue solutions will take anywhere from 12 to 24 hours to dry completely.
Can I use stiffening spray instead of glue?
Yes, stiffening spray is another option for stiffening your crochet project, but the results may not be as strong or long-lasting as using glue. Stiffening spray is also more expensive than glue.
Will stiffening my crochet project change the texture of the yarn?
Slightly, yes. Stiffening your crochet project will make it stiffer and slightly less pliable. However, the extent of the change will depend on the type of glue you use and how much you apply.
Do I need to wash my crochet project before stiffening it?
It is a good idea to wash your crochet project before stiffening it to remove any dirt or oils that may be on the yarn. However, make sure to let it air dry completely before applying the glue solution.
Can I stiffen crochet projects made from any type of yarn?
Yes, you can stiffen crochet projects made from any type of yarn. However, yarns with a looser or more textured stitch may not hold their shape as well as tighter stitches.
Can I add color to my stiffening glue solution?
Yes, you can add food coloring to your glue solution to add color to your crochet project. However, make sure not to use too much coloring as it can stain your crochet or leave a residue.
How do I store my stiffened crochet project?
Store your stiffened crochet project in a cool, dry place away from direct sunlight to prevent it from yellowing or losing its shape. You can also store it flat between two pieces of clean, dry cloth.
Can I stiffen crochet projects that have already been assembled?
Yes, you can stiffen crochet projects that have already been assembled. Just take care not to get any glue solution on any areas that you don’t want to stiffen.
Can I make my own stiffening solution instead of using glue?
Yes, you can make your own stiffening solution using equal parts white glue and water. Mix the solution together and adjust the amount of glue or water to achieve the desired consistency.