Personalizing your headwear can be an exciting and creative process, and attaching patches to hats is a popular way to showcase your style and interests. Customizing your cap with unique patches can transform an ordinary accessory into a statement piece that reflects your personality and flair. With the right materials and techniques, you can easily add a touch of individuality to your wardrobe.
The Appeal of Customizing Your Hat with Patches
The appeal of DIY hat patch customization lies in its simplicity and the endless possibilities it provides. Whether it’s a band logo, sports emblem, or an artistic design, a well-placed patch can elevate the look of your hat. Moreover, this form of personalization allows you to express your identity and make a lasting impression.
Choosing the Right Adhesive for Fabric Patches
Selecting the appropriate adhesive is crucial when you’re looking to ensure a secure and durable bond between the patch and your hat. The market offers a myriad of options, each designed for specific materials and applications. Understanding the properties of these adhesives is the first step toward successful customization.
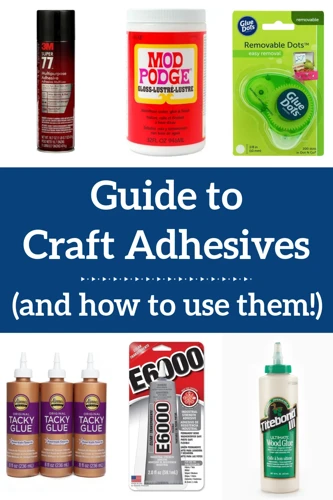
Types of Hat Patch Glue and Their Uses
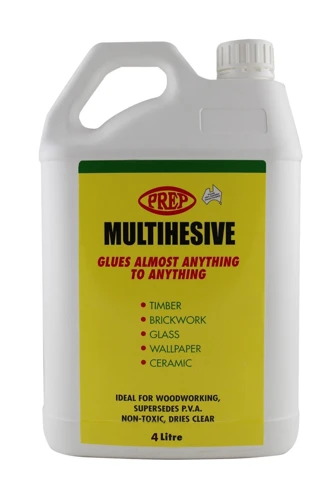
When it comes to attaching patches to hats, the choice of hat patch glue can make all the difference. Options range from fabric glues and permanent adhesives to temporary bonders. Fabric glue for hats is specially formulated to withstand the rigors of daily wear and the occasional wash, making it an ideal choice for a lasting patch attachment.
Preparation for Attaching Patches to Hats
Before you start your DIY hat patch project, proper preparation is key. This will involve gathering all the necessary materials and ensuring the surface of the hat is ready for the patch to be applied.
Gathering Materials
- Choose your patch and hat.
- Select the right adhesive for fabric patches.
- Prepare any tools you might need, such as tweezers or a toothpick, for precise application.
Cleaning and Prepping the Hat Surface
To ensure a strong bond, the surface where you’ll be applying the patch must be clean and free of oils or dirt. Gently wipe the area with a damp cloth and allow it to dry completely. If your hat is machine washable, consider laundering it beforehand for best results.
Step-by-Step Guide to Apply a Patch

With your materials at the ready and your hat prepped, it’s time to start the patch attachment process. Following a clear guide will help you avoid common mistakes and achieve a professional-looking result.
Positioning Your DIY Hat Patch
First, decide on the perfect spot for your patch. Temporarily secure it with masking tape or a few stitches to ensure it doesn’t shift during the gluing process. Check the alignment from different angles to confirm it’s exactly where you want it.
Securing Patches on Caps with Fabric Glue
Apply a thin layer of fabric glue to the back of the patch, spreading it evenly to the edges without oversaturating. Carefully align the patch on the hat and press down firmly. Wipe away any excess glue with a damp cloth and allow the adhesive to cure according to the manufacturer’s instructions.
Iron-On Patch Alternative: A How-To
If you’re looking for an iron-on patch alternative, adhesive sheets or heat-activated glue can offer a no-sew solution. This method requires a heat source, like an iron, and provides a strong bond that rivals traditional sewing.
Applying Heat to Attach Patches without Sewing
Place the patch where you want it on the hat, then cover it with a thin cloth to protect it from direct heat. Using an iron on a medium setting, press down on the patch for the time specified by the adhesive’s instructions. Allow it to cool and check the edges to ensure a secure attachment.
Finishing Touches for Patch Attachment
After attaching your patch, some additional steps can help reinforce the bond and give your hat a polished look. These finishing touches will not only enhance the aesthetic but also contribute to the longevity of your hat customization.
Ensuring Longevity of Your Hat Customization
Once the glue has fully cured, inspect the patch’s edges for any loose areas. If needed, apply additional adhesive to secure the edges. Consider applying a waterproof sealant if you plan on wearing the hat in various weather conditions, to protect both the fabric and the bond.
Troubleshooting Common Issues with Patch Attachment
Occasionally, you may encounter issues such as edges lifting or patches not adhering properly. In such cases, reapply adhesive or consider stitching the edges for added security. Always refer to the adhesive manufacturer’s guidelines for troubleshooting tips.
Conclusion: Enjoying Your Personalized Hat
With your patch firmly attached, it’s time to enjoy your freshly personalized hat. Wearing it proudly will no doubt garner compliments and may even inspire others to start their own DIY hat patch projects.
Final Tips for Maintaining Your Custom Hat
To maintain your customized hat, handle it with care during wear and cleaning. If the hat requires washing, hand wash it gently and avoid scrubbing the patched area. Regular checks for any signs of wear will help you address issues before they lead to patch detachment.
FAQs on Attaching Patches to Hats
Even with a comprehensive guide, questions may arise. Here are some answers to common queries about the process of attaching patches to hats.
How to Choose the Best Hat Patch Glue?
When choosing the best hat patch glue, consider the fabric of your hat, the type of patch, and the conditions it will be exposed to. A waterproof, flexible fabric glue designed for textiles is often the best choice for a secure and lasting bond.
What Are the Benefits of DIY Hat Patch Over Sewing?
The benefits of a DIY hat patch over sewing include ease of application, no need for sewing skills or equipment, and a clean finish without visible stitches. It’s also a more accessible option for those who want a quick and effective method for customizing their hats.
If you’re looking to personalize your hat with a patch, our easy-to-follow guide on how to glue a patch on a hat will help you secure it perfectly. And while you’re embracing your creative side, you might also enjoy our tutorial on how to draw a glue stick, a fun project for artists of any level. Additionally, for the DIY enthusiasts interested in fashion and costume design, don’t miss our step-by-step process on how to make a wig cap with glue. Explore these resources to enhance your crafting skills!
Can You Reapply a Patch That Has Come Loose?
Yes, you can reapply a patch that has come loose. Remove any old adhesive, clean the area, and reapply using fabric glue or another suitable adhesive. Follow the same steps as the initial application to ensure the patch is secured properly.