Have you ever wanted to create a custom wig cap for your next hairstyle but didn’t know where to start? Look no further! In this ultimate guide, we will walk you through the step-by-step process of making a wig cap with glue, from measuring your head to securing the cap with wig clips. You’ll need some key materials like glue, double-sided tape, scissors, measuring tape, a mannequin head, a mesh dome cap, and wig clips, which we will cover in detail. Without further ado, let’s jump in and learn how to make a wig cap with glue like a pro!
Materials Required
When it comes to making a wig cap using glue, you’ll need to gather some specific materials to ensure a successful and long-lasting result. Below, we have listed all the essential materials you’ll need for this DIY project. Make sure to have these items ready before starting. And if you have any doubts regarding hair extensions or wig installation, try reading these related articles: How to Install a Closure with Glue, What is the Best Wig Glue?, or What is the Difference Between Glueless and Glue Lace Wigs?.
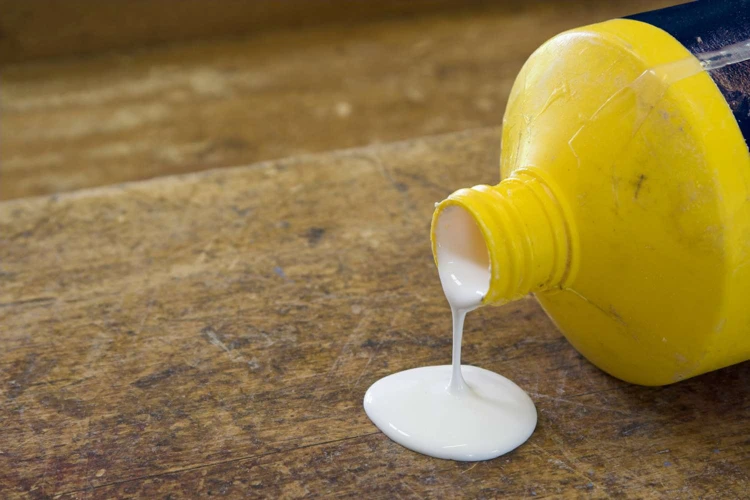
Glue
For making a wig cap with glue, a strong adhesive is necessary to keep the cap securely in place. Choosing the right type of glue can make a big difference in the success of your wig-making project. There are various types of glue that can be used for this purpose, but for the best hold, a specific wig glue is recommended. A good wig glue is one that is strong, waterproof, and dries clear.
One common type of glue that is often used in making wig caps is a lace wig adhesive. This type of glue is designed specifically for securing lace wigs and is known for its superior hold. It is usually applied around the perimeter of the wig cap to secure it in place. Another option is a hairpiece adhesive, which is similar to lace wig adhesive but is designed for use with hairpieces.
Some people also use hair bonding glue to create wig caps. Hair bonding glue is typically used for attaching hair wefts or extensions to natural hair. While this glue can be effective for creating a wig cap, it may not be as strong as a wig-specific adhesive. Additionally, it is important to make sure that the glue is safe to use on the skin and won’t cause irritation or allergic reactions.
When selecting glue for making a wig cap, it is important to read the instructions carefully and make sure that the glue is compatible with the materials you will be using. Some glues may be more appropriate for use with certain types of mesh caps or wig clips. It’s also important to be mindful of any special care or instructions for removing the glue, especially if it will be used on natural hair.
Here’s a table summarizing some popular types of wig glue:
| Glue Type | Characteristics | Popular Brands |
|---|---|---|
| Lace Wig Adhesive | Strong, waterproof, dries clear, specifically designed for securing lace wigs | Ghost Bond, Got2b Glued, Bold Hold |
| Hairpiece Adhesive | Strong, waterproof, dries clear, designed for use with hairpieces | Pro Hair Labs, Ultra Hold, Walker Tape |
| Hair Bonding Glue | Designed for attaching hair wefts or extensions, may not be as strong as wig-specific adhesive | Salon Pro, Hair Couture, Hair Factory |
If you want to know more about how to care for glue-in hair extensions, just visit: /how-to-care-for-glue-in-hair-extensions/.
Double-Sided Tape
Double-sided tape is a crucial element required in making a wig cap with glue. The tape helps to create a natural-looking hairline by securing the wig cap in place. It is recommended to use high-quality double-sided tape for better results.
Here are a few things to consider when using double-sided tape for making the wig cap:
| Tip | Description |
|---|---|
| Choose the right size | The size of the tape should correspond with the size of your head. Using tape that is too small or too large may cause discomfort or won’t hold the wig cap in place securely. |
| Stick it on clean skin | Make sure the area around your hairline is clean and free of oils and sweat. Apply the double-sided tape on your skin, as close to your hairline as possible. This will ensure a smoother and more natural-looking hairline. |
| Cut the tape | Measure the length of your hairline and cut the double-sided tape accordingly. Ensure that the tape does not stretch, as this can lead to a distorted hairline. |
| Remove the tape carefully | When removing the tape, do it slowly and carefully. This will prevent any damage to your skin. |
| Replace frequently | Double-sided tape has a limited lifespan, especially if subjected to heat and humidity. It’s advisable to replace the tape every few days to ensure proper adhesion. |
If you’re interested in knowing more about hair glue, check out our article on “What is Hair Glue Made Of?“.
Double-sided tape is not only necessary for making wig caps but is also useful for holding hair extensions in place. To learn more about gluing hair extensions, check out our article on “How to Glue Hair Extensions in Short Hair“.
Scissors
When it comes to making a wig cap with glue, having a good pair of scissors is key. You will need a sharp pair of scissors to cut the mesh dome cap to the right size and to trim off any excess cap. Additionally, you may want to use scissors with a pointed tip to create a more natural-looking hairline with the double-sided tape.
It’s important to use a high-quality pair of scissors that can cut through the cap smoothly without snagging or tearing the mesh. Using dull scissors can result in a jagged edge, which can make the wig look unnatural and uneven.
If you’re not sure which scissors to use, opt for a pair of fabric scissors or hair shears. These types of scissors are designed specifically for cutting through fibers like the mesh cap used in wig-making. They are typically sharper and have smoother blades that can cut through the cap cleanly.
Avoid using regular household scissors or scissors with serrated edges, as these can damage the cap and make it harder to create a smooth edge. Make sure to clean your scissors before using them to avoid spreading any dirt, hair, or bacteria onto the cap.
By using a good pair of scissors, you can ensure that the cap fits your head perfectly and looks natural when the wig is attached. For more information on hair gluing techniques, check out our guide on how to glue hair on a wig cap or our article on how to make hair bonding glue.
Measuring Tape
When it comes to making a wig cap with glue, precise measurements are crucial. This is where the measuring tape comes in. Using a measuring tape, you can accurately determine the circumference of your head for a perfect fit. You’ll need to measure all the way around your head, starting from the hairline at the nape of your neck, up to the hairline on your forehead, and down to the nape of your neck again. Write down the measurement once you’ve taken it.
It’s important to note that wig caps can come in different sizes, from small to large. So, your head measurement will determine the size of the cap you will need. If you’re not sure which size you need, check the packaging of the cap to see the recommended head circumference size.
Once you determine your head circumference and the appropriate cap size, you can move on to the next step in creating your wig cap with glue. Make sure to keep your measuring tape handy throughout the process, as you may need to take additional measurements while cutting the cap to size.
Pro Tip: If you prefer to use a curly weave instead of a mesh dome cap for your wig, you can check out our article on how to glue in curly weave for step-by-step instructions on how to do this. Or, if you’re looking to glue hair on a stocking cap, we’ve got you covered with our article on how to glue hair on a stocking cap.
Mannequin Head
When creating your own wig cap with glue, a mannequin head is an essential tool to have on hand. A mannequin head serves as a base where you can secure the wig cap while you work on it. This helps to ensure that the cap stays in place and maintains its shape while you attach the hair extensions.
Here are some key features to look for when choosing a mannequin head:
| Feature | Description |
|---|---|
| Material | Choose a mannequin head that is made of high-quality materials such as silicone or foam. This will help to ensure that the head can withstand the glue and won’t get damaged over time. |
| Size | It’s important to choose a mannequin head that is the same size as your head so that the wig cap will fit properly. Most mannequin heads come in a standard size, but you can find some that are adjustable. |
| Realistic Features | If you plan on using the mannequin head to style your wig, choose one that has realistic features such as a natural-looking hairline and facial features. |
| Accessibility | Make sure that the mannequin head has a flat base so that it’s easy to work with. Some mannequin heads come with a stand or clamp that can be used to secure it to a table or countertop. |
Using a mannequin head is a great way to ensure that your wig cap fits properly and looks natural once it’s complete. With the help of a mannequin head, you can easily apply the glue and secure the cap while you work on styling your new wig. So be sure to have one on hand before you begin this DIY project.
If you’re interested in learning more about working with hair extensions, check out our article on how to glue in curly weave for more tips and tricks.
Mesh Dome Cap
When it comes to making a wig cap with glue, one of the most important materials you will need is a mesh dome cap. This cap serves as the foundation for your wig and helps to ensure that it fits securely and comfortably on your head.
What is a Mesh Dome Cap?
A mesh dome cap is a specially designed wig cap that is made from a breathable and stretchy material. It is designed to be worn directly on the head and creates a secure base for the wig to be attached to.
Why Use a Mesh Dome Cap?
Using a mesh dome cap provides a number of benefits when it comes to making a wig. Firstly, the breathable material helps to prevent your head from becoming too hot or sweaty while wearing the wig. Secondly, the stretchy material of the cap helps to create a secure fit for even the most complex wig styles. Finally, using a mesh dome cap helps to protect your natural hair from damage caused by the glue or tape used to secure the wig.
How to Choose the Right Mesh Dome Cap
When choosing a mesh dome cap, there are a few factors that you should consider. Firstly, you should choose a cap that is made from a high-quality material that is both breathable and stretchy. Secondly, make sure that the cap is the correct size for your head to ensure a comfortable fit. Finally, consider the color of the cap in relation to the color of the wig that you will be creating.
Where to Buy Mesh Dome Caps
Mesh dome caps can be purchased from a variety of hair and beauty supply stores, both online and offline. It is important to choose a reputable supplier to ensure that you are buying a high-quality cap that will provide the support and comfort that you need.
Using a mesh dome cap is an essential step when it comes to making a wig with glue. By choosing the right cap and using it correctly, you can create a wig that is comfortable, secure and looks great.
Wig Clips
When it comes to making a wig cap with glue, wig clips are an essential item to have on hand. These small clips help to keep the cap in place while you apply the glue and secure it to your head.
Here are a few things to keep in mind when using wig clips:
- Make sure to use a high-quality brand of wig clips.
- Position the clips evenly around the cap to ensure that it stays in place.
- Be careful not to use too many clips, as this can cause discomfort and make it difficult to apply the wig later on.
- If you have sensitive skin, consider using silicone wig clips, which are designed to be more comfortable and gentle on the scalp.
Wig clips are a simple but important component of making a wig cap with glue. By using them properly, you can ensure that your cap stays securely in place while you work and that your finished wig looks and feels great.
Step-by-Step Process
Are you ready to learn how to make a wig cap with glue? It might seem like a daunting task, but it’s actually quite simple when you follow the step-by-step process. In this section, we will walk you through the process so that you can create a wig cap that perfectly fits your head. Follow each instruction carefully, and you’ll have a professional-looking wig in no time. So grab your materials and let’s get started!
Step 1: Measure Your Head
Before beginning the process of making a wig cap with glue, the first step is to measure your head to determine the appropriate size for your cap. This ensures a comfortable and secure fit for your wig. Here’s how to do it:
Step 1: Prepare the materials needed for measuring your head.
You will need a measuring tape and a pen and paper to record your measurements.
| Materials | Quantity |
|---|---|
| Measuring tape | 1 |
| Pen and paper | 1 |
Step 2: Position the measuring tape on your forehead.
Place the measuring tape horizontally on your forehead, above your eyebrows.
Step 3: Measure the circumference around your head.
Wrap the measuring tape around the back of your head and back to the starting point on your forehead. Make sure to keep the measuring tape snug and straight around your head.
Step 4: Record your measurements.
Jot down the measurement on your paper and repeat the process two more times to ensure accuracy. Take the average of the measurements as your final measurement.
Step 5: Use the measurement to determine the size of your mesh dome cap.
Mesh dome caps come in different sizes, ranging from small to extra-large. Choose the appropriate size according to your head measurement.
With this information in hand, you are ready to move on to the next step in making your wig cap with glue.
Step 2: Cut the Mesh Dome Cap to Size
Cutting the mesh dome cap to the proper size is a crucial step in making a wig cap with glue. To ensure a proper fit, follow these steps:
- Place the mesh dome cap on the mannequin head and adjust it so that it covers the entire head area. Make sure there is some extra material at the bottom to cover the nape of the neck.
- Secure the cap in place. Use wig clips to hold the cap securely in place on the mannequin head. This will prevent it from shifting around while you are cutting it, ensuring a more accurate fit.
- Measure the circumference of the head. Use your measuring tape to measure around the circumference of the head, running the tape across the forehead, above the ears, and at the back of the head. Write down the measurement for later reference.
- Mark the cap at the measured perimeter. Use a washable marker to mark the mesh dome cap at the measurement you just took on the mannequin head.
- Trim the cap. Using a pair of scissors, carefully cut the excess material off the mesh dome cap according to the markings you made. Be sure to cut just inside the markings to ensure a snug fit – you don’t want the cap to be too loose or too tight.
By following these steps, you can ensure that the mesh dome cap is properly cut and sized for the head it will be worn on. A properly fitting cap is crucial for the wig to look natural, feel comfortable, and stay securely in place on the head.
Step 3: Apply Glue to the Cap
To apply glue to the cap, you will need a high-quality glue that will securely hold the cap in place. Here are the steps to follow:
- Select the Right Glue: Choose a glue that is specifically designed for wigs and is safe to use on the skin. Look for a glue that dries clear and remains flexible, so that it can move with your head and not become brittle.
- Apply the Glue: Starting at the nape of the neck, apply a thin layer of glue to the mesh dome cap using a small brush or applicator. Be sure to apply an even layer of glue, so that the cap adheres smoothly and securely to your scalp.
- Don’t Apply Too Much Glue: Avoid applying too much glue as it will cause the cap to become stiff and uncomfortable. Additionally, too much glue could make it harder to remove the cap from the mannequin head.
- Dry Time: Give the glue ample time to dry. The drying time varies depending on the type of glue used, so make sure to follow the recommended drying time for your specific glue.
- Inspect: Inspect the cap to ensure that it has adhered properly and there are no air pockets or wrinkles. If you see any issues, gently remove the cap and reapply the glue in the affected areas.
By following these steps, you can apply glue to the cap and ensure that it adheres smoothly and securely to your scalp. Remember that applying glue requires patience and precision to achieve the best results.
Step 4: Place the Cap on the Mannequin Head
To ensure a secure and comfortable fit, placing the cap on the mannequin head correctly is crucial. Follow these steps to get it right:
| Step | Action |
|---|---|
| 1 | Place the empty mannequin head on a flat surface. |
| 2 | Hold the mesh dome cap from the sides and stretch it out gently to expand the cap. This will help it fit properly onto the mannequin head. |
| 3 | Slide the expanded cap onto the mannequin head from the back of the head towards the front. This will ensure the cap sits properly on the head. |
| 4 | Adjust the cap so that it covers the entire mannequin head up to the hairline. |
| 5 | Smooth out the cap so there are no wrinkles or folds. This will ensure that the wig sits smoothly over the cap. A smooth cap means a smooth wig. |
It’s important to make sure that the cap sits properly on the mannequin head. This will help ensure that the wig you make fits well and looks natural when you wear it. Don’t rush this step; take the time to properly place the cap so that the rest of the process goes smoothly.
Step 5: Secure the Cap with Wig Clips
After gluing the wig cap onto the mannequin head, it’s essential to secure it in place with wig clips. These clips ensure that the cap stays put and provides a stable base for you to work on.
Materials Required: Wig Clips
Step-by-Step Guide:
| Step 1 | Take your wig clips and position them along the perimeter of the wig cap. They should be evenly spaced apart and placed close to the edge of the cap. This will ensure that the clips are hidden when the wig is worn and will provide maximum hold. |
| Step 2 | Once you have determined the placement of the clips, sew them onto the cap using a needle and thread. Ensure they are tied off securely so that they do not come loose when you are using the wig. |
| Step 3 | Continue to position and sew wig clips along the perimeter of the cap, ensuring that you have enough clips to hold the wig securely in place. Generally, it’s good to have 4-6 clips for a smaller cap, and 8-10 clips for a larger cap. |
| Step 4 | Once you have sewn all the wig clips in place, ensure that they provide even tension on the cap and that it feels secure. Adjust the clips if needed, and now it’s time to start adding the hair wefts onto the cap! |
By following these steps, your wig cap will be held securely in place and provide a perfect base for adding hair wefts. Remember, having proper tension in the wig cap helps the wig sit comfortably and look as natural as possible. So take the time to sew your wig clips on securely for the best results.
Step 6: Create a Hairline with Double-Sided Tape
One important step in creating a natural-looking wig is to create a hairline that mimics that of a real scalp. This can be achieved with the use of double-sided tape. Follow these steps to create a hairline using double-sided tape:
| Step 1 | Prepare the Tape |
| Take a piece of double-sided tape and fold it in half with the sticky side facing out. |  |
| Step 2 | Apply the Tape |
| Place the folded tape on your forehead where you want the hairline to be. Smooth it down firmly so that it adheres to your skin. |  |
| Step 3 | Cut the Tape |
| Using scissors, cut the tape along the desired hairline shape. Be careful to make clean, straight cuts. |  |
| Step 4 | Remove the Protective Layer |
| Carefully peel off the protective layer from the other side of the tape. This will reveal the other sticky side that will be used to attach the wig. |  |
By using double-sided tape, you can create a customized and natural-looking hairline on your wig cap. Just be sure to trim any excess tape and cap around the edges to avoid any visible bumps or ridges.
Step 7: Cut Off Excess Cap
After securing the mesh dome cap, it’s time to trim away the excess material. The excess cap can create an uncomfortable and bulky look under the wig. Here’s how to cut off the excess cap to create a clean and natural-looking wig:
Step 1: Take your scissors and cut off the excess mesh cap along the hairline. Make sure to leave a small amount of mesh cap behind the hairline to keep the wig cap secure.
Step 2: Use the scissors to trim off the excess material at the nape of the neck. Cut the cap as close to the hairline as possible to create a natural-looking finish.
Step 3: Cut off any excess material on the sides of the wig cap. Be careful not to cut too close to the hairline.
Step 4: Once you have cut off the excess cap, check the fit of the wig cap on the mannequin head to see if any further trimming is needed. If the wig cap looks bulky or uncomfortable, make additional cuts to create a snug fit.
Step 5: After you have trimmed the excess cap, remove the wig cap from the mannequin head and try it on. Check to see if the wig cap fits properly and if there are any areas that need further trimming.
Remember to take your time while cutting off the excess cap. It’s better to make gradual cuts rather than cutting too much all at once. With patience and precision, you can create a comfortable and natural-looking wig cap that will last for multiple wears.
Tips and Tricks
As you venture into making your own wig cap using glue, there are some valuable tips and tricks to keep in mind. These insights can help you create a high-quality wig cap that fits snuggly on your head without falling off. So, before you start your DIY wig-making process, take a moment to read this section carefully. Here are some crucial tips and tricks to follow along the way.
Use a High-Quality Glue
When making a wig cap with glue, it is essential to use a high-quality glue to ensure durability and a secure hold. Here are some of the best glues for making a wig cap:
| Type of Glue | Description |
|---|---|
| Lace Wig Glue | This type of glue is specifically formulated for lace front wigs and is designed to provide a strong hold on skin and lace material. It is also waterproof and can withstand sweat and humidity. |
| Got2B Glued Ultra Gel | This gel is a popular choice for wig makers due to its strong hold and affordability. It dries clear and is easy to use, making it a great option for beginners. |
| E6000 Craft Adhesive | This industrial-strength adhesive is perfect for making wig caps that will withstand heavy wear and tear. However, it can be difficult to remove and may cause damage to the wig if not used carefully. |
| Ghost Bond XL | This waterproof adhesive is designed to provide a long-lasting hold without damaging the scalp or the wig. Its non-toxic formula makes it safe for all skin types, while its easy application process ensures that it can be used by anyone. |
While cheap glue may seem tempting, it is essential to use a high-quality glue to ensure that the wig cap will stay in place and last for a long time. It is also important to follow the instructions on the glue carefully, as some may require a specific drying time or a certain application method. By using a high-quality glue and following the instructions carefully, you can ensure a secure and long-lasting hold for your wig cap.
Be Careful While Cutting Off Excess Cap
Cutting off the excess cap is one of the most important steps in making a wig. However, it’s also a step that requires some caution and precision. One careless cut could ruin all of your hard work, so it’s important to take your time and be careful. Here are some tips to help you cut off the excess cap without any mishaps:
| Tip | Description |
|---|---|
| 1. Use sharp scissors | Using blunt scissors can make it difficult to cut cleanly through the cap, leading to jagged edges that can affect the final look of the wig. Invest in a good pair of sharp scissors for best results. |
| 2. Cut in small sections | It’s easier to control your cuts when you work in small sections. Start at one edge of the cap, and slowly work your way around, cutting off small sections at a time until you reach the other side. |
| 3. Check your work frequently | After you make a cut, take a moment to examine it and make sure it looks even. If you notice any uneven edges or jagged areas, use your scissors to trim them down. |
| 4. Don’t rush | Take your time and work slowly and carefully. Rushing through this step could result in a ruined wig cap and wasted time and effort. |
| 5. Practice makes perfect | If you’re new to making wigs, cutting off the excess cap can be a bit tricky. Don’t get discouraged if your first attempt isn’t perfect. Keep practicing, and soon you’ll be able to cut off the excess cap with ease. |
By following these tips and being very careful while cutting off the excess cap, you’ll be able to create a flawless wig that looks professional and well-made. Remember to take your time and practice until you feel confident in your abilities.
Conclusion
In conclusion, creating a wig cap with glue may seem like a daunting task, but with the right materials and step-by-step process, it can be done easily and efficiently. The key to success is to use high-quality glue and take your time measuring and cutting the mesh dome cap to fit your head properly.
As you follow the steps outlined in this ultimate guide, don’t be afraid to experiment with different techniques to achieve the hairline and fit you desire. Remember to be patient and take your time with each step to ensure the best results.
Having a well-fitted wig cap is the foundation for creating a flawless and natural-looking wig, so it’s worth dedicating the time and effort to get it right. Whether you’re a professional wig maker or a beginner looking to try your hand at DIY wigs, this guide has everything you need to know to get started. So gather your materials and get ready to create your perfect wig cap with glue!
Frequently Asked Questions
What type of glue is best for making a wig cap?
It is best to use a strong, flexible, and waterproof glue, such as a clear bonding adhesive or a hair extension glue.
How much glue should I use on the cap?
Only use a thin layer of glue on the mesh dome cap to avoid any discomfort or irritation once the wig is worn.
Can I use tape instead of glue for making a wig cap?
Yes, you can use double-sided tape instead of glue to create a hairline on the cap, but it may not be as secure as using glue on the entire cap.
What size wig clips should I use?
It is recommended to use medium size wig clips, as they provide a strong hold without damaging the wig cap.
Can I use a different color cap besides beige?
Yes, you can use a different colored mesh dome cap to match the wig color or create a unique look.
How do I know if the cap is the right size?
Measure your head circumference and compare it to the mesh dome cap size. It should fit snugly but not be too tight or too loose.
How long does it take for the glue to dry?
The drying time can vary based on the type of glue used, but it usually takes about 24-48 hours for the glue to fully dry and set.
Can I wash the wig after making the cap?
Yes, you can wash the wig once it has been secured onto the cap, but be sure to use a gentle shampoo and conditioner and let it air dry completely before wearing it again.
Can I adjust the hairline after applying the double-sided tape?
Yes, you can adjust the hairline before cutting off the excess cap. If you need to make any adjustments after cutting, you may need to remove the tape and start again.
Do I need to use a mannequin head to make a wig cap?
No, you can make a wig cap without a mannequin head, but using one makes the process easier and ensures the cap stays in place while you work.