Embarking on a journey of DIY wig making can be an exciting endeavor for anyone looking to explore their creativity or find cost-effective solutions for hair styling. Creating your own stocking cap wig offers a personalized touch and the satisfaction of bringing your vision to life. With the right tools and some patience, you can achieve a custom look that’s uniquely yours.
Essential Materials for Homemade Wig Creation
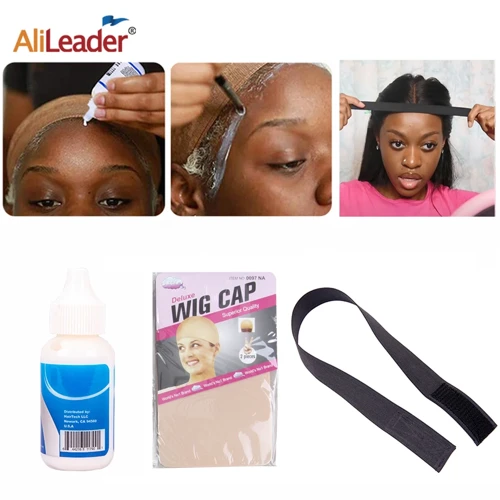
Before diving into the hairpiece application process, gathering all necessary materials is crucial to ensure a smooth and successful homemade wig creation. Let’s explore what you’ll need.
Choosing the Right Stocking Cap
- Ensure the cap fits snugly on your head
- Opt for a cap color that matches your scalp or the hair color
Selecting the Best Hair Adhesive Techniques
There are various hair adhesive techniques available, and selecting the most suitable one is vital for a secure wig on cap. From temporary hair glue tips to more permanent bonding solutions, consider your lifestyle needs and the longevity you desire.
Preparation for Hairpiece Application

Proper preparation is key to a seamless hairpiece application. This stage sets the foundation for your stocking cap wig and determines the final outcome.
Cleaning and Preparing Your Stocking Cap
Start by cleaning the stocking cap to remove any oils or residue. A clean base ensures better adhesion when gluing hair to cap.
Measuring and Cutting Hair Wefts
Measure the wefts against your cap to ensure they fit perfectly. Cut them to size, allowing for a little extra to ensure full coverage.
Step-by-Step Wig Making Tutorial
Now, let’s begin the actual process of crafting your wig with this comprehensive wig making tutorial.
Step 1: Apply Hair to Stocking Cap
Starting from the nape, apply hair to stocking cap by carefully pressing the wefts onto the glue applied on the cap’s surface.
Step 2: Secure Wig on Cap with Hair Glue Tips
Use quality hair glue to secure wig on cap. Apply a thin layer of glue along the weft line and wait for it to become tacky before pressing down the hair.
Step 3: Gluing Hair to Cap in Layers
Work your way up the cap in layers, ensuring each is firmly in place before proceeding to the next. Allow time for the glue to set.
Step 4: Attaching the Hairline and Closure
Attach the hairline and closure pieces with precision, making sure they blend seamlessly with the rest of the wig for a natural look.
Step 5: Finalizing and Styling Your Stocking Cap Wig
Once all pieces are secured, style your wig as desired. Trim any excess and customize the hairline for a finished look.
Advanced Techniques in Wig Construction
To elevate your wig-making skills, incorporating advanced techniques can add to the wig’s natural appearance and durability.
Combining Sewing and Gluing Methods for Extra Durability
For those who require a more robust wig, implementing a combination of sewing and gluing can provide extra security and longevity.
Creating Natural Hairlines and Partings
Mastering the art of natural hairlines and partings is essential for a realistic-looking wig. Practice and attention to detail are key.
Maintenance and Care for Your DIY Wig
After investing time and effort into your DIY wig making, maintaining its appearance is important for long-term wear.
How to Store Your Wig Properly
- Keep your wig on a mannequin head or in a silk bag to maintain its shape
- Avoid direct sunlight and heat to prevent damage
Cleaning and Reviving Your Stocking Cap Wig
Regular cleaning and conditioning can revive your stocking cap wig, keeping it looking fresh and vibrant. Use products designed for synthetic or human hair, depending on your wig’s material.
Troubleshooting Common Issues
Even with care, you may encounter some issues with your homemade wig. Here’s how to address them.
Fixing Loose Wefts and Shedding
If you notice loose wefts or shedding, a touch-up with hair glue may be necessary. Delicately reapply glue to the affected areas and press firmly.
Adjusting Fit and Comfort of the Wig
Adjusting the fit can improve comfort significantly. If your wig feels too tight or loose, try resizing the cap or adding cushioning liners for a better fit.
Whether you’re a seasoned cosplayer or just looking to enhance your hairstyle for a special occasion, learning how to secure hair to different types of headwear is an invaluable skill. Our tutorials are here to guide you through the process. Discover the nuances of attaching hair to various types of caps with our step-by-step guides: how to glue hair on a cap, specifically tailored for wig enthusiasts, delve into how to glue hair on a wig cap, and for those preferring an even more secure and snug fit, our article on how to glue weave on a stocking cap will ensure your new locks stay put. Each guide is designed to help you achieve a flawless and natural-looking result with your hair projects.
Conclusion: Enjoying Your Creation
Through the process of DIY wig making, not only have you crafted a unique hairpiece, but you’ve also gained invaluable skills. Enjoy wearing your stocking cap wig with pride, knowing it’s a reflection of your dedication and personal style.