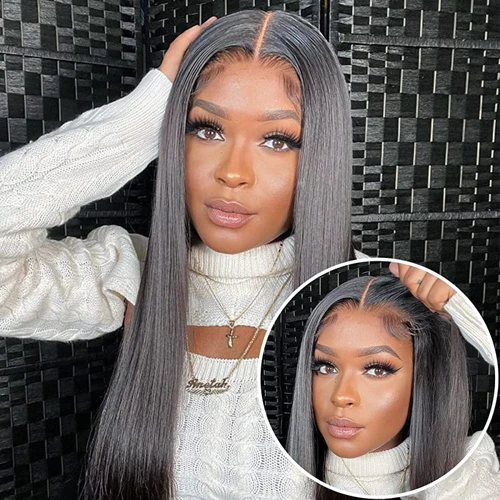
Embracing a new hairstyle often involves the art of installing hair closures — a technique that can transform your appearance with a seamless, natural look. Whether you’re aiming for added volume or length, mastering the glue-down method for closures is key. This comprehensive closure installation guide promises to empower you with the knowledge to achieve a flawless finish in the comfort of your own home.
Closure Installation Guide: Preparing for Your Glue-On Closure Tutorial
Understanding Different Types of Hair Closures
Diving into the world of hair extensions, closures come in various forms including lace, silk base, and monofilament. Lace closures, particularly favored for their versatility, offer a breathable option with a variety of parting styles. Understanding the differences is crucial for selecting the right one for your desired look.
Benefits of a Lace Closure
A lace closure not only protects your natural hair but also provides a flawless canopy for a full weave closure gluing. It’s the cornerstone for a stunning transformation, offering a natural hairline and easy maintenance, making it a popular choice for those seeking a polished finish.
DIY Hair Closure Installation: The Glue Down Method for Closures
Gathering Your Supplies for Glue-On Closure
Before beginning your glue-on closure tutorial, assemble the necessary tools:
- Lace closure
- Hair adhesive specifically designed for lace attachments
- Scalp protector
- Blow-dryer
- Tweezers
- Scissors
Preparing Your Natural Hair and Scalp
Preparation is essential. Start by thoroughly washing and conditioning your hair. Cornrow or flatten your hair to create a smooth base, and apply a scalp protector to safeguard your skin from potential irritation caused by the adhesive.
Lace Closure Application: Step-by-Step Process
Cleaning and Preparing the Lace Closure
Begin with a clean slate by gently washing your lace closure. Trim any excess lace, being careful not to cut too close to the hairline. Customization with tweezers for a more natural hairline may follow, depending on personal preference.
Applying the Adhesive for Lace Closure
Apply a thin layer of hair adhesive along the perimeter where the lace will sit. Use a cool setting on your blow-dryer to make the glue tacky, which ensures a stronger hold for the lace closure application.
Positioning and Attaching Closure with Adhesive
With precision, align the closure with your natural hairline and gently press down. Ensure the lace is taut to avoid any bunching or lifting, which could compromise the natural look of the attachment.
Securing the Full Weave Closure with Glue
Once the lace is positioned, apply pressure along the edges to firmly secure the weave closure with glue. A tail comb can be used to press down the lace into the adhesive without getting your fingers sticky.
Bonding Lace Closure: Tips for a Secure and Lasting Fit
Ensuring Proper Placement and Alignment
The success of bonding lace closure lies in meticulous placement. Double-check the alignment of the closure to your natural part to ensure it looks as natural as possible. The right placement also contributes to the longevity of the style.
Maintenance Tips for Glue-On Lace Closures
Maintaining your new do involves gentle handling and proper care. Refrain from heavy oils that could loosen the adhesive and wrap your hair nightly to reduce friction. Regular touch-ups may be necessary to preserve the look and security of your closure.
Finishing Touches: Blending and Styling Your Weave
The final step in your DIY hair closure installation is to seamlessly blend the closure with your weave. This might involve cutting, curling, or straightening the hair to match your natural tresses. Remember to use heat protectant products to maintain the integrity of both your natural hair and the extensions.
Troubleshooting Common Issues in Hair Closure Glue Installation
Challenges such as lifting edges or irritation can arise with any hair closure glue installation. Address lifting by applying additional adhesive with precision. If skin irritation occurs, remove the closure gently and consult a professional for advice on skin-friendly adhesives.
Are you interested in learning the ins and outs of wig installation, particularly when it comes to using glue? Our comprehensive guide on how to install a closure with glue has got you covered with step-by-step instructions and expert tips. But for those who prefer not to use glue, we also have resources on alternative methods. Check out our tutorials on how to install a lace closure without glue and how to fix a lifting closure without glue for glue-free options. And if you’ve ever encountered issues with construction glue, our article on how to remove construction glue can help you tackle that sticky situation.
Conclusion: Enjoying Your New Look
With your lace closure securely in place, it’s time to step out and showcase your refreshed appearance. Confidence in your closure installation skills will grow with each attempt, allowing you to enjoy the transformative power of hair extensions without reservation. Embrace your new look with pride, knowing it’s a product of your own craftsmanship.