Starting a felt crafting project can be a daunting task, especially when it comes to gluing felt. With so many types of felt and glue available, it can be overwhelming to know which combination to use for the best results. Additionally, properly preparing the felt surface is crucial for a successful finished product. However, don’t worry! In this complete guide, we’ll cover everything you need to know about how to glue felt, including the types of felt and glue to use, preparing the surface, and gluing felt to various materials. You’ll also discover useful tips and tricks for a flawless crafting experience. Let’s dive in!
What You’ll Need
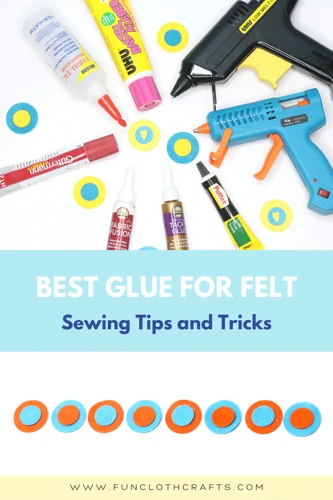
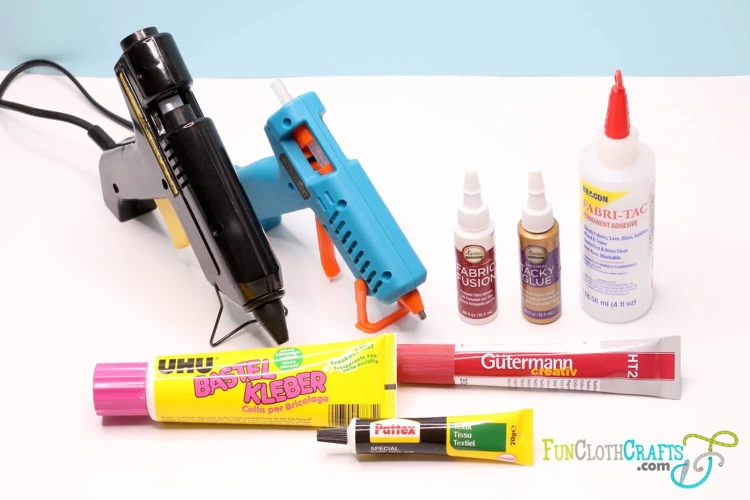
When it comes to gluing felt, having the right supplies can make all the difference in ensuring a successful project. Before you get started, here are some items you’ll need:
Types of Felt
There are various types of felt available in the market, and understanding their differences is essential to choose the right one for your project. Here are some popular types of felt:
- Wool Felt: Made of sheep’s wool, wool felt is durable, soft, and available in various colors. It is perfect for home décor and accessory projects like hats, scarves, and bags.
- Polyester Felt: This synthetic felt is stiffer than wool and less expensive. It comes in a broad range of colors and is excellent for crafting and kid’s projects.
- Blended Felt: A mix of wool and polyester fibers, blended felt offers the benefits of both fibers. It’s durable, soft, and easy to work with.
- Acrylic Felt: This is the most common type of felt available in craft stores. It is affordable but less durable than other types. Acrylic felt can serve as an excellent base for embellishment projects.
Knowing the type of felt you are working with will help you choose the right glue and techniques for your project. For example, if you decide to work with wool felt, you might want to consider using fabric glue like fabric glue to ensure the felt adheres evenly. On the other hand, if you’re working with polyester felt, craft glue like craft glue might be more appropriate.
Types of Glue
There are several types of glue that can be used for gluing felt to different surfaces. Some types of glue work better than others for specific projects. It’s important to choose the right type of glue to ensure that your project holds up over time. Here are some of the most popular types of glue for gluing felt:
| Type of Glue | Highlighted Features | Recommended Surfaces |
|---|---|---|
| Fabric Glue | Quick-drying, washable, flexible | Fabric, felt, ribbon, lace, and other textiles |
| Craft Glue | Dries clear, strong holding power | Paper, wood, plastic, metal, and other surfaces |
| Acid-Free Glue | Non-toxic, archival quality, pH-neutral | Paper, scrapbooks, and other papercraft projects |
| Hot Glue | Fast drying, strong bond | Wood, fabric, metal, plastic, and many other surfaces |
Fabric glue is specifically designed for bonding textiles and is a popular choice when gluing felt to fabric or other textiles. This type of glue dries clear and is flexible and washable, which makes it ideal for attaching felt to things like clothing or hats. Fabric glue can also be used to attach ribbon or lace to felt.
Craft glue is a versatile adhesive that dries clear and can be used on many different surfaces. It has a strong holding power and is a good option for attaching felt to surfaces like paper, wood, plastic, and metal. If you’re looking for a versatile glue that can be used for a variety of projects, then craft glue is a great option.
Acid-free glue is a popular choice for papercraft projects, such as scrapbooks. This type of glue is non-toxic, pH-neutral, and archival quality, which means it won’t discolor or degrade over time. Acid-free glue is also a good option for attaching felt to paper. If you’re wondering about how to glue paper onto wood, check out our article on how to glue paper onto wood.
Hot glue is a popular option because it dries quickly and has a strong bond. It can be used on many different surfaces, including fabric, metal, and plastic, which makes it a versatile option. When using hot glue, it’s important to be careful, as the glue can become very hot and can cause burns. If you’re wondering about how to glue rubber onto fabric, check out our article on how to glue fabric to rubber.
When selecting glue for gluing felt, it’s important to choose a glue that is appropriate for the surface you are working with. By choosing the right glue, you can ensure that your project will hold up over time and that the finished product will look great.
Other Supplies
Apart from felt and glue, there are various supplies you’ll need to successfully glue felt to different surfaces. Here are some of the other necessary supplies you should gather before starting your project:
| Supply | Description |
|---|---|
| Scissors | To cut the felt to the desired shape and size |
| Ruler | To measure and mark the felt for cutting |
| Paintbrush | To apply glue smoothly and evenly to the felt |
| Craft knife | To make precise cuts in the felt if needed |
| Iron | To straighten and flatten the felt surface |
| Ironing board | To provide a flat surface for ironing the felt |
| Cotton swabs | To clean up excess glue that may get onto unwanted areas of the felt or project |
These additional supplies will help you glue felt to various surfaces without any trouble. If you’re working with a particular felt project, make sure to gather all the necessary supplies before you start.
In case you need to stiffen crochet with glue for your project, check out our helpful article on how to stiffen crochet with glue. If you’re wondering about what glue to use for upholstery, we’ve got you covered. And if you ever need to glue ribbon to glass, simply head to our guide on how to glue ribbon to glass for a smooth and hassle-free process.
Preparing the Felt Surface
Before gluing felt, it’s important to properly prepare the surface to ensure a strong and long-lasting bond. Cleaning and drying the felt, as well as cutting it to the right size, are crucial steps in the preparation process. By taking the time to properly prepare the felt, you can help prevent any potential issues during the gluing process. And if you’re working with other materials, like foam rubber or paper, be sure to check out our guides on how to glue foam rubber or how to glue paper to fabric for more helpful tips.
Cleaning and Drying
Before gluing felt, it’s important to properly clean and dry the surface. This will ensure that the glue adheres well and the final product looks smooth and polished. Here are some tips on how to clean and dry your felt:
| Step | Instructions |
|---|---|
| Step 1 | Remove any debris or loose fibers from the felt using a soft-bristled brush or lint roller. This will ensure that the glue adheres to a clean surface. |
| Step 2 | If the felt is particularly dirty, dampen a clean cloth with water and gently wipe the surface. Avoid using too much water, as this can cause the felt to become misshapen or lose its texture. |
| Step 3 | Allow the felt to air dry completely before gluing. Do not use a hair dryer or other heat source, as this can cause the felt to shrink or warp. |
It’s important to note that not all types of felt can be cleaned in the same way. Some felts, like wool felt, can be gently washed with mild soap and water, while others, like acrylic felt, should only be spot cleaned. Always check the care instructions before attempting to clean your felt.
By taking the time to properly clean and dry your felt, you’ll be setting yourself up for success when it comes to gluing. Your finished product will look neat and professional, and the glue will adhere well to the surface.
Cutting to Size
Before you start gluing the felt, it’s important to cut it to the correct size and shape. Here are some essential steps to follow when cutting felt to size:
- Measure and Mark: Use a measuring tape and a fabric pen to measure and mark the felt at the desired size and shape. This will ensure that you have neat and precise edges.
- Use a Cutting Mat: Place the felt on a cutting mat to protect your work surface and use a rotary cutter or a fabric scissors to cut along the marked lines. A cutting mat will also help prevent damage to your tools and table surface.
- Consider the Material: Depending on the type of felt, you may need to use different cutting techniques. For example, synthetic felt tends to be thinner and easier to cut than wool felt, which may require sharper tools.
- Use Templates: If you need to cut multiple shapes or designs, consider creating a template out of cardboard or paper. Simply trace the shape onto the felt and cut along the lines. This helps ensure consistency and accuracy.
- Be Careful: When cutting felt, it’s important to apply gentle pressure and take your time. Rushing or using too much force can result in uneven cuts or even damage to the felt itself.
Remember, the key to successful gluing is in the preparation of your materials. Cutting your felt to size and shape using these techniques outlined above will help ensure that your project turns out exactly as you envisioned.
Gluing Felt to Fabric
One of the most common uses for felt is as an embellishment or appliqué on fabric. Whether you’re adding a cute felt shape to a t-shirt or creating a patchwork quilt, gluing felt to fabric can be a great option. However, it’s important to choose the right glue and prepare both surfaces properly to ensure a strong bond. Here are some tips and tricks for gluing felt to fabric like a pro.
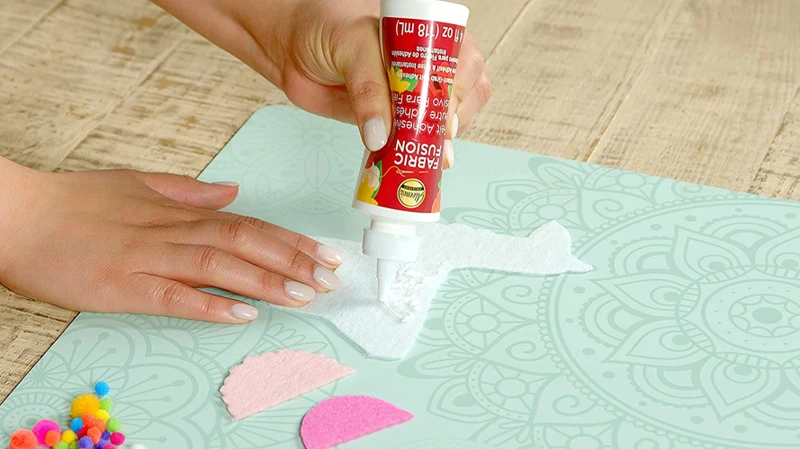
Using Fabric Glue
When it comes to gluing felt to fabric, using fabric glue is certainly one of the best options. Here’s how to use it effectively:
Step 1: Choose the right type of fabric glue for your project. There are several types of fabric glue available in the market, so make sure to choose one that suits your needs the best.
Step 2: Start by cleaning and drying the surfaces you want to glue together. Any debris or dirt on the surfaces can affect the adhesion, so make sure the surfaces are clean before you begin.
Step 3: Apply the fabric glue to one of the surfaces. Use a thin, even layer of glue to ensure that the felt sticks well. Be careful not to use too much glue, as this can cause the fabric to wrinkle.
Step 4: Press the surfaces together firmly, making sure there are no air bubbles. Hold the surfaces in place for a few minutes to allow the glue to set.
Step 5: Wait for the glue to dry completely before handling the item. This may take anywhere from a few hours to overnight.
When using fabric glue, it’s important to pay attention to the manufacturer’s instructions and precautions. Here are some tips to help you get the best results:
- Test the glue on a small, inconspicuous area before applying it to the entire item.
- Avoid washing the item immediately after gluing, as this can weaken the bond.
- Store the fabric glue in a cool, dry place to ensure its longevity.
Using fabric glue is a great option for gluing felt to fabric, and by following these steps and tips, you can achieve great results.
Sewing with Felt
Felt can be easily secured to fabric by sewing it on. This method is particularly useful when attaching decorative felt elements, such as patches, to clothing or accessories. Follow these steps to sew felt onto fabric:
- Cut your felt to the desired size and shape. Use sharp scissors to cut the felt piece according to your specific design or shape. Keep in mind that felt can fray easily, so be sure to make precise cuts.
- Thread your needle. Choose a thread color that matches the felt or the fabric you will be attaching it to. Thread the needle and tie a knot at the end of your thread.
- Position the felt piece on the fabric. Pin the felt onto the fabric in the desired location. Ensure that the felt is properly aligned with the fabric and that it lies flat.
- Sew the felt onto the fabric. With the needle and thread, start sewing the felt onto the fabric by taking a stitch through both the felt and fabric layers. Use a whipstitch or running stitch for a more secure attachment. For a neater finish, sink the knot between the felt and fabric with each stitch. Continue stitching around the entire felt piece until it is securely attached.
- Finish your work. Once you have sewn around the entire felt piece, finish off your work by tying a knot on the backside of the fabric and cutting off any excess thread.
Sewing felt onto fabric can be a great way to add some personality and unique flair to any garment or accessory. Additionally, sewing allows for a strong, long-lasting hold that can withstand repeated use and washing. Just be sure to take your time and make precise cuts and stitches for the best results.
Gluing Felt to Paper
When it comes to crafting and scrapbooking, gluing felt to paper can add a unique and tactile element to your project. However, it can be tricky to get the felt to adhere smoothly without causing wrinkles or bubbles. This section will provide you with a complete guide on how to properly glue felt to paper, including the types of glue to use and tips on avoiding common mistakes. So roll up your sleeves and get ready to dive into this fascinating technique!
Using Acid-Free Glue
When it comes to gluing felt to paper, it’s important to use acid-free glue to avoid damaging the paper. Acid-free glue is a type of adhesive that has a neutral pH level, meaning it won’t deteriorate the paper over time. Here are some steps to follow when using acid-free glue:
| Step | Action |
|---|---|
| Step 1 | Choose the right glue: Look for acid-free glue at your local craft store or online. Make sure it’s specifically designed for paper crafting. |
| Step 2 | Prepare the felt: Cut the felt to the desired size and shape. If needed, you can use a ruler and a rotary cutter to achieve straight edges. |
| Step 3 | Apply the glue: Use a thin layer of acid-free glue on the back of the felt. Avoid using too much glue to prevent wrinkling or bubbling. Smooth out the glue with a small brush or a sponge, if needed. |
| Step 4 | Position the felt: Carefully place the felt on the paper, pressing down gently to secure it. If you need to reposition the felt, do it quickly before the glue dries. |
| Step 5 | Let it dry: Allow the glue to dry completely before handling the paper. This can take anywhere from a few minutes to a few hours, depending on the type of glue and the humidity of the environment. |
Remember to use acid-free glue sparingly, as it can cause wrinkling and bubbling if you apply too much. Using acid-free glue ensures that your felt project won’t harm your paper and will last for years to come.
Avoiding Wrinkles
When gluing felt to paper, it’s important to avoid wrinkles in order to achieve a smooth finish. Here are some tips to help you get it right:
- Start with a clean surface: Make sure your work area is clean and free from any debris or dust that might get caught between the felt and paper and cause wrinkles.
- Use a light hand: Apply the glue to the felt in a thin, even layer, taking care not to apply too much pressure that can cause the felt to wrinkle.
- Smooth out the felt: After you’ve applied the felt, gently smooth out any wrinkles or bubbles using your fingers or a small roller.
- Avoid excessive stretching: Pulling the felt too tight can cause it to warp or wrinkle. Be sure to handle the felt carefully and avoid stretching it more than necessary.
- Allow time to dry: Once the felt is applied, allow ample time for the glue to dry completely before moving, handling, or placing any weight on it. This will help prevent any wrinkles from forming due to shifting or movement.
By following these simple tips, you can ensure a wrinkle-free finish when gluing felt to paper, and create beautiful and professional-looking projects.
Gluing Felt to Other Surfaces
When it comes to crafting, felt is a versatile and popular choice of material. From clothing and accessories to home decor and kids’ crafts, the possibilities are endless. While gluing felt to fabric and paper are common methods, what about attaching it to other surfaces? In this next section, we’ll explore the process of gluing felt to unconventional surfaces and the best glue options to ensure a secure hold. Let’s dive in and discover how to bond felt to a variety of materials.
Using Craft Glue
Craft glue is a versatile option for gluing felt to various surfaces, including wood, metal, and plastic. Craft glue is best suited for projects that don’t require a lot of durability, and where the finished piece won’t be subjected to frequent or heavy use.
When using craft glue to glue felt, it’s important to choose a formula that dries clear, and won’t leave behind any residue. You’ll also want to consider the drying time of the glue you choose, as some formulas take longer than others to set.
To use craft glue to attach felt, follow these steps:
- Clean the surface you’ll be attaching the felt to, and make sure it’s dry.
- Cut the felt to the appropriate size and shape.
- Apply a thin layer of craft glue to the surface you’ll be gluing the felt to.
- Smooth the felt onto the surface, making sure to apply pressure and eliminate any air bubbles.
- Allow the glue to dry completely, which can take anywhere from a few hours to overnight depending on the formula you’re using.
- Check to make sure the felt is securely attached before handling or using the finished piece.
While craft glue can be a great option for gluing felt to a variety of surfaces, keep in mind that it’s not the most durable choice. For projects that will see heavy use or exposure to moisture, consider using alternate adhesives such as fabric or hot glue.
Avoiding Bubbles
When gluing felt to other surfaces with craft glue, it’s important to avoid bubbles. Bubbles can create a bumpy and uneven surface, which can be distracting and unattractive. Here are some tips to help you avoid bubbles in your felt projects:
| Tip | Description |
| Apply glue evenly | Try to apply a thin, even layer of glue to both your felt and the surface you’re gluing it onto. This will help prevent bubbles from forming. |
| Press gently | When you place your felt onto the surface, press gently and evenly with your hands or a flat object like a book or ruler. This will help eliminate any air pockets between the felt and the surface. |
| Avoid over-applying glue | If you apply too much glue, it can push air bubbles up from the surface. Be sure to use just enough glue to create a strong bond. |
| Work in small sections | Working in small sections allows you to apply the glue and attach the felt before it dries. This helps you avoid bubbles and ensures a smooth surface. |
| Smooth out bubbles | If you do end up with bubbles, don’t worry! You can try to smooth them out with your fingers or a flat object before the glue dries. This may not work for larger bubbles, but it can help with smaller ones. |
By following these tips, you can create a clean and even surface when gluing felt to other materials with craft glue. Remember to work carefully and take your time to ensure the best results.
Tips and Tricks
Looking for a few tricks to make your felting projects easier and more successful? In this section, we’ll share some helpful tips that will take your felting skills to the next level. From using a glue gun to protecting your work surface, these tips and tricks will ensure that your projects look great and stand the test of time. So, grab your supplies and get ready to learn how to glue felt like a pro!
Using a Glue Gun
When it comes to using a glue gun to adhere felt to other surfaces, there are a few things to keep in mind. A glue gun is a quick and easy way to attach felt to almost any surface, but it can be easy to make mistakes that leave your project looking messy or even permanently damaged. Below is a table with some tips for using a glue gun effectively when gluing felt:
| Tip | Description |
|---|---|
| Use a low-temperature setting | Felt can melt easily, so it’s important to use a glue gun that has a low-temperature setting. This will help prevent the felt from becoming damaged. |
| Apply the glue in small sections | To get the best bond, it’s important to apply the glue in small sections. This will ensure that the glue doesn’t dry before you have a chance to press the felt into place. |
| Press and hold firmly | Once you’ve applied the glue, you’ll want to press the felt firmly into place. Hold it there for a few seconds to ensure that the glue has time to set. |
| Avoid getting glue on the front of the felt | If you get glue on the front of the felt, it can be difficult to remove without leaving a visible mark. Try to keep the glue on the edges of the felt. |
| Protect your work surface | A glue gun can be messy, so it’s a good idea to protect your work surface with a sheet of wax paper or parchment paper. This will make cleanup easier. |
By following these tips, you can ensure that your felt project comes out looking clean and professional. Using a glue gun can be a fast and easy way to attach felt to other surfaces, but it’s important to use it carefully to avoid damaging your work.
Protecting Your Work Surface
When working with glue, it’s important to protect your work surface to prevent any damage or unwanted sticking. Here are some ways to protect your table when gluing felt:
| Method | Description |
|---|---|
| Use a Protective Cover | A simple way to protect your table from glue and felt residue is by covering it with a protective layer. You can use a plastic tablecloth, wax paper, or even old newspapers to protect your table from any spills. |
| Use a Dedicated Work Surface | If you plan on doing a lot of gluing, it might be helpful to designate a specific work surface for your felt projects. This can be a dedicated craft table or even a large sheet of cardboard that you can lay over your table to protect it. |
| Protect Your Table’s Surface | Another option is to protect the surface of your table by placing a layer of cardboard or foam board between the table and your felt project. This will create a barrier between the sticky glue and your table, preventing any damage or unwanted sticking. |
By taking the time to protect your work surface, you can keep your table in good condition while still enjoying all the benefits of working with felt and glue.
Using Glue Alternatives
If you don’t have glue on hand or prefer not to use it, there are several alternatives you can try when gluing felt. Here are some effective glue alternatives:
| Glue Alternative | Description |
|---|---|
| Double-Sided Tape | This is a quick and easy alternative to glue. Cut the double-sided tape to the desired size and apply it to the felt. Then press the felt onto the surface you want it to stick to. |
| Felt Adhesive Sheets | These sheets have an adhesive backing that makes it easy for you to stick them to surfaces. Simply cut the adhesive sheets to the desired size and shape, peel off the backing, and apply the felt to the surface. |
| Fabric Stiffener | If you’re working with soft or floppy felt, fabric stiffener can help. Simply spray the fabric stiffener onto the felt until it’s saturated. Then, lay the felt onto the surface and press it down firmly until it dries. |
| Invisible Thread | If you prefer sewing over gluing, use invisible thread to stitch the felt onto the surface you want. This is a great option if you’re working with delicate fabrics or items that will be seen from both sides. |
| Binder Clips | Binder clips can be a helpful alternative when gluing felt to a surface. Simply clip the felt securely in place while it dries. |
While glue is the traditional method for attaching felt to surfaces, these alternatives can be just as effective. Experiment with different alternatives to find the one that works best for your project.
Conclusion
In conclusion, gluing felt can be a rewarding and satisfying experience, whether you are creating a DIY project, repairing a garment, or making a decoration. However, it is crucial to have the right tools and materials, as well as a clean and dry surface to work on.
Remember to choose the appropriate type of glue for your project and always follow the manufacturer’s instructions for best results. Whether you are using fabric, acid-free, or craft glue, make sure you apply it evenly and avoid wrinkles, bubbles, or excess glue.
When cutting and preparing the felt, take your time and use sharp scissors or a rotary cutter to ensure accurate and clean edges. If you are attaching the felt to a fabric surface, consider using a sewing machine for extra durability and neatness.
Furthermore, if you are using a hot glue gun, be cautious and protect your work surface and your fingers from burns. Finally, don’t be afraid to experiment with different techniques and embellishments to make your felt project stand out.
With these tips and tricks, you can create stunning and long-lasting felt crafts that will impress your friends and family. So, gather your supplies and start gluing!
Frequently Asked Questions
What type of felt is best for gluing?
Wool felt is the best type of felt to use for gluing projects. It holds glue well and is durable enough to maintain its shape.
Can I use regular glue to glue felt?
While regular glue can be used to glue felt, it’s best to use glue specifically designed for fabric and felt. Fabric glue will ensure a stronger hold and won’t damage the fabric.
How do I cut felt to size?
Use sharp fabric scissors to cut felt to the desired size. It’s important to cut the felt precisely to avoid any uneven edges or gaps in the glue.
How do I avoid wrinkles when gluing felt to paper?
Apply the adhesive to the paper and gently place the felt on top, smoothing out any wrinkles as you go. Avoid applying too much pressure to the felt, as it can cause wrinkling.
What is the best way to protect my work surface during gluing?
Use wax paper or a disposable tablecloth as a barrier between your work surface and the felt. This will protect your surface from any excess glue or potential damage from the gluing process.
Can I use a glue gun to glue felt?
Yes, a glue gun is a great option for gluing felt. Just be sure to use a low-temperature setting and to apply the glue in a thin, even layer for the best results.
What is the best way to avoid bubbles when gluing?
Apply the glue evenly and in a thin layer to avoid any air bubbles. Use a flat tool or your fingers to smooth out the felt and remove any potential air pockets.
Is there an alternative to glue for gluing felt?
Yes, double-sided adhesive sheets are a great alternative to traditional glue. Simply cut the adhesive sheet to size, peel off the backing, and apply it to the desired surface.
Can I sew felt instead of gluing it?
Yes, sewing is a great option for attaching felt to fabric or other surfaces. Be sure to use a needle and thread that are strong enough to hold the felt in place.
What is the best type of glue to use for delicate felt projects?
For delicate felt projects, use a glue that is acid-free and won’t damage the material. A clear-drying craft glue is a good option for these types of projects.