Introduction
Bakelite, a type of thermosetting plastic invented in the early 1900s, has become a popular material for various applications due to its heat-resistance and durability. However, gluing Bakelite can be a challenging task even for experienced DIY enthusiasts. In this guide, we will explore the step-by-step process of how to glue Bakelite, including preparing the surface, choosing the right glue, applying the glue, drying, and finishing. We will provide useful tips and troubleshooting advice to help you achieve a perfect result. So if you’re ready to learn how to glue Bakelite like a pro, let’s get started!
What is Bakelite?
Bakelite is a type of thermosetting plastic that was first developed by Belgian chemist Leo Baekeland in 1907. It was one of the first plastics ever made and is known for its durability and heat resistance. Bakelite is made by mixing phenol and formaldehyde together and then heating the mixture under pressure. This causes the molecules to cross-link, creating a hard, solid material.
Bakelite Properties
Here are some of the key properties of Bakelite:
| Property | Description |
|---|---|
| Appearance | Bakelite can be found in a range of colors, including brown, black, and red. It has a distinctive look, with a shiny, almost glass-like finish. |
| Hardness | Bakelite is a very hard material that is difficult to scratch or dent. It is also very brittle, meaning it can snap or break easily under pressure. |
| Heat resistance | Bakelite has a high resistance to heat, making it useful in applications where it will be exposed to high temperatures, such as electrical connectors and automobile components. |
| Chemical resistance | Bakelite is resistant to a wide range of chemicals, including acids and alkalis. It is also resistant to water and can be used in damp or wet environments. |
| Electrical properties | Bakelite is an excellent electrical insulator and is widely used in electrical applications, such as switches and circuit boards. |
Why is Gluing Bakelite Important?
Bakelite’s durability and heat resistance make it a popular material for a wide range of applications, from electrical components to jewelry. However, there may come a time when you need to glue two pieces of Bakelite together, either for repair or for a DIY project. When it comes to gluing Bakelite, it’s important to choose the right type of glue and prepare the surface properly to ensure a strong, lasting bond.
Internal Link: How to Make Waterproof Body Glue
Why is Gluing Bakelite Important?
Gluing Bakelite is important for several reasons. Firstly, Bakelite is a thermosetting plastic that is known for its durability and heat-resistant properties. However, it can crack or break easily which makes gluing it an important process to repair such damages. Secondly, Bakelite is an attractive material that is often used for vintage and antique items such as radios, telephones, and jewelry. Gluing Bakelite can help restore these items to their original appearance and maintain their value.
Using the right glue and gluing technique is crucial for ensuring a strong and long-lasting bond. Using the wrong type of glue may cause further damage to the Bakelite or weaken the bond over time. It is also important to properly prepare the Bakelite surface before applying glue to ensure a solid bond. Failure to prepare the surface may lead to a weak bond or glue failure.
Gluing Bakelite is not only necessary for repairing damages but also for preserving the quality and value of vintage and antique Bakelite items. If you are interested in learning how to glue other materials besides Bakelite, check out our articles on gluing soapstone together, gluing wax together, or gluing stone to wood.
Preparing Bakelite for Gluing
Before you start gluing Bakelite, it’s important to properly prepare the surface to ensure a strong and long-lasting bond. Any dirt, dust, or grime on the surface can prevent the glue from properly adhering, leading to a weak bond that can easily break. This section will provide you with a complete guide to preparing Bakelite for gluing, including cleaning the surface, roughening the surface, and sanding the edges. By following these steps, you’ll be able to create a strong bond that will last for years to come. And if you’re wondering about how long does T7000 glue take to dry, or how to glue a pool table felt, or how to glue sea glass, or how to glue guitar nut, or what is PUR glue, or how to glue a tile back on, check out our related articles for more information.
Clean the Surface
One of the most important steps in gluing Bakelite is to clean the surface thoroughly. Any dirt, oil, or residue on the surface can prevent the glue from adhering properly, leading to weak joints and potentially causing the item to break.
To begin, use a soft, dry cloth to wipe away any loose debris or dust from the surface. Next, wipe the surface down with a solvent such as rubbing alcohol or acetone to remove any grease or oil. Be sure to wear gloves and work in a well-ventilated area when using solvents.
After cleaning with a solvent, rinse the Bakelite with warm water and mild soap to remove any remaining residue. Rinse thoroughly and dry completely with a clean, lint-free cloth.
If your Bakelite has deep stains or ingrained dirt, you can use a plastic-safe cleaner or a mild abrasive cleaner like baking soda or toothpaste. Apply the cleaner to a soft, damp cloth and gently rub the surface until the stain is removed. Rinse thoroughly and dry completely.
Remember, clean surfaces are crucial in obtaining a strong bond when gluing Bakelite. Neglecting to clean the surface properly can result in poor adhesion and a weakened bond that may fail over time.
Internal link: Read here about how long does T7000 glue take to dry
Roughen the Surface
Before gluing Bakelite, it’s important to roughen the surface for better adhesion. To do this, you can use sandpaper with a coarse grit of around 60 to 80. You can also use a sanding wheel or a sanding disc if you have one. By roughening the surface, you create more area for the glue to bond to, which strengthens the overall bond.
To roughen the surface, take the sandpaper and rub it over the surface of the Bakelite. Use firm pressure and move in a circular motion to create an even roughness. Make sure to cover the entire surface that will be glued. You can also use a sanding block to keep the sandpaper flat and even.
Tip: If you’re having trouble holding the Bakelite steady while sanding, you can use clamps or a vice to hold it in place.
After roughening the surface, use a clean cloth to remove any dust or debris. This will ensure a clean surface for gluing. Once the surface is clean, you can move on to sanding the edges.
Did you know? Roughening the surface is a common practice in many other gluing tasks. For example, if you’re gluing sea glass, you should also roughen the surface using sandpaper to ensure a strong bond. Want to learn more about gluing different materials? Check out our articles on gluing pool table felt, gluing sea glass, or gluing a guitar nut. If you’re interested in learning about Pur glue, we have an article on that too! And if you need to know how to glue a broken tile, check out our article on repairing broken tiles.
Sand the Edges
When gluing Bakelite, it is crucial to prepare the surface properly to ensure a strong bond. Sanding the edges of the Bakelite is an essential step in this preparation process.
Why sand the edges of Bakelite?
Bakelite is a hard and rigid material, which means that it can be challenging for glue to stick to its surface. Sanding the edges of the Bakelite can help create a rougher and more textured surface, allowing the glue to adhere better.
How to sand the edges of Bakelite?
To sand the edges of Bakelite, you will need sandpaper with a fine or medium grit. Begin by cutting the sandpaper into small strips, then wrap one strip around a sanding block or a piece of wood. Hold the Bakelite piece firmly and press the edge onto the sandpaper. Move the Bakelite piece back and forth along the sandpaper, making sure to apply even pressure. Continue sanding each edge until the surface has a slightly rough texture.
What type of sandpaper to use?
When sanding Bakelite edges, it’s best to use sandpaper with a grit between 120 and 180. A finer grit may not create enough texture on the surface, while a coarser grit may create too much texture, making it difficult to achieve a smooth finish.
How to avoid sanding too much?
Sanding too much can remove too much of the Bakelite surface, creating a weaker bond. To avoid this, sand the edges of the Bakelite lightly and evenly until the surface has a slightly rough texture, making sure not to sand away too much of the material.
To summarize, sanding the edges of Bakelite is an essential step in preparing the surface for gluing. By following the steps mentioned above and using the appropriate sandpaper grit, you can create a textured surface that allows the glue to bond better and achieve a strong hold. Be careful not to sand too much and achieve the perfect texture for the best gluing results.
Choosing the Right Glue for Bakelite
When it comes to gluing Bakelite, choosing the right glue is crucial for a strong and durable bond. With so many adhesive options available, it can be overwhelming to select the one that best suits your project needs. To make the decision-making process easier, we’ve compiled a list of the most effective glues for Bakelite and their unique characteristics. Read on to learn about the pros and cons of epoxy, super glue, urethane, and polyurethane adhesives for gluing Bakelite.
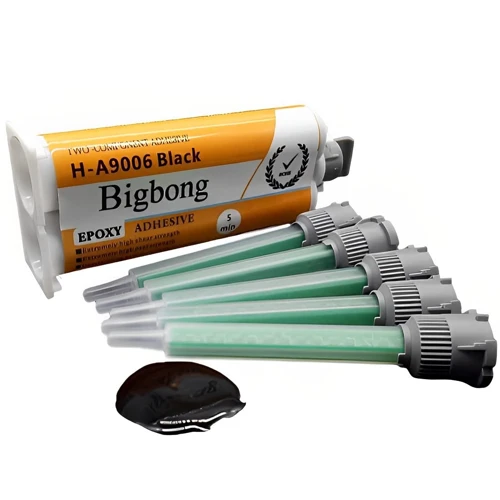
Epoxy
Epoxy is a popular type of adhesive for gluing Bakelite due to its strong bonding properties. It consists of two parts – a resin and a hardener – that are mixed together before application. Once mixed, the two parts create a chemical reaction that solidifies the adhesive and forms a very strong bond.
Advantages:
- Strong bonding capability, making it ideal for Bakelite
- Dries clear, making it ideal for transparent or light-colored Bakelite
- Resistant to water and chemicals, making it suitable for use in harsh environments
Disadvantages:
- Can be messy to work with due to the need to mix the two parts together
- Can take a while to set fully, sometimes up to 24 hours
- Can be expensive compared to other types of glue
When using epoxy to glue Bakelite, it’s important to follow the instructions carefully and mix the resin and hardener in the correct proportions. Apply the adhesive evenly to both surfaces, then clamp them together tightly. Clean up any excess adhesive with a cloth or paper towel. Let the epoxy dry completely before removing the clamps, usually around 24 hours.
Remember to wear gloves and work in a well-ventilated area when using epoxy, as it can be harmful if it comes in contact with the skin or is inhaled. If you experience any adverse reactions, seek medical attention immediately.
Ultimately, epoxy is a reliable option for gluing Bakelite due to its strength and durability, making it a popular choice among DIY enthusiasts and professionals alike.
Super Glue
When it comes to gluing Bakelite, super glue is a popular option. This type of adhesive is known for its quick-setting time and strong bond. However, it’s important to note that not all super glues are suitable for Bakelite. It’s essential to choose the right type of super glue that is formulated for use with Bakelite.
Advantages of Super Glue for Bakelite
One advantage of using super glue for Bakelite is its fast setting time. This means that you can start using the glued object within minutes of applying the adhesive. Super glue also creates a strong bond that can withstand moderate stress.
Another advantage is that super glue is readily available and easy to store. You can easily purchase it at your local hardware store or online, and it can be stored in a cool, dry place for long periods.
Choosing the Right Super Glue for Bakelite
It’s essential to choose the right type of super glue when working with Bakelite. Not all super glues are created equal, and choosing the wrong one can result in a weak bond that doesn’t last.
When selecting a super glue for Bakelite, look for a product that is specifically formulated for use with plastic materials. Additionally, make sure the glue is designed for non-porous surfaces, as Bakelite is a hard, non-porous plastic. A cyanoacrylate-based super glue is a good choice for Bakelite, as it can create a strong bond in a short amount of time.
Applying Super Glue to Bakelite
To apply super glue to Bakelite, first, ensure that the surface is clean and dry. Apply the adhesive sparingly, using a toothpick or small brush to avoid over-application. Be careful not to get the glue on your skin, as it can bond to human skin.
Pros Cons
Quick-setting time Can bond to skin
Creates a strong bond Not all super glues are formulated for use with Bakelite
Easy to store and readily available Over-application can result in a weak bond
Specifically formulated products are available
Can be used on non-porous surfaces
Super glue can be a great option for gluing Bakelite, but it’s essential to choose the right product and apply it carefully. By following the right procedure, you can create a strong, long-lasting bond that can stand up to moderate stress.
Urethane
Urethane adhesives are a popular choice for gluing Bakelite due to their high strength and durability. They are also extremely versatile and can bond a wide range of materials, making them an ideal choice for general-purpose gluing applications.
Some benefits of using urethane adhesives for Bakelite gluing include:
- High Strength: Urethane adhesives are known for their high bonding strength and ability to withstand stress and strain.
- Fast Curing: Urethane adhesives typically cure quickly and can achieve full strength in as little as 24 hours.
- Water Resistance: Urethane adhesives are highly resistant to water and moisture, making them a great choice for outdoor and wet environments.
- Chemical Resistance: Urethane adhesives are also resistant to most chemicals, including acids, bases, and solvents.
When using urethane adhesives for Bakelite gluing, it’s important to follow the manufacturer’s instructions carefully, as the curing time and application process can vary depending on the specific product.
To help ensure a successful bond, follow these steps when using urethane adhesives for Bakelite gluing:
| Step | Instructions |
|---|---|
| 1 | Clean the surface of the Bakelite to remove any dirt, dust, or debris. |
| 2 | Roughen the surface of the Bakelite with sandpaper to create a better bonding surface. |
| 3 | Apply the urethane adhesive to the roughened surface in a thin, even coat. |
| 4 | Immediately place the Bakelite in the desired position and apply pressure to ensure a tight bond. |
| 5 | Wipe away any excess adhesive that may have squeezed out during the bonding process. |
| 6 | Allow the adhesive to cure completely according to the manufacturer’s instructions before using or applying any additional finishing treatments to the Bakelite. |
By following these steps and using a high-quality urethane adhesive, you can achieve a strong and durable bond when gluing Bakelite.
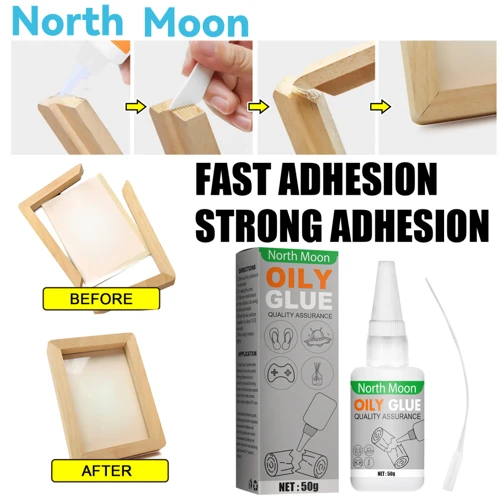
Polyurethane
One option for gluing Bakelite is to use polyurethane glue. Polyurethane glue is known for its strength and ability to bond to a variety of surfaces, including Bakelite. Here are some things to consider when using polyurethane glue:
- Make sure the surface is clean and dry before applying the glue.
- Apply a small amount of glue to one surface using a brush or applicator.
- Press the two surfaces together and clamp them in place.
- Allow the glue to dry completely, which can take several hours.
- Sand away any excess dried glue using fine-grit sandpaper.
- Be aware that polyurethane glue can expand as it dries, so be sure not to apply too much.
- Also, keep in mind that polyurethane glue has a strong odor and can take a while to dry completely.
Polyurethane glue is a good option for bonding Bakelite due to its strength and versatility. However, be sure to carefully follow the instructions for use and take proper safety precautions when working with this type of glue.
Applying the Glue to Bakelite
Now that you have prepared your Bakelite surface and chosen the right type of glue, it’s time to apply the adhesive to the material. This step is crucial for ensuring a strong and long-lasting bond. In this section, we will discuss the proper technique for applying glue to Bakelite to achieve optimum results. Let’s dive into the nitty-gritty details of the gluing process!
Apply the Glue
When applying the glue to your Bakelite project, it’s important to choose the right type of glue for the job. Consider the size and weight of the pieces being glued together, as well as the temperature and humidity of the work environment. Once you have chosen the right glue, follow these steps for applying it:
| Step | Instructions |
|---|---|
| 1 | Apply the glue to one of the surfaces – using a small brush or applicator, apply a thin layer of glue to one of the surfaces that you want to glue together. Be sure to spread the glue evenly and avoid applying too much. Remember, a little goes a long way! |
| 2 | Press the surfaces together – once the glue has been applied to one surface, gently press the two surfaces together. Make sure they are properly aligned before applying too much pressure. You can use a clamp or even your hands to hold the pieces in place. |
| 3 | Apply more glue – apply more glue to any areas that may have gaps or that didn’t receive enough in the first application. Again, avoid over-application of glue. |
| 4 | Smooth out the excess glue – use a damp cloth or paper towel to carefully wipe away any excess glue that may have seeped out. Be careful not to apply too much pressure or remove too much of the glue. |
Remember, proper application of glue is crucial to the success of your Bakelite project. If you’re unsure about the best way to apply the glue, consult the manufacturer’s instructions or seek advice from a professional.
Clamp the Bakelite
To ensure proper adhesion of the glue to the Bakelite, it’s important to clamp the materials together. Here are the steps to follow when clamping Bakelite:
Step 1: Apply the glue evenly to the surface of the Bakelite that will be glued together.
Step 2: Align the two Bakelite pieces together and press them firmly into place.
Step 3: Use a clamp to hold the two pieces of Bakelite securely together.
Step 4: Tighten the clamp gradually and evenly to ensure that the pressure is evenly distributed across the Bakelite surface. Be careful not to apply too much pressure, as this can damage the Bakelite or cause the glue to squeeze out.
Step 5: Allow the glue to dry completely according to the manufacturer’s instructions.
Step 6: Once the glue is dry, remove the clamp carefully and gently.
Make sure to use a clamp that’s appropriate for the size and shape of the Bakelite piece being glued. It’s also important to place the clamp in a position that will apply even pressure to the entire surface being glued.
Remember, proper clamping is crucial for achieving a strong, long-lasting bond between Bakelite pieces. If you’re unsure about the correct type or size of clamp to use, consult with the glue manufacturer or a professional.
Wipe Away Excess Glue
Once the Bakelite pieces are securely clamped together, it’s important to wipe away any excess glue before it dries. Excess glue can cause an unsightly finish, and potentially weaken the bond between the Bakelite pieces.
To wipe away excess glue, use a clean cloth that has been dampened with rubbing alcohol. Gently wipe away any glue that has oozed out from between the Bakelite pieces. Be sure to use gentle pressure, as too much pressure can cause the pieces to shift and can weaken the bond.
Table:
| Materials Needed | Tools Needed |
|---|---|
| – Clean cloth | – Rubbing alcohol |
It’s important to note that wiping away excess glue should be done quickly after clamping the Bakelite pieces together. Once the glue starts to set, it becomes increasingly difficult to remove any excess glue without damaging the bond between the pieces.
By wiping away any excess glue, you’re ensuring a clean and professional-looking finish for your Bakelite project.
Drying and Finishing Bakelite
After successfully gluing Bakelite, the next step is to let the glue dry and finish the surface to ensure it looks seamless and professional. This final stage is critical to the overall success of the project. Without proper drying and finishing, the glue may crack or discolor, which can take away from the end result. It’s essential to take the necessary steps to ensure that the Bakelite is not only bonded but has a smooth and polished finish. In this section, we’ll cover the steps to dry and finish Bakelite, including removing clamps and cleaning up residue, and sanding down any rough spots. Let’s dive in!
Let the Glue Dry
After applying the glue to the bakelite, it is important to allow it to fully dry before handling the item. The amount of time required for the glue to dry will depend on the type of glue being used and the environmental conditions. In general, epoxy and polyurethane glues can take anywhere from 24 to 48 hours to fully cure, while super glue and urethane glue can dry in as little as a few minutes.
Here are some steps to follow when letting the glue dry:
- Avoid touching or moving the item while the glue is drying.
- Place the item in a well-ventilated area to allow for proper air circulation. This will help facilitate the drying process.
- Make sure the item is resting on a flat surface and is not leaning or tilted in any way. This will help ensure that the glue is drying in an even layer.
- Depending on the type of glue used, it may be necessary to keep the item clamped or weighed down during the drying process. Check the manufacturer’s instructions for specific recommendations.
It is important to note that rushing the drying process can lead to poor results. While it may be tempting to handle the item or remove clamps before the glue is fully dry, this can cause the bond to weaken or even break. Take the time to let the glue dry completely to ensure a strong, durable bond.
Once the glue has fully dried, it is time to move on to the next step in the process: removing clamps and cleaning up any residual glue. By following the proper steps for gluing and allowing the glue to fully dry, you can ensure that your bakelite item is restored and ready for use.
Remove Clamps and Clean Up Residue
After letting the glue dry completely, it is time to remove the clamps and clean up any residue on the surface of the Bakelite. This is a critical step in ensuring a seamless finish to your project.
Step 1: First, remove the clamps carefully to avoid shaking or damaging your glued item. Be patient and gentle, as the glue might still be slightly tacky.
Step 2: Next, use a scraper or a razor blade to remove any excess glue or residue on the surface of the Bakelite. You can also use sandpaper to smooth out any rough spots.
Step 3: Once you have removed the excess glue, use a solvent such as acetone or rubbing alcohol to clean the surface of the Bakelite. This will ensure that the surface is clean and free of any oils or dirt that may interfere with the bonding.
Step 4: After cleaning the surface, let the Bakelite dry completely before using it. This may take a few hours, depending on the glue you used and the temperature and humidity in your workspace.
Keeping the surface of the Bakelite clean is essential to achieving a successful bonding result. Any leftover adhesive or dirt can weaken the bond and cause the glued item to fail over time. Make sure to take your time and be thorough in cleaning up the residue before using your item.
Sand Down Rough Spots
After letting the glue dry and removing the clamps, you may notice some rough spots on the surface of the Bakelite. These spots can be a result of excess glue or imperfect sanding during the preparation stage. To ensure a smooth and even surface, sand down the rough spots using fine-grit sandpaper.
Start by wrapping the sandpaper around a block of wood to provide a flat surface for sanding. Use light pressure to sand the rough spots in a circular motion, moving the sandpaper back and forth until the surface is even. Remember to sand gently to avoid accidentally removing too much material.
After sanding down the rough areas, clean the surface with a damp cloth to remove any dust or debris left over from sanding. This will ensure that the surface is clean and ready for finishing.
If the rough spots are particularly deep, you may need to fill them in before sanding. Use a small amount of extra glue or epoxy to fill in the gaps, and allow it to dry before sanding. This will ensure that the surface is even and smooth, with no visible imperfections.
Once you have sanded down the rough spots, the Bakelite should be ready for further finishing. This may include polishing the surface to a shine or adding a layer of protective sealant to ensure that the glue stays in place. Overall, sanding down rough spots is an important step in the gluing process, as it ensures that the final product looks and feels smooth and even.
Here is a table showing the recommended grit size for sanding different types of Bakelite:
| Type of Bakelite | Recommended Grit Size |
|---|---|
| Phenolic Bakelite | 220 – 320 grit |
| Catalin Bakelite | 400 – 600 grit |
| Compression Molded Bakelite | 80 – 120 grit |
Remember to match the grit size to the specific type of Bakelite you’re working with to achieve the best results.
Troubleshooting Common Bakelite Gluing Problems
When it comes to gluing Bakelite, problems may arise even if you follow each step of the process thoroughly. These issues can range from bonding failure to discoloration of the glue, and they may leave you feeling frustrated and lost. However, there’s no need to panic! In this section, we will address several of the most common Bakelite gluing problems and provide effective solutions that will help you achieve perfect results every time. So, keep reading to learn how to troubleshoot gluing problems like a pro.
Bonding Failure
Bonding failure can occur when the glue does not properly adhere to the surface of the Bakelite. This can be caused by a variety of factors, including:
- Incorrect Surface Preparation: If the surface is not cleaned and roughened properly, the glue will not properly bond to the Bakelite.
- Wrong Type of Glue: Different types of Bakelite may require different types of glue. Using the wrong type of glue can result in poor bonding and bonding failure.
- Inadequate Clamping: If the Bakelite is not clamped tightly enough, the glue may not be able to properly bond and could result in bonding failure.
- Moisture or Contaminants: Moisture or contaminants on the surface of the Bakelite can interfere with the bonding process and result in bonding failure.
If bonding failure occurs, it is important to identify the cause and take steps to correct it before attempting to reapply glue. This may involve re-cleaning and roughening the surface, choosing a different type of glue, or properly clamping the Bakelite. It is also important to ensure that the glue is properly mixed and applied according to the manufacturer’s instructions for the best results.
Cracks in the Glue
When you notice cracks in the glue, it can be frustrating after all the time and effort you put into gluing your Bakelite piece. However, it’s not uncommon for cracks to occur, especially if the glue wasn’t applied correctly or if the Bakelite wasn’t prepped properly before gluing. Here are some possible causes of cracks in the glue and tips on how to prevent them:
| Possible Causes | Prevention Tips |
|---|---|
| Not enough glue was applied to the Bakelite. | Make sure to apply enough glue to allow for a strong bond. Don’t skimp on the glue! |
| The Bakelite wasn’t clamped correctly. | Ensure that the Bakelite is securely clamped until the glue dries. |
| The glue didn’t dry properly or was disturbed during the drying process. | Allow sufficient drying time for the glue and avoid any movement of the glued pieces until the glue has fully dried. |
In some cases, cracks in the glue may be irreparable, and the only solution is to reapply the glue to those areas. However, prevention is always the best course of action, and by taking the proper steps to ensure a strong bond between the Bakelite pieces, you can minimize the risk of cracks occurring.
Glue Discoloration
One of the frustrating problems that you may encounter when gluing Bakelite is glue discoloration. This occurs when the glue dries and leaves behind a visible, unsightly residue that doesn’t match the color of the Bakelite. There are several factors that can cause glue discoloration, such as the type of glue used or how it was applied. Here are some tips to prevent glue discoloration:
- Choose the Right Glue – Some glues tend to discolor over time, while others remain clear and transparent. If you’re concerned about glue discoloration, choose an epoxy glue that dries clear.
- Follow Instructions Carefully – Always read the instructions carefully before applying the glue. Avoid using too much glue, as this can increase the chances of discoloration. Apply the glue thinly and evenly to avoid excess buildup.
- Practice Good Application Techniques – When applying the glue, use a small brush or toothpick to apply a thin layer evenly to the surface of the Bakelite. Avoid applying too much pressure or rubbing the glue into the Bakelite, which could lead to discoloration.
- Check for Proper Drying Time – Make sure you let the glue dry completely before handling or using the Bakelite object you’ve glued. If the surface is still slightly tacky or sticky, it could cause discoloration over time.
- Avoid Exposure to Heat or Sunlight – Once the Bakelite has been glued and is dry, keep it away from heat sources or direct sunlight. This can cause discoloration and damage to the glue over time.
By following these tips, you can avoid glue discoloration and achieve a professional finish when gluing Bakelite. Remember to take your time and follow best practices for gluing Bakelite, so you can enjoy the benefits of this durable and beautiful material for years to come.
Conclusion
After following the steps outlined in this guide, you should now know how to glue Bakelite effectively. Whether you are repairing a vintage Bakelite item or creating a new project, the right glue and preparation can make a big difference in the final result. Take the time to properly clean, roughen, and sand the surface of the Bakelite, select the appropriate type of glue, and allow sufficient drying time. By doing so, you can successfully bond Bakelite and achieve a strong, long-lasting hold. Keep reading for a summary of the key steps and tips for achieving the best results.
Summary of the Steps to Glue Bakelite
To summarize the steps to glue Bakelite, follow the below guide:
- Clean the Surface: Ensure that the Bakelite surface is clean and free of any debris or dust. Use a damp cloth or alcohol to get rid of any oil or dirt on the surface.
- Roughen the Surface: Use a fine sandpaper to roughen the surface of the Bakelite. This will allow the glue to adhere better to the surface.
- Sand the Edges: sand the edges of the Bakelite that will be glued together for better adhesion.
- Choose the Right Glue: Depending on the project and Bakelite surface, choose the right adhesive. Epoxy, Super Glue, Urethane or Polyurethane are the most effective adhesives for Bakelite.
- Apply the Glue: Carefully apply the glue to one of the Bakelite surfaces. Don’t use too much glue as it might overflow and create a mess.
- Clamp the Bakelite: Press both Bakelite surfaces together and use clamps to keep them in place while the glue dries.
- Wipe Away Excess Glue: After clamping, wipe away any excess glue that may have squeezed out from the edges of the Bakelite.
- Let the Glue Dry: Leave the Bakelite to dry for the duration specified by the adhesive used.
- Remove Clamps and Clean Up Residue: Once the glue has dried, remove the clamps and clean up any residue left behind.
- Sand Down Rough Spots: If any rough spots exist after gluing, sand them down for a smooth finish.
By following these simple steps and using the right adhesive for your project, gluing Bakelite can be a breeze. However, it’s important to follow the manufacturer’s instructions and tips to ensure that the adhesive works effectively.
Tips for Perfect Gluing Results
To ensure perfect gluing results for your Bakelite project, follow these tips:
| Tip 1: | Avoid using too much glue. The excess glue can cause discoloration and take longer to dry. |
| Tip 2: | Choose the right glue for your project. Epoxy, super glue, urethane, and polyurethane are all good options for Bakelite. |
| Tip 3: | Clean the surface of the Bakelite thoroughly before applying glue. Any dirt or oil on the surface can affect the bonding. |
| Tip 4: | Make sure the Bakelite is clamped tightly while the glue sets. This will ensure a strong bond and prevent any movement of the pieces being glued. |
| Tip 5: | Sand any rough spots once the glue has dried to achieve a smooth finish. |
| Tip 6: | Store your Bakelite project in a dry and cool place to prevent damage to the glue bond over time. |
By following these tips, you can achieve perfect gluing results for your Bakelite project. Remember to choose the right glue for your project, clean and roughen the surface, clamp the pieces tightly during bonding, and sand any rough spots once the glue has dried.
Frequently Asked Questions
Can Bakelite be glued?
Yes, Bakelite can be glued using the appropriate type of glue and preparation techniques to ensure a strong bond.
What types of surfaces can Bakelite be glued to?
Bakelite can be glued to a variety of surfaces, including metal, wood, and plastic.
Can Bakelite be cleaned with regular household cleaners?
It is recommended to avoid using harsh or abrasive cleaners on Bakelite, as they can damage the surface. Instead, use a mild soap and water to clean the surface before gluing.
How long does it take for Bakelite glue to dry?
The drying time for Bakelite glue will depend on the type of glue used and the conditions in which it is drying. Generally, epoxy and polyurethane glues can take up to 24 hours to fully dry.
What is the best type of glue for Bakelite?
Epoxy glue is a popular choice for gluing Bakelite due to its strong bonding properties and ability to fill in gaps. Super glue and urethane glue can also be effective.
Do I need to roughen the surface of Bakelite before gluing?
Yes, roughening the surface of Bakelite with sandpaper or another abrasive material can help the glue adhere better to the surface.
Can I use heat to speed up the drying process?
It is not recommended to use heat sources to speed up the drying process, as this can damage the Bakelite and compromise the bond of the glue.
Can Bakelite be sanded after gluing?
Yes, Bakelite can be sanded after gluing to smooth out rough spots and create a more polished finish.
What should I do if the glue bond fails?
If the glue bond fails, it is important to clean off the old glue and repeat the gluing process, ensuring that the surface is properly cleaned and prepared.
Can Bakelite be painted after gluing?
Yes, Bakelite can be painted after gluing once the glue has fully dried and the surface has been properly sanded and cleaned.