When it comes to giving a room a fresh coat of paint, achieving a smooth and even finish with a roller can be a challenging task. The last thing you want is unsightly roller marks and an uneven application. But fear not, there are tips and tricks to help you achieve a flawless finish. From selecting the right roller and preparing your surface to rolling the paint correctly and cleaning your roller, we’ve got you covered. Follow these step-by-step tips to achieve a professional-quality result that will leave your walls looking smooth and beautiful.
Choose the Right Roller
When it comes to painting with a roller, one of the most important factors that can affect the quality of the job is choosing the right roller. With so many different types and sizes of rollers available, it can be perplexing to figure out which one will work best for your project. Fortunately, by paying attention to a few key factors, you can make an informed decision and select the optimal roller for your particular painting task. Let’s take a more in-depth look at some of these essential considerations for choosing the right roller. For more information, check out our guide on how to choose the right roller for painting.
Select the Appropriate Nap Length
When choosing a roller for your paint job, it is important to select the appropriate nap length. The nap length of a roller refers to the thickness of the fibers on its cover. Generally, the rougher the surface you are painting, the longer the nap length you will need. On the other hand, smoother surfaces require shorter nap lengths.
Here are some tips for selecting the appropriate nap length:
- For smooth, flat surfaces, such as ceilings or new walls, use a roller with a nap length of 1/4 inch or less. This will give you a smooth finish with minimal texture.
- For semi-smooth surfaces, such as lightly textured walls or surfaces with some imperfections, use a roller with a nap length of 3/8 to 1/2 inch. This will help to fill in any small gaps or imperfections while still providing a smooth finish.
- For heavily textured surfaces, such as textured wallpaper or popcorn ceilings, use a roller with a nap length of 3/4 inch or more. This will help you to get full coverage in the deep grooves and textures of the surface.
Choosing the right nap length can make all the difference in achieving a smooth finish with your roller. Be sure to consider the surface you are painting and choose a roller with the appropriate nap length accordingly. If you need more information about roller covers uses, you can visit the related article.
Select the Correct Material
When choosing the material of your roller cover, it’s important to consider the type of paint you’ll be using and the surface you’ll be painting. Different materials are better suited for different paint types and textures.
Microfiber rollers work well with latex paints, as they provide good coverage and have minimal shedding. They also work on smooth surfaces and can be used with oil-based paints if they are specifically labeled for both.
Synthetic fiber rollers are ideal for oil-based paints, as they are highly absorbent and release the paint evenly. They’re also great for textured surfaces, allowing you to get into tight spaces and crevices.
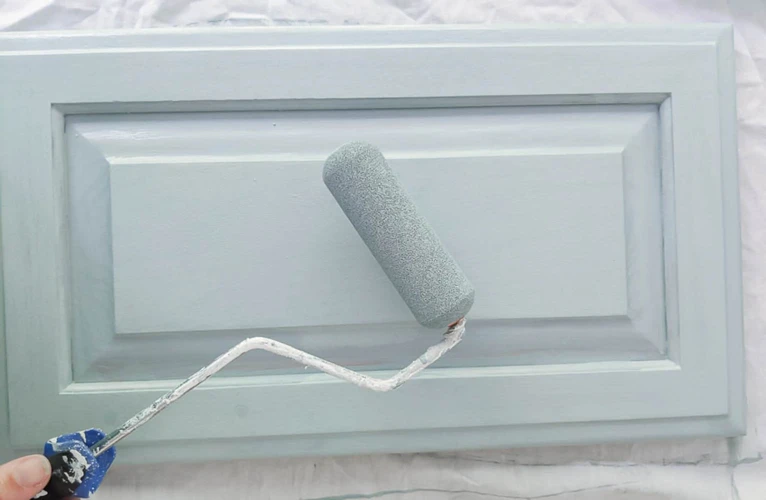
Foam rollers are often used for glossy surfaces like doors and trim. They don’t leave a lot of texture behind, but they can be used with both oil-based and water-based paints.
Wool rollers should be used for textured surfaces as they have a thicker nap that can reach into grooves and crevices. They are also highly absorbent, making them a great choice for applying a lot of paint quickly.
It’s important to remember that you should always match the nap length to the surface you’re painting. A shorter nap is best for smooth surfaces, while a longer nap will work better for textured surfaces. Additionally, be sure to only load the roller with the optimal amount of paint to avoid drips and uneven coverage. For more information on roller covers and their uses, check out our roller covers guide.
Use a High-Quality Roller Frame
When working on a paint job, it’s essential to use a high-quality roller frame, which will help you achieve a smooth and even finish. A good roller frame will not only be more comfortable to use, but it will also ensure that the roller covers stay in place during the painting process, preventing any accidents or smudges on the wall.
Here are a few things to consider when choosing a roller frame:
- Size and Length: The size of your roller will depend on the project you’re working on. For larger surfaces, consider using a wider roller to minimize the amount of time it takes. A longer handle length can also help reduce the amount of strain on your arms.
- Material: Roller frames are made of different materials such as aluminum, steel, or plastic. Aluminum and steel frames are more durable and last longer than plastic. They also provide better control and are ideal for heavy-duty jobs.
- Compatibility: Ensure that the roller frame is compatible with the roller cover you’re using. Some roller frames are designed for specific covers.
- Comfort: Look for a roller frame that is comfortable to hold and easy to grip. A soft grip will also help to minimize the amount of pressure applied to your hands and arms during use.
- Brand: Stick to reputable and well-known brands to ensure the quality of the frame. A well-known brand is also more likely to have a variety of roller frames to choose from with various features and materials.
Investing in a high-quality roller frame will make your painting job more manageable and efficient. You will also achieve better results with less effort. When done with the job, cleaning and maintaining your roller will ensure that it stays in good shape for the next time you need it. Check out our guide on how to clean and maintain your roller for more information.
Prepare Your Roller
Now that you have selected the right roller for your painting project, it’s time to prepare it for optimal paint application. Properly preparing your roller can lead to a smoother finish and reduce the likelihood of any imperfections. Before you begin, make sure to read our article on common mistakes in roller painting, so you can avoid any potential issues. Once you’re ready, follow these simple steps to prepare your roller for the task at hand.
Remove Loose Fibers
To achieve a smooth finish with a roller, it is important to prepare the roller by removing any loose fibers that may be present on the roller’s surface. Loose fibers can cause bumps and inconsistencies in the paint finish.
Here are the steps to follow to remove the loose fibers:
- Wrap masking tape around your hand with sticky side facing out.
- Pat the roller carefully with the sticky side of masking tape wrapped hand. Be sure to focus on the entire surface of the roller, applying more pressure in areas where fibers are more concentrated.
- Remove the tape from the roller carefully, trying not to leave any adhesive residue on the roller’s surface.
- Repeat the process if needed, until all loose fibers have been removed from the roller’s surface.
Once you have removed the loose fibers from the roller, you can proceed to paint textured surfaces with the right technique and load the roller with the right amount of paint for optimal coverage, reading our other articles.
Ensuring that your roller is free of loose fibers will help to create a consistent and smooth finish on your painted surface. In addition to prepping your roller, it is important to properly prepare the surface you will be painting on, as well as using the correct technique when applying paint with the roller. Avoiding common mistakes can also help you achieve the desired result.
Prime the Roller
After removing any loose fibers from the roller, the next step to achieving a smooth finish is to prime the roller. This is an important step because it helps the roller absorb the paint evenly, preventing drips and inconsistencies in the finish.
To prime the roller, there are a few simple steps to follow:
- Wet the roller with water or paint thinner, depending on the type of paint you will be using.
- Roll the roller over a piece of cardboard or scrap wood to remove the excess water or paint thinner.
- Load the roller with paint by dipping it into the paint tray and rolling it back and forth until the roller is evenly coated with paint.
By priming the roller in this way, you can ensure a smooth and even application of paint when you come to actually roll it onto your surface. Remember, the key is to apply the paint in thin and even coats, building up depth and pattern as necessary. If you are interested in learning more about roller painting techniques and how to achieve different patterns and depths with your roller, be sure to check out our comprehensive guide. Alternatively, if you are interested in stenciling with a roller, our step-by-step guide will walk you through the process.
Prepare Your Surface
Before you begin rolling the paint onto your walls, it’s essential to prepare your surface properly. A well-prepared surface will ensure that you achieve a smooth and even painted finish. There are a few crucial steps in the preparation process that you should follow. Let’s explore how to prepare your surface for a smoother finish.
Wash and Dry the Wall
Before you begin painting, it’s important to properly prepare your surface to ensure a smooth finish. One of the essential steps in surface preparation is washing and drying the wall. Here are some tips on how to do it effectively:
- Gather your supplies: Before you start, gather all the supplies you need, including a bucket, sponge, cleaning solution, and towels.
- Choose the right cleaning solution: The type of cleaning solution you use will depend on the type of surface you are painting. For example, if you are painting a kitchen where there is grease and oil buildup, you may need a degreaser. If you are painting a bathroom, you may need a mildew remover. Consult your paint supplier for recommendations.
- Dust the surface: Use a soft cloth or a vacuum with a brush attachment to remove any loose dust or debris from the wall.
- Test a small area: Before you wash the entire wall, test a small area first to make sure the cleaning solution won’t damage the surface or cause the paint to peel.
- Fill a bucket with warm water and cleaning solution: Mix the cleaning solution with warm water in a bucket according to the manufacturer’s instructions.
- Saturate the sponge: Dip a sponge into the cleaning solution and wring it out well. The sponge should be damp, not dripping wet.
- Clean the wall: Starting at the top of the wall, lightly scrub the surface with the sponge, working in sections. Rinse the sponge frequently in the cleaning solution and wring it out well. Be careful not to soak the wall with too much water.
- Rinse the wall: Once you have cleaned the entire wall, rinse it thoroughly with clean water to remove any cleaning solution residue.
- Dry the wall: Use clean, dry towels to remove excess water from the wall. Allow the wall to air dry completely before painting.
By properly washing and drying your surface before painting, you can ensure that the paint adheres well and that you achieve a smooth, even finish.
Mend Any Imperfection
Before painting, ensure that the surface you will paint on is free from any imperfections such as cracks, holes, or peeling paint. Not addressing these issues can cause your paint to adhere unevenly, resulting in a rough finish.
Here are some steps to mend imperfections on your surface:
| Action | Tools Needed |
|---|---|
| Fill in cracks and holes | Putty knife, Spackle or joint compound |
| Sand rough spots | Sandpaper (150-grit or finer), Sanding block |
| Remove loose paint | Scraper, Wire brush |
For cracks and holes, fill them in with Spackle or joint compound using a putty knife in a smooth, even layer. Allow it to dry completely and then sand it down to a smooth finish with 150-grit or finer sandpaper using a sanding block.
For rough spots or peeling paint, remove any loose paint with a scraper or a wire brush. Sand the area with sandpaper to smooth out the surface.
By taking the time to address any imperfections on your surface, you can ensure a smooth finish for your final paint job.
Apply a Primer
Before rolling the paint onto your surface, you need to apply a primer. The primer will help the paint to adhere better to the surface, creating a smooth finish. Here are some steps to ensure that you apply the primer correctly:
Choose the right primer for your surface. There are different types of primers available, each designed for a specific surface, such as drywall or wood. Make sure to choose the correct one for your project.
Clean the surface thoroughly before applying the primer. This will ensure that the primer adheres properly to the surface. Use a damp cloth to wipe away any dust or debris.
Apply the primer using a roller. Use a brush to apply primer in areas that are difficult to reach with a roller. Apply the primer in small sections, working your way across the surface.
Roll the primer onto the surface with light pressure. Start at the top of the surface, and work your way downwards. Make sure to overlap each section of primer to ensure even coverage.
Allow the primer to dry completely according to the manufacturer’s instructions. This usually takes around 4-6 hours depending on the type of primer used.
By following these steps, you will be able to apply the primer correctly, ensuring that the paint adheres properly to the surface, resulting in a smooth finish.
Roll the Paint
Now that you have prepared your surface and roller, it is time to roll the paint onto your walls. This step can seem daunting, especially if you are new to painting. But with the right technique, you can achieve a smooth and even finish. In this section, we will guide you through the process of rolling paint onto your walls, step by step, ensuring that you achieve a professional-looking result. Follow these tips to avoid mistakes and create a beautiful finish that you will be proud of.
Work from Top to Bottom
One of the most important tips to achieve a smooth finish with a roller is to work from top to bottom. This technique helps to avoid drips and uneven areas.
Why Work Top to Bottom?
Working from the top down allows gravity to work in your favor. The paint will naturally flow downward and settle, which reduces the risk of drips and ensures an even finish. Additionally, it is easier to see and correct any drips or mistakes when working from top to bottom.
How to Work Top to Bottom
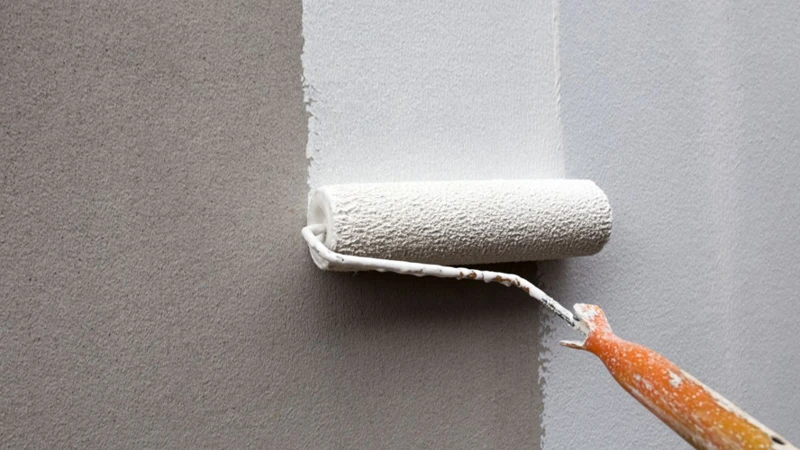
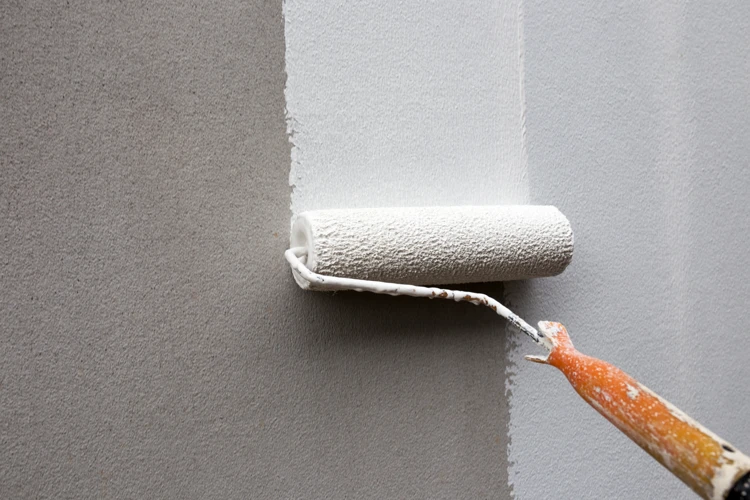
When beginning, use your roller to make a large “W” or “M” pattern on your wall, starting at the top corner of your wall. Fill in the pattern with paint by rolling vertically from top to bottom. Work in small sections to ensure the paint doesn’t dry too quickly. Once you have covered the section, move down to the next section, slightly overlapping the previous one to create a smooth transition.
Tips for Success
There are several tips to remember when working from top to bottom:
| Tip | Description |
| Start at the Top | Start at the highest point on your wall and work your way down. |
| Work in Small Sections | Work in sections that are manageable, so the paint doesn’t dry before you can roll it out. |
| Overlap Each Section | Overlap each section slightly to ensure a smooth transition without any lines. |
| Roll with Light Pressure | Apply light, even pressure to the roller to avoid causing drips or uneven areas. |
| Avoid Overworking the Paint | Be sure to avoid overworking the paint, because this can cause it to become thin and uneven. |
By following these simple tips and techniques, you can achieve a smooth, even finish on your walls when using a roller. Remember to work from top to bottom, applying light pressure and overlapping each section to create an even finish.
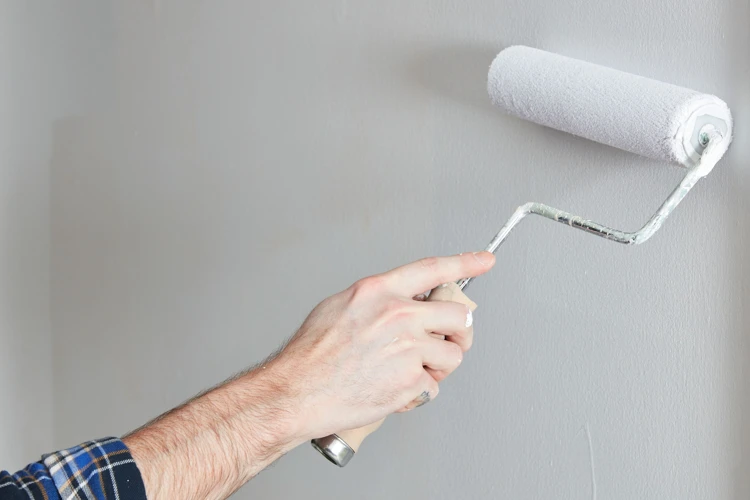
Apply Light Pressure
When rolling paint onto a surface, it’s important to apply light pressure to avoid leaving behind roller marks or creating an uneven finish. Here are a few tips to keep in mind:
- Start with less pressure: Begin by applying very little pressure and gradually increasing as needed. This will give you greater control over the amount of paint being applied and allow you to achieve a smooth finish.
- Don’t push too hard: Avoid the temptation to apply too much pressure or push the roller into the surface. This can cause the paint to spread unevenly and create visible roller marks.
- Use a longer roller: Choosing a roller with a longer nap can help to distribute paint more evenly and reduce the need for heavy pressure.
- Work in sections: Break the surface into smaller sections and apply the paint in a smooth, even motion. This will help to prevent the paint from drying too quickly and reduce the chance of roller marks.
- Roll in alternating directions: To create an even finish, roll the paint in one direction and then go over it again in the opposite direction. This will help to distribute the paint evenly and eliminate roller marks.
Remember, achieving a smooth finish takes time and patience. Don’t rush the process and always use light pressure to apply the paint. With a little practice, you’ll be able to roll paint like a pro and achieve a beautiful, flawless finish.
Use a W Pattern
When rolling paint onto a wall, it’s important to use a specific pattern to ensure a smooth and even finish. One effective pattern to use is the “W” pattern. This involves rolling the paint onto the wall in the shape of a “W”. Here’s how to do it:
Step 1: Start by dipping the roller into the paint, and then roll it back and forth on the tray to remove any excess.
Step 2: Begin at the top of the wall, and roll a vertical stripe of paint about two to three feet wide.
Step 3: Without reloading the roller, use a zigzag motion to fill in the top of the stripe with paint, creating the first “W.”
Step 4: Move down to the next section, and repeat the zigzag motion to fill in the bottom of the “W.”
Step 5: Continue this process for each section of the wall, using the “W” pattern to apply the paint.
By following this pattern, you can avoid leaving streaks or lines in the paint, which can be especially noticeable when the paint dries. It also helps ensure that each section of the wall is evenly covered with paint.
Of course, it’s important to use light pressure when rolling the paint, and to avoid overworking the paint in any one area. Remember to roll in different directions for the best coverage, and to always maintain a wet edge to avoid creating lap marks.
Using a “W” pattern when rolling paint is an effective technique that can help achieve a smooth and even finish. By taking your time and following the steps carefully, you can achieve professional-quality results in your next painting project.
Avoid Overworking the Paint
When painting with a roller, it’s important to avoid overworking the paint. Overworking the paint means continually going over an area with the roller, which can cause the paint to become uneven or clumpy. Here are some tips to avoid overworking the paint:
- Work in small sections: To avoid overworking the paint, work in small sections. This will allow you to apply the paint evenly without having to go back over the same area repeatedly.
- Allow the paint to dry: Before applying a second coat of paint, it’s important to allow the first coat to dry completely. This will help prevent the paint from becoming uneven or clumpy when you apply the second coat.
- Use a light touch: Applying too much pressure to the roller can cause the paint to become uneven or clumpy. Use a light touch and let the roller do the work.
- Roll slowly: Rolling the paint slowly will help ensure a smooth and even finish. If you roll too quickly, it can cause the paint to become uneven.
- Overlap each stroke: To ensure full coverage, overlap each stroke by about half. This will help prevent any gaps or missed spots.
By following these tips, you can avoid overworking the paint and achieve a smooth, even finish on your walls or other surfaces.
Clean Your Roller
As you come to the end of your painting project, you may start to feel a sense of relief that the hard work is over. However, there is still one important task that you must complete in order to maintain your painting tools and ensure they are ready for your next project. Properly cleaning your roller is crucial for achieving a smooth finish in your future painting endeavors. By following these important steps, you can make sure your roller is clean and ready for its next use.
Remove Excess Paint
Before cleaning your roller, it’s important to remove any excess paint to make the cleaning process easier and more effective. Follow these steps to remove excess paint from your roller:
| Step | Instruction |
|---|---|
| Step 1 | Scrape off any excess paint using the roller grid or the edge of the paint tray. Hold the roller over the tray to catch any drips. |
| Step 2 | Squeeze the roller gently from top to bottom with your hand or a roller squeeze tool. This will help to remove any remaining paint and excess water from washing. |
| Step 3 | Blot the roller with a clean cloth or paper towel to absorb any remaining paint or water. Repeat as necessary until the roller is almost dry to the touch. |
By removing excess paint from your roller before cleaning it, you can extend the life of the roller and prevent paint from drying on the surface. This will help to ensure that your roller is ready for use the next time you need it.
Wash the Roller
After removing the excess paint, it is essential to wash the roller properly so that it can be used again in the future. The following table outlines the steps for washing the roller:
| Step 1: | Fill a bucket with warm water and a few drops of dish soap. |
| Step 2: | Submerge the roller in the bucket and swirl it around to loosen any remaining paint. |
| Step 3: | Remove the roller from the bucket and rinse it thoroughly with clean water. |
| Step 4: | Squeeze out any excess water and use a clean towel or paper towels to dry the roller as much as possible. |
| Step 5: | Hang the roller upside down to air dry completely before storing it. |
It’s important to note that washing the roller immediately after use will make the process much easier and prevent the paint from hardening on the roller. Additionally, for oil-based paints, mineral spirits or paint thinner may need to be used instead of dish soap and warm water. Taking the time to properly clean and store your roller will ensure it lasts for multiple uses and maintains its quality.
Store the Roller Properly
Proper storage of your roller after use is crucial to maintain its quality and prolong its lifespan. Here are some tips for storing your roller properly:
- Clean the Roller: Before storing the roller, make sure to remove any excess paint by rolling it over a piece of newspaper or paper towel. This will prevent the paint from drying and hardening on the roller.
- Wrap it Up: Once the roller is clean, wrap it in a plastic bag or plastic wrap to keep it from drying out. This will also prevent any dust or debris from settling on it.
- Store it in a Cool Place: Avoid storing the roller in a hot or humid place, as this can cause the paint to dry out and harden on the roller. Instead, store it in a cool, dry place like a closet or pantry.
- Store it Vertically: Storing the roller vertically with the nap facing up will help maintain the shape and prevent it from becoming misshapen or flattened over time. You can use a roller cage or a cardboard tube to hold the roller in place.
- Label the Roller: If you’ve wrapped up multiple rollers, it’s a good idea to label each one with the type of paint and the date it was last used. This will make it easier to identify the roller when you need it again.
By following these simple steps, you can ensure that your roller stays in good condition and is ready to use for your next painting project.
Conclusion
In conclusion, achieving a smooth finish with a roller takes more than just applying paint to a surface. It requires careful consideration of the roller, its preparation, the surface being painted, and the technique used to apply the paint. By choosing the right roller with the appropriate nap length and material, as well as a high-quality roller frame, you can ensure that your paint application is consistent and effortless.
Preparing the roller by removing loose fibers and priming it will also help to create a smooth finish. Additionally, preparing the surface by washing and drying it, mending any imperfections, and applying a primer will help the paint adhere properly and prevent any unwanted textures or unevenness.
When it comes to actually rolling the paint, working from top to bottom, applying light pressure, and using a W pattern can make all the difference. It’s important to avoid overworking the paint to prevent it from becoming tacky or uneven.
After completing the project, cleaning the roller properly by removing excess paint, washing it, and storing it correctly will ensure that it remains in good condition for future use.
By following these tips for achieving a smooth finish with a roller, you can achieve a flawless finish and be proud of the results. Don’t rush the process and take the time to properly prepare both the paint roller and the surface being painted, and you will be rewarded with a beautiful finish that will last for years to come.
Frequently Asked Questions
How do I choose the right nap length for my roller?
The nap length you need depends on your surface type. For smooth surfaces, use a short-nap roller; for rough surfaces, use a longer-nap roller.
What type of roller material should I use?
For water-based paints, use a synthetic roller cover. For oil-based paints, use a natural fiber roller cover.
Why is a high-quality roller frame important?
A high-quality roller frame ensures that the roller cover stays in place and won’t twist or slip during use, resulting in a smoother finish.
Do I need to remove loose fibers from my roller?
Yes, it’s important to remove any loose fibers from your roller cover before use to prevent the fibers from getting into the paint and ruining the finish.
Should I prime my roller before use?
Priming your roller can help it absorb paint more evenly and improve the quality of the finished paint job.
Do I need to wash and dry my wall before painting?
Yes, washing and drying your wall ensures that there is no dust or debris on the surface, which can affect the quality of the finished paint job.
What should I do if there are imperfections on my wall?
Use putty or spackle to mend any imperfections on your wall before painting.
Why is it important to apply a primer?
Applying a primer helps to seal the surface and create a smoother base for your paint, resulting in a better-looking finish.
Should I use a specific pattern when rolling the paint?
Yes, using a “W” pattern ensures that the paint is applied evenly and reduces the risk of roller marks.
How should I store my roller after use?
After cleaning, let your roller dry completely and then store it in a dry place to prevent mold and mildew from developing.