Introduction
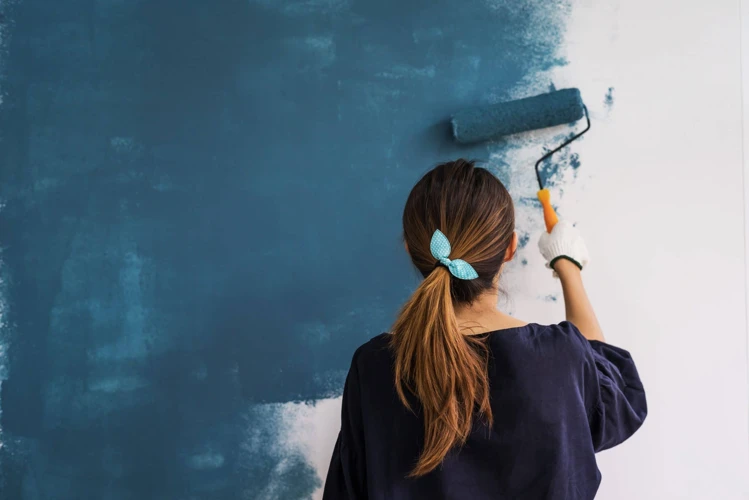
The process of painting a room can seem daunting, but there are various techniques and tools that can make it easier and even enjoyable. One such tool is a roller, which can be used to create patterns and depth on your walls. By utilizing roller painting techniques, you can transform a plain and boring wall into a focal point that elevates the entire space. In this article, we’ll explore the steps and tips for creating captivating patterns and textures with roller painting techniques, as well as the types of patterns that can be achieved with this method.
Why Roller Painting Techniques are Effective
Roller painting techniques are effective for creating unique and decorative patterns on walls or other surfaces. The texture of a paint roller creates a variety of visual effects that cannot be achieved with a brush alone. Additionally, using a roller allows for quicker and more efficient coverage of large areas.
By utilizing different techniques, patterns and textures such as vertical or horizontal stripes, ombre, chevron and arrow patterns can be created to add visual interest and depth. This method works especially well on textured surfaces, as the raised areas will catch the paint and create even more depth.
It’s important to choose the right roller for painting to achieve the desired results. Large nap rollers work well for textured surfaces, while smaller nap rollers are better for smoother surfaces for optimal paint coverage and smoother finish. It’s also important to use high-quality roller covers to achieve the best results.
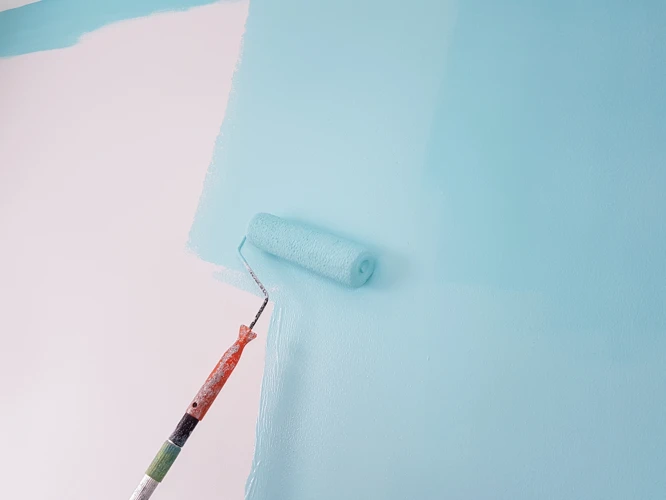
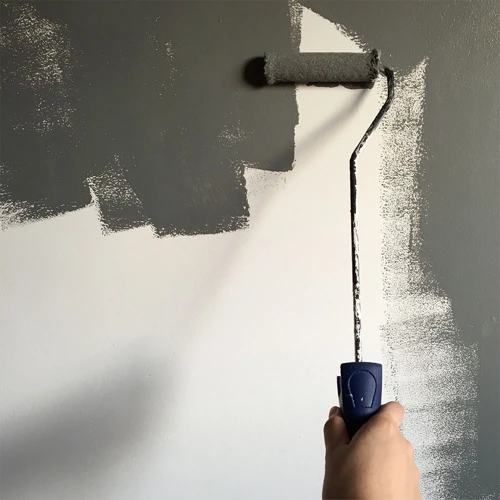
With proper loading and roller painting techniques such as the W-technique, it is possible to get full coverage with minimal splatter or mess. By mixing and diluting paint, a wide range of effects can be created.
However, there are some common mistakes to avoid when rolling paint. For example, applying too much pressure can result in an uneven finish or oversaturation, while not enough pressure can lead to poor coverage. Following a few tips, such as cleaning and maintaining rollers properly and using stenciling guides can help create a clean and professional-looking finished product.
Roller painting techniques are an efficient and effective way to create unique patterns and textures on walls or other surfaces. Choosing the right equipment and utilizing various techniques can create visually stunning results.
Types of Patterns and Textures that can be Created with Roller Painting Techniques
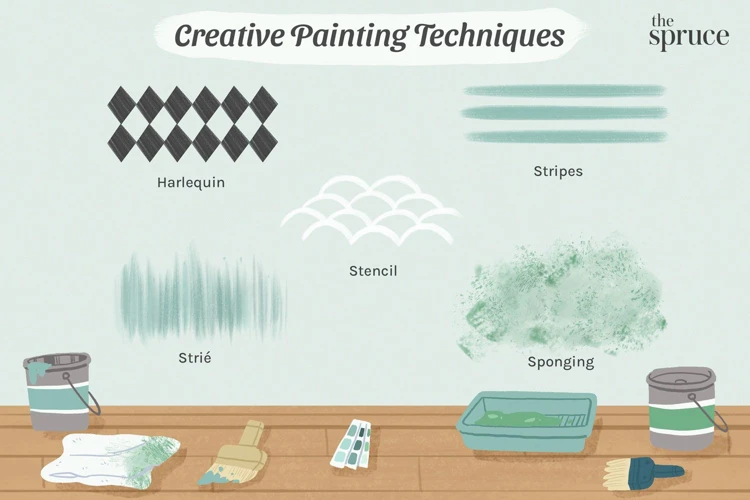
There are a variety of patterns and textures that can be achieved using roller painting techniques. Each pattern creates a unique look and adds depth to a room. Here are some patterns and textures to consider:
- Vertical Stripes: Vertical stripes create the illusion of height and can make a room look larger. This pattern can be achieved by using a long roller and painting in a straight up-and-down motion.
- Horizontal Stripes: Horizontal stripes can make a room appear wider. This pattern is created by painting in a side-to-side motion with a roller.
- Chevron and Arrow Patterns: Chevron and arrow patterns are created by taping off areas of the wall before painting. These patterns add a fun and trendy element to any room.
- Ombre: Ombre is a gradual blend of colors from light to dark. This pattern can be achieved by using a roller to blend colors together in a sweeping motion.
- Stenciling: Stenciling is a way to add intricate patterns to a wall. Using a stencil and a roller, you can create a wide variety of designs on your wall.
- Dry Brushing: Dry brushing involves lightly dragging a partially loaded roller across the surface of the wall. This is a great way to add a subtle texture to your wall.
Remember, the right roller for the job is important when achieving these patterns and textures. Different roller covers have different uses and can create a different finish. Also, practice the optimal paint coverage and roller loading along with the W technique coverage to ensure the smoothest finish possible. Don’t forget to clean and maintain your rollers properly so they last for future painting projects. Lastly, be aware of common mistakes made when roller painting textured surfaces, and refer to a stenciling roller guide if you plan on trying out stenciling for the first time.
Preparation
Before you start creating beautiful patterns and textures on your wall with roller painting techniques, it’s essential to prepare your workspace thoroughly. Proper preparation ensures a smooth and easy painting process, and the final outcome will meet your expectations. In this section, we’ll discuss in detail the preparation steps and tips you should follow before you start painting. We’ll cover essential supplies you need to gather, preparing the area, and priming the wall to ensure the paint adheres properly. You will also find helpful tips related to roller covers and smooth finish rollers that might come in handy during the painting process. Let’s dive in and explore the preparation stage! For more information related to roller covers and their uses, check out our roller covers and uses guide, or for tips on achieving a smooth finish, visit our guide on smooth finish roller tips. If you’re interested in roller painting techniques for textured surfaces, visit our guide on roller painting techniques for textured surfaces.
Gathering Supplies
Before beginning any roller painting project, it’s essential to have all the necessary supplies beforehand. This ensures a smooth and uninterrupted painting process. Below is a list of supplies that should be gathered before starting with the project:
| Roller | A basic roller frame along with roller sleeves are required. The size of the roller sleeve corresponds to the size of the roller frame. A 9-inch roller frame with a medium pile sleeve is commonly used. |
| Paint Tray | Use a paint tray to pour the required amount of paint required for the project. |
| Painter’s Tape | Use painter’s tape to mask off the areas that do not require painting. |
| Paint Brushes | A few paintbrushes, including a 2-inch angled brush, can be useful for areas in which a roller cannot reach. |
| Drop Cloths | Cover the floor or ground where the painting will be done with a drop cloth or plastic sheeting. |
| Sandpaper | If the wall or surface isn’t smooth, use sandpaper to smoothen the surface before priming and painting it. |
| Primer | A good-quality primer creates a smooth and even surface, hiding any imperfections and creating a strong base for painting. |
| Paint | Choose the right type and quality of paint for your project. There are specific types of paint that work best for roller painting techniques. |
| Paint Additives | Paint additives can be useful if you want to create unique effects such as a matte finish or a metallic look. |
| Clean-up Supplies | Have a supply of paper towels, rags, and a bucket of soapy water to clean up spills and splatters while painting. |
Having all of the above supplies before starting the project saves time and prevents any interruptions during the painting process.
Preparing the Area
Preparing the area before roller painting is essential to ensure that the paint goes on smoothly and adheres properly to the wall. Here are the steps for preparing the area:
- Clear the Space: Remove all furniture, wall décor, and other objects from the room. Cover the floor and any remaining objects with drop cloths or plastic sheeting to protect them from paint splatter.
- Clean the Walls: Use a damp cloth or sponge to wipe down the walls, removing any dust, dirt, grime, or cobwebs. This will help the paint adhere properly to the surface of the wall. If the walls have grease or mildew, use a mixture of warm water and mild soap to clean them before rinsing with clean water.
- Repair Any Damage: Inspect the walls for any cracks, dents or holes, and repair them before painting. Use spackling compound or wall putty to fill any nail holes or small cracks. For larger holes or cracks, you may need to use mesh tape and joint compound.
- Protect Trim and Windows: Use painter’s tape to mask off any trim, windows, or other areas that you don’t want to paint. This will help prevent drips and ensure that the lines are clean and crisp.
By following these steps, you can create a clean and smooth canvas for your roller painting project.
Priming the Wall
Before starting any painting project, it is essential to prime the wall to ensure a smooth and even surface. Here are the steps to properly prime a wall for roller painting techniques:
- Clean the wall: Use a damp cloth to remove any dirt, dust, or debris from the wall. Allow the wall to dry completely before proceeding.
- Repair any damages: Fill any cracks, holes, or gaps in the wall using spackle or joint compound. Smooth out any rough patches with sandpaper and wipe away the dust with a clean cloth.
- Choose a primer: Select a primer that is specifically designed for the surface you are painting on, whether it be drywall, wood, or metal. A bonding primer can help the paint adhere better to the surface.
- Prepare the primer: Stir the primer thoroughly to ensure an even consistency. If necessary, add water or thinner to dilute it. Check the manufacturer’s instructions for the proper dilution ratio.
- Apply the primer: Using a roller, apply the primer in long, even strokes, working from the top of the wall to the bottom. Be sure to overlap each stroke to avoid leaving streaks. Allow the primer to dry completely according to the manufacturer’s instructions.
- Inspect the wall: After the primer is dry, inspect the wall for any missed spots or areas that need additional attention. Touch up any areas as necessary before proceeding with painting.
By taking the time to properly prime a wall before painting, it can help the paint adhere better to the surface and prevent peeling or chipping in the future.
Paint Selection
Now that you have prepared your wall and gathered your supplies, it’s time to select the right paint for your roller painting techniques. Choosing the appropriate paint is crucial to achieving the desired result. With so many options available, it can be a challenging task to determine which paint is best for your project. In this section, we will explore some essential factors to consider when selecting the perfect paint, such as the type of roller technique you want to achieve and the color you want to use. We will also discuss how to mix and dilute paint to achieve the desired consistency. With the right paint selection, your roller painting project will be a success!
Choosing the Right Paint for Roller Painting Techniques
When it comes to roller painting techniques, choosing the right paint is crucial for achieving the desired effect. Here are some considerations to keep in mind when selecting paint for your project:
| Factor | Considerations |
| Color | Consider the color scheme of the room or area being painted. Lighter colors tend to make a room look bigger, while darker colors can create a cozy atmosphere. If you want to create depth or texture, consider using multiple shades of the same color or complementary colors. |
| Finish | Choose a finish that complements the texture you want to create. Flat or matte finishes work well for subtle patterns, while glossy or semi-gloss finishes can create a more dramatic effect. |
| Type of Paint | There are several types of paint to choose from, including latex, oil-based, and acrylic. Latex paint is easy to clean up and dries quickly, but may not be as durable as oil-based paint. Oil-based paints are more durable and resistant to scratches and stains, but take longer to dry and require solvents for cleanup. Acrylic paints are a newer option and can offer the best of both worlds, with easy cleanup and durability. |
| Quality | Higher quality paint may cost more upfront, but can save time and money in the long run by requiring fewer coats and lasting longer. Look for paint with a high percentage of solids, which indicates a thicker, more durable coating. |
| Brand | Choose a reputable brand with good reviews and a range of color options. Some brands may also offer specialty paints specifically designed for certain roller painting techniques, such as ombre or stenciling. |
By considering these factors, you can choose the right paint for your roller painting project and ensure that the finished product has the desired depth and texture.
Mixing and Diluting Paint
Before starting the roller painting techniques, it is essential to have the right paint and consistency. Mixing and diluting paint is a crucial step in achieving the desired results. Here are some tips on how to mix and dilute paint for roller painting techniques:
- Read the paint label – Every paint brand and type have unique characteristics and requirements. It is important to read the paint label to know how much water or other additives are recommended by the manufacturer.
- Use a mixing stick or paddle – A mixing stick or paddle can help blend the paint thoroughly. It is important to stir the paint well to ensure consistency, especially when using multiple cans.
- Start with a small amount of water – Adding too much water can affect the paint’s coverage and durability, so it is crucial to add small amounts of water gradually. A good rule of thumb is to add around 10% water to the paint and mix well.
- Test the consistency – After mixing and diluting the paint, test its consistency by applying a small amount on a scrap material or cardboard. The paint should be smooth and easy to apply, but not too runny or thin.
- Use a paint strainer – Sometimes, there may be clumps or impurities in the paint that can clog the sprayer or roller. Using a paint strainer can help filter out these impurities and achieve a smooth finish.
- Consider the surface and technique – The type of surface and roller painting technique being used can affect the paint’s consistency. For example, when painting a textured surface, a thicker paint consistency may be necessary to fill the crevices or bumps. Some techniques like dry brushing may require a thicker, less diluted paint.
By following these tips, you can achieve the right consistency of paint for your roller painting techniques and create beautiful patterns and depth on your walls.
Techniques for Creating Patterns and Depth
As we move into the meat of this article, we will explore various roller painting techniques that can be used to create stunning patterns and add depth to your walls. Roller painting is a cost-effective and easy way to transform any room in your home. From simple stripes to intricate chevron patterns, the possibilities are endless. With just a little bit of practice and the right technique, you can create a custom look that reflects your personal style. So, let’s dive in and explore the various techniques that will take your wall painting skills to the next level!
Vertical Stripes
One way to create a pattern with roller painting techniques is by incorporating vertical stripes. This technique is effective in adding height to a room and making the space feel more open. Here are the steps to achieve this look:
| Step | Action |
|---|---|
| 1 | Measure and mark the wall: With a measuring tape and a pencil, measure the width of the wall and divide it by the desired width of the stripes. Use a level to draw vertical lines on the wall. |
| 2 | Tape off the stripes: Using painter’s tape, carefully tape along the pencil lines. Make sure to press the tape down firmly, especially along the edges to prevent bleeding. |
| 3 | Apply primer: Use a roller to apply primer to the wall. A tinted primer can help with coverage, especially if you are using a lighter colored paint. |
| 4 | Paint the stripes: Use a roller to paint every other stripe with the desired color. Make sure to roll over the tape line to prevent bleeding. Let the paint dry completely before removing the tape. |
| 5 | Remove the tape: Carefully peel off the painter’s tape at a 45-degree angle. If the paint starts to chip, use a utility knife to cut along the tape line. |
Vertical stripes can create a classic and timeless look, especially when using a traditional black and white color scheme. This technique can also be modernized by using bold and bright colors, or even by using metallic paints. Play around with the stripe width and spacing to achieve a personalized look that fits your space.
Horizontal Stripes
Creating horizontal stripes with roller painting techniques can give a room a modern and sophisticated look. The process involves using painter’s tape to mark out the stripes and a roller to paint them. Here are the steps to create horizontal stripes:
| Step | Description |
|---|---|
| Step 1 | Measure the height of the wall and decide how wide you want the stripes to be. Use painter’s tape to mark off the stripes along the length of the wall, making sure they are evenly spaced. |
| Step 2 | Using a small roller, paint the edges along the painter’s tape to create a crisp line. Once the edges are painted, use a larger roller to fill in the area between the tape with paint. |
| Step 3 | Allow the paint to dry completely before removing the painter’s tape. If the tape is removed before the paint is dry, it can cause the paint to bleed and create uneven lines. |
| Step 4 | If you want to add more depth to the stripes, use a small brush to paint a glaze over the stripes. This will give the stripes a slightly darker shade and make them appear more textured. |
| Step 5 | Once the glaze has dried, use a roller to apply a clear coat sealant over the entire wall. This will protect the stripes from scratches and scuffs. |
By following these steps, you can create horizontal stripes that add a bold and stylish element to any room.
Chevron and Arrow Patterns
One interesting roller painting technique that can add an eye-catching design to any wall is the Chevron and Arrow pattern. This pattern consists of repeated “v” shapes (chevrons) or “>”, alternating in direction to create an arrow-like appearance. Here are the steps to create this pattern:
Step 1: First, decide on the size of the chevrons or arrows you want to create. You can use painter’s tape to mark off the areas where you want to paint, or you can use a stencil. Make sure the tape is level and straight to create a professional-looking pattern.
Step 2: Next, choose two colors that complement each other for your chevron or arrow pattern. For example, if you’re using a light grey base coat, you could use a darker grey for the chevrons/ arrows. Or, if you’re feeling adventurous, you could use two bold colors that contrast each other, such as black and white.
Step 3: Using a roller, paint the first coat of your base color onto the wall. Allow the paint to dry completely before continuing with the next step.
Step 4: When the base coat is dry, take your stencil or painter’s tape and position it where you want your chevrons or arrows to be. Make sure it’s straight and level and press it firmly onto the wall.
Step 5: Using the second color, paint over the stencil/ tape. You only need one coat at this stage.
Step 6: After the second coat of paint has dried slightly but is still slightly tacky, carefully remove the stencil/ tape. Use a slow, steady motion to avoid smudging the paint.
Step 7: Allow the paint to dry completely before touching up any areas that need it.
Step 8: For added depth and complexity to your Chevron and Arrow Pattern, try experimenting with different sizes and shapes of the chevrons or arrows, or incorporating additional colors.
By following these steps, anyone can create their own Chevron and Arrow pattern. With patience and attention to detail, anyone can create a professional-looking design on their walls.
Ombre
One of the most popular roller painting techniques is creating an Ombre effect on the wall. This technique involves blending two or more colors so that they gradually fade into one another. The effect is stunning and creates a unique and personalized look in any space. Here are the steps to achieve an Ombre effect:
| Step | Action |
|---|---|
| 1 | Choose your colors: Select two or more colors that blend well together. It is recommended to use paint samples on a small area of the wall to ensure that the colors work well together before committing to painting the entire wall. |
| 2 | Apply the base coat: Paint the entire wall with the lightest color from top to bottom. Allow the paint to dry completely. |
| 3 | Mix the colors: Mix equal parts of the lightest color and the second color to create a middle shade. Apply a strip of the middle shade paint to the top of the wall and blend it horizontally into the base coat using a damp roller. Be sure to blend it well to avoid any visible lines. |
| 4 | Paint with the middle shade: Continue painting the middle shade horizontally in a strip across the wall, gradually adding more of the second color to the mixture with each strip. Blend the paint between each strip using a clean, damp roller. Be sure to blend it well to avoid any visible lines. |
| 5 | Create the darkest shade: Once the middle shade has been painted on the wall, mix equal parts of the middle shade and the second color to create the darkest shade. Paint this color on the bottom of the wall and blend it up into the middle shade using a damp roller. |
| 6 | Blend the colors: Blend the colors together using a clean, damp roller, again making sure to blend it well to avoid visible lines. Keep blending until the colors are seamlessly blended from top to bottom. |
| 7 | Allow the paint to dry: Let the paint dry completely before adding any final touches or moving furniture back into the room. |
Achieving an Ombre effect may take some practice, but the end result is worth the effort. Be sure to use high-quality paint and tools to achieve the best results.
Stenciling
Stenciling is a roller painting technique that can add intricate designs and patterns to your walls. It involves using a stencil or template to create a repeating design on the wall. This technique requires a bit of patience and precision but can have stunning results.
Gathering Supplies
To stencil your wall, you will need a stencil or template, painter’s tape, a stencil brush, and your chosen paint color. You may also want to have a level and a pencil to make sure your stencil is straight and even.
Preparing the Wall
Before beginning to stencil, make sure the wall is clean and dry. If there are any holes or imperfections on the wall, fill them in with spackle and sand them smooth.
Securing the Stencil
Once your wall is prepped, use painter’s tape to secure the stencil in place. Make sure it is level and straight, and use the tape to hold it firmly against the wall.
Applying the Paint
Dip your stencil brush in the paint, then tap it on a paper towel or rag to remove any excess. Lightly and evenly dab the brush over the stencil, making sure to stay within the lines. It’s important to use a light touch to prevent the paint from bleeding under the stencil.
Building Layers
Once your first layer of paint has dried completely, you can add additional layers to create depth and dimension. Simply repeat the process of applying the paint to the stencil until you achieve your desired texture and color.
Cleanup
Once you’re finished stenciling, carefully remove the stencil from the wall and allow the paint to dry completely. Clean your stencil brush with soap and warm water, and remove any excess paint from the stencil with a damp cloth.
Tip: When stenciling, it may be helpful to work in sections, moving the stencil and repositioning it as you go. This can help ensure that the pattern is uniform and even throughout the entire wall.
Stenciling can be a fun and creative way to add intricate designs and patterns to your wall. With a little bit of patience and precision, you can create a beautiful and unique textured look in your home.
Dry Brushing
Dry brushing is a technique that can add depth and texture to a painted surface. It involves using a dry brush to apply a small amount of paint unevenly and lightly over a base coat. This method can create a weathered or distressed look, giving a surface a vintage or rustic feel.
To dry brush, follow these steps:
| Step | Instruction |
|---|---|
| Step 1: | Choose a base coat color and allow it to dry completely. |
| Step 2: | Dip a dry brush lightly into the paint, then remove most of the paint by wiping it on a paper towel or rag. |
| Step 3: | Using very light pressure, drag the brush over the surface of the base coat, allowing the bristles to catch on the texture and imperfections of the surface. |
| Step 4: | Repeat steps 2 and 3 with different colors to create depth and layering. |
| Step 5: | Step back occasionally to assess the effect and adjust as necessary. |
| Step 6: | Once finished, allow the paint to dry completely before adding any protective coat. |
Keep in mind that dry brushing is a subtle technique and should be used sparingly. Too much can create a messy or overwhelming look. It’s best to practice on a small area or scrap piece of wood before applying to a larger surface.
Dry brushing is an easy and inexpensive way to add interest and texture to any painted surface. Give it a try on furniture, walls, or even decorative items like picture frames or planters.
Completion and Cleanup
As you complete your roller painting project, it’s important to pay attention to the final touches as well as the cleanup process. Failure to do so can result in unsightly blemishes and stains. To ensure a flawless finish, follow these important tips for completing and cleaning up your work area. Don’t rush the final steps, as they are crucial to achieving a professional-looking project.
Final Touches
After completing your roller painting project, there are a few final touches that can make a big difference in the overall look of your work. Consider the following final touches to give your project a professional finish:
- Touch-up: Inspect your work and look for any areas that may need a touch-up. Use a small brush to gently apply paint to any areas that need it.
- Clean edges: Use painter’s tape to clean any uneven lines or edges, taking care not to peel up any of your freshly painted walls.
- Remove paint spots: Use a wet cloth or sponge to carefully remove any paint spots or splatters on floors, baseboards, and ceiling lines
- Accessorize: The final touch to your newly painted room is accessorizing it. Consider adding throw pillows, curtains, or a rug that complements your new wall color.
By taking the time to complete these final touches, you’ll ensure that your roller painting project looks its best and is a space that you’ll be proud to show off.
Cleanup and Storage
Once you’ve finished your roller painting project, it’s time to clean up the area and properly store your supplies for future use. This final step is just as important as the preparation and painting stages to ensure that your tools are ready to use for the next project.
1. Clean Up the Work Area: The first step is to clean up any paint drips or spills around your workspace. You can use a damp cloth or paper towel to wipe up any excess paint, and then dispose of it properly. It’s also essential to clean any paint brushes or rollers that were used in the project. You can clean them with warm, soapy water or the appropriate cleaning solution for the type of paint you used.
2. Store Your Supplies: Once you have cleaned everything up, it’s time to store your supplies. Make sure that you follow the storage instructions for the type of paint and roller you used. Some rollers may need to be wrapped in plastic or placed in a storage container to prevent them from drying out or becoming damaged. You can also store your paint in a cool, dry place away from direct sunlight to prevent it from going bad.
3. Dispose of Waste Properly: Be sure to dispose of any paint or cleaning solutions that you did not use properly. You can take them to a local waste disposal facility or contact your local government to find out how to dispose of hazardous waste in your area.
By properly cleaning up and storing your supplies, you can extend the life of your tools and ensure that they are ready to use the next time you have a project.
Conclusion
After following the steps to create pattern and depth with roller painting techniques, there are a few key takeaways to keep in mind. First and foremost, preparation is key. Before even picking up a roller, it’s important to gather all necessary supplies, prepare the area, and prime the wall. Skipping these steps can lead to frustrating mistakes and unsatisfactory results.
When it comes to choosing paint, it’s important to select the right type for the desired effect. Mixing and diluting the paint properly can also make a significant difference in the finished product.
Once ready to start painting, there are a variety of techniques to choose from depending on the desired pattern or texture. Vertical and horizontal stripes are classic choices, while chevron and arrow patterns offer a more modern twist. Ombre is a popular technique for creating a gradient effect, while stenciling and dry brushing offer more intricate designs. Experimenting with different techniques can lead to unique and personalized results.
After completing the painting, it’s essential to add any final touches and perform a thorough cleanup. Properly storing any leftover paint and supplies can also save time and hassle for future projects.
Overall, roller painting techniques offer a versatile and cost-effective way to add pattern and depth to any room. With careful preparation, paint selection, and technique execution, stunning results can be achieved. Happy painting!
Frequently Asked Questions
What is roller painting?
Roller painting is a technique of painting walls or surfaces using roller brushes instead of traditional paint brushes.
What are the advantages of using roller painting techniques?
Using roller painting techniques helps you cover large spaces in a shorter amount of time, and creates a uniform texture with a consistent amount of paint applied to the surface.
How do I prepare the area for roller painting?
You should start by cleaning the surface and covering any furniture or areas that you don’t want to get paint on. Proper ventilation is also necessary.
What kind of paint should I use for roller painting?
You should choose a paint type and finish that suits the space you want to paint. Satin or eggshell finishes are common choices since they are easy to clean and durable.
How do I choose the right roller brush for the job?
The best roller brush for a particular job depends on the type of surface to be painted, the texture desired, and the type of paint being used. Medium-nap or high-nap roller covers are typically used for textured surfaces, while smooth surfaces usually require short-nap covers.
How do I create vertical stripes?
To create vertical stripes, apply paint in long vertical strokes using a roller brush. Wait for the paint to dry completely, then use painter’s tape to mask off the areas that you want to keep unpainted. Apply a second coat of paint and remove the tape while the paint is still wet.
Can I use roller painting techniques on furniture?
Yes! Roller painting techniques are not limited to walls and can be used on furniture, cabinets, and other surfaces.
What is dry brushing?
Dry brushing is the technique of loading a small amount of paint onto a roller brush and applying it lightly to the surface. This technique creates texture and subtle variations in color.
How do I prevent roller marks when using roller painting techniques?
To avoid roller marks, make sure to use a high-quality roller brush and work in small, manageable sections. Roll the brush in one direction to distribute the paint evenly and avoid overloading the roller.
What should I do with the roller brush after I’ve finished painting?
After you’ve finished painting, clean the roller brush well with soapy water or a cleaning solution that is appropriate for the paint you used. Then, store the roller brush in a cool, dry place until you need to use it again.