When it comes to painting textured surfaces like stucco, popcorn ceilings, or even brick, achieving a smooth and even finish can be a challenging task. The unique texture of these surfaces can make it difficult for the paint to adhere and spread evenly, resulting in an unattractive paint job. However, with the right tools and techniques, it is possible to achieve a flawless finish that will make your walls or ceilings look brand new. In this article, we will explore the essential roller painting techniques and tips for achieving a smooth and even finish on textured surfaces. So let’s dive in and get started!
Tools and Materials
When it comes to roller painting techniques for textured surfaces, having the right tools and materials is crucial to achieving a smooth and even finish. From selecting the appropriate paint roller and tray to using painter’s tape and drop cloths, every aspect of the process can make a difference in the final result. In this section, we’ll discuss the essential tools and materials needed for roller painting on textured surfaces, as well as provide relevant links for further information on roller covers, loading techniques, and maintaining your rollers.
1. Paint Roller Selection
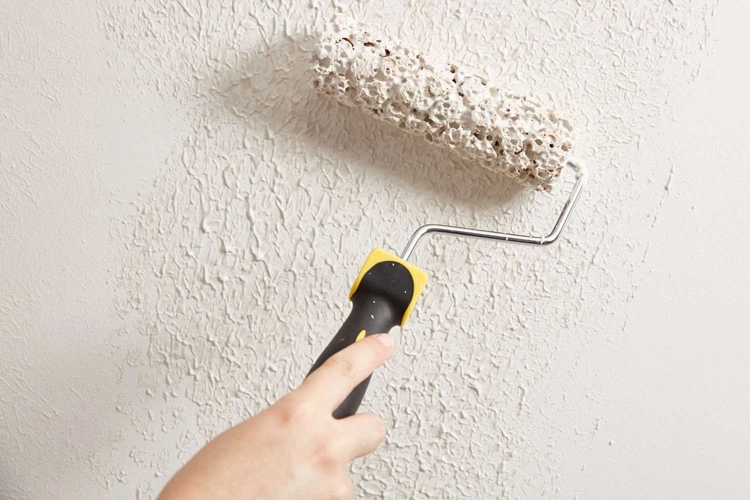
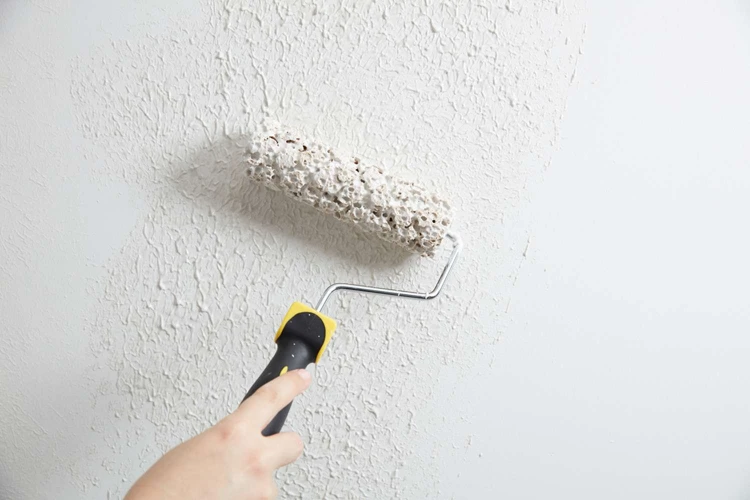
When it comes to choosing the right paint roller for textured surfaces, it’s important to consider the type of texture and the depth of the pattern. Using the wrong roller can lead to an uneven and unprofessional finish.
There are four main types of paint rollers:
| Type | Best for… | Not recommended for… |
|---|---|---|
| Nap Rollers (long pile) | Textured surfaces, rough walls and ceilings, stucco, brick | Smooth surfaces, can leave fabric fibers on painted surface |
| Half-Inch Nap Rollers | Textured surfaces with moderate depth patterns, drywall with slight imperfections | Too short for deeper textures, can leave roller marks on smoother surfaces |
| Microfiber Rollers | Smooth surfaces, moderate textures, high gloss paint and finishes | Deeply textured surfaces, can leave microfiber strands on painted surface |
| Foam Rollers | Smooth surfaces, high gloss paint and finishes, cabinets and furniture | Textured surfaces, can leave air bubbles in paint |
To select the right size roller for your project, consider the surface area and the type of paint being used. A larger roller covers more area quickly, but can be harder to maneuver in tight spaces. A smaller roller is ideal for smaller areas or trimming work around corners and edges.
Optimal paint coverage and even finish depends not only on selecting the correct roller type, but also on proper roller loading technique. Be sure to load enough paint on the roller without overloading or using too much pressure to avoid applying the paint unevenly.
For more information on roller covers and their uses, check out our guide. Additionally, for tips on achieving a smooth finish with your roller, see here; and for information on how to properly clean and maintain your rollers, see here.
2. Paint Tray
When it comes to painting textured surfaces, the right paint tray can make a big difference in achieving a smooth and even finish. Here are some tips for selecting and using a paint tray:
- Choose the right size: Make sure your paint tray is large enough to comfortably fit your roller, but not so large that it makes it difficult to distribute the paint evenly.
- Look for a sturdy material: A flimsy plastic tray can lead to spills and uneven paint distribution. A metal or sturdy plastic tray is a better option.
- Consider a tray liner: A disposable tray liner can make cleanup much easier and faster.
- Load the roller properly: When loading your roller with paint, don’t overload it. Check out our article on optimal paint coverage and roller loading for tips on how much paint to use.
- Use the right technique: In addition to the right tray, the right painting technique can make a huge difference when painting textured surfaces. Check out our article on roller painting techniques for pattern depth and the W technique for optimal coverage.
- Avoid common mistakes: There are some common mistakes to avoid when it comes to using a paint tray, such as overloading the roller or using a tray that is too small. Read our article on common mistakes with roller painting to make sure you’re not making any of these errors.
By following these tips, you can ensure that your paint tray is working for you and not against you as you tackle your textured surface painting project.
3. Paint
When it comes to choosing the right paint for textured surfaces, there are a few things to keep in mind. First, it’s important to select a paint that is specifically designed for textured surfaces, as these paints are formulated to provide better coverage and adherence to rough surfaces. Additionally, it’s important to consider the color and finish of the paint, as some colors and finishes may hide or accentuate the texture of the surface.
Some popular types of paint for textured surfaces include:
- Textured Paint: This type of paint is specifically designed for textured surfaces and provides a thick, textured finish that can help hide imperfections in the surface.
- Eggshell or Satin Finish Paint: These paints have a low sheen and work well on textured surfaces because they don’t reflect light as much as high-gloss paints, which can accentuate the texture of the surface.
- Masonry Paint: Masonry paint is designed for use on exterior textured surfaces, such as stucco, brick, or concrete.
It’s important to note that the type of roller selected can also impact the finish of the paint. For example, a larger nap roller will be better for textured surfaces than a smaller nap roller, as it will help the paint get into all the crevices and bumps.
If you’re unsure about which paint or roller to use for your project, don’t hesitate to speak with a knowledgeable salesperson at your local hardware or paint store. They can provide guidance on the best products to use for your specific needs.
Internal html link: /right-roller-for-painting/
4. Painter’s Tape
When painting textured surfaces, using painter’s tape is crucial to achieving clean and precise edges. The tape provides a barrier that prevents paint from bleeding onto nearby surfaces, such as baseboards or trim. Before applying the tape, ensure that the surface is completely dry and free of dust or debris.
Here are some tips for using painter’s tape when painting textured surfaces:
- Choose a tape that is specifically designed for use with paint, such as blue painter’s tape.
- Apply the tape carefully and securely, pressing down firmly to create a tight seal between the tape and the surface. This will help to prevent any paint from seeping under the tape.
- Use a plastic putty knife or your fingers to smooth down the edges of the tape, ensuring that it is completely flush with the surface.
- When removing the tape, wait until the paint is dry to the touch but not fully cured. This will help to prevent the paint from peeling off with the tape.
- Remove the tape slowly and at a 45-degree angle, pulling it back on itself instead of away from the surface. This will help to prevent the tape from tearing or leaving behind any sticky residue.
- If you need to create a design or pattern on the textured surface, you can use painter’s tape to create a stencil. Cut the tape to the desired shape using a craft knife or scissors, then apply it to the surface. Follow the same steps as above to ensure clean and precise edges. For more information on stenciling techniques, check out our stenciling roller guide.
By using painter’s tape correctly, you can ensure that your paint job looks neat and professional. Don’t skip this important step in achieving a smooth and even finish on textured surfaces.
5. Drop Cloth or Plastic Sheet
To ensure that you keep your floors and surrounding areas clean and paint-free, it’s essential to use a drop cloth or plastic sheet during your paint job. Here are some tips for using this protective material effectively:
- Choose the right material: There are a variety of drop cloths and plastic sheets available. Choose one that fits your needs and budget, based on the size of the area you’ll be painting, the texture of the surface, and whether or not you’ll need to move the covering around as you paint.
- Secure the edges: Make sure that the cloth or sheet is secured to the floor with masking tape or painter’s tape, so that it doesn’t accidentally slide around while you’re painting. This will also help prevent any paint from seeping through the edges and ruining your floors or carpets.
- Be mindful of movement: When you’re moving around the room to paint, be mindful of the drop cloth and don’t step on it, as this could cause you to slip or trip. If you need to move the covering around, be sure to lift it up completely and re-tape the edges.
- Dispose of properly: Once your paint job is complete, carefully fold up the drop cloth or plastic sheet and dispose of it properly. If there is excess paint on the covering, allow it to dry completely before disposing of it in the trash. Avoid shaking it out or leaving excess paint on the cloth or sheet, as this could cause the paint to splatter and create a mess.
Properly utilizing a drop cloth or plastic sheet can help make your paint job easier and cleaner, allowing you to focus on achieving a smooth and even finish on your textured surfaces.
Preparation
Preparing the textured surface before painting is crucial to ensure a flawless and long-lasting finish. Without proper preparation, the paint may not adhere properly or may show imperfections, ruining the entire look of the room. In this section, we will outline the essential steps you need to take to prepare the surface, including surface cleaning, repair, and protection. We’ll guide you through each of these steps to help ensure your painting project goes smoothly and looks stunning upon completion.
1. Surface Cleaning
Before you start painting a textured surface, it is important to thoroughly clean it to ensure a smooth and even finish. Here are some steps you can follow for effective surface cleaning:
- Remove any loose debris: Begin by removing any loose dust, dirt or cobwebs from the surface, using a duster or a soft-bristled brush. Make sure to cover your nose and mouth with a mask or respirator to avoid inhaling any dust or debris.
- Wash the surface: Use a mixture of warm water and mild soap to wash the surface, and then rinse it thoroughly with clean water. Avoid using abrasive cleaners, which can damage the texture of the surface.
- Remove grease or oil stains: If there are any grease or oil stains on the surface, use a degreaser to remove them. Apply the degreaser to the stained area, scrub it with a soft brush, and then rinse it off with clean water.
- Dry the surface: Once you have cleaned the surface, allow it to dry completely before painting. You can wipe it with a clean cloth or let it air dry.
By following these simple steps, you can ensure that the surface is clean and ready for painting. A clean surface will allow the paint to adhere properly, and will also result in a smooth and even finish.
2. Surface Repair
Before applying paint to a textured surface, it is important to ensure that any damage or imperfections are repaired. To repair the surface, follow these steps:
- Inspect the surface: Before starting repairs, inspect the surface to identify any cracks, holes, or other damage that needs to be repaired.
- Fill any holes or cracks: Use a spackling compound or filler to fill any holes or cracks in the surface. Apply the filler with a putty knife, and smooth it out evenly. Allow the compound to dry completely before proceeding to the next step.
- Sand the surface: After filling the holes or cracks, sand the surface to create a smooth and even texture. Use fine grit sandpaper and sand in a circular motion, while applying slight pressure. Wipe the surface with a damp cloth to remove the dust particles after sanding.
- Check for paint peeling: Check if the paint on the surface is peeling or flaking. If yes, remove the peeling paint using a scraper or sandpaper. Sand the surface lightly after removing the peeling paint.
- Prime the surface: If the surface is repaired or had peeling paint, apply a primer coat before painting. Priming helps create a base for the topcoat and ensures better adhesion.
By following these steps, your textured surface will be repaired and prepared for the painting process. It is important to remember that a well-prepared surface will result in a better finish and longevity of the painting job.
3. Surface Protection
Before starting with the actual painting process, it is important to properly protect the surrounding surfaces from accidental drips, splatters, and spills. This will not only prevent potential damages, but it will also make the cleaning process much easier.
Here are some ways to protect the surface:
- Cover the floor with a drop cloth or a plastic sheet to avoid any accidental paint drips, especially if you are painting the ceiling as well. This will also prevent the paint from getting into the carpets or hardwood floors, protecting them from permanent stains.
- Use painter’s tape to mask off any areas that you don’t want to be painted, such as the edges of the ceiling, baseboards, or light fixtures. Make sure the tape adheres well to the surface to have a clean and sharp finish, but also remember to remove it as soon as the paint is dry to avoid peeling.
- Cover any larger items in the room that cannot be removed such as furniture, with a plastic sheet or a drop cloth. This will prevent accidental splatters or spills on costly home items.
- If you are painting outside, use a plastic sheet or a drop cloth to cover any plants and trees or any other objects that are susceptible to paint splatters, especially on a windy day.
- Lastly, it is important to protect yourself while painting. Use gloves, goggles, and protective clothing to avoid skin irritation or eye damage from paint splatters.
- Use a good-quality angled paint brush, ideally 2-3 inches wide. This will allow you to easily reach into corners and tight spaces and make precise cuts. Ensure that the bristles are firm but flexible.
- Load the brush with paint but do not overload it. Tap off any excess paint on the inside of the paint can or on the rim of the paint tray to avoid drips and splatters.
- Paint from dry to wet. Start at the top of the edge and work your way downwards. This will help to avoid drips and ensure a smooth, even finish.
- Hold the brush at an angle and apply steady pressure. Aim to paint a straight line, with the bristles angled toward the textured surface. You may need to use your other hand to steady the brush.
- Take your time and be patient. Cutting in can be a slow and precise process, but it’s worth taking the time to do it right.
- Inspect the surface: Before applying the second coat, inspect the surface to make sure there are no drips, bumps or bubbles. If you notice any imperfections, use sandpaper to smooth them out before proceeding.
- Stir the paint: Use a stir stick to gently stir the paint, but avoid over-stirring, as this can introduce air bubbles into the mix.
- Load the roller: Dip the roller into the paint tray and then roll it back and forth to ensure an even coat of paint. Make sure not to overload the roller, or the excess paint will create drips and clumps.
- Apply the second coat: Begin rolling the second coat onto the surface, using the same technique you used for the first coat. Make sure to work in small sections and maintain a wet edge to avoid lap marks. Apply the paint in a criss-cross pattern to ensure that there are no missed spots.
- Wait for drying: Allow the second coat to dry fully as specified on the paint can. A textured surface may require longer drying times between coats than a smooth surface, so be sure to follow the paint’s instructions.
- Follow manufacturer’s recommendations: Paint manufacturers typically specify how long it takes for a coat of paint to dry completely. It’s important to follow these recommendations to the letter to achieve the best results possible.
- Avoid humid environments: Humidity can slow down the drying process and cause the paint to dry unevenly. Try to paint during days with lower humidity, and keep the room well ventilated to keep the air circulating.
- Apply the second coat after the first coat has dried completely: By waiting until the first coat is completely dry, you can avoid the risk of smudging or smearing the first coat when you apply the second. Allow at least 24 hours between coats of paint.
- Be patient: Even if the surface feels dry to the touch, it may not be fully dry underneath. Give the paint job a couple of extra hours to dry before removing any painter’s tape, removing drop cloths, or moving furniture back into the room. It’s always better to be safe than sorry!
- Step 1: Remove Excess Paint
- Step 2: Clean the Roller
- Step 3: Clean the Paint Tray
- Step 4: Proper Storage
Remember to take the time to properly protect the surrounding surfaces before starting to paint. This will save you time and effort in the long run and ensure a smooth and successful painting project.
Application

It is finally time to apply the paint to your textured surface. This is where all the preparation work pays off, and you can see your vision come to life. Follow these step-by-step guidelines for a beautiful painted finish. Get your paint roller and tools ready, and let’s begin the process of transforming your textured surface with a smooth and even finish.
1. Paint Rolling Techniques
When it comes to painting textured surfaces, it can be challenging to achieve a smooth and even finish. However, by utilizing the proper roller painting techniques, you can make your job much easier and achieve better results.
The table below summarizes some important tips to keep in mind while paint rolling on textured surfaces:
| Technique | Description |
| Use a Thick Roller Cover | For textured surfaces, it’s important to choose a roller cover with a thick nap that can easily reach into crevices and uneven areas. This type of roller will also hold more paint, allowing for longer application periods between refills. |
| Apply Paint in a “W” Pattern | Instead of rolling up and down, apply paint in a “W” pattern, overlapping each section slightly. This technique will ensure that you get into every crevice and that the paint is evenly distributed on the surface. |
| Use Light Pressure on the Roller | When applying the paint, it’s crucial to use light pressure on the roller. By using too much pressure, you may flatten the paint and disrupt the texture of the surface. |
| Avoid Overworking the Paint | Roll over each section only once or twice to avoid overworking the paint. Overworking the paint can result in an uneven finish and potential damage to the texture of the surface. |
| Roll from Dry to Wet Areas | When rolling out the paint, roll from dry areas towards wet areas to avoid pulling up any partially dry paint. This will help to ensure that the finish is smooth and even. |
| Inspect the Surface | After each section is completed, inspect the surface for any missed spots or uneven coverage. Touch up any necessary areas with an additional coat of paint. |
By following these roller painting techniques, you can achieve a smooth and even finish on textured surfaces. Remember to take your time and not rush the process, as this will help to ensure the best results possible.
2. Cutting In Edges
Cutting in edges is an important step in achieving a professional-looking paint job on textured surfaces. It involves using a brush to carefully paint along the edges where the textured surface meets other surfaces, such as ceilings, windows, doors, or trim. This helps to ensure a neat and even finish and prevent the roller from accidentally touching these surfaces.
To perform this step effectively, follow these tips:
By following these tips, you can achieve clean and crisp edges that will enhance the overall finish of your textured surface painting project.
3. Working in Sections
When painting larger textured surfaces, it is important to work in sections to ensure that the paint is evenly applied and does not dry before you have the chance to work it in properly. Working in sections also helps to avoid lap marks and overlap. Here are some steps to follow when working in sections:
| Step | Description |
|---|---|
| 1 | Divide the surface into manageable sections: Use painter’s tape to mark off the areas you will be working on. This helps to keep the paint lines clean and prevents accidentally painting areas you didn’t intend to. |
| 2 | Maintain a wet edge: When painting adjacent sections, make sure to keep a wet edge by working quickly and blending the paint being applied to the section being finished. This will help to avoid visible seams between sections. |
| 3 | Overlap sections slightly: When starting a new section, overlap the preceding section by an inch or two. This ensures even coverage and a seamless finish as you move from section to section. |
| 4 | Avoid overworking the paint: Once you have applied the paint to the section, use only light pressure with the roller to spread the paint evenly. Avoid overworking the paint as it can cause the texture to flatten. |
By following these tips, you can achieve a smooth and even finish on textured surfaces, without the headache of visible seams and uneven paint coverage.
4. Second Coat Application
After the first coat has dried completely, it is time to apply the second coat. The second coat is essential to achieve a smooth and even finish on a textured surface. Here are the steps you should follow to apply the second coat:
By following these steps, you can ensure that your textured surface has a smooth and even finish that will last for years to come. Remember to be patient and take your time to achieve the best results.
5. Drying Time
Proper drying time is crucial to achieving a smooth and even finish on your textured surface. Not allowing enough time for the paint to dry can result in smudging, smearing, and an uneven appearance. Here are some tips to ensure your paint job dries properly:
By following these simple tips, you can ensure that your textured surface looks smooth, even, and professional. Remember: rushing the drying process can lead to a disastrous paint job, so take your time.
Cleanup
After you have completed your painting project, it’s important to properly clean up your tools and materials. Neglecting this step can not only cause damage to your equipment, but it can also lead to environmental harm. It’s crucial to follow the appropriate cleanup procedures to ensure a smooth and stress-free painting experience in the future. In this section, we will discuss the necessary steps to properly clean up your tools and materials.
1. Paint Reuse or Disposal
After completing your roller painting project, it’s important to properly handle any leftover paint. You have two options for handling paint: reusing or disposing of it.
Paint Reuse: If you have leftover paint that’s still in good condition, you can definitely save it for future use. Here are some tips for reusing paint:
| Tip | Description |
| 1 | Store the paint in an airtight container |
| 2 | Keep the paint in a cool, dry place |
| 3 | Mix thoroughly before reuse |
| 4 | Add a paint thinner to improve the consistency, if needed |
Paint Disposal: If you have paint that’s no longer in good condition, you’ll need to dispose of it properly. Improper paint disposal can harm the environment, so it’s important to follow your local regulations for disposal. Here are some general tips for paint disposal:
| Tip | Description |
| 1 | Check with your local hazardous waste facility for disposal guidelines |
| 2 | Don’t pour paint down the drain or throw it in the dumpster |
| 3 | If possible, allow the paint to dry out completely before disposal |
| 4 | Mix cat litter or sawdust into liquid paint to speed up the drying process |
| 5 | Once the paint dries out, it can be disposed of in the trash |
By following these tips for paint reuse or disposal, you can safely handle any leftover paint from your roller painting project.
2. Tool Cleaning
When it comes to roller painting techniques for textured surfaces, proper cleaning of the tools is essential for their longevity and reuse. Follow the steps below to efficiently clean your paint tools.
After you’re done painting, use a paint scraper to remove any excess paint from the roller. Remember to scrape in a direction away from yourself to avoid any accidents.
Once you have removed any excess paint from the roller, rinse it thoroughly under running water. After that, use a paint roller cleaner to remove any remaining paint from the roller. It’s essential to clean the roller thoroughly to ensure it’s ready for the next painting job.
Next, clean the paint tray with a clean cloth, removing all excess paint. At this point, the tray is ready for reuse or storage.
Make sure your paint tools are completely dry before storing them. If you don’t store your tools properly, they can develop a rust or mildew issue. Once the tools are dry, store them away from any moisture, such as in a dry cabinet or toolbox.
By following the above steps, you can make sure that your paint tools stay in excellent condition for future use. Remember always to wear protective gloves while cleaning the tools and dispose of unused paint according to the prescribed guidelines.
Conclusion
In conclusion, roller painting can be a great way to update the look of a textured surface in your home. However, it is important to follow the proper techniques and precautions in order to achieve a smooth and even finish.
Remember to carefully select the right paint roller for the job and use a tray that is appropriate for the size of roller you are using. Additionally, choose a quality paint that is suitable for the particular surface you are painting.
Preparation is key, and taking the time to clean and repair the surface and protect surrounding areas will ensure the best outcome. Using painter’s tape and a drop cloth or plastic sheet will prevent paint from getting where it shouldn’t be and make for easier cleanup.
When it comes to application, using proper rolling techniques, cutting in edges, working in manageable sections, and applying a second coat will help to achieve the desired smooth finish. It is also important to allow ample time for drying before touching or adding a second coat.
After you are finished, proper cleanup is essential for maintaining your tools and protecting the environment. You can either dispose of leftover paint or save it for future touch-ups, and make sure to clean your roller and tray thoroughly.
In the end, taking the time to follow these steps will result in a professional looking paint job that you can take pride in. With these roller painting techniques for textured surfaces, you can transform any room in your home with ease.
Frequently Asked Questions
What is textured surface painting and why is it challenging?
Textured surface painting is the process of painting surfaces that are not smooth, such as stucco or popcorn ceilings. It is challenging because it can be difficult to achieve a smooth and even finish.
What type of roller should I use for textured surfaces?
A thick nap roller is typically best for textured surfaces because it allows for the paint to get into all of the crevices and bumps.
Do I need to use painter’s tape?
Painter’s tape can be helpful in achieving clean and straight lines, especially when painting near edges or trim that should not be painted.
What should I do to prepare the surface before painting?
The surface should be cleaned thoroughly to remove any dirt, dust or debris. Any repairs that need to be made, such as filling in cracks, should also be completed before painting.
What should I do to protect my floors and furniture during painting?
A drop cloth or plastic sheet can be used to cover floors and furniture to protect them from any paint spills or splatters.
How do I apply the first coat of paint?
Start by using a W-shaped rolling motion with the roller, applying the paint in a zig-zag pattern. This will ensure that the paint is applied evenly over the textured surface.
How do I cut in edges when painting textured surfaces?
Use a small brush to carefully paint along edges or close to the ceiling, baseboards or other trim. This will ensure that the edges have a clean and even finish.
Should I apply a second coat of paint?
Applying a second coat of paint will provide a more even and finished look to the surface. It is recommended to wait until the first coat is dry before applying the second coat.
How long should I wait for the paint to dry?
Drying time can vary depending on the type of paint and the environmental conditions. It is best to wait at least 24 hours before touching or recoating the surface.
How should I clean up after painting?
Any leftover paint can be stored in the original container and used for touch-ups. Brushes and rollers should be cleaned with warm water and soap for water-based paints or mineral spirits for oil-based paints.