Have you ever been to a party with a pinata and thought, “I wish I could make one of those”? Well, guess what? You can! Making a pinata with a balloon and glue is easier than you might think. It’s a fun project that will not only save you some money but will also add a personal touch to your next celebration. In this step-by-step guide, we’ll show you how to make a pinata from start to finish. So, let’s grab some supplies and get started!
Materials
You can’t make a pinata without the necessary materials! Before diving into the pinata-making process, you’ll need to gather the right supplies. Here’s a list of materials you’ll need for this project:
– Balloon
– Newspaper or scrap paper
– Flour
– Water
– Bowl
– Spoon
– Scissors
– Tape
– Tissue paper
– String or ribbon
Make sure you have all of these items on hand before you get started. If you’re missing anything, take a quick trip to the store or see if there are any substitutes you can use. You can also check out some of our other glue-related tutorials, such as how to make glue stick slime or what can you make with glue and water for some more creative inspiration.
Gather Supplies
Before starting your pinata project, you’ll need to gather the necessary supplies to ensure a successful outcome. Here is a list of materials you’ll need:
- Balloon: The size of the balloon depends on how large you want your pinata to be.
- Newspapers: You’ll need plenty of old newspapers to make the papier-mache mixture.
- Flour: Flour is a key ingredient in making papier-mache glue.
- Water: Water is used to mix with the flour to make the papier-mache glue.
- Bowl: You’ll need a bowl to mix your papier-mache glue mixture in.
- Whisk: Use a whisk to mix your papier-mache glue until it reaches a smooth consistency.
- Scissors: Scissors will be needed to cut your newspapers into strips as well as to trim the edges of your pinata after it has dried.
- Tissue Paper: Tissue paper is used to decorate the pinata in colorful designs and patterns.
- String or Twine: String or twine is used to hang the pinata and to make the handle for it.
- Candy or Goodies: Choose your favorite candies or toys to fill your pinata for the ultimate surprise.
- Craft Paint: If you want to add more details and design to your pinata, consider using craft paint to make it more unique.
Using the right supplies will ensure that your pinata project will be successful and that you’ll be able to enjoy the fun of breaking it open at your next party! If you’re missing any supplies, try one of our other articles on how to make different crafts, such as how to make glue for kids, how to make sand sculptures with glue, or even how to make fake braces without glue!
Prep Work Area
Before getting started with creating your pinata, it’s important to prep your work area. A well-organized workspace will help make the process smoother and more enjoyable. Here are some tips for prepping your work area:
| Cover Your Surface | Cover your work surface with a large piece of plastic or a newspaper to protect it from glue and papier-mache. |
| Gather Your Tools | Gather all necessary tools and have them on hand. This includes scissors, paint brushes, a mixing bowl, and of course, glue and newspaper. |
| Set Up a Drying Area | Designate an area for the pinata to dry. It’s best to choose an area that is well-ventilated and out of the way to avoid any accidents while the pinata is drying. |
| Keep a Trash Bin Nearby | Make sure to have a trash bin or bag nearby to dispose of any scraps of paper or paper towels. This will help you keep your work area clean and prevent clutter from piling up. |
By preparing your work area before starting, you will be able to work more efficiently and enjoy the process of making your pinata. To learn more about fun DIY projects with glue, check out our article on how to make cheesecloth ghosts with glue.
Step 1 – Inflate Balloon
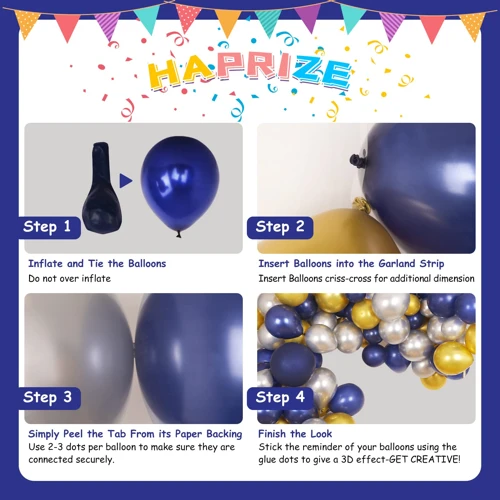
The first step in making a pinata with a balloon and glue is to select a balloon. Choose your preferred size and shape, keeping in mind that larger balloons will result in a larger pinata. Once you’ve chosen your balloon, it’s time to inflate it. Using a hand pump or an air compressor, blow up the balloon until it’s the desired size. Be careful not to overinflate the balloon, as it may pop during the papier-mache process.
Pro tip: If you have trouble holding onto the balloon while inflating it, place the balloon in a bowl or bucket to hold it steady.
When the balloon is inflated to your liking, tie off the end with a knot. This will serve as the bottom of your pinata. Make sure the knot is tight so that it doesn’t come undone during the papier-mache process.
Internal link: If you’re looking for more fun craft projects to try, check out our guide on how to make goo with glue and water.
Now that you’ve inflated the balloon, it’s time to move on to preparing the glue mixture.
Step 2 – Prepare Glue Mixture
Before you start the papier-mache process, you need to prepare a glue mixture. This mixture will act as an adhesive for the paper, giving the pinata its structure. To make a perfect sticky and sturdy glue mixture, you’ll need the following materials:
- Newspapers or paper towels: tear into small pieces to cover the pinata.
- All-purpose flour: 1 cup.
- Water: 1 cup.
- Bowl: to mix the glue.
- Spoon or whisk: to mix the glue.
Now, let’s move on to how to make the glue mixture:
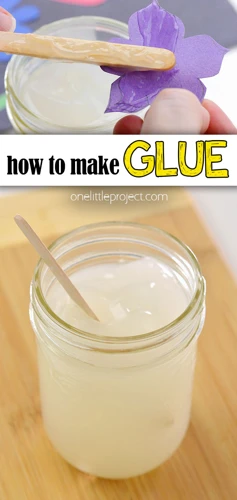
- Mix the flour and water: Add one cup of flour and one cup of water to the bowl. Use a spoon or whisk to mix them until there are no lumps.
- Cook the mixture: In a saucepan, heat the mixture over low heat, whisking continuously until the mixture thickens. You need to cook the mixture until it becomes smooth and glue-like.
- Coolly down the mixture: Turn off the heat and let the mixture cool down before use.
Congratulations! You have made a glue mixture for your pinata. Now it’s time to commence the next step of the pinata making process!
Pro tip: You can make different types of glue mixture, such as flubber with glue, glue with sugar and water, or crackle paint with glue. If you want to know more about these mixtures, you can check out the following links:
Step 3 – Add First Layer of Papier-mache
The third step towards making your own piñata is adding the first layer of papier-mache. This is where the real fun begins!
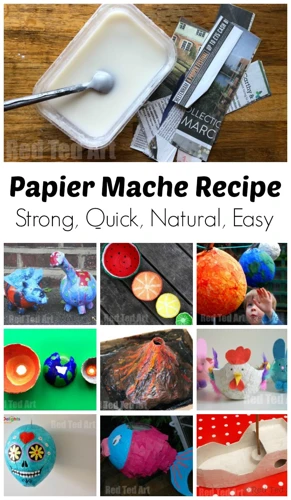
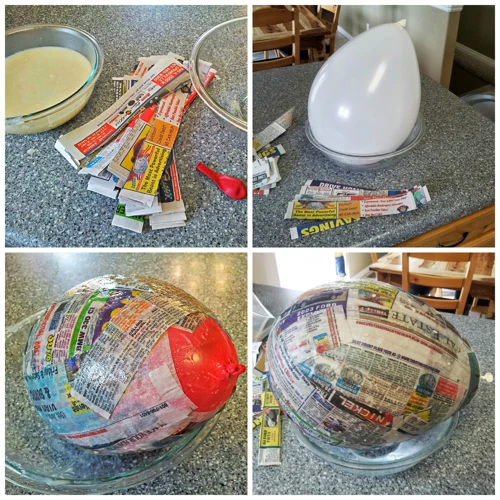
Preparing the Papier-Mache Mixture
Before we begin crafting, we need to prepare the papier-mache mixture. In a mixing bowl, combine 1 part water and 1 part flour. Mix it until you have a smooth consistency. If you want to make a larger piñata, you may need to prepare more mixture.
Applying the Papier-Mache
Now it’s time to start applying the papier-mache mixture to the balloon. Cut strips of newspaper into around 1-inch-wide pieces. Dip each strip into the mixture and then apply it to the balloon, smoothing it out as you go. Make sure each strip is completely coated with the mixture to ensure it sticks to the balloon.
Apply the strips in a mix of horizontal and vertical directions to create a sturdy structure. It’s important to leave a small opening at the top of the balloon so you can later fill the piñata with candy.
Repeat the Process
After the first layer is complete, allow your piñata to dry for at least two hours. Then, you’ll need to repeat the process so that you have around 2-3 layers total. This will ensure that your piñata is strong and sturdy enough to withstand some hits.
Remember to take your time when applying each layer of papier-mache, as a high-quality piñata is built layer by layer. Once done, set it aside to dry completely.
Now you’re ready to move on to step 4!
Step 4 – Repeat Until Balloon is Covered
After the first layer of papier-mache has dried, it’s time to add additional layers until the balloon is fully covered. This step is crucial in ensuring that the piñata will be sturdy enough to withstand hits without breaking too soon.
The Layering Process:
Take one strip of paper or tissue at a time and coat it with the glue mixture. Run it through your fingers to remove excess glue, then carefully place it onto the balloon, smoothing out any wrinkles or bubbles. Continue adding strips in a random criss-cross motion until the entire balloon is covered.
Ensuring Smoothness:
It’s important to make sure each layer is smoothed down before adding the next one. This way, the piñata will have a nice even finish and won’t have any lumps or bumps. Use a small paintbrush to smooth out the strips of paper, making sure they are firmly attached and well-coated with glue.
Covering the Bottom:
Make sure to flip the balloon over and cover the bottom as well. Apply the papier-mache strips around the tied end of the balloon, sealing it up nice and tight. Continue adding layers until the piñata is thick enough to be sturdy, but not too thick that it will be hard to break.
Allowing Drying Time:
After each layer is applied, allow the piñata to dry completely before adding the next layer. This will take several hours, so be patient. You may need to apply as many as 4-6 layers, depending on the desired thickness.
Optional Touches:
If you want to add some extra touches to your piñata, such as spikes or decorative shapes, you can add these during the layering process. Simply cut out the shapes from tissue paper and attach them to the piñata with the glue mixture.
Final Result:
Once you have finished layering, allow the piñata to dry completely. Once it has dried, it should be firm to the touch and ready to decorate. You have now completed the most time-consuming part of making a piñata. Congratulations!
Step 5 – Let Pinata Dry
After you have completed the papier-mache process, the pinata must be left to dry completely before moving to the next step. The drying process can take anywhere from a few hours to an entire day, depending on the humidity of the environment.
Be patient – Don’t Rush the Drying Process
It’s essential that you let the pinata dry naturally, especially if you used a balloon as the base. Trying to speed up the process with a fan or a heater will only lead to a weak, brittle pinata that will break apart before it is supposed to. The patience you exhibit to the drying process will ensure that your pinata will last long and remain sturdy.
Find a Safe, Dry Drying Area
Once you have gently placed the layered balloon in a safe area, you can let it dry. It’s important to find a clean, dry place to leave the pinata to dry. You can use tables, spare chairs, or any other surface area to put your pinata on. Make sure that you have enough space for air to circulate around the pinata.
Check for Complete Dryness
After a few hours, lightly touch the surface of the pinata to see if it has dried thoroughly. If it is still wet in some places, let it dry for a few more hours. The paper-mache should be hard and dry to the touch.
Tip: Dry overnight
It’s best to leave the pinata to dry overnight, giving it enough time to harden and solidify. Additionally, you can check the weather and find a day that is free of precipitation to make the drying process more successful.
By following these tips, your pinata will have the strength it needs to hold all of the candy and goodies you put inside. Once it’s dried, move onto the next step – decorating the pinata.
Step 6 – Decorate Your Pinata
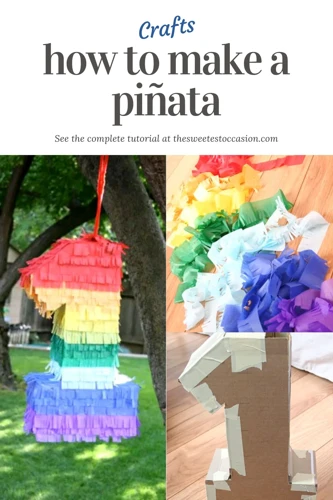
After completing the previous steps, it’s time to let your creativity shine and decorate your pinata. Here are some tips and tricks for turning your papier-mache balloon into a colorful, eye-catching masterpiece!
1. Paint it: Acrylic paint is perfect for adding a pop of color to your pinata. Start by adding a base layer of white paint over the entire surface, then add your desired colors. Be sure to let each layer of paint dry thoroughly before adding another one.
2. Tissue paper: You can add tissue paper to cover the surface of the pinata. Use different colors and cut them into small pieces. Apply a layer of glue mixture (the same one you used in the previous steps) onto your pinata and layer the tissue paper on top of it. Continuously add more layers until you are satisfied with the look.
3. Stickers: Add some personality to your pinata by using stickers to create your desired design. Cut them into any shape or size that you like and stick them onto the surface. Remember: the possibilities are endless!
4. Streamers: Add some flair to your pinata by using crepe paper streamers. Cut them into different lengths and colors, then glue them around the perimeter of the hole you cut and all along the pinata. You can let them dangle for extra decoration.
5. Personalize it: Use letters or stencils to spell out names or phrases for your pinata. This is a great opportunity to get creative and add a personal touch to your design.
It’s important to remember that decorating your pinata can take time, so don’t rush it. Each step will add to the final product, so take it slow and have fun with it. Once you’re satisfied with the look, it’s time to move on to the next step.
Step 7 – Add Candy or Goodies
Once your pinata is completely decorated and dried, it’s time to add the candy or goodies! This is the most exciting part, as it is what everyone is waiting for. Before you start, make sure that you have enough candy or goodies to fill the pinata, and that they are small enough to easily fit through the hole you created.
Step 1: Gather all the candy and goodies you want to add to your pinata. You can use all kinds of items, from small toys to wrapped candies. Choose items that are colorful and will create a fun and exciting experience for whoever breaks open the pinata.
Step 2: Insert the candy or goodies through the hole of the pinata one by one. Be creative with how you arrange the items, and make sure there’s a good variety so that everyone will be happy with what they receive.
Step 3: Once you have added all the candy and goodies, it’s important to seal the hole properly. Use some strips of papier-mache and glue mixture to cover the hole. Press the strips firmly to make sure they adhere to the pinata and create a strong seal. Don’t worry if the hole is not perfectly covered, as you can always decorate over it.
Step 4: Let the pinata dry completely with the candy and goodies inside. This may take a few hours, so be patient and make sure the pinata is completely dry before moving on to the next step.
Step 5: Gently shake the pinata to make sure the candy and goodies are well distributed inside. If you feel like there’s not enough, you can always add more through the hole you sealed earlier.
Adding candy and goodies is a crucial part of making your own pinata, as it is what makes the experience fun and rewarding. Don’t be afraid to get creative with what you put inside, and always remember to seal the hole properly to make sure that the candy and goodies stay inside until the pinata is broken open.
Step 8 – Cover Pinata Hole
After adding sweets and goodies to your piñata, it’s time to cover the hole where you inserted them. For this step, you will need tissue paper, scissors, and glue.
Begin by cutting the tissue paper into small squares or rectangles. The size of the pieces should be large enough to cover the hole, but not too big that it makes the covering process difficult.
Next, apply glue around the edges of the hole. Use a small brush or your finger to spread the glue evenly over the surface. Then, take one of the tissue paper pieces and gently press it onto the glue, making sure it covers the hole completely.
Continue to layer the tissue paper pieces, slightly overlapping each one as you go. Make sure to apply glue to each piece before adding additional layers. It’s important to cover the hole entirely to prevent the contents from falling out during the game.
Once you have layered enough tissue paper to cover the hole completely, let the glue dry. This step may take some time, so be patient and allow the glue to set completely.
Finally, you can decorate the tissue paper covering however you like to match the theme of your party or event. Use streamers, ribbons, or markers to add your personal touches. Once completed, your piñata is ready to be hung and enjoyed by all!
Conclusion
After following these simple steps, you should have successfully created a pinata with a balloon and glue! This fun and creative activity can be enjoyed by all ages and is perfect for parties, holidays, or just a rainy day activity. Remember to gather all the necessary materials before starting and to prep your work area for easy clean up.
Inflating the balloon is the first step in creating your pinata, followed by preparing the glue mixture. Adding multiple layers of papier-mache will ensure a sturdy pinata that will hold up against the amusement of party-goers. It’s important to let the pinata thoroughly dry before decorating and filling it with candy or goodies.
Once the pinata is dry, it’s time to get creative and add some personality. Whether you decide to paint it, cover it in tissue paper, or add streamers and ribbons, your pinata is sure to look great and bring a smile to everyone’s face.
Finally, don’t forget the most important part – filling the pinata with candy or goodies! Add in some of your favorite treats and watch as the excitement builds before the pinata is cracked open.
Overall, making a pinata with a balloon and glue is a simple and enjoyable process that can be customized to fit any occasion or personal taste. Follow these easy steps and get ready to celebrate with a pinata that is sure to be a hit!
Frequently Asked Questions
Can I use any type of glue for this project?
No, it’s recommended to use white school glue or mod podge for papier-mache projects.
What type of balloon should I use?
You can use a regular round balloon or a long balloon to create different shapes.
How many layers of papier-mache do I need?
You should use at least three layers to make sure the pinata is sturdy and won’t break too easily.
Do I have to use newspaper for the papier-mache?
No, you can use any type of thin paper like tissue paper or crepe paper.
Can I decorate the pinata before it’s completely dry?
No, it’s best to wait until the pinata is completely dry to avoid any smudging or tearing of the paper.
What type of candy or goodies should I use?
It’s best to choose individually wrapped candy or small toys to avoid any mess inside the pinata.
How do I hang the pinata?
You can insert a piece of string or ribbon into the papier-mache before it dries, making sure it’s secure and can hold the weight of the pinata.
How long does it take to dry?
Drying time can vary based on temperature and humidity. It usually takes around 24-48 hours for the pinata to be completely dry.
What if my pinata breaks too easily?
You can add more layers of papier-mache or reinforce weak spots with extra glue and paper to make it more sturdy.
Can I make a pinata without a balloon?
Yes, you can create a pinata base using cardboard or a paper mache form and then cover it with papier-mache.