Have you ever heard of glue stick slime? You may be wondering what this strange substance is and how to make it. Well, you’ve come to the right place! In this article, we will provide a step-by-step guide on how to make glue stick slime, along with materials needed, tips and tricks, and safety precautions. Whether you’re a slime-making pro or a beginner, this guide will help you create a fun and gooey substance that will provide hours of entertainment. So roll up your sleeves and let’s get started!
Materials Needed
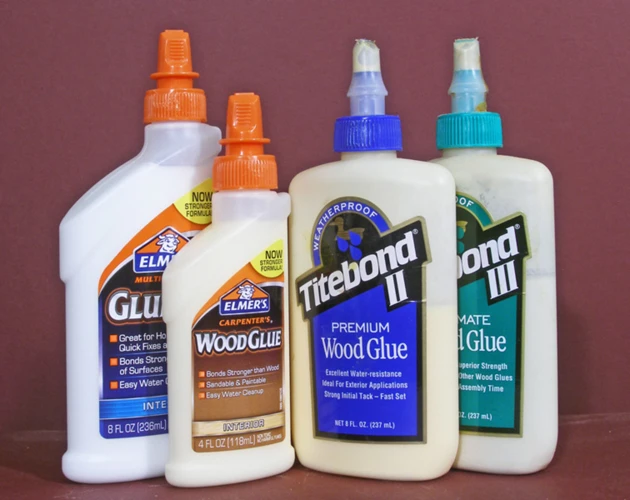
To make the perfect glue stick slime, you will need a few essential materials. The key ingredient, of course, is glue. But not just any glue will do. This recipe specifically calls for Elmer’s white school glue, which can be found at most stores. You will also need a borax solution, food coloring, and water. If you don’t have these materials on hand, don’t worry! You can easily make the borax solution yourself or substitute it with liquid starch. For more creative uses of glue, check out our article on what else you can make with glue and water.
Glue
When making glue stick slime, it’s important to choose the right type of glue. Most people use white glue, but clear or glitter glue can also be used to add some extra sparkle to the slime. If you’re not sure where to find the glue, it can be purchased at any craft store, or even at some grocery stores.
Here is a list of different types of glue that can be used:
- White glue
- Clear glue
- Glitter glue
- Permanent glue
- School glue
Using different types of glue can give your slime a unique texture or appearance. For example, glitter glue will give your slime some shimmer, while white glue will produce a smooth and stretchy slime.
It’s also important to note that some recipes for glue stick slime call for liquid starch or laundry detergent, instead of borax solution. However, this article will focus on the borax solution recipe.
Gloopy glue can also be used as an alternative to regular glue. It’s a type of homemade glue that is made from flour, sugar, and water. Gloopy glue can be used in place of regular glue to make slime, but it may produce a different texture and consistency.
No matter what type of glue you choose to use, make sure to use a high-quality brand to ensure the best results.
Borax Solution
One of the key materials needed for making glue stick slime is a borax solution. This solution helps to turn the liquid glue into a slimy, stretchy substance. To make a borax solution, you will need:
| Materials | Measurements |
|---|---|
| Borax | 1 teaspoon |
| Warm water | 1 cup |
Note: Borax is a household cleaning product that can be found in the laundry aisle of most grocery stores.
Here’s how to make the borax solution:
- Dissolve 1 teaspoon of borax in 1 cup of warm water.
- Stir the solution until the borax is completely dissolved.
Once the borax solution has been made, you can mix it with the glue mixture to create the slime. It’s important to use caution when handling borax, as it can be harmful if ingested or gets in contact with eyes. Make sure to keep the solution out of reach of children and pets.
Tip: If you don’t have access to borax, you can make your own slime activator using a mixture of water and baking soda. To learn how to make different types of homemade glue, check out these articles:
How to Make Liquid Latex with Elmer’s Glue
How to Make Window Clings with Glue
How to Make Sand Sculptures with Glue
How to Crackle Paint with Glue
How to Make Eraser Putty with Glue
How to Make Glue with Sugar and Water
Food Coloring
Adding food coloring to your glue stick slime is an excellent way to personalize your creation and make it more visually appealing. There are countless options available when it comes to choosing colors, so feel free to get creative and experiment until you find the perfect hue. Here is a breakdown of some of the most popular types of food coloring that you can use to customize your slime:
| Food Coloring Type | Color | Usage Tips |
|---|---|---|
| Liquid food coloring | Available in a rainbow of colors | Start with a few drops and add more as needed. Mix well to create an even color. |
| Gel food coloring | Intense, vibrant colors | A little goes a long way – start with a toothpick-sized amount and mix well. |
| Powdered food coloring | More muted, pastel colors | Dilute the powder in a small amount of water before adding to the glue mixture. |
While adding food coloring is a fun way to customize your slime, it’s important to take precautions to avoid staining your clothing or work surface. Lay down some newspaper or use a designated craft area to limit the potential mess. Also, be sure to wash your hands thoroughly after handling the food coloring to prevent accidental stains. Finally, remember to have fun and experiment with different color combinations until you find the perfect shade for your glue stick slime creation.
Water
Water is a key ingredient in making glue stick slime. It helps to give the slime its desired texture and consistency. For this recipe, you will need to use warm water. The warm water will help the ingredients mix together more easily.
When preparing your water, be sure to measure it out precisely. Too little water will result in a hard, lumpy slime while too much water will make the slime too runny and sticky. Follow the recipe instructions carefully and measure your water using a measuring cup.
One helpful tip is to use distilled water instead of tap water. Tap water can sometimes contain impurities that can affect the quality of your slime. Distilled water is pure and can improve the overall texture of your slime.
Here is a table outlining the amount of water needed for this recipe:
| Ingredient | Amount |
|---|---|
| Glue | 1/2 cup |
| Borax solution | 1/2 tsp |
| Food coloring | As desired |
| Water | 1/4 cup warm water |
Make sure to use the right amount of water for your own slime recipe. When mixed with the other ingredients, the water should create a smooth, pliable slime. If you are having difficulty achieving the right consistency, you may need to add more water in small increments until the desired consistency is reached.
Water plays a crucial role in making glue stick slime. In addition to being an essential ingredient, water helps create the perfect texture and consistency for your slime. Remember to measure your water carefully, use warm or distilled water, and adjust the amount of water slowly if necessary to avoid creating a poor quality slime.
Steps to Make Glue Stick Slime
Now that we have everything that we need, it’s time to dive into the fun part: making the slime! Follow these simple step-by-step instructions to create your very own batch of glue stick slime. Don’t worry if you’re a beginner, making slime is easy and everyone can do it. Let’s get started!
Step 1: Pour Glue
To start making your glue stick slime, you’ll need to gather all of your materials and get ready to mix! The first step in making this fun and unique slime is pouring out your glue into a mixing bowl. It is important to use the right type of glue for your slime, so make sure you choose a clear or white washable PVA glue. This is the type of glue that will give you the right texture and consistency for your slime.
Tip: You can adjust the amount of glue depending on how much slime you want to make. For a small batch, you can use a half bottle of glue (4 oz), but for a larger batch, you may need to use a whole bottle (8 oz) or more.
Now that you have your glue in the mixing bowl, you can start to add other ingredients to give your slime its unique texture and color. But before we move on to the next step, it’s important to remember to protect your work surface with a plastic tablecloth or newspaper to avoid creating a mess.
Here is a table of the materials needed for Step 1: Pour Glue:
| Materials | Amount |
|---|---|
| Clear or White Washable PVA Glue | 4 oz – 8 oz |
With your glue ready, it’s time to move on to the next step in making your amazing glue stick slime.
Step 2: Mix in Water and Color
To continue with making the glue stick slime, the next step is to mix in some water and color. This is where you can get creative and choose any color you like. Here’s how to do it:
- Take a bowl and add the glue you poured in step 1.
- Add some water to the glue and mix well. The recommended ratio is two parts glue to one part water, but you can adjust this to your preference. Note: Be sure to measure carefully as too much water can make the slime too sticky or runny.
- Once you have added the water, stir in a few drops of food coloring of your choice. You can also experiment by mixing different colors to create unique shades. Pro tip: Gel food coloring works better than liquid as it creates brighter colors and doesn’t thin out the slime.
Mixing in the water and color is an important step as it helps to activate the glue and give the slime its texture. Remember to stir well, making sure the color and water are evenly distributed throughout the glue. Once you have achieved your desired color, it’s time to move on to the next step.
Step 3: Combine with Borax Solution
To combine the glue and borax solution, follow these steps:
- Step 1: Grab your borax solution that you made in Step 2.
- Step 2: Slowly pour a small amount of the borax solution into the glue mixture.
- Step 3: Start stirring the mixture with a spoon as you pour in the borax solution. You will start to see the slime forming!
- Step 4: Keep adding small amounts of borax solution until the slime is no longer sticky and is easy to handle. Be careful not to add too much borax solution or your slime will become too stiff and break apart easily.
It’s important to note that the amount of borax solution you will need varies based on the type of glue used. You may need a bit more or less borax solution than what is recommended in the recipe. In general, it’s better to start with less borax solution and add more as needed.
As you mix in the borax solution, you will notice the liquid in the glue mixture start to thicken. Keep stirring until the slime mixture is fully combined and no longer sticky. Once your slime is formed, you can begin to knead it and play with it to your heart’s content!
Step 4: Knead and Play with Your Slime
Now that all of the ingredients have been combined, it’s time to get your hands a little dirty and start kneading and playing with your slime! Follow these steps for the perfect consistency:
- Use clean, dry hands to gently pick up the slime from the bowl.
- At first, the slime might feel a little sticky. That’s okay! Keep kneading the slime and it will eventually come together and form a smooth texture.
- If the slime is too sticky, add small amounts of borax solution to the outside of the slime and knead it in until it’s no longer sticky.
- If the slime is too dry, add a tiny bit of water and knead it in until it reaches the desired consistency.
- Have fun playing with your slime! It will be stretchy and pliable, so you can stretch it, roll it, bounce it, and more.
Remember to always wash your hands after playing with slime and store it in an airtight container to keep it fresh. And don’t forget to experiment with different colors and glitter to make each batch of slime unique and personalized to your liking!
Tips and Tricks
Looking to take your glue stick slime game to the next level? Look no further than these helpful tips and tricks for slime-making success. Whether you’re a seasoned slime DIYer or just starting out, these handy suggestions will make the process easier and more enjoyable. So, grab your supplies and get ready to create some seriously satisfying slime! Here are some standout ideas to keep in mind:
Prevent Sticking with Cooking Spray
One of the common issues while playing with slime is that it can stick to surfaces, making it challenging to clean up. But worry not, as we have a simple solution to prevent your slime from sticking to surfaces. You can use cooking spray as a lubricant to create a barrier between the surface and the slime.
What is cooking spray?
Cooking spray is a non-stick spray that is used to prevent food from sticking to pans or baking dishes. It is a combination of various oils such as canola oil, soybean oil, palm oil, and lecithin. The oil mixture is compressed and sprayed through a nozzle to form a fine mist.
How to use cooking spray?
Using cooking spray to prevent slime from sticking is quite simple. Spritz a small amount of cooking spray onto the surface where you will be playing with slime. Spread the oil evenly using a paper towel or a cloth. Once the surface is coated, you can start playing with your slime without worrying about it sticking.
Benefits of using cooking spray
Using cooking spray has many benefits when it comes to playing with slime. For instance:
| Benefits | Description |
|---|---|
| Non-toxic | Cooking spray is safe to use and won’t cause any harm if accidentally ingested |
| Inexpensive | Cooking spray is an affordable option compared to other slime lubricants |
| Easy to use | Cooking spray is readily available, and a little goes a long way in preventing slime from sticking |
Precautions while using cooking spray
While cooking spray is a safe option to prevent slime from sticking, it is essential to take some precautions while using it. For example:
- Avoid spraying directly onto the slime as it may break down the integrity of the slime
- Do not apply the cooking spray near an open flame or hot surface, as it is highly flammable
- Use in a well-ventilated area to avoid breathing in the oil mist
Using cooking spray is an effective and safe way to keep the slime from sticking to surfaces. So, the next time you make some slime, try using cooking spray as a lubricant, and enjoy playing with your stretchy, squishy, and satisfying creation.
Store in an Airtight Container
Storing your glue stick slime properly is essential to keeping it in good condition for future playtime. The best way to store your slime is in an airtight container. This will prevent the moisture from escaping and keep the slime from drying out.
Why Use an Airtight Container?
An airtight container is a container that is completely sealed from the outside environment. By using an airtight container, you create a sealed environment that minimizes the amount of air that can interact with your slime.
This is important because air can dry out the slime and cause it to become hard and brittle. An airtight container keeps the moisture inside and prevents your slime from losing its elasticity.
Choosing the Right Airtight Container
There are many different types of airtight containers on the market. Choosing the right one depends on your personal preference and the size of your slime.
One option is to use a plastic container with a tight-fitting lid. These containers are easy to find and come in a range of sizes. Another option is to use a glass jar with a screw-on lid.
Make sure that the container is completely clean and dry before storing your slime. Any dirt, dust, or moisture can contaminate your slime and ruin it.
How to Store Your Slime
To store your slime in an airtight container, start by thoroughly cleaning and drying the container. Next, take your slime and form it into a ball or shape that will fit inside the container.
Place the slime inside the container and make sure that the lid is secure. Store the container in a cool, dry place away from direct sunlight.
How Long Will Your Slime Last?
The length of time that your slime will last depends on a variety of factors, such as the quality of the ingredients used and how well it is stored.
If stored properly in an airtight container, your slime can last for several weeks or even months. However, if the slime becomes too dry or hard, it is time to discard it and make a fresh batch.
By following these tips and storing your glue stick slime in an airtight container, you can ensure that it stays soft, stretchy, and ready for playtime whenever you are!
| Step | Action |
| 1 | Thoroughly clean and dry the container. |
| 2 | Form the slime into a ball or shape that will fit inside the container. |
| 3 | Place the slime inside the container. |
| 4 | Ensure the lid is secure on the container. |
| 5 | Store in a cool, dry place away from direct sunlight. |
Experiment with Different Colors and Glitter
Adding different colors and glitter to your glue stick slime is a great way to make it look even more fun and unique. By mixing in different colors or adding glitter, you can create a slime that is personalized to your liking. Here are some ways to experiment with colors and glitter:
- Use Food Coloring: Add a few drops of food coloring to your glue mixture before combining with the borax solution. Mix it in well before adding the borax solution.
- Try Different Glitters: There are many types of glitter available at craft stores that you can mix into your slime. Fine glitter will create a subtle sparkle, while chunky glitter will give your slime a more textured feel.
- Create Ombre Slime: To make ombre slime, divide your glue mixture into separate bowls and add progressively more food coloring to each bowl. Then, pour the mixtures together and knead them until they form a smooth ombre effect.
- Make Rainbow Slime: Divide the glue mixture into 5 or 6 separate bowls and add a different color of food coloring to each bowl. Then, mix the borax solution in each bowl separately before combining them together and kneading until you have a colorful rainbow slime.
Remember to experiment and have fun with your colors and glitter! Adding these extra touches to your glue stick slime can make it truly one-of-a-kind.
Safety Precautions
When it comes to making glue stick slime, safety should always be a top priority. While it may seem like a fun and harmless activity, there are potential risks to keep in mind. By taking the necessary precautions and following some simple guidelines, you can ensure that your slime-making experience is a safe and enjoyable one. Here are some important safety tips to keep in mind.
Adult Supervision Required
Making glue stick slime can be a fun and engaging activity for people of all ages. However, it is important to ensure that safety precautions are taken to avoid any harm or accidents. Adult supervision is necessary while making glue stick slime to ensure that the activity is enjoyed without any mishaps.
Why is Adult Supervision Necessary?
During the process of making glue stick slime, the use of hot water, borax solution, and other materials can pose a risk if not handled with care. It is essential to have an adult present who can oversee the activity and provide guidance if needed. Certain individuals may be allergic to the materials used in making slime and may require immediate attention if any adverse reactions occur.
How to Ensure Safe Slime Making
To ensure safe glue stick slime making, adult supervision is crucial. Additionally, it is important to adhere to the following safety precautions:
| Safety Precaution | Explanation |
|---|---|
| Use Gloves | Wearing gloves is recommended to avoid skin irritation or contact with harmful chemicals. |
| Wash Hands | After the slime making is complete, make sure to wash hands thoroughly with soap and water. |
| Don’t Eat or Drink | It is highly recommended to avoid eating, drinking, or smoking during the process to prevent any ingestion of harmful chemicals. |
| Don’t Rub Eyes | Avoid touching eyes or mouth while making slime, as the chemicals may cause irritation if they come in contact with sensitive areas. |
By following these safety precautions and having adult supervision, making glue stick slime can be an enjoyable and safe activity for everyone involved.
Avoid Ingesting or Rubbing Eyes
When making glue stick slime, it’s important to avoid ingesting or rubbing your eyes with the mixture. This may seem like common sense, but accidents can happen, particularly if young children are involved in the creation process.
To stay safe, make sure to follow these tips and precautions:
| Tip | Explanation |
| Wash Hands Before and After | Before making slime, wash your hands to remove any dirt, germs, or bacteria. After handling the slime, wash your hands again to ensure you don’t transfer any chemicals to other surfaces or objects. |
| Keep Away from Mouth and Eyes | Do not put glue stick slime near your mouth or eyes, and avoid letting young children play with the mixture unsupervised. If someone accidentally ingests the slime or gets it in their eyes, seek medical attention immediately. |
| Use Non-Toxic Ingredients | When making slime, use non-toxic ingredients to ensure safety. Check the labels on the products you use to ensure they are safe for children to handle and play with. |
By following these safety precautions, you can ensure that the process of making glue stick slime is a fun and safe activity for everyone involved. Remember, while slime making can be a fun activity, safety should always come first.
Conclusion
After following the steps outlined in this guide, you should have a batch of fantastic glue stick slime. This fun and easy-to-make DIY project is perfect for kids and adults alike. Not only is it a great sensory activity, but it also offers a unique opportunity to learn about the science of polymers.
When you’re finished playing with your glue stick slime, remember to store it properly in an airtight container to keep it fresh. And don’t be afraid to experiment with different colors and glitters to make your slime even more exciting.
While making glue stick slime is generally safe, it’s important to always exercise caution. Be sure to keep the slime away from young children who may be more likely to ingest it, and always supervise kids when they’re playing with their slime. Additionally, avoid touching your eyes or ingesting the slime, and wash your hands thoroughly after playing with it.
Overall, making glue stick slime is a simple and entertaining way to spend an afternoon. So what are you waiting for? Gather your materials and get ready for some slime-filled fun!
Frequently Asked Questions
What is slime and why is it so popular?
Slime is a stretchy, gooey substance that is fun to play with and make. It became popular because of its satisfying texture and the endless possibilities for customization and creativity.
What makes glue stick slime work?
Glue stick slime relies on the chemical reaction between the glue and borax solution. The borax solution crosslinks the polymer molecules in the glue, creating the sticky and stretchy substance we know as slime.
Is it safe to make and play with glue stick slime?
When made and handled correctly, glue stick slime is generally safe to play with. However, it is important to take safety precautions and avoid ingesting or rubbing the slime in your eyes.
What type of glue is best for making slime?
Clear school glue or white PVA glue works best for making glue stick slime. Avoid using any type of glue that contains glitter or other additives, as this may affect the consistency of the slime.
Can I substitute borax with other ingredients?
Yes, you can substitute borax with liquid starch, contact lens solution, or baking soda and saline solution. However, the proportions may differ and you may need to adjust accordingly.
How can I make my slime less sticky?
If your slime is too sticky, try adding a bit more borax solution or kneading it with your hands until it becomes less sticky. You can also try adding some baby oil or lotion to the slime to make it less adhesive.
What can I add to my slime to make it smell good?
You can add a few drops of essential oils or fragrance oils to your slime to make it smell good. Just be careful not to add too much, as this may affect the consistency of the slime.
How long can I store my slime for?
If stored properly in an airtight container, glue stick slime can last for weeks or even months. However, if you notice any changes in color or consistency, it may be time to make a fresh batch.
Can I wash slime out of my clothes?
It may be difficult to wash slime out of clothes, especially if it has already dried. Try using a combination of warm water and dish soap or vinegar to remove the slime, and avoid using hot water or a dryer as this may set the stain.
What are some common mistakes to avoid when making slime?
Some common mistakes to avoid when making slime include using too much borax solution, not mixing in enough water, adding too much food coloring or glitter, and not kneading the slime enough before playing with it.