Introduction
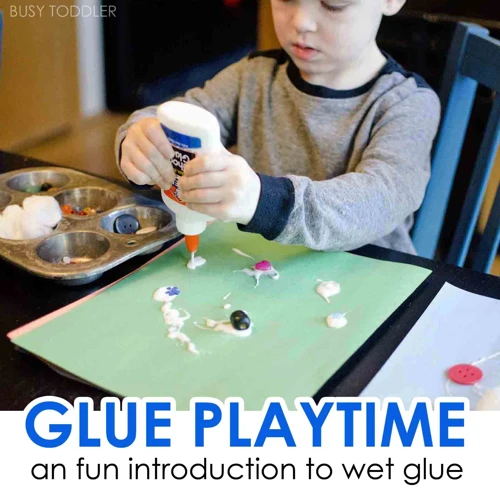
Are you looking for a fun and easy way to add some texture and personality to your home decor projects? Crackle paint is a popular technique that creates a unique, aged look with cracks and fissures in the top coat of paint. In this beginner’s guide, you’ll learn how to achieve the crackle effect using a common household ingredient – glue! By following these simple steps, you can transform any surface into a work of art with a vintage vibe. So let’s get started!
What is crackle paint?
Crackle paint is a painting technique that gives surfaces a cracked or aged appearance. When it dries, the top layer of paint cracks revealing the base coat underneath. This produces a visually interesting effect, which can add depth and character to any surface. The technique is often used in furniture restoration, home decor, and craft projects.
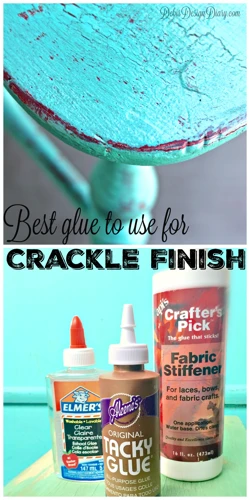
To achieve the crackle effect, glue is sometimes added to the base coat of paint. The glue reacts with the top coat of paint, causing it to crack and release some of the base coat underneath. The result is a unique finish that looks weathered and old-fashioned.
The crackle effect is sometimes referred to as shabby chic, a popular interior design style that emphasizes vintage or antique elements. It’s frequently used in decorating homes, boutiques, restaurants, and other spaces that aim to evoke an older era.
There are various methods of creating the crackle effect, but adding glue to the base coat of paint is one of the easiest. In the following sections, we’ll provide step-by-step instructions on how to crackle paint with glue, as well as some alternative techniques you might want to try.
For those who are interested in making their own glue to use in this technique, you can check out our article How to Make Glue with Sugar and Water or How to Make Goo with Glue and Water.
Why use glue?
Using glue for crackle paint provides a unique and crackled texture to the surface, perfect for adding character to furniture, home decor, and even artwork. This technique is ideal for beginners because the process is easy, and the materials needed are affordable.
Using glue as a medium for crackle painting produces a more distinct crackle compared to other methods. The glue causes the topcoat of paint to shrink and break apart as it dries, creating a unique and textured look. Another advantage of using glue is that it has a great adhesive property, which makes it perfect for uneven surfaces.
Here are the advantages of using glue for crackle paint:
| Advantages |
|---|
| Creates a more distinct crackle |
| Provides a unique and textured look |
| Has an excellent adhesive property |
| Suitable for uneven surfaces |
If you’re interested in other projects that you can do with glue, slime-making is another fun activity that kids and adults alike will enjoy. You can create sand sculptures with glue that can be a great activity for family bonding time. Another popular activity is to create piñatas with glue and balloons, which can be a hit at birthday parties and other celebrations.
Materials
When it comes to creating a crackle paint masterpiece, it’s important to start with the right materials. Proper preparation and choosing the right supplies will ensure that your crackle finish turns out just as you envisioned. Here’s what you’ll need:
What you’ll need
To get started with crackle painting with glue, there are several materials that you’ll need to gather beforehand. These items are:
- Surface: A wooden or metal surface to be crackle painted.
- Clean cloth: to remove any dust from the surface before painting.
- Sandpaper: for smoothing out any rough patches on the surface.
- Base coat paint: acrylic or latex paint can be used as a base coat.
- Top coat paint: a contrasting color to the base coat paint.
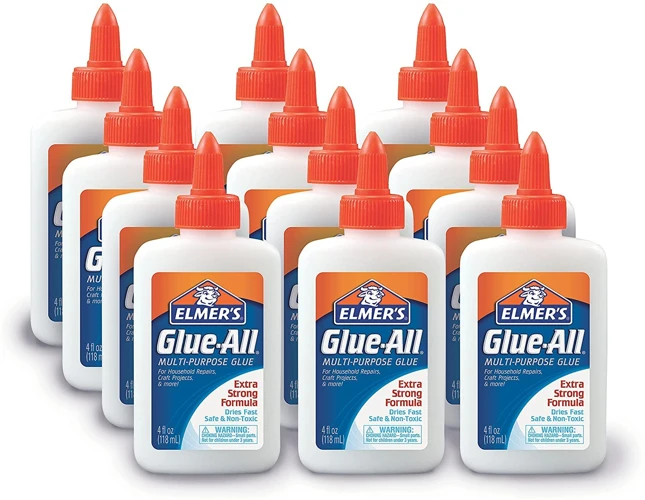
- Glue: PVA glue or school glue can be used.
- Water: to dilute the glue.
- Paint brushes: to apply glue and paint.
- Drying rack: A place for your painted surface to dry
It is important to note that while these are the necessary materials, there are also certain optional supplies that may come in handy. For example, using a heat gun or a hairdryer to create cracks in the paint, sandpaper to create a distressed look, or painters tape to create clean lines. Additionally, the glue can be substituted with alternative materials such as Mod Podge, white school glue, or cornstarch and glue mixture. To learn how to make some of these alternatives, check out our articles on how to make goo with cornstarch and glue or how to make glue stick slime.
Optional supplies
Optional supplies can add some fun and creativity to your crackle painting project. While they are not necessary, they can certainly enhance the final result. Here are some optional supplies you might want to consider:
| Item | Description |
| Glitter | Add some sparkle to your crackle finish with some glitter. You can sprinkle it over the wet glue before it dries to create a shimmering effect. |
| Texture medium | If you want to add some texture to your project, consider using a texture medium. Mix it with the glue to create a gritty surface that will show through the top coat. |
| Stencils | To create more complex designs on your crackle finish, try using stencils. Place the stencil on the surface before the glue dries, and then apply the top coat. When you remove the stencil, you’ll have a beautiful design. |
| Paint pens | Paint pens can be used to add intricate designs or details to your crackle finish. Once the topcoat is dry, use paint pens to draw on top of the cracks. |
| Want to make your own glue? | You can try making your own glue with simple household ingredients. Check out our tutorial on how to make gloopy glue, how to make slime out of glue and toothpaste, or how to make eraser putty with glue for some fun options. |
Adding optional supplies like these can give your project an extra pop of creativity and make it truly unique. But remember, you can still achieve a beautiful crackle finish without them. Let your imagination and artistic vision guide you, and have fun with the process.
Preparing the Surface
Before you begin crackle painting, it is important to properly prepare the surface to ensure optimal crackle formation. This step is crucial for achieving a flawless finish that will last for years to come. By taking the time to follow these preparation steps, you will be setting yourself up for success. Let’s dive into the details on how to get your surface ready for crackling.
Clean and sand the surface
Before applying crackle paint with glue, it is crucial to properly prepare the surface. Doing so will ensure the best results possible. Here’s a step-by-step guide:
Step 1: Clean the surface
- Remove all dirt, dust, and debris from the surface using a clean, damp cloth or sponge.
- For tougher stains or grime, a mild soap solution can be used.
- Dry the surface thoroughly with a clean towel or let it air dry completely.
Step 2: Sand the surface
- Using sandpaper, gently rub the surface in a circular motion to create a rough texture.
- This will allow the base coat and glue to adhere better to the surface.
- Wipe away any dust or debris with a clean cloth.
By properly cleaning and sanding the surface, you will be creating a better foundation for the crackle paint to adhere to. Skipping this step may result in the paint not sticking properly, and the crackle effect not coming out as desired. So take the time to do it right, and the end result will be worth it.
Base coat the surface
Before applying the glue that will create the crackle effect, it’s important to prepare the surface with a base coat. This will provide a uniform background for the crackle paint and help the crackle effect stand out.
Here are the steps for base coating the surface:
- Choose a color for the base coat that will complement the crackle paint you plan to use.
- Make sure the surface is clean and dry before starting. Any dirt or debris can affect how well the base coat adheres to the surface.
- If the surface is not already primed, apply a coat of primer first. This will help the base coat adhere better and improve the overall finish.
- Using a paintbrush or roller, apply an even coat of the base paint over the entire surface. Be sure to cover the surface completely and avoid leaving any brush marks or streaks.
- If the base coat is too thin, you may need to apply a second coat after the first one dries. This will ensure that the surface is fully covered and provide a better background for the crackle paint.
- Let the base coat dry completely before moving on to the next step. This can take anywhere from a few hours to overnight, depending on the type of paint you’re using and the humidity level.
By taking the time to properly base coat the surface, you’ll create a smooth and consistent foundation for the crackle paint. This will help ensure that the crackle effect is even and eye-catching, and that the finished piece looks polished and professional.
Let the base coat dry
After applying the base coat to the surface, it is important to allow it to dry completely before moving on to the next step. The amount of time needed for the base coat to dry will depend on the type of paint used and the surface it is applied to.
Table: Estimated Drying Times for Common Types of Paint
| Type of Paint | Estimated Drying Time |
|---|---|
| Latex paint | 1-2 hours |
| Oil-based paint | 6-8 hours |
| Chalk paint | 30 minutes-1 hour |
It’s important to follow the recommended drying time for the specific type of paint being used to ensure that the base coat is fully dry and ready for the next step. Rushing the drying process could result in an uneven finish or damage to the surface.
A good way to check if the base coat is dry is to gently touch the surface with a finger. If the paint feels dry and does not transfer to your finger, then it is likely ready for the next step. If it still feels tacky or wet, then it needs more time to dry.
In addition to allowing the base coat to dry completely, it’s important to make sure the surface is level and free from debris. Any bumps or imperfections in the base coat could affect the crackle effect or the final finish of the project. Sanding the base coat lightly after it has dried can help to smooth out any rough spots and ensure an even surface for the next steps.
Applying Glue
Now that you have prepped your surface with a base coat, it’s time to apply the glue. This is a crucial step in achieving a successful crackle effect. But with so many types of glue on the market, you may be unsure which one to use. And even after choosing the right glue, diluting it to the correct consistency can be a bit tricky. Don’t worry, we’ll walk you through each step so you can be confident in creating beautifully crackled paint with glue.
Choose the type of glue
When it comes to crackle painting with glue, choosing the right type of glue is crucial for achieving the desired crackle effect. There are several types of glue that can be used for this technique, and each has its own properties and benefits. Here are some of the most popular types of glue used in crackle painting, along with their characteristics:
| Glue Type | Properties | Benefits |
|---|---|---|
| PVA Glue | Dries clear and flexible, water-soluble | Easy to find, non-toxic, versatile |
| Craft Glue | Thick and strong, dries opaque | Excellent for creating texture, can be tinted with paint |
| Mod Podge | Water-based sealer, glue and finish | Dries clear, multiple finishes available, can be used as top coat |
| Elmer’s Glue | Dries clear and flexible, water-soluble | Easy to find, affordable, non-toxic |
PVA glue is a popular choice for crackle painting because it is easy to find and versatile. It dries clear and flexible, which makes it perfect for creating a crackle effect. It is also water-soluble, which means it can be easily cleaned up with water.
Craft glue is thicker and stronger than PVA glue, which makes it ideal for creating texture in your crackle finish. It dries opaque, which means you can tint it with paint to create a custom color for your crackle effect.
Mod Podge is a water-based sealer, glue and finish that can be used for all sorts of crafts, including crackle painting. It dries clear and is available in multiple finishes, including matte, glossy and satin. It can also be used as a top coat over your crackle finish to protect it and give it a polished look.
Elmer’s glue is another great option for crackle painting. It dries clear and flexible, just like PVA glue, but it is more affordable and easy to find. It is also non-toxic, which makes it safe to use for kid-friendly projects.
Ultimately, the type of glue you choose will depend on your personal preference and the look you are trying to achieve. Experiment with different types of glue to see which one works best for your project.
Dilute the glue
To achieve the desired crackle effect, diluting the glue is a crucial step. Here are the steps to dilute the glue:
Step 1: Choose the type of glue
The type of glue you choose will determine how much water you need to dilute it. You can choose between white school glue, wood glue, or PVA glue.
Step 2: Add water
Pour the glue into a mixing container, and add water to dilute it. The general rule of thumb is to add one part water to one part glue. However, this can vary depending on the type of glue you’re using.
Step 3: Mix the glue and water together
Use a stir stick to mix the glue and water together thoroughly. Keep stirring until the mixture is consistent in texture and color.
Step 4: Test consistency
Once you’ve mixed the glue and water, test the consistency by lifting the stir stick and observing how the mixture drips. If it drips too quickly, add more glue. If it’s too thick, add more water.
Step 5: Use the diluted glue immediately
Only dilute the amount of glue you need for your project since diluted glue has a shorter shelf life. Apply the diluted glue to the surface while it is still wet.
By diluting the glue, you are weakening it, which allows it to crack and create the desired effect when the top coat is applied. Be careful not to dilute the glue too much, or the effect may not work as intended. With the right level of dilution, you’ll be on your way to achieving a beautiful crackle paint finish.
Apply the glue to the surface
When applying the glue to the surface, you’ll want to work carefully and methodically to ensure an even coating. Here’s a step-by-step breakdown of how to do it:
| Step | Instructions |
|---|---|
| Step 1: | Prepare your workspace by covering it with a drop cloth or newspaper to protect your surface from any spills or drips. |
| Step 2: | Stir your glue mixture gently to ensure all ingredients are fully incorporated. |
| Step 3: | Using a foam brush, begin to apply the glue to the surface in a thin, even layer. Brush in one direction to avoid any bubbles or streaks. |
| Step 4: | Work in small sections, as the glue dries quickly. Avoid overworking the glue, as this can cause it to become tacky and difficult to work with. |
| Step 5: | Repeat the process until the entire surface is covered with a thin layer of glue. Make sure to apply the glue to any crevices or details in the surface, as these areas will produce the most dramatic crackle effect. |
Remember, the key to achieving a successful crackle effect is to keep your layers thin and even. Too much glue can result in an overcrackled or bubbled finish, while too little glue may produce an undercrackled or incomplete effect. By following these steps and taking your time with the process, you’ll be able to create a unique and stunning crackle finish on any surface.
Let the glue dry
After you’ve applied the glue to the surface, it’s important to let it dry completely before moving on to the next step. This can take anywhere from 1-2 hours, depending on the type of glue you used and the thickness of the layer applied. Here are some tips to ensure that the glue dries properly:
- Clean workspace: Make sure your workspace is clean and dust-free to avoid any debris settling onto the glue.
- Avoid touching the glue: It’s best to avoid touching the glue while it dries, as this can cause smudging and uneven drying.
- Check for transparency: Before moving to the next step, check if the glue has dried completely by looking for transparency and no wetness with your naked eyes. This can be done in a well-lit area or by shining a light at a low angle across the surface.
Letting the glue dry thoroughly is crucial to ensuring a successful crackle effect. If you rush the process, the topcoat may not adhere to the surface uniformly. So be patient and give the glue enough time to dry completely. In the upcoming sections, we’ll discuss how to apply the topcoat and create the crackle effect.
Applying the Top Coat
After allowing the base coat of paint to fully dry, it’s time to move onto the next step: applying the top coat. This is where the magic of crackle paint really begins to happen! The top coat of paint will react with the glue to create a beautifully aged, crackled effect on your surface. With a few easy steps, you’ll have a unique and textured finish that is sure to impress. Let’s dive in and explore the process of applying the top coat in detail.
Choose the type of top coat
When it comes to selecting the perfect top coat for your crackle paint project, there are several options to choose from. Here are some of the most popular top coat options and their respective features:
- Matte finish: If you prefer a more subdued and subtle look, a matte finish may be the best choice for you. This top coat goes on smoothly and dries to a non-glossy, velvety finish that won’t detract from the crackle effect.
- Satin finish: A satin finish top coat offers a compromise between matte and glossy finishes. It provides a slight sheen while still being understated, which can help highlight the crackle effect without making it too flashy.
- Glossy finish: If you want your crackle effect to really stand out, a glossy finish might be the way to go. This finish has a high shine that can make the cracks in the paint more visible, but it may also compete with other elements in the room.
- Clear coat: Another option is to use a clear coat as your top coat. This will enhance the durability of the underlying paint and help protect the crackle effect from wear and tear.
Ultimately, the choice of top coat for your crackle paint project will depend on your personal preference and the overall aesthetic you’re trying to achieve. Be sure to consider the other elements in the room and how the top coat will interact with them, as well as the practical considerations like durability and ease of application.
Apply the top coat over the glue
Once the glue is dry, it’s time to apply the top coat. The purpose of the top coat is to protect the surface and provide a base for the crackle effect to adhere to. Here’s how to apply the top coat:
| Step 1: | Choose the type of top coat you want to use. You can use acrylic paint, water-based polyurethane, or any other type of water-based clear coat. Avoid using oil-based top coats as they can prevent the crackle effect from working properly. |
| Step 2: | Apply a thin layer of top coat over the entire surface. Use a brush or a roller for larger surfaces. Make sure the top coat is completely dry before moving on to the next step. |
| Step 3: | Apply a second layer of top coat, but this time, apply it thicker than the first layer. This will ensure that the crackle effect is more prominent. Be careful not to apply it too thick, as this can cause the top coat to crack instead of creating the desired effect. |
| Step 4: | Let the top coat dry completely. This may take a few hours, depending on the type of top coat used and the humidity in the air. Do not rush this step, as it is important for the crackle effect to work properly. |
By following these steps, you can apply the top coat over the glue and prepare the surface for the crackle effect. Remember to choose the right type of top coat, apply it in thin layers, and let it dry completely before moving on to the next step.
Let the top coat dry
After applying the top coat of paint over the glue, it’s essential to let it dry completely before moving on to the next step. Drying times for the top coat may vary depending on the specific type of paint you’re using. As a general rule, it’s best to follow the instructions on the paint can regarding drying time.
Here are some tips to ensure that the top coat dries evenly:
- Make sure the room you’re working in is well-ventilated to help the paint dry quicker.
- Avoid applying the top coat too thickly, as this can increase drying time and lead to uneven drying.
- Try to keep the room at a consistent temperature and avoid exposing the painted surface to direct sunlight or heat sources, as this can also affect drying time.
- Check the paint for dryness by gently touching a small, inconspicuous area with your finger. If it feels tacky or comes off on your finger, it’s not dry yet. If it feels dry, it should be safe to move on to the next step.
It’s crucial to let the top coat dry completely before attempting to create the crackle effect. Rushing this step can result in the crackle effect failing to form properly and may lead to a less than desirable finished product. Once the top coat is completely dry, you can move on to creating the crackle effect.
Creating the Crackle Effect
Now, it’s time for the magic to happen! The highlight of crackle painting is the crackle effect, which gives the surface a vintage and rustic look. This effect is created by the glue pulling apart the topcoat as it dries, leaving visible cracks that reveal the base coat underneath. In this section, we will delve into the nitty-gritty of how to create this sought-after crackle effect. So, roll up your sleeves and let’s get cracking!
Use heat to create cracks
Using heat to create cracks in the crackle paint is an essential step in achieving the desired effect. Here are some steps to do it:
- Using a heat gun: Hold a heat gun roughly 6 inches away from the painted surface and start heating the top coat until it starts to bubble. As the bubbles form, they will create small cracks in the paint. Move along the surface until you achieve the desired crackle effect.
- Using a hairdryer: If you do not have a heat gun, a hairdryer will suffice. Set the hairdryer on the highest heat setting and hold it 6 inches away from the painted surface. As the top coat heats up, it will begin to crack and settle, creating the crackle effect. Make sure to be patient and let the heat do its job gradually.
- Avoid overheating: While using heat to create the crackle effect, it’s important not to overheat the top coat. Doing so can lead to unwanted bubbles and damage to the surface beneath the paint. Use heat in moderation and always keep a safe distance away from the surface while heating it.
By following these steps, you can intentionally create the crackle effect and achieve a beautiful, textured surface for your project.
Sand the crackle finish
Once your crackle finish has fully dried, it’s time to sand it down for a smooth and polished look. Here are the steps to follow:
- Prepare Your Sandpaper: Choose a fine-grit sandpaper, typically between 220 and 240 grit, to avoid damaging the surface. Cut the sandpaper into smaller pieces for better control.
- Sand the Surface: Gently sand the entire surface in a circular motion. This will help remove any rough areas and make the finish smooth. You may also choose to sand specific areas to distress the finish slightly.
- Wipe Down the Surface: After sanding, use a damp cloth to wipe down the surface and remove any dust or debris created during sanding.
- Apply Finish: Once the surface is dry, apply a clear coat or wax to seal the finish and protect it from any moisture or wear and tear.
Remember to work slowly and carefully when sanding the crackle finish to avoid removing too much of the topcoat. You can always sand further if needed, but it’s hard to put back what has already been removed. With these simple steps, your newly crackled surface will be smooth, polished, and ready to display.
Alternative Techniques
If you’re looking for alternative methods to create a crackle effect on your surface, then you’re in luck! There are a few unique techniques that you can try out to achieve the same eye-catching results. These unconventional methods involve using different types of glue, paint, and materials. So, let’s dive into these creative alternatives and give your project a distinctive and stunning look.
Craft glue and acrylic paint technique
For those who prefer a different approach, a craft glue and acrylic paint technique is a great alternative to achieve a crackle effect. This technique is perfect for those who want a more subtle crackle finish.
Materials Needed:
| Craft Glue and Acrylic Paint Technique | Materials Needed |
|---|---|
| Craft Glue | Acrylic Paint (in two contrasting colors) |
| Paintbrush | Sandpaper |
| Sealant (optional) | Clean cloth |
Step-by-Step Guide:
- Apply a base coat of acrylic paint on the surface and let it dry completely.
- Apply a layer of craft glue over the base coat and let it dry half-way, until it becomes tacky to the touch.
- Apply the second color of acrylic paint over the glue layer. The paint will start to crackle as it dries.
- If desired, sand the surface lightly to enhance the crackle effect.
- Seal the surface with a clear sealant for added protection.
Quick Tips:
- Experiment with different color combinations to create a unique look.
- Work in small sections to ensure the glue doesn’t dry too quickly.
- Use a hairdryer on a low setting to speed up the drying process.
Whether you choose the traditional method with white glue or the craft glue and acrylic paint technique, both methods can create beautiful and stylish crackle finishes perfect for any DIY project.
Elmer’s glue and chalk paint technique
Elmer’s Glue and Chalk Paint Technique
This technique is a variation of the standard crackle paint method, using Elmer’s glue and chalk paint. The result is a slightly more textured finish with a more rustic appearance. Here’s how to do it:
| Materials | Instructions |
| Elmer’s glue | Apply the glue in a thick layer, using a brush or foam roller. Let the glue dry completely. |
| Chalk paint | Apply the chalk paint in a contrasting color to the base coat, using a brush or roller. The crackle effect will appear as the paint dries, so avoid going over the same area twice. |
| Sandpaper | Use sandpaper to distress the surface and reveal some of the base coat underneath. |
One benefit of this technique is that the chalk paint will adhere better to the Elmer’s glue than some other types of paint. You can vary the amount of crackle effect by adjusting the thickness of the glue layer and the drying time before applying the paint. This technique is also great for creating an aged, vintage look on furniture or decor pieces. Remember to experiment with different color combinations to find the right look for your project.
Tips and Tricks
Now that you have learned how to create a crackle paint effect with glue, it’s time to take things up a notch and learn some tips and tricks to help you perfect your crackling technique. These simple yet effective tips and tricks will help you achieve the best results possible and create stunning crackle finishes on your projects. So, let’s dive in and discover some helpful tips and tricks!
Work in small sections
When cracking paint with glue, it’s important to work in small sections to ensure that the glue and top coat don’t dry before you can create the crackle effect. This technique can be time-consuming, but it’s worth it for a professional-looking finish. Here are some tips to keep in mind when working in small sections:
- Divide the surface into manageable areas. If you’re working on a large piece of furniture, consider breaking it down into smaller sections like the drawers or the top surface. This will make it easier to work with and ensure that you don’t miss any spots.
- Apply the glue and top coat in thin layers. Thick layers take longer to dry and increase the chance of the paint cracking unevenly. Apply a thin layer of glue, let it dry, and then apply a thin layer of top coat.
- Use a clean brush for each section. This will prevent the glue and top coat from getting mixed together and creating an inconsistent crackle effect.
- Work in a well-ventilated area. The glue and top coat can be fumes, so it’s important to use them in a well-ventilated area. Open windows or use a fan to circulate the air.
By following these tips, you’ll be able to work in small sections and create a beautiful crackle finish on your project. Remember to take your time and be patient – the end result will be worth it!
Experiment with different color combinations
One way to add a unique touch to your crackle paint project is to experiment with different color combinations. Using different colors for your base coat and top coat can result in a truly stunning finished product.
To get started, consider using contrasting colors that will really pop against each other. For example, a deep navy blue base coat with a bright white top coat will create a bold contrast that is sure to catch the eye. Alternatively, you can use shades of the same color for a more subtle effect, such as a light blue base coat with a deep blue top coat.
Another way to experiment with color is to add a third color into the mix. This can be done by using a glaze or wash in a complementary color over the crackle finish. For example, if you have a crackle finish with a caramel-colored base and white top coat, you could use a green glaze to add depth and interest to the piece.
When it comes to color combinations, the possibilities are truly endless. Don’t be afraid to get creative and try something unexpected. You might be surprised by the beautiful results.
Pro tip: When experimenting with color combinations, it’s a good idea to test them out on a small section first to make sure you like the way they look together. Once you find a combination you love, you can confidently apply it to the rest of your project.
Use a hairdryer to speed up the drying process
When it comes to crackle painting, patience is definitely a virtue. However, waiting for each layer to dry can be frustrating, especially if you’re working on a large project. That’s where a hairdryer can come in handy. Here are some tips for using a hairdryer to speed up the drying process:
- Use low heat: High heat can cause the paint to bubble or crack, so it’s best to use the lowest heat setting on your hairdryer.
- Keep your distance: Hold the hairdryer at least 6 inches away from the painted surface to avoid blowing the paint around.
- Move the hairdryer around: To avoid overheating one area, keep the hairdryer moving back and forth over the surface.
It’s important to note that using a hairdryer to speed up the drying process is not a substitute for letting each layer dry thoroughly. In other words, don’t rush the process and compromise the quality of your crackle finish. Use the hairdryer as a helpful tool in combination with proper drying time.
Conclusion
As we come to the end of this beginner’s guide on how to create a crackle paint effect with glue, it’s important to reflect on the key takeaways. Throughout this article, we’ve explored the materials needed, the steps to prepare the surface, and the techniques to apply glue and topcoat to achieve the desired crackle effect. But before we wrap up, let’s summarize some of the important tips and tricks we’ve learned along the way to ensure your project turns out flawlessly.
Summary
After following the steps outlined in this beginner’s guide, you should have successfully created a crackle paint finish using glue. To recap, here are some key points to keep in mind:
- Materials: Gather all the necessary materials before you begin, including your surface, base coat, glue, and top coat.
- Preparing the Surface: Properly cleaning and sanding your surface before applying the base coat is crucial for achieving a smooth, even finish.
- Applying Glue: Diluting your chosen glue and applying it evenly to the surface is essential in creating the crackle effect.
- Applying the Top Coat: Choose the right type of top coat and apply it evenly over the dried glue to seal in the crackle effect.
- Creating the Crackle Effect: Applying heat and sanding the finish are two key steps in achieving the desired crackle effect.
- Alternative Techniques: Experiment with different glue and paint combinations to achieve unique crackle finishes.
- Tips and Tricks: Working in small sections, trying out different color combinations, and using a hairdryer to speed up drying time can all improve your crackle paint results.
Remember to be patient and allow ample drying time between each step. With practice, you can master this fun and versatile painting technique.
Final Thoughts
After completing the process of crackling paint with glue, take a step back and admire the unique look you’ve created. However, there are a few final thoughts to keep in mind.
Patience is key: Allow each layer to fully dry before moving on to the next step. Rushing the drying process may result in a less desirable outcome.
Experimentation is encouraged: Don’t be afraid to try different types of glue, top coats, and color combinations to achieve the desired effect. Each material reacts differently, so some experimentation may be necessary.
Practice makes perfect: If this is your first time trying out crackle painting with glue, don’t expect perfection on the first try. Like any technique, practice and experience will help you improve your skills.
Protect the finished product: Once your crackle finished project is complete, consider applying a protective coat such as varnish or polyurethane to help preserve its finish.
Have fun with it: Crackling paint with glue is a creative and enjoyable process. Don’t be afraid to let loose and have some fun with your project.
Crackling paint with glue is an exciting technique that can achieve stunning and unique results. With some patience, experimentation, and practice, anyone can master this technique and create beautiful crackled finishes on various surfaces. So, grab your supplies, and have fun exploring this artistic process!
Frequently Asked Questions
What surfaces can be crackle painted?
Crackle paint can be used on a variety of surfaces such as wood, metal, plastic, and glass.
Why is it important to sand the surface before crackle painting?
Sanding the surface ensures better adhesion of the paint and helps to achieve a smoother finish.
What type of glue should I use for crackle painting?
You can use different types of glue such as PVA glue, white glue, or school glue for crackle painting. Just make sure to dilute it with water before use.
Can I crackle paint without a base coat?
No, it is essential to apply a base coat before crackle painting to achieve the desired effect. The top coat of paint will crackle and reveal the base coat underneath.
What can I use besides a hairdryer to create cracks in the paint?
You can also use a heat gun or a candle to create cracks in the paint. Just be careful not to scorch the surface or burn yourself.
Can I use any type of paint as a top coat for crackle painting?
No, it is recommended to use a water-based paint as a top coat for crackle painting. Oil-based paint may not crackle properly and could affect the overall finish.
Can I use multiple colors for crackle painting?
Yes, you can use multiple colors for crackle painting. Just make sure to apply the lighter color as a base coat and the darker color as a top coat for best results.
Can I seal the crackle painted surface?
Yes, you can seal the crackle painted surface with a clear sealer or varnish. This will protect the surface and ensure the longevity of the finish.
Can I wash or scrub a crackle painted surface?
Yes, you can wash a crackle painted surface gently with soap and water. However, avoid using abrasive cleaners or scrubbing the surface too vigorously as it may damage the finish.
What is the drying time for crackle paint?
The drying time for crackle paint may vary depending on the temperature, humidity, and thickness of the paint layers. However, it generally takes about 2-4 hours for the paint to dry completely.