Have you ever walked past a store window and saw fun and cute designs stuck to it? Those are called window clings, and they are a great way to add a creative touch to any window at home or at work. But did you know that you can make your own window clings with just a few materials? Yes, it’s true! In this step-by-step guide, we’ll show you how to make window clings with glue and food coloring. Not only is it an easy and affordable way to decorate your windows, but it’s also a fun project to do with kids. So, let’s get started!
Materials Needed
When it comes to making window clings with glue, having the right materials is crucial. To create these fun decorations, you’ll need a few key ingredients that you may already have on hand. Here’s what you’ll need:
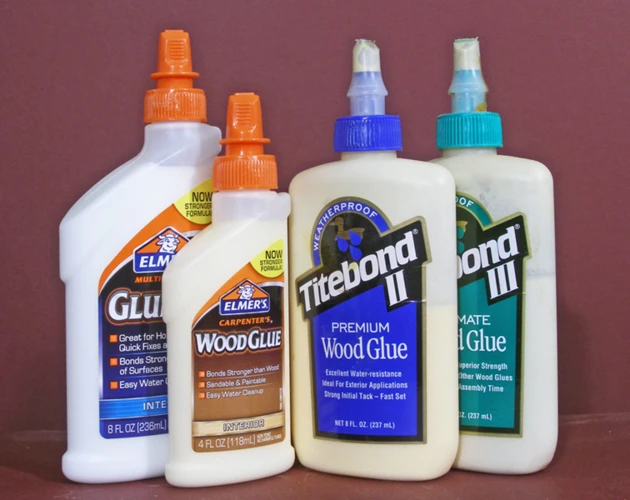
- Glue: For this project, you can use any white glue that dries clear. If you prefer to make your own glue, check out our article on how to make wood glue at home.
- Food Coloring: To give your window clings a pop of color, you’ll need food coloring. Experiment with different colors for a festive look.
- Plastic Bags: You’ll use these to create the actual clings, so make sure you have a few on hand. Sandwich bags work great for this project.
- A Template or Stencil: While it’s possible to freehand your window cling design, using a template or stencil will give you more precise results. Check out our article on what you can make with glue and water for more project ideas that involve stenciling with glue.
Glue
Glue is the main ingredient in creating window clings. It is essential to use the right type of glue to achieve the desired results. The ideal glue for making window clings is Elmer’s glue or any white school glue which contains polyvinyl acetate (PVA). This type of glue dries clear and is easy to use. There are several types of glue that will not work for this project, such as super glue, hot glue, or tacky glue.
| Type of Glue | Suitable for Window Clings? |
|---|---|
| Elmer’s glue | Yes |
| White School Glue | Yes |
| Super Glue | No |
| Hot Glue | No |
| Tacky Glue | No |
Using the wrong type of glue can result in clings that are too brittle or not durable enough to adhere to the window. Also, when selecting glue, make sure it is fresh as expired glue may not stick properly. If you want to make gloopy glue that is great for sensory play or slime making, check out our article on How to Make Gloopy Glue.
Food Coloring
Using food coloring in your glue mixture is an excellent way to customize your window clings to your liking. Food coloring also adds an element of fun to the process, making it an activity that kids can enjoy as well. When choosing food coloring, be sure to pick high-quality, vibrant colors to make your window clings pop. You can find food coloring at your local grocery store or online.
Here are a few tips to keep in mind when using food coloring in your glue mixture:
- Mix it evenly: When adding food coloring to your glue mixture, be sure to mix it thoroughly to get an even color.
- Experiment with different colors: Don’t be afraid to mix and match your food coloring to create new colors for your window clings. For example, mixing blue and red food coloring can create a beautiful purple hue.
- Start with a small amount: When adding food coloring, use a small amount at first and gradually add more until you reach your desired color.
Using food coloring can be a fun and creative way to personalize your window clings. Try experimenting with different colors and see what unique designs you can create. However, be careful not to overdo it, as too much food coloring can cause the glue to become less sticky and reduce the effectiveness of your window clings.
Plastic Bags
When making window clings with glue, plastic bags make for an excellent tool to apply the mixture to your window. There are a variety of plastic bags you can use, but the best are clear plastic bags with a zip lock. This will make transferring the glue mixture to the bag much easier and less messy.
However, it is essential to make sure the bag is not too thick, as this can make it difficult to trace your design accurately. A thin plastic bag also helps to ensure that the glue mixture is spread thinly across the template or stencil, resulting in better window clings.
If you don’t have a clear plastic bag with a zip lock, do not worry! You can use other types of plastic bags, such as sandwich bags or grocery bags. It is best to choose bags that are sturdy but still thin enough to be able to trace your design through.
Below is a table summarizing the pros and cons of different plastic bag options for making window clings:
| Plastic Bag Type | Pros | Cons |
|---|---|---|
| Clear plastic bag with zip lock | Easy to transfer glue mixture, minimal mess | May be more expensive than other options |
| Sandwich bag | Widely available, easy to find | May not be as durable as other options |
| Grocery bag | Eco-friendly option, sturdy enough for tracing designs | May be too opaque to trace design accurately |
The type of plastic bag you choose ultimately depends on your personal preference and resources. Regardless of the type, it is crucial to ensure that the bag is clean, free from holes, and sturdy enough to hold the glue mixture in place. With a little practice, making window clings with glue using plastic bags can be a fun and easy DIY project!
A Template or Stencil
Using a template or stencil is a crucial step in creating window clings with glue. A template or stencil is a pattern or design that you can use to create a more precise and detailed window cling. With a template, you can easily transfer a specific design onto your cling, making it look more professional.
To create a simple stencil, you can draw your design on paper or cardboard and cut it out with a sharp knife or scissors. You can also buy pre-made stencils at craft stores or online. Using a stencil will save you time and effort, especially if you plan on creating multiple window clings with the same design.
TIP: If you are new to creating window clings, it is a good idea to start with a simple design on your stencil. As you gain more experience, you can experiment with more complex designs.
When using a stencil for your window cling, it’s important to secure it in place on a flat surface before tracing your design with the glue mixture. You can use tape or weights to keep the stencil from moving. Be sure to leave enough space around the stencil to create the border of the cling.
TIP: If you want to create a border around your window cling, use a ruler or other straight edge to trace a line around the stencil before filling in the design.
Using a template or stencil will help you create precise and detailed window clings with glue. It is a simple step that can elevate your final product and make it stand out.
If you need inspiration for designs to use on your stencil, check out our article on how to make cheesecloth ghosts with glue. You can also use the glue mixture to create other fun crafts, like glue balls or goo.
Preparing the Glue Mixture
Mixing the right consistency of glue and food coloring is crucial when it comes to making window clings. The mixture should be thick enough to hold its shape, but not too thick that it won’t stick to the window. In this section, we will go over the step-by-step process of preparing the glue mixture for your window clings. If you’re interested in other DIY projects that require glue, such as making edible glue for sweet trees or body glue, check out our articles on how to make edible glue for sweet trees and how to make body glue.
Step 1: Mix Glue and Food Coloring
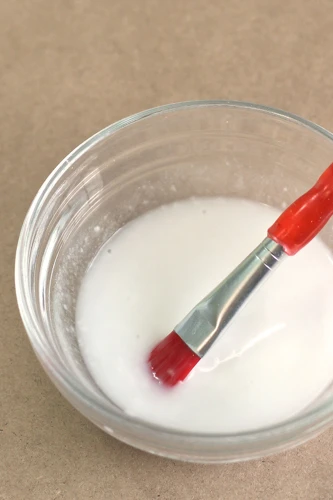
To create your own window clings, the first step is to mix the glue and food coloring together. This will be the base of your window cling that will stick to any smooth surface such as a window or mirror. The materials you’ll need for this step include glue, food coloring, and a bowl to mix the ingredients in.
Use a ratio of two parts glue to one part food coloring. This will give you a thick, durable mixture that will dry into a flexible, adhesive window cling. For example, if you are using ½ cup glue, you’ll want to add ¼ cup of food coloring. Once you have the ratio that you need, combine the two ingredients in a bowl and stir them together.
It’s important to note that the color of the food coloring will affect the final color of your window cling. For example, blue food coloring mixed with glue will result in a blue window cling when it dries. If you want a different color for your window cling, experiment with different food coloring combinations.
| Materials | Quantity |
|---|---|
| Glue | 2 parts |
| Food coloring | 1 part |
| Bowl | 1 |
Once you have mixed the glue and food coloring together, you can move onto the next step of the process. If you’re interested in other projects using glue, such as creating crafting balls, check out our article on that topic. Alternatively, for more fun with glue and water, learn how to make goo with glue and water.
Step 2: Stir Thoroughly
Once you have combined the glue and food coloring, the next step is to stir the mixture thoroughly to ensure that the color is evenly distributed. This step is crucial for achieving the desired result, as uneven coloring can ruin the design of your window cling.
To stir the mixture, it is recommended to use a plastic spoon or a wooden stick. Use a smooth and continuous motion, making sure to scrape the sides and bottom of the container to ensure that all the glue and food coloring are fully mixed.
To check whether the mixture is evenly colored, you can tilt the container to one side and observe the color of the mixture. If there are any light or dark spots, continue stirring until the color is uniform throughout.
Remember that the amount of food coloring used will affect the intensity of the color. If you want a more vibrant color, you may need to add more food coloring and stir again until the desired shade is achieved.
Once you are satisfied with the color and consistency, it is time to move on to the next step in the process – transferring the mixture to a plastic bag.
Step 3: Transfer Mixture to a Plastic Bag
Now, it’s time to transfer the glue mixture from the bowl to a plastic bag. This step is important because it makes it easier to apply the glue mixture onto the stencil or template that you have selected.
To transfer the mixture to a plastic bag, follow the steps below:
- Step 1: Carefully pour the glue mixture into a small bowl.
- Step 2: Hold the plastic bag open with one hand.
- Step 3: Use a spoon or spatula to scoop the glue mixture into the plastic bag.
- Step 4: Make sure that all the air is pushed out of the plastic bag before you seal it.
- Step 5: Cut a small corner off the sealed end of the plastic bag. This will be the opening that you use to apply the glue mixture onto the stencil or template.
Note: It’s important to use a plastic bag that doesn’t have any holes or tears in it. Otherwise, you won’t be able to apply the glue mixture smoothly and your window clings might come out looking uneven. You can also use a plastic squeeze bottle instead of a plastic bag, but make sure that it has a small opening so that you have better control over the amount of glue mixture that comes out.
Creating the Window Cling
Now that you have your colored glue mixture ready, it’s time to create your window cling masterpiece! With a little patience and creativity, you can make beautiful decorations to brighten up any window in your home. Follow these simple steps below for a stress-free crafting experience.
Step 1: Select Your Design
The first step in creating your own window clings is selecting your design. This step is crucial since it sets the tone for the entire project. Here are some tips to help you choose the perfect design for your window clings:
- Think about your interests: Your window clings can be a reflection of your personality or interests. For example, if you love animals, you can choose a design that features your favorite animal.
- Search for inspiration: Take a look at various window cling designs online or in books and magazines. This can give you some ideas on how you want to create your window cling.
- Consider your surroundings: Think about where you’ll be placing the window cling and choose a design that complements the space. If you’re placing it in a child’s room, you can choose a fun and playful design. Alternatively, if it’s for your office, you can choose a design that’s more professional.
- Keep it simple: Since you’ll be tracing the design with glue, it’s best to choose a simple design that you can easily replicate with the glue mixture.
By following these tips, you can choose a design that speaks to you and makes your window clings unique. Remember, the design you choose should be something that you’re proud of and excited to display on your windows.
Step 2: Place Template or Stencil on a Flat Surface
Before you begin tracing your design, it’s important to choose a flat surface to work on. This will ensure that your stencil or template stays in place while you’re tracing and prevent any smudging or errors. Here are some steps to follow when placing your stencil or template:
- Step 1: Find a clean and flat surface to work on. A table or countertop works well.
- Step 2: Place your stencil or template on the surface, making sure it’s centered and secure. You can use tape to keep it in place if necessary.
- Step 3: If you’re using a template, make sure it’s the right size for your window. You can adjust the size by printing it out on a different scale or using a photocopier.
- Step 4: If you’re using a stencil, make sure it’s positioned correctly on the surface. You can use a ruler to measure the distance between the stencil and the edges of the surface to make sure it’s centered and straight.
Once your stencil or template is in place, you’re ready to begin tracing your design with the glue mixture. It’s important to keep your hand steady and take your time to ensure accuracy and neatness. Use a thin layer of the glue mixture for best results, and be careful not to go outside the lines of your stencil or template. With practice, you’ll be able to create beautiful and unique window clings that will add a touch of color and fun to your home or office.
Step 3: Trace Design with Glue Mixture
Once you have your template or stencil in place, it’s time to trace your design with the glue mixture. This step is crucial for creating your window cling. Here’s how you can do it:
| Step 1 | Snip off a corner of the plastic bag containing the glue mixture. This will act as your “pen” for tracing the design. |
| Step 2 | Start by outlining the edges of your design with the glue mixture. Make sure you apply the glue mixture evenly and continuously, without lifting your “pen.” |
| Step 3 | Once you have outlined the edges, fill in the rest of the design with the glue mixture. Again, make sure you apply the glue evenly and continuously. |
| Step 4 | While tracing, try to keep the glue thickness consistent throughout the design. Thicker areas will take longer to dry and may not adhere properly to the window surface, while thin areas may not be visible at all. |
| Step 5 | If you make a mistake while tracing, don’t worry. Simply wait for the glue to dry and use a toothpick or craft knife to carefully remove any excess or misplaced glue. |
Remember to take your time and be patient while tracing your design with the glue mixture. Rushing through this step may lead to an uneven or incomplete cling that won’t stick to your window. So take a deep breath, steady your hand, and enjoy the creative process!
Step 4: Let Dry Overnight
Once you have finished tracing your design with the glue mixture, it is important to let it dry completely overnight before attempting to remove it from the stencil or template. This will ensure that the cling has fully formed and will stick properly to your window surface.
Here are a few tips to help ensure proper drying:
- Place the stencil or template in a flat area where it will not be disturbed.
- Make sure there is proper ventilation in the room to allow the cling to dry properly.
- Avoid touching or moving the stencil/template during the drying process to allow the glue to fully set.
- If you are in a hurry and cannot wait overnight, you can try drying the cling with a hairdryer on low heat. However, air-drying is still the recommended method.
Remember, a fully dried cling will be easier to remove and will stick better to your window surface. Rushing the drying process can lead to smudging or smearing of the design and could cause the cling to fall off the window once applied. So be patient and give your window cling plenty of time to dry overnight for best results.
Step 5: Peel Cling off Stencil or Template
After allowing the glue mixture to dry completely overnight, it’s time to peel the window cling off the stencil or template. This step requires a gentle touch to avoid tearing the cling. Here is a step-by-step guide on how to peel a cling off a stencil or template:
- Step 1: Carefully lift one corner of the cling with your fingernail. Be gentle to avoid tearing the cling.
- Step 2: Slowly peel the cling away from the stencil or template, sliding your fingernail along the surface to keep it level and prevent tearing.
- Step 3: If you encounter a stubborn spot where the cling is sticking to the stencil or template, use a toothpick or tweezers to gently lift and separate the cling from the surface.
- Step 4: Once the cling has been fully peeled off the stencil or template, remove any excess glue on the back of the cling with a damp paper towel.
- Step 5: Place the cling adhesive-side down onto a clean surface, such as a piece of wax paper or plastic wrap, until you’re ready to apply it to your window.
It’s important to handle the cling delicately during the peeling process to ensure it remains intact and doesn’t tear. If you do accidentally tear the cling, you can try piecing it back together with a small amount of glue mixture. However, it’s best to avoid tearing the cling altogether by taking your time during the peeling process. With patience and a gentle touch, you can successfully create beautiful window clings using glue!
Tips and Tricks
As you venture into the world of window cling making, there are a few things to keep in mind to ensure your end result is as perfect as possible. Here are some handy tips and tricks that can take your window clings to the next level. Don’t be afraid to experiment and have fun with the process!
Tip 1: Clean the Window Surface Before Applying
A crucial step in ensuring the success of your window clings is cleaning the surface of the window before you begin. Even the smallest specks of dust or dirt on the window can cause the cling to not adhere properly, resulting in a messy and unattractive finished product. To avoid this frustrating outcome, thoroughly clean the surface of your window with a damp cloth and mild soap. Use a dry cloth to wipe away any excess moisture.
Tip: If you’re working with a particularly dirty or greasy surface, consider using a solution of equal parts vinegar and water to wipe down the window. This will help break down any grease or grime and leave you with a clean surface to work with.
Cleaning the window surface is especially important if you plan to apply the cling to the inside of the window. Make sure to wipe down both sides of the window, as dust and dirt can accumulate on the inside as well.
Tip: Before applying the cling, use a lint roller to remove any last traces of dust or lint from the surface of the window. This will help ensure a smooth, clean surface for your cling to adhere to.
Taking the time to properly clean the window surface before applying your cling will greatly improve the outcome of your project. So don’t skip this important step and be sure to enjoy the beautiful results of your hard work!
Tip 2: Use Stencils for Easy Design Transfer
Design transfer can be a bit tricky when it comes to making window clings with glue. However, a simple solution to this is to use stencils. By using stencils, you can easily transfer any design onto your window cling without the worry of ruining it. Here are some tips on how to use stencils for easy design transfer:
| Tip: | Choose a stencil that fits your window’s shape and size. |
| Tip: | Secure the stencil onto your flat surface (table, countertop, etc.) with tape to prevent it from sliding around. |
| Tip: | Place your plastic bag on top of the stencil and tape it down to keep it in place. |
| Tip: | Trace your design onto the plastic bag with the glue mixture, making sure to follow the stencil’s outline closely. |
| Tip: | Wait until the glue dries completely before peeling off the cling from the stencil. |
By following these tips and using a stencil, you can easily transfer any design onto your window cling with minimal effort and great results. Plus, using a stencil also allows you to create more intricate and detailed designs that may be difficult to free-hand. So, don’t hesitate to experiment with different stencils and designs to create your perfect window cling.
Tip 3: Experiment with Different Food Coloring Colors
Adding color to your window clings can add an extra level of creativity and fun to your project. Don’t be afraid to experiment with different food coloring colors to create a unique and personalized look. Here are some tips on using color effectively:
| Food Coloring Color | Effect on Window Cling |
|---|---|
| Red | Creates a bright and bold look, great for Valentine’s Day or other romantic occasions. |
| Green | Perfect for Christmas or other holiday themes, adds a festive touch. |
| Blue | Creates a cool and calming effect, great for ocean or beach themes. |
| Yellow | Adds a cheerful and sunny touch to your window cling, perfect for springtime or summer projects. |
| Purple | Creates a regal and elegant look, great for formal occasions or royal-themed designs. |
| Orange | Adds a warm and vibrant touch, perfect for fall-inspired designs. |
Remember to start with a small amount of food coloring, as a little goes a long way. You can always add more if you need to. Additionally, mix colors together to create custom shades if you can’t find the exact color you’re looking for. Have fun with color and experiment to find the perfect look for your window clings!
Tip 4: Use a Thin Layer of Glue Mixture for Best Results
When making window clings with glue, it is important to use a thin layer of glue mixture for best results. Applying too much glue can cause the design to become blurry or the cling to not stick properly to the window. To ensure that you are using the correct amount of glue mixture, consider the following tips:
| Tip: | Use a small squeeze bottle or a paintbrush to apply the glue mixture onto the stencil or template. This will help you control the amount of glue being applied and ensure that you are using a thin layer. |
| Tip: | Start by applying a thin layer of glue mixture onto the design, and then add more if necessary. It is better to add more glue than to use too much at once. |
| Tip: | Be patient and allow the glue to dry completely before peeling it off the stencil or template. This will help ensure that the design remains intact and does not smudge. |
By using a thin layer of glue mixture and following these tips, you can create beautiful and professional-looking window clings that will stick with ease to any smooth, clean surface. So next time you’re creating your own window clings, remember to apply a thin layer of glue mixture for the best results!
Conclusion
After following the step-by-step guide, you should have beautiful homemade window clings to adorn your windows with. Creating window clings with glue is a fun and easy DIY project that can be done with items commonly found around the house. The possibilities for designs are endless, as you can create your own stencils or templates or even freehand your unique designs. Experimenting with different food coloring colors will help you achieve the perfect shades to match your home decor or a specific holiday theme. Remember to clean the window surface before applying the clings for long-lasting results.
Not only is making window clings with glue a fun project to do alone or with family and friends, but it’s also a cost-effective way to decorate your home for any occasion. Plus, you can customize the designs to your liking and have the satisfaction of knowing you made them yourself.
If you’re feeling inspired to create more DIY window decor, consider trying out other materials such as contact paper, glitter, or tissue paper. The possibilities for fun and creative window decor are endless, and with a little imagination and some basic materials, you can transform any window into a work of art.
Frequently Asked Questions
1. Can I use any type of glue for making window clings?
No, it’s best to use clear school glue, as it dries clear and doesn’t leave a residue on the window.
2. What type of plastic bag works best for this project?
A small ziplock bag is recommended, as it allows for easy mixing and application of the glue mixture.
3. Can I use paint instead of food coloring?
No, using paint for this project can cause the cling to become too thick and difficult to remove from the stencil or template.
4. Is there a specific type of window that works best for applying window clings?
No, window clings can be applied to any type of window, as long as the surface is clean and dry.
5. Can I reuse a stencil or template for multiple window clings?
Yes, you can reuse a stencil or template as many times as you like, just make sure to clean it between uses.
6. How long should I let the window cling dry before peeling it off the stencil or template?
It’s best to let the cling dry overnight to ensure it is fully dry and easy to remove.
7. Can I add glitter to the glue mixture?
Yes, you can add glitter to the glue mixture for a sparkly effect, just make sure to mix it thoroughly.
8. Is it safe to use food coloring for this project?
Yes, using food coloring for this project is safe and non-toxic.
9. Can I make window clings in different shapes?
Yes, you can use any template or stencil shape for your window cling designs.
10. Will the window clings leave a residue on the window?
No, as long as the surface is clean before application, the window clings should come off easily without leaving a residue.