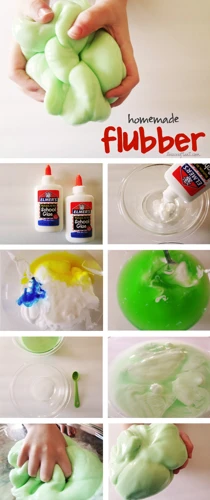
Imagine touching something squishy, stretchy, and utterly amusing to play with. That’s what flubber is — a non-toxic, homemade plaything that has gained popularity due to its unique texture and entertaining qualities. This blog post will guide you through the process of how to make flubber, an engaging science activity that doubles as a fun toy for children and adults alike.
Flubber Ingredients
Homemade Flubber Basics
Before diving into the creation process, let’s outline the essential flubber ingredients. You’ll need white glue, water, and food coloring for the base. To achieve the distinctive stretchy quality, you’ll also need a cross-linking agent, which is typically borax powder mixed with water.
Alternative Flubber Without Borax
For those seeking an alternative, there are flubber recipes without borax. These often use contact lens solution containing boric acid and sodium borate, alongside baking soda, to replicate the cross-linking effect without using borax powder directly.
How to Make Flubber with Glue
Preparing Your Materials
First things first, gather all your materials. You’ll need a mixing bowl, measuring cups, a spoon or spatula, and the ingredients listed in the previous section. Ensure your workspace is covered to avoid any potential mess.
Flubber Recipe With Borax
- In one bowl, mix 3/4 cup of warm water with a cup of glue.
- Add food coloring to the glue mixture until you reach your desired hue.
- In a separate bowl, dissolve 1 teaspoon of borax into 1/2 cup of warm water.
- Slowly pour the borax solution into the glue mixture, stirring continuously.
- Once the mixture thickens and starts pulling away from the bowl’s sides, knead it with your hands.
Flubber Recipe Without Borax
- Combine a cup of glue with 3/4 cup of water in a bowl, adding food coloring as you like.
- In a separate container, mix 1/2 cup of water with 1/4 cup of baking soda and stir until dissolved.
- Add contact lens solution to the baking soda mixture slowly, mixing until it starts to form.
- Pour this mixture into the glue, and stir until the substance becomes firmer.
- Remove from the bowl and knead until it reaches the desired consistency.
The Flubber Experiment
Observing Flubber Properties
Once you make flubber, observe its fascinating characteristics. Stretch it, bounce it, and watch how it flows slowly when left on a flat surface. These properties make flubber an excellent tool for sensory play and scientific exploration.
Scientific Explanation of Flubber
Flubber is a polymer, which means it’s made of long chains of molecules interconnected to form a stretchy and flexible material. The cross-linking agent — either borax or an alternative — causes the glue’s polymer molecules to link together, creating flubber’s unique texture.
DIY Flubber Tips and Tricks
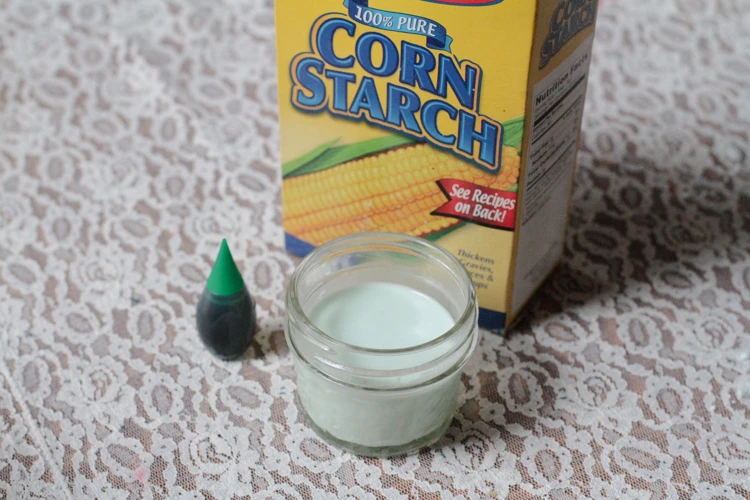
For the best experience with your homemade flubber, store it in an airtight container to prevent drying out. If it gets a little wet or sticky over time, a sprinkle of cornstarch can revive its original texture. Also, playing with flubber on a hard surface makes it easier to clean up afterward.
Flubber Slime Variations
Colorful Flubber Slime
Adding different colors to separate batches and then combining them can create a marbled effect. Experiment with glow-in-the-dark paint for a flubber that lights up the dark.
Glittery Flubber Slime
For a sparkling touch, introduce fine glitter into the mix. The glitter will be suspended in the flubber, creating a mesmerizing visual effect, especially when stretched and squished.
Safety Precautions for Flubber Making
While creating flubber is generally safe, it’s essential to supervise young children to ensure they don’t ingest any ingredients. Wash hands thoroughly after playing with flubber, and avoid contact with the eyes and mouth. In case of any allergic reactions, discontinue use immediately.
FAQs on Making Flubber
- Can you make flubber with clear glue? Yes, clear glue can also be used to create a translucent flubber.
- How long does homemade flubber last? Flubber can last several weeks when stored properly in an airtight container.
- What if my flubber is too sticky? Adding a bit more of the cross-linking agent can help reduce stickiness.
If you’re interested in fun and creative DIY projects using glue, you’re in the right place! Not only can you learn how to make flubber with glue for a squishy, stretchy good time, but you can also explore other glue crafts. Discover how to make gak with glue for a different kind of slimy fun, or if you’re into arts and crafts, find out how to crackle paint with glue to achieve a vintage look on your furniture or artwork. And for the curious minds, we have a unique guide on how to make gobbledy glue, a mysterious substance that’s sure to pique your interest!
Conclusion: Enjoying Your Homemade Flubber
Flubber isn’t just a fun craft; it’s a gateway to understanding basic chemistry through hands-on learning. By following this guide, you’ve learned not only how to make flubber with glue but also how to experiment with its properties. Enjoy your colorful, squishy creation, and remember to share the fun with others!