Gluing wood can be a challenging task, especially when you don’t have the necessary tools like clamps. Without clamps, you might be wondering if gluing wood is possible. The good news is that you can glue wood without clamps. However, the process requires careful preparation and a few special techniques. In this guide, we’ll take a comprehensive look at how you can glue wood without clamps. Whether you’re a novice or an experienced woodworker, you’ll learn some valuable tips and tricks that will help you achieve a strong and lasting bond without clamps. So, let’s dive in and explore the various methods you can use to glue wood without clamps.
Why no clamps?
As a beginner woodworker, you may not have all the tools necessary to complete a project, which may include clamps. However, even if you do have clamps, there may be instances where you can’t use them. In this section, we will explore why clamps may not be an option, including situations where they’re not necessary and when no clamps are available. So, if you’re facing a situation where clamping isn’t feasible, don’t worry! We have alternatives that work just as well.
When clamps aren’t necessary
When clamps aren’t necessary: While clamps are a preferred way to apply pressure for woodworking, there are instances when they may not be necessary. One such case is when you’re working with a small project, where using clamps may not be feasible. Additionally, when you’re doing repairs on a piece of furniture that is still functional and, therefore, cannot be disassembled, clamps cannot be used. Alternatively, when you want to use an adhesive that requires the bonding surfaces to remain in contact for a shorter period, clamps may not be the best option.
In such situations, there are numerous other options available that you can use to apply pressure. For example, you can use aluminum foil to apply direct pressure on the bonded surfaces. You can also use a heavy object, like a book, to apply weight and gravity and help the bond become stronger. Additionally, you can use specially designed hot glue gun nozzles that can be adjusted to apply the right amount of glue and pressure to the wood.
Another alternative method is the use of a spray adhesive. This type of adhesive creates an instant bond between the surfaces and doesn’t require any clamping. Similarly, you can use hot glue to attach small pieces of wood together without needing any clamps. With hot glue, you get a fast drying time, and the bond is quite strong.
Instead of clamps, you can use wooden wedges or toggle clamps to apply pressure to the wood pieces. These clamps are specially designed to exert pressure on the wood from different angles, and the use of multiple wedges or clamps ensures consistent pressure application. Alternatively, you can use craft sticks or wooden jigs to hold wood pieces together while the glue dries.
It is critical to note that when clamps aren’t used, it is essential to be patient and allow the glue sufficient drying time. You should also avoid moving the wood pieces during the curing process to achieve a robust bond.
No clamps available
We’ve all been there – in the middle of a project, ready to glue two pieces of wood together, only to realize that there are no clamps available. Don’t panic! There are still ways to successfully glue wood without clamps.
1. Use heavy objects: Look around for any heavy objects such as books, bricks, or even your toolbox. Place them on top of the wood to provide pressure, allowing the glue to bond effectively. Make sure to cover the objects with plastic or cloth in case of any glue drips.
2. Utilize furniture: If you don’t have any heavy objects lying around, furniture can serve as a great alternative. For example, use a chair or a table as a support for the wood. Apply glue to both pieces of wood, press them together, and let them lean against the furniture. The weight of the furniture will provide pressure and hold the pieces in place.
3. Duct tape: Duct tape can be an effective substitute for clamps. Wrap the duct tape tightly around the piece of wood, making sure that it stays in place. Leave the tape on until the glue dries.
4. Use wooden dowels: If you have wooden dowels of the same thickness as your wood pieces, you can use them as makeshift clamps. Apply glue and insert the dowels through both pieces of wood, twisting to tighten them. Once the glue is dry, you can remove the dowels.
5. Hot glue: Hot glue can also be a substitute for clamps. Apply hot glue along the edge of the wood and press the pieces together firmly. The hot glue will dry quickly and hold the pieces in place. However, hot glue might not be strong enough for heavy-duty projects.
These are just a few of the alternatives to consider when no clamps are available. Be creative and resourceful – you never know what might work in a pinch! However, use caution and make sure to choose a method that is appropriate for your project. If you need further guidance on how to use hot glue, check out our guide on using hot glue.
Preparation
Before you begin gluing wood without clamps, it is important to take the time for preparation. Proper preparation can help ensure a successful glue-up and give your project the best chance at longevity. This includes cleaning and drying the surfaces, testing the fit, and gathering all necessary materials. A little extra effort during this step can save time and frustration later on. Now, let’s dive deeper into the preparation stage and take a closer look at each crucial component.
Clean and dry surfaces
Before beginning the gluing process, it’s important to clean and dry the surfaces that will be bonded together. Any debris, dust, or moisture on the wood can prevent a strong bond from forming. To clean the surfaces, use a clean cloth to wipe away any dirt or debris. If there is moisture on the wood, allow it to dry completely before proceeding with gluing.
Here are some tips for cleaning and drying surfaces:
- Use a dry microfiber cloth to remove any dust or debris.
- If there are any stubborn stains or residues, use a damp cloth to gently wipe them away. Make sure to dry the area completely after wiping.
- For oily or greasy surfaces, use a degreaser or rubbing alcohol to remove the residue. Wipe the area with a dry cloth to remove any excess cleaning solution.
- Make sure to check the wood for any splinters or rough spots and sand them down to create a smooth surface for gluing.
It’s essential that the surfaces are completely dry before applying any glue. Moisture can weaken the bond between the two pieces of wood and cause the glue to fail. To ensure that the wood is dry, leave it in a dry, well-ventilated area for several hours or overnight.
Remember, the success of any gluing project depends on the preparation. Taking the time to properly clean and dry the surfaces will ensure that the glue bonds effectively. For more information on how to use hot glue, refer to our article on hot glue basics.
Test fit
Before applying glue, it’s important to do a test fit to ensure a tight and secure joint. A test fit involves positioning the pieces together without glue to see if there are any gaps or misalignments. This step is especially important when gluing multiple pieces of wood together.
To perform a test fit, follow these steps:
| Steps | Description |
|---|---|
| 1 | Check for fit |
| 2 | Apply pressure |
| 3 | Check alignment |
| 4 | Adjust if necessary |
First, check to make sure that the pieces fit together properly without any gaps or misalignments. Apply gentle pressure to see if the pieces stay in place and are flush with each other. Check the alignment of the pieces to ensure they are in the correct position.
If there are any issues with the fit or alignment, adjust the pieces as necessary before applying glue. Sometimes, it may be necessary to sand or trim the pieces to achieve a better fit. However, be careful not to remove too much material as this can weaken the joint.
By taking the time to do a test fit, you can prevent issues with the final product and ensure a strong and secure joint. Once you’re satisfied with the fit, you can move on to the next step of preparing the surfaces for gluing.
Pro tip: If you’re uncertain about the type of glue to use, check out our article on what glue to use in a glue gun. Or, if you’re interested in using a hot glue gun for your project, read our guide on how to use a hot glue dent puller or find out how long hot glue takes to dry on plastic in our article on how long hot glue takes to dry on plastic.
Gather materials
To successfully glue wood without clamps, you will need to make sure you have all the necessary materials on hand. Here are the essential materials you will need for the job:
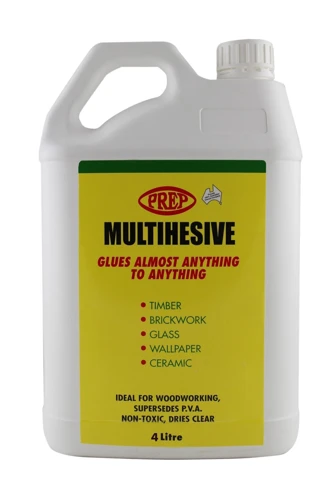
- Wood glue: Choose a high-quality wood glue that is appropriate for your specific project.
- Wooden sticks: These will be used as applicators for the glue.
- Sandpaper: For smoothing the surfaces before applying the glue.
- Clean cloth: To wipe away excess glue and to keep the area clean.
- Weights or heavy objects: These will be used to hold the wood pieces together while the glue dries.
- Masking tape: This can be used to hold the wood pieces in place if they are not staying put with just finger pressure or gravity.
Other items that may come in handy include clamps, wooden jigs, or wooden wedges. These tools can be helpful in keeping the wood pieces aligned, but they are not necessary if you follow the methods outlined in this article.
Be sure to choose a material that will not damage the wood. For example, avoid rubber bands or metal weights that can dent or scratch the wood surface. It is also important to have a clean work area to prevent any debris or dirt from getting in the glue or on the wood pieces. With the right materials on hand, you can proceed to the next steps for gluing wood without clamps.
Application Methods
Now that we’ve covered the preparation stage, let’s move on to the various methods of applying glue without clamps. There are several techniques that can be used to achieve a strong and reliable bond between two pieces of wood. Each method has its own advantages and disadvantages, so it’s important to choose the one that best suits your project needs. Let’s explore these techniques in more detail below.
Finger Pressure
One method of gluing wood without clamps is by using finger pressure. This technique involves pressing the two surfaces firmly together with your hands to create a strong bond.
Here are the steps to follow:
- Apply a thin layer of glue to one of the surfaces to be joined.
- Press the two surfaces together, aligning them as accurately as possible. Use your fingers to apply pressure across the entire surface for several minutes.
- Continue applying pressure for at least 30 minutes to allow the glue to set and the bond to form.
It’s important to note that this method is only suitable for small and light pieces of wood, as it may not provide enough pressure for larger or heavier pieces.
Tips:
- Wear gloves to protect your hands from excess glue.
- Use a scrap piece of wood as a backing to provide extra support while applying pressure.
While finger pressure may not be the strongest or most reliable method of gluing wood, it can be effective for small projects or those with limited resources. Always keep in mind the weight and size of the wood pieces when deciding on the best gluing method to use.
Weight and Gravity
When you don’t have clamps at your disposal, you can still glue wood together using the power of weight and gravity. This method is best used when gluing long, straight boards together or when working on a horizontal surface.
Here are the steps for using weight and gravity to glue wood without clamps:
- Apply glue to one of the surfaces.
- Place the two surfaces together, making sure they are flush.
- Position heavy objects on top of the wood, spaced evenly over the area you are gluing.
- Allow the weight from the objects to press the wood together.
- Leave the objects in place until the glue has fully dried, usually 24 hours.
It’s important to choose objects that are heavy enough to provide sufficient pressure, but not so heavy that they will damage the wood or cause the surfaces to slip. You can use anything from bricks to books to achieve the necessary weight.
It’s worth noting that this method may not be suitable for every project. If the wood you are gluing together has irregular surfaces or gaps, you might need to use a different method to ensure a strong bond.
Here are some additional tips for using weight and gravity to glue wood:
- Make sure the wood is completely level to prevent the surfaces from sliding.
- Consider using a scrap piece of wood between the surface and the heavy objects to prevent them from leaving marks or indentations.
- Avoid placing heavy objects near the edges of the wood to prevent the surfaces from slipping or separating.
By using weight and gravity to your advantage, you can successfully glue wood together without clamps. Remember to be patient and allow the glue to fully dry before removing the heavy objects.
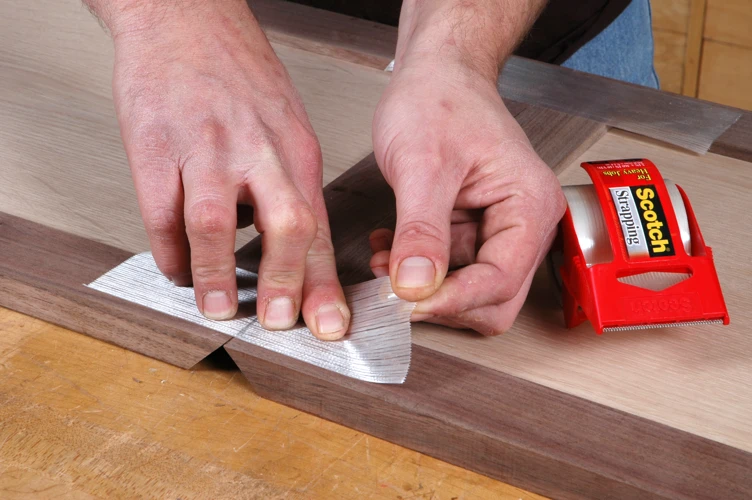
Tape Method
One of the easiest ways to glue wood without clamps is by using the tape method. It is an effective approach if you don’t have clamps available or if the surface is in an awkward position where a clamp would be difficult to use. This method works best with smaller projects or areas that require precision.
To use the tape method, follow these simple steps:
- Clean the surfaces: As with any application method for gluing wood, you need to make sure the surfaces are clean and free from any debris. Use a damp cloth to wipe down both surfaces and let them dry completely.
- Apply glue: Apply a thin layer of glue to one of the surfaces. It’s essential to use the right amount of glue. Too little, and the bond will be weak, too much, and you’ll have a mess to clean up. A good rule of thumb is to use just enough glue to cover the surface with a thin layer.
- Secure the joint: Once you’ve applied the glue, align the two surfaces and press them together. Use your fingers to apply pressure around the edges to ensure they have made contact.
- Tape it up: Once you have the wood pieces in the proper position, apply painter’s tape over the joint. Make sure to wrap the tape tightly around the wood to hold it in place while the glue dries.
- Let it dry: Allow the glue to dry completely before removing the tape. Depending on the type of glue used, it could take anywhere from a few hours to overnight. Refer to the adhesive manufacturer’s instructions for drying times.
- Remove the tape: Once the glue has dried, carefully remove the tape from around the joint. Be sure to remove it slowly to avoid any damage to the wood surface.
The tape method provides a reliable solution when clamps aren’t available or when they’re not the best option. However, it’s essential to use painter’s tape as opposed to regular masking tape. Painter’s tape is gentle on wood and won’t leave any adhesive residue.
Another advantage of using the tape method is that you can use it with a wide range of adhesives. From PVA glue to epoxy, the tape method is versatile in its application.
Remember to use caution when working with this method, you should not rush the drying process; otherwise, the bond won’t be strong enough.
Clamp Alternatives
When it comes to gluing wood without clamps, there are various alternatives that can do the job just as well. Here are some options to consider:
- Bungee Cords: Bungee cords can be used to hold two pieces of wood together while the glue dries. Simply wrap the bungee cords around the wood tightly, but be careful not to apply too much pressure otherwise it can cause the wood to warp.
- Rope: Rope can also be used as an alternative to clamps. Use the rope to tightly tie the wood pieces together. However, similar to bungee cords, too much tension can also cause the wood to bend or warp.
- Clothespins: Clothespins are commonly used as a substitute for clamps. They can be clamped along the edges of the two pieces of wood, holding them together. It’s important to use enough clothespins to provide proper pressure across the entire glued area.
- Duct Tape: Duct Tape can be wrapped around the wood pieces like a bandage, holding them together tightly. It’s important to use multiple layers for best results. The duct tape will need to be removed once the glue has dried completely.
- C-Clamps: Though they may technically be considered clamps, C-clamps are a great alternative to traditional clamps. They can be placed on the edges of the wood pieces and tightened to provide the necessary pressure. Be sure to use enough clamps to cover the whole surface area of the glued section.
- Pinch Rods: Pinch rods are similar to C-clamps, but the pressure is applied from above instead of the sides. They can be used for larger projects as they can exert more pressure than traditional clamps.
Note: Regardless of which alternative method you choose, proper pressure is the key to a successful glue up. Be cautious not to over tighten which could cause warping or breaking the delicate pieces of the wood.
Chemical Adhesives
One alternative to clamping when gluing wood together is the use of chemical adhesives. These adhesives come in various forms such as epoxy, polyurethane, and cyanoacrylate (also known as super glue).
Chemical adhesives have several advantages over traditional clamps. They typically have a faster drying time than glue, and they often create a stronger bond. They are also useful in situations where clamps cannot be used effectively, such as when gluing irregularly shaped pieces or tight spaces.
Here is a table comparing some popular chemical adhesives for wood:
| Adhesive | Strength | Drying Time | Waterproof | Price |
|---|---|---|---|---|
| Epoxy | Strongest | 30 minutes – 24 hours | Yes | $$$ |
| Polyurethane | Strong | 1-4 hours | Yes | $$ |
| Cyanoacrylate | Medium | 10-60 seconds | No | $ |
When using a chemical adhesive, it is important to follow the manufacturer’s instructions carefully. Wear gloves and eye protection, and ensure that the surfaces to be glued are clean and dry. Apply the adhesive sparingly and evenly, being careful not to use too much and cause the glue to drip or run.
Chemical adhesives can be a useful alternative to clamping for glueing wood together, providing a strong and reliable bond. However, they come at a higher cost than traditional glue and may require greater care and attention during the application process.
Hot Glue
When it comes to gluing wood without clamps, hot glue can be a reliable alternative. Here’s how you can use hot glue in your woodworking projects:
| Step 1: | Prepare your surfaces by cleaning and drying them. |
| Step 2: | Apply a small amount of hot glue to one surface and press the two surfaces together while the glue is still warm. |
| Step 3: | Hold the two surfaces firmly together until the glue cools and hardens, which usually takes just a few minutes. |
| Step 4: | Repeat on all desired surfaces. |
While hot glue can be a quick and easy alternative to clamps, it may not be the best choice for all projects. Hot glue is not as strong as some other types of adhesive, so it may not be suitable for projects that will be subjected to heavy stress or weight. Additionally, hot glue may not be the best choice for projects that will be exposed to high temperatures or moisture.
Hot glue can be a convenient and effective option for gluing wood without clamps in certain situations. Just be sure to consider the unique needs and demands of your specific project to ensure that hot glue is the right choice for you.
Wooden Jig
A wooden jig is a specially made tool that assists in gluing wood without using clamps. This method is particularly helpful when gluing smaller pieces of wood together. Here are the steps to create a wooden jig:
- Measure the wood pieces: Start by measuring the wood pieces that need to be glued together. Then create a wooden framework that will hold the pieces in place during the gluing process.
- Cut the wooden framework: Cut the wooden framework to match the measurements of the pieces. Use a saw to create the corners of the framework.
- Glue the wooden framework: Apply wood glue to the corners of the wooden framework and attach them together, creating a rectangular or square shape that will hold the wood pieces. Allow the glue to dry completely before moving onto the next step.
- Place the wood pieces: Apply glue to the surfaces of the wood pieces that need to be joined together. Then place them inside the wooden framework, making sure that they are lined up correctly and that the glue is evenly distributed.
- Attach the jig: Once the wood pieces are in place, attach the wooden jig to the pieces with clamps or weights. The jig will hold the wood pieces in place as the glue dries.
- Dry and remove the jig: Allow the glue to dry completely, according to the manufacturer’s instructions. Once dry, remove the clamps or weights and carefully remove the wooden jig from the wood pieces.
Using a wooden jig can be an effective way of gluing wood without clamps, especially when working with smaller pieces of wood. However, it’s important to take the necessary precautions and use the right amount of glue to ensure a strong and secure bond.
Wooden Wedges
One of the best alternatives to clamps for gluing wood is using wooden wedges. This method works well for larger projects or when you need to glue several pieces together at once.
To use wooden wedges, you will need a few simple materials:
| Materials: | |
| Wooden wedges | To apply pressure to the joint |
| Titebond III Ultimate Wood Glue | A strong wood glue that dries clear |
| Brush or roller | To apply the glue evenly |
| Wooden blocks or scrap | To protect your project and distribute pressure |
The first step is to apply a thin, even coat of glue to the surfaces you want to join. Lay the pieces together and press them firmly. Next, insert the wooden wedges tightly into the joint at a slight angle. The wedges should be placed at regular intervals along the joint to ensure even pressure.
Once all of the wedges are in place, you can gently tap them in further to increase pressure as needed. You can also add more wedges if necessary. Be careful not to damage your project or apply too much pressure.
After the glue has dried, gently remove the wedges by tapping them back out with a hammer and chisel or a block of wood. Sand any excess glue from the joint and finish your project as desired.
Tips:
- Use enough wedges to ensure even pressure along the joint
- Protect your project by placing wooden blocks or scrap on either side of the joint
- Be careful not to apply too much pressure and damage your project
- Allow the glue to dry completely before removing the wedges
Using wooden wedges is a simple and effective alternative to clamps for gluing wood. It can be especially helpful for larger projects and when you don’t have access to clamps. With a bit of patience and practice, you’ll be able to use this method with confidence and achieve strong, durable joints.
Toggle Clamps
Toggle clamps are handy tools that leverage the power of a mechanical lever to secure wood pieces together. They are spring-loaded and can generate a considerable amount of clamping force, making them ideal for holding wood pieces in place when you don’t have clamps available.
Toggle clamps come in different sizes and styles, and can be purchased at any hardware store. They are easy to use, just follow the manufacturer’s instructions, and they will do the work for you, ensuring that your glue joints are tight and secure.
Here is a list of toggle clamps you can use:
| Toggle Clamp | Description |
|---|---|
| Push-Pull Toggle Clamp | This type of clamp is perfect for holding together small pieces of wood. It has a small profile and can fit in tight spaces, making it an excellent choice for intricate projects. |
| Vertical Toggle Clamp | This clamp is designed to hold pieces of wood upright, making it perfect for edge joining or other vertical applications. |
| Horizontal Toggle Clamp | This clamp is designed to hold pieces of wood flat, making it perfect for flat or table-like projects. |
| Toggle Plunger Clamp | This clamp has a unique design that allows it to plunge down onto the workpiece, making it ideal for holding shelves or other vertical applications. |
Toggle clamps can be an effective alternative to traditional clamps when gluing wood without clamps. However, use caution when using them, and make sure to remove them before the glue dries to avoid damaging your project.
Tips and Tricks
As you dive into the world of wood gluing without clamps, it’s important to keep a few tips and tricks in mind to ensure your project turns out perfectly. These techniques have been tried and tested by experts in the field and will help you overcome any obstacles or challenges you may encounter along the way. Stick around for some essential advice that will elevate your wood gluing game to the next level!
Use a scrap piece
When attempting to glue wood without clamps, it can be helpful to use a scrap piece of the same type of wood as your project to help keep things in place. By attaching the scrap piece to one side of the joint with tape, you can apply glue to the other side and then press the two pieces together, with the scrap piece acting as a buffer to prevent the joint from sliding out of place.
Additionally, using a scrap piece can help protect your project from accidental damage when applying pressure or weight to hold the joint together. Here are some tips to keep in mind when using a scrap piece:
| Tip | Description |
|---|---|
| Choose the right size | Make sure the scrap piece is large enough to cover the entire joint and provide enough surface area for the tape to adhere properly. |
| Position it carefully | Place the scrap piece on the opposite side of the joint that you will be applying glue to. Make sure it is centered and in the correct position before attaching with tape. |
| Use enough tape | Apply tape to both the scrap piece and the project piece to ensure a secure hold during the glueing process. |
| Remove it carefully | After the glue has dried, remove the scrap piece and any tape residue carefully to avoid damaging the joint. |
Using a scrap piece can help make the process of gluing wood without clamps more manageable and prevent any unwanted joint movements. Just be sure to choose the right size, place it carefully, use enough tape and remove it carefully after the glue has dried.
Be patient
When gluing wood without clamps, it’s important to remember to be patient throughout the process in order to achieve the best results possible. Rushing through the steps can lead to a weaker bond and a less durable overall project. Here are a few things to keep in mind when exercising patience during the process:
- Maintain Pressure: Whether you’re using finger pressure, weight and gravity, or an alternative method, make sure to maintain pressure on the joint until the glue sets. This may take several hours, so plan your time accordingly and avoid moving or disturbing the piece during this period.
- Allow Drying Time: After the glue has set, allow it to dry completely. This may take up to 24 hours, depending on the type of glue used and the humidity levels in the environment. Avoid handling the piece during this time, as any movement or stress on the joint can weaken the bond.
- Avoid Overly Moist Environments: If possible, avoid exposing the piece to overly moist environments during the drying process, as this can impede the glue from drying properly and weaken the bond.
- Check for Bond Strength: Once the glue has dried, check the bond to ensure it’s strong and secure. If the joint feels weak, allow it to set and dry for a longer period of time, or consider reapplying the glue and repeating the process.
- Protect the Project: Finally, once the glue has fully dried and the bond is strong, take steps to protect the project from potential damage. This may include adding a sealant or finish to the wood surface to help protect it from moisture and other environmental factors.
Remember, being patient throughout the gluing process can help ensure a stronger bond and a more successful outcome for your project.
Use the right amount of glue
Using the right amount of glue is crucial in avoiding a mess and ensuring the quality of the finished result. A common mistake is using too much glue, which can cause the wood to warp or the glue to dry slowly. On the other hand, using too little glue can result in a weak bond or the pieces not sticking together at all.
To determine the appropriate amount of glue to use, consider the size and type of wood being glued, as well as the type of glue being used. Some adhesives require more glue than others to create a strong bond.
The following table provides a general guideline for the amount of glue needed based on the size of the wood pieces being glued together:
| Wood Size | Amount of Glue |
|---|---|
| Thin strips or small pieces | A thin coating of glue |
| Small to medium-sized pieces | A small bead of glue along each edge |
| Large pieces or panels | A generous amount of glue spread evenly across the surface |
It’s always better to start with less and add more as needed, rather than using too much glue right away. It’s also important to apply the glue evenly to avoid lumps and bumps that can affect the final look and quality of the project.
Remember, using the right amount of glue not only helps to create a strong bond, but also prevents damage to the wood and ensures a smoother and cleaner finishing process.
Clean up excess glue
When working with glue, it’s important to keep in mind that excess glue can ruin the appearance of your project. Here are some tips for cleaning up excess glue:
- Wipe away excess glue immediately: As soon as you notice excess glue on your project, wipe it away with a damp cloth or paper towel. Waiting too long can cause the glue to dry and harden, making it more difficult to remove.
- Scrape away excess glue: If the glue has already dried, use a scraper or razor blade to carefully remove as much excess glue as possible without damaging the surrounding wood. Be careful not to scratch the wood surface.
- Sand away remaining residue: For any remaining glue residue, use sandpaper to gently sand it away. Start with a coarse grit sandpaper and gradually work your way up to a finer grit until the area feels smooth to the touch.
- Clean with acetone: If the glue is particularly stubborn, you can use acetone to dissolve it. Apply a small amount of acetone to a cloth and gently rub the area until the glue dissolves. Be sure to rinse the area with water afterward to remove any residue.
- Protect surrounding areas: To protect the surrounding wood from excess glue, place a piece of masking tape or painter’s tape around the area you are gluing. This will make it easier to clean up any excess glue and prevent it from spreading to other areas of your project.
By following these tips, you can ensure that your project looks its best by keeping excess glue at bay.
Let the glue dry
Allowing the glue to dry completely is crucial for a strong bond between the pieces of wood. The drying time can vary depending on the type of glue used and the conditions, such as temperature and humidity. Refer to the manufacturer’s instructions for the recommended drying time.
Type of glue | Drying time | Conditions
— | — | —
PVA Glue | 30 minutes to 1 hour | Room temperature and moderate humidity
Cyanoacrylate Glue (Super Glue) | Few seconds to few minutes | Low to moderate humidity
Epoxy Glue | 24 hours | Room temperature and dry conditions
Polyurethane Glue | 2 to 6 hours | Room temperature and high humidity
It is important not to disturb or move the wood pieces during the drying process as this can weaken the bond. Once the glue is dry, check for any gaps or areas that may need additional glue or touch-ups. Sand down any excess glue and finish the project as desired. Properly allowing the glue to dry will ensure a strong and long-lasting bond between the wood pieces.
Protect your project
One important aspect of any DIY project is protecting the final product. When it comes to gluing wood without clamps, there are several protective measures you can take to ensure your project remains free of damage.
Protective Measure | Description
— | —
Cover with wax paper | Before gluing, place a piece of wax paper or parchment paper over your work surface. This will prevent any glue drips from sticking to your countertop or table.
Protect with tape | Another option is to use painter’s tape to protect the surrounding areas. Simply place the tape around the edges of your project before applying the glue.
Use a scrap piece | If you have a scrap piece of wood lying around, place it between your project and any clamps or other tools you’re using. This will help prevent any nicks or dents in your woodworking project.
Sand and seal | After your glue has dried, take some sandpaper and smooth out any rough edges or excess glue. Finish off the project with a sealant or varnish to further protect it from wear and tear.
By taking the time to protect your project during the gluing process, you’ll ensure that it remains in the best possible shape once it’s complete. Whether you opt to use wax paper, tape, or a scrap piece of wood, the end result will be well worth the extra effort.
Use caution
When gluing wood without clamps, it’s important to use caution to avoid injuries or damaging your project. Here are some safety tips to keep in mind:
- Wear protective gear: It’s always a good idea to wear gloves and eye protection when working with glue and wood.
- Avoid contact with skin: Some glues can cause skin irritation or allergic reactions, so make sure to avoid contact with your skin. If you do get glue on your skin, wash it off immediately with soap and water.
- Work in a well-ventilated area: Many glues emit fumes that can be harmful if inhaled, so make sure to work in a well-ventilated area or wear a mask.
- Keep glue away from children: Glue can be toxic if ingested, so make sure to keep it out of reach of children and pets.
- Don’t rush: Take your time and work carefully to avoid making mistakes or causing damage to your project.
By following these safety tips, you can ensure that your woodworking project is not only successful but also safe for you and others involved. Remember to always use caution when working with glue and wood.
Conclusion
After reading this comprehensive guide, you now have the knowledge and confidence to glue wood without clamps. By understanding when clamps are necessary, and the various alternative methods available, you can choose the technique that works best for your project.
Remember to take the time to properly prepare your surfaces and gather all necessary materials before beginning. When applying the glue, use a steady hand and the appropriate amount to ensure a strong bond.
While there may be situations where clamps are the best option, there are many scenarios where they simply aren’t necessary or aren’t available. By using finger pressure, weight and gravity, tape, or other clamp alternatives, you can achieve the same results without the added expense and hassle of clamps.
It’s also important to remember to use caution and protect your project while working with glue, regardless of whether or not you’re using clamps. Clean up any excess glue and let it dry completely before applying any further pressure or handling the project.
In conclusion, gluing wood without clamps is a skill that every woodworker should have in their toolbox. With the right preparation, application techniques, and tools, you can achieve strong and lasting bonds between your pieces of wood, without the need for clamps. So next time you’re faced with a project that requires glue but no clamps, don’t be intimidated – you’ve got this!
Frequently Asked Questions
Can I glue wood without clamps?
Yes, you can glue wood without clamps. There are alternative methods that can be used.
What is the tape method?
The tape method involves applying tape over the joint to hold the pieces of wood together while the glue dries. It is important to use strong tape that does not tear easily.
Is finger pressure effective for gluing wood?
Finger pressure can be effective for gluing wood, but it requires a longer period of time to ensure that the pieces have been bonded securely.
What are some clamp alternatives for gluing wood?
Some alternative methods to clamping include using a wooden jig, wooden wedges, or toggle clamps. These methods can be effective for smaller projects.
What type of chemical adhesive should I use for gluing wood?
The type of chemical adhesive you should use for gluing wood depends on the specific project. Some popular options include polyurethane glue, epoxy, and cyanoacrylate glue.
Is hot glue suitable for gluing wood?
Hot glue can be used for gluing wood, but it is not recommended for projects that require a strong and durable bond. It is better suited for arts and crafts.
What are wooden wedges and how are they used?
Wooden wedges are small pieces of wood that are used to apply pressure to the joint. They are placed between the wood pieces and tapped into place until a secure bond is formed.
How do I protect my project while the glue is drying?
You can protect your project while the glue is drying by covering it with a piece of plastic or wax paper. This will prevent any dust or debris from getting onto the wet glue.
What should I do if I use too much glue?
If you use too much glue, gently wipe away the excess with a damp cloth. Do not remove too much glue, as it can weaken the bond between the pieces of wood.
What is the most important thing to remember when gluing wood without clamps?
The most important thing to remember when gluing wood without clamps is to be patient. Give the glue enough time to dry and ensure that a strong bond has been formed before removing any pressure or weight from the joint.