Introduction
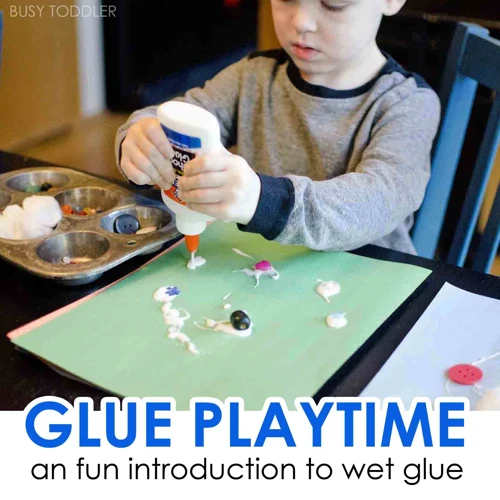
Hot glue is a versatile adhesive that can be used in a variety of crafts and DIY projects. It is a type of thermoplastic adhesive that is versatile and easy to use, making it a popular choice for beginners and experienced crafters alike. If you are new to hot gluing, you may be wondering how to get started. In this guide, we will provide you with a comprehensive beginner’s guide on how to use hot glue, including selecting the right glue gun and sticks, preparing your work surface, and common mistakes to avoid. Read on to learn more!
What is Hot Glue?
Hot glue is a type of adhesive product that is melted using a hot glue gun and applied to surfaces to hold them together. The glue is made from thermoplastic material, which means that it becomes soft and pliable when heated and solidifies when cooled. Hot glue is a versatile and easy-to-use adhesive that can bond a wide range of materials together.
Using hot glue is a popular choice for arts and crafts projects, home repairs, and DIY projects because of its fast drying time and strong bonding ability. It can be used to glue together materials such as wood, fabric, plastic, and foam, among others.
One of the benefits of hot glue is that it can be used on both porous and non-porous surfaces, and it is resistant to water and humidity. It can also be used to fill gaps and holes in materials, making it a useful product for repairing damaged items.
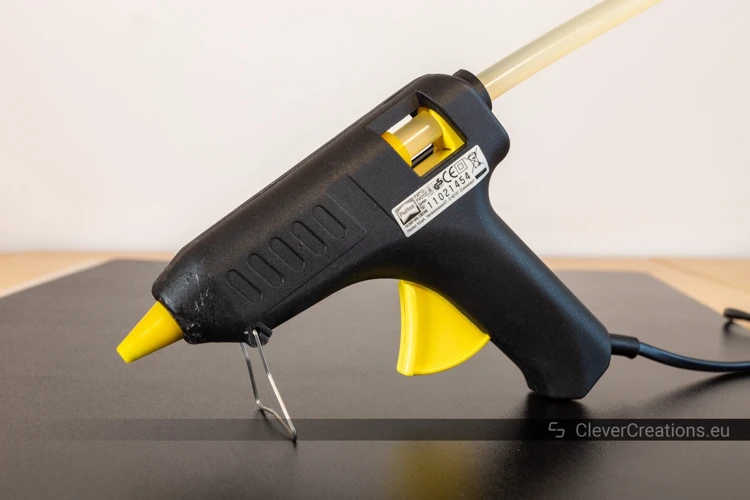
A hot glue gun is required to use hot glue. These devices have an internal heating element that melts the glue sticks and an attached trigger that dispenses the melted glue onto the surface being bonded. Hot glue guns are available in different sizes and shapes, so it’s important to choose the right one for your project.
While hot glue is generally safe to use, it’s important to take precautions to avoid burns. Use caution when handling the hot glue gun and avoid touching the hot glue until it has cooled. If you experience skin contact with hot glue, run it under cool water until the glue has solidified and then gently remove it. If you have any concerns about the safety of hot glue, consult a medical professional.
There are many creative uses for hot glue, from making hot glue stencils to creating beautiful hot glue snowflakes or pinata glue. However, it’s important to follow proper techniques to avoid common mistakes like using too much glue or not clamping the pieces together.
If you want to learn how to fix a glue gun or make icicles with hot glue, you can find step-by-step instructions online. Check out our other related articles such as How to Make Hot Glue Snowflakes, Is Hot Glue Toxic When Dry, and How to Make a Hot Glue.
Why Use Hot Glue?
Hot glue is a versatile adhesive used by both professionals and hobbyists, and is renowned for its strength and ease of use. There are many reasons why hot glue is preferred over other adhesives, and here are a few:
1. Fast Drying
One of the primary advantages of hot glue is its fast drying time. Unlike other adhesives that take a long time to set, hot glue dries within seconds, making it a perfect choice for projects that require quick adhesion.
2. Strong Bonding
Hot glue forms a strong bond between surfaces, making it ideal for a wide range of applications. From woodwork, ceramics, fabrics, and plastics, hot glue works on almost all materials and ensures a secure bond.
3. Versatility
Hot glue is versatile and can be used for a wide range of projects and applications. It can be used to bond, fix, and embellish various materials, making it an excellent choice for DIY projects, arts, and crafts, and even home repairs.
4. Easy to Use
Hot glue is extremely easy to use and requires minimal equipment. All you need is a hot glue gun and glue sticks, and you are ready to go. Simply insert the glue stick into the gun, plug it in, and wait for it to heat up.
5. Beginner-Friendly
Hot glue is beginner-friendly and requires no prior experience or expertise to use. It is a great choice for those new to crafting, DIY, and home repairs, making it accessible to everyone.
Whether you are a DIY enthusiast, an artist, or someone who likes to tinker around the house, hot glue is an excellent choice for all your bonding needs. With its fast-drying time, strong bond, and versatility, hot glue is an essential tool for any crafter or DIYer.
Preparing to Hot Glue
Preparing your materials and work area is essential to ensure a successful hot gluing experience. Read on to learn about selecting the right tools and setting up your workspace before diving into your hot glue project.
Selecting a Hot Glue Gun
When it comes to selecting a hot glue gun, it’s essential to consider a few factors that will affect your glueing experience. Here are some things to keep in mind:
- The size of the glue gun: Hot glue guns come in various sizes, from mini to full-sized options. If you want to work on small projects, a mini or a medium-sized glue gun will work fine. For larger projects, it’s better to go with a larger gun, as it will hold more glue and offer more precision.
- The wattage: The wattage determines how quickly the glue gun heats up and how fast it dispenses glue. High-wattage guns will heat up quickly and provide more glue, which is suitable for larger projects. A lower wattage gun is more suitable for smaller projects and delicate materials.
- The temperature control: Some glue guns come with temperature control options, making it easier to adjust the heat level according to the material you’ll be working with. If you’re working with delicate fabrics or plastics, opt for a glue gun that allows temperature control.
- The trigger type: There are two trigger types- manual and automatic. Manual trigger glue guns require you to push the glue out manually, while automatic guns dispense the glue with a simple squeeze of the trigger. Automatic guns are more suitable for larger projects, keeping productivity a top priority.
Keeping these factors in mind will help you choose the right hot glue gun for your needs and preferences. If you’re still unsure, do some research, read reviews and check with professionals who’ve used glue guns. Remember, choosing the right glue gun can make the difference between a successful project and a messy one.
For those who want to take their hot glue game to the next level, check out our article on how to make hot glue stencils.
Choosing the Right Hot Glue Sticks
Choosing the right hot glue sticks is key to ensuring a successful project, as it will affect both the strength and durability of your glue. There are many different types of hot glue sticks available on the market, so it is important to choose the right one for your specific application.
Size: The size of the hot glue stick you choose should be based on the size of your hot glue gun. Most hot glue guns will state the appropriate size on the label or in the instruction manual. Using the wrong size can cause problems such as the glue not melting properly or not dispensing evenly.
Material: The material of the hot glue stick is also an important factor to consider. There are hot glue sticks made for use on specific materials, such as wood, fabric, plastics, and metals. Make sure to choose a hot glue stick that is suitable for the material you are working with.
Strength: The strength of the hot glue stick is another important factor to consider. Different types of hot glue sticks have different levels of strength, so consider the level of durability required for your project.
Color: Hot glue sticks are available in a variety of colors. Choosing a color that matches your project material can result in a more seamless look.
Brand: Lastly, the brand you choose may also affect the quality of your hot glue sticks. Look for a reputable brand that is well known for producing high-quality hot glue sticks.
Remember that not all hot glue sticks are created equal, so take the time to choose the right ones for your project. Also, make sure to follow the manufacturer’s instructions for the specific hot glue sticks you purchase to ensure optimal results.
If you are interested in learning how to make icicles with hot glue, check out our guide.
Preparing Your Work Surface
Preparing your work surface is an essential step before starting any hot glue project. A well-prepared workspace will ensure that you have a smooth and successful gluing experience. There are a few things to keep in mind before beginning.
Clean the Surface: Before starting your project, be sure to clean the surface you will be gluing on. A clean surface means better adhesion and a stronger hold. Use a damp cloth to wipe away any dust, dirt, or debris.
Protect the Surface: You may also want to consider protecting your work surface with a covering like wax paper or a silicone mat. This will prevent any hot glue from sticking to your surface and save you from having to clean it up later.
Choose a Stable Surface: Make sure your work surface is stable and level. You don’t want to be working on an uneven or wobbly surface as this can lead to a mess or even accidents.
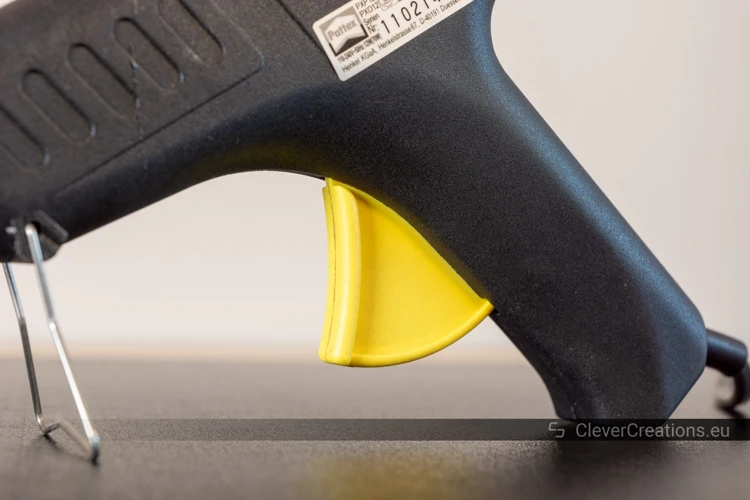
Position Your Glue Gun: Place your glue gun on a stable flat surface such as a table or a workbench. If you don’t have a glue gun stand, you can also use a small piece of cardboard with a crease to hold the gun upright.
In addition to these tips, make sure you have all of your materials in reach before beginning your project to avoid any unnecessary movement. Once your workspace is prepped, you are ready to start gluing.
If you need information on how to fix a glue gun, check out our article on how to fix a glue gun.
Hot Gluing Techniques
Mastering hot gluing techniques will allow you to handle various DIY projects like a pro. While it may seem straightforward, understanding how to apply hot glue properly and get the desired results without leaving a mess can take some practice. In this section, we’ll explore some tips and tricks to help you achieve a perfect hot glue hold every time. So, grab your hot glue gun and sticks, and let’s dive in! And if you are looking to glue frags for your aquarium or terrarium, or make pinata glue, or stick popcorn to paper, or secure picture frame corners, check out these helpful links: how-to-glue-frags, how-to-make-pinata-glue, how-to-glue-popcorn-to-paper, how-to-glue-picture-frame-corners.
Applying Hot Glue
When it comes to applying hot glue, it’s important to get it done quickly and efficiently to avoid any mess and ensure a strong hold. Here are some steps to follow:
1. Turn on your hot glue gun and allow it to heat up. This usually takes a few minutes.
2. Once the gun is heated, insert a hot glue stick into the back of the gun. Make sure it’s secure and in place.
3. Squeeze the trigger of the hot glue gun to start the flow of glue. Hold the gun at a 45-degree angle and apply the glue in a steady, even stream.
4. Apply the glue to one surface of the materials you’re working with, using just enough to create a strong bond. Avoid using too much glue, as it can lead to mess and take longer to dry.
5. Quickly join the two pieces of material together before the glue starts to dry. Make sure to firmly press the two pieces together to ensure a strong hold.
6. Continue to apply the glue and join the pieces of material together until your project is complete.
Remember to work quickly but carefully, as hot glue can be difficult to remove once it’s set. Additionally, make sure to keep the hot glue gun away from children and any flammable materials while it’s in use.
Pro tip: If you’re having trouble seeing where you’re applying the glue, try using a small flashlight to illuminate the area. This can help you ensure that you’re applying the glue in the right spot and in the right amount.
Clamping and Holding
When it comes to hot gluing, it’s important to clamp or hold the pieces together until the glue dries. This will ensure a sturdy hold and prevent any separation. Here are some helpful tips for clamping and holding your hot glue projects:
- Plan ahead: Before you begin assembling your project, think about how you will clamp or hold the pieces together. You’ll want to make sure you have enough clamps or materials to hold everything in place until the glue dries.
- Use the right clamps: Depending on the size and shape of your project, you may need specific types of clamps. For smaller projects, binder clips or clothespins may do the trick, while larger projects may require bar clamps or vise grips.
- Protect your work surface: If you are using clamps that may damage your work surface, such as metal clamps on a delicate wood piece, be sure to place a protective barrier between the clamp and the surface.
- Apply the glue: Apply the hot glue to one surface and then quickly but gently press the other surface onto the glue. Use your clamps or holding materials to secure the project in place.
- Be patient: It’s important to let the glue dry completely before removing the clamps or holding materials. This can take anywhere from a few moments to a few hours depending on the type and amount of glue used.
- Clean up excess glue: Once the glue has dried and the clamps are removed, use a scraper or sandpaper to remove any excess glue that may be visible.
Remember, the key to successful clamping and holding is planning ahead and using the right tools for the job. Take your time, be patient, and don’t rush the drying process. With these tips in mind, you’ll be able to create beautiful and sturdy hot glue projects every time.
Cleaning Up Hot Glue
Once you’ve finished your hot gluing project, it’s important to clean up any excess glue before it dries and hardens. This will help ensure a clean and professional-looking finished product. Here are some tips for cleaning up hot glue:
- Use a scraper: If the hot glue has dried and hardened, you may need to use a scraper to gently remove it from the surface. Be careful not to scratch the surface or damage the material underneath.
- Use alcohol: Rubbing alcohol or acetone can help dissolve hot glue. Simply apply a small amount to a cloth and gently rub the glue until it starts to come off.
- Use hot water: If the surface is waterproof and heat-resistant, you can use hot water to soften the glue. Submerge the glued area in hot water for a few minutes, then use a scraper or your fingers to peel off the glue.
- Use a hot glue gun: Yes, you read that right. If the hot glue has not fully hardened yet, you can use a hot glue gun to soften it again. Simply apply more hot glue to the hardened glue, wait a few seconds, and then use a scraper or your fingers to peel off the glue.
It’s important to always be cautious when handling hot glue, especially when it’s still hot. Use protective gloves if necessary and avoid touching the glue or the surface it’s on until it has cooled down completely. By taking the time to properly clean up hot glue, you can ensure a smooth and professional-looking finished product.
Hints and Tips
Hot gluing may seem simple enough, but there are always ways to improve your technique. Here are some helpful hints and tips to ensure that your hot gluing projects turn out perfectly. From avoiding burns to knowing which materials work well with hot glue, these tips can help make your next hot gluing project a success.
Avoiding Burning Yourself
Hot glue is a great adhesive, but it can also be quite dangerous if not handled properly. Here are some tips to avoid burning yourself while hot gluing:
- Protect your skin: The simplest way to avoid burns is to protect your skin. Wear gloves and long sleeves to cover exposed skin. You can also use other protective gear such as goggles or a face shield if you want to take extra precautions.
- Be careful with the glue gun: When using the hot glue gun, always be aware of where the tip of the gun is. Keep your fingers and other body parts away from the tip, especially when squeezing the trigger to release the glue.
- Work slowly: Take your time when applying hot glue. Don’t rush the process, which increases the likelihood of accidental burns. Move the gun slowly and steadily, allowing the glue to melt and flow onto the surface.
- Use a heat-resistant surface: Make sure your work surface can handle the heat of the glue gun. Place a heat-resistant mat or tablecloth under your project to avoid damaging your work surface or surrounding area.
- Clean up spills immediately: In the event of a spill, immediately clean up any hot glue with a damp cloth. Don’t try to handle or touch the glue, as it is still hot and can cause severe burns.
By following these simple tips and taking the necessary precautions, you can enjoy the benefits of hot glue while minimizing the risk of burns and injuries. Remember to always prioritize safety when using hot glue.
Using Hot Glue on Different Materials
When it comes to using hot glue on different materials, there are a few things to keep in mind to ensure a secure bond. Here are some tips:
- For paper, cardboard, and foam: Hot glue works well on these porous materials. However, be cautious when applying the glue as it can warp or create bumps on thinner materials.
- For fabric: Hot glue can be ideal for fabric, as it creates a strong bond quickly. It is important to make sure the fabric is clean and dry before gluing. Be careful not to use too much glue, as it can seep through the fabric and create a mess on the other side. Test a small area of fabric before committing to a larger project.
- For wood: Hot glue can work well on wood, but it is important to choose the right type of glue and to clamp the pieces together while the glue sets. Be sure to sand the surface of the wood before gluing, as it will help the glue adhere better.
- For plastic and metal: Hot glue can be used on some types of plastic and metal, but always test a small area first. It is important to choose the right glue, as some types may not work well on certain types of plastic or metal. The surface should also be cleaned and dried before gluing.
- For glass: Hot glue can work well on glass, but it is important to choose the right type of glue and to use it sparingly. Too much glue can cause the glass to crack or warp. Make sure the glass is clean and dry before gluing.
Remember, hot glue can be a versatile adhesive, but it is important to take into account the type of material you are working on and to use the appropriate technique to ensure a strong bond.
Common Hot Gluing Mistakes to Avoid
When it comes to hot gluing, mistakes can be easily made, especially for beginners. These errors can not only lead to unsatisfactory results, but also affect the durability of the project. It’s important to be aware of these common hot gluing mistakes, so you can avoid them and achieve professional-looking results every time. Here are some tips to help you steer clear of the most typical hot gluing mishaps.
Using Too Much Glue
One common mistake that beginners make when hot gluing is using too much glue. While you might think that more glue will create a stronger bond, it can actually have the opposite effect. Using too much glue can lead to mess and a weak bond, and it also takes longer to dry.
To avoid using too much glue, it is important to choose the right size glue stick. If you are working on a small project, a mini hot glue gun and stick should be sufficient. However, for larger projects, a standard or even a jumbo hot glue stick might be necessary. Using the right size glue stick will help you control the amount of glue you are using.
Another tip is to apply the glue in thin, even lines. This will ensure that the glue spreads evenly and does not clump or drip. It also helps prevent excess glue from seeping out when you clamp the pieces together.
To help you visualize the amount of glue needed, we have created a table below:
| Project Size | Glue Stick Size | Amount of Glue |
|---|---|---|
| Small | Mini | Thin, even lines |
| Medium | Standard | Thin, even lines |
| Large | Jumbo | Thin, even lines |
Remember, the key to using hot glue effectively is to use just enough glue to create a strong bond, without using too much. By selecting the right size glue stick and applying the glue in thin, even lines, you’ll be able to avoid this common mistake and create a professional-looking finished product.
Not Clamping the Pieces Together
When hot gluing, it’s important to clamp the pieces together while the glue cools and sets. If you don’t clamp the pieces together, the glue may not form a strong enough bond, and your project could fall apart. Here are some reasons why people may forget to clamp their pieces together and how to avoid making this common mistake:
- Impatience: It can be tempting to move on to the next step of your project before waiting for the glue to set. However, it’s important to be patient and wait for the glue to cool down and set before removing the clamp.
- Forgetfulness: You may simply forget to clamp the pieces together. To avoid this, make a checklist of all the steps involved in your project and refer to it as you go.
- No Access to Clamps: You may not have access to clamps if you’re working on a project away from your home or workspace. In this case, you can use heavy objects like books or bricks to weigh down the pieces.
Not clamping the pieces together is a mistake that can easily be avoided. Make sure to be patient, use checklists, and have access to clamping tools or heavy objects. This will ensure that your project stays intact and looks great in the end.
Wrong Glue Selection
Choosing the wrong type of hot glue can lead to a failed project or even damage to your materials. To make sure you’re using the right glue for your project, it’s important to understand the different types of hot glue and their best uses.
| Type of Hot Glue | Best for |
|——————|———-|
| Low-temperature | Delicate materials, like fabrics and foam |
| High-temperature | Stronger bonds on most materials, including metals and plastics |
| All-purpose | Versatile and can be used on a variety of materials |
Using low-temperature hot glue on a material it’s not intended for can result in the glue not bonding well to the surface or even causing damage, as the glue may not melt enough to create a strong bond.
High-temperature hot glue, on the other hand, can melt some plastics, so it’s important to test the glue on a small, inconspicuous area before proceeding with your project.
All-purpose hot glue can be a good option if you’re using multiple materials in your project and aren’t sure which type of glue to choose. However, keep in mind that it may not be the best choice for specialized materials.
By taking the time to choose the right type of hot glue for your project, you’ll ensure that you get the best results and avoid any mistakes or damage to your materials.
Conclusion
After reading this beginner’s guide on how to hot glue, you should now have a good understanding of how to successfully use a hot glue gun. Remember to always prioritize safety and choose the right type of hot glue for your project. It’s also important to prepare your work surface before beginning and try to avoid using excessive amounts of glue.
If you do make a mistake, don’t worry! Hot glue is easy to remove when still warm and can be cleaned up with a little bit of rubbing alcohol if it has cooled and hardened.
Whether you are using hot glue to attach a new trim to your curtains or to create a unique DIY project, by following these tips and tricks, you’ll be able to get the most out of your hot glue gun.
So next time you find yourself in need of a strong adhesive, remember that hot glue is a versatile, reliable, and easy-to-use option that is perfect for many different projects. With a little bit of practice and patience, you’ll soon be a hot gluing pro!
Frequently Asked Questions
How long does hot glue take to dry?
It typically takes hot glue around 30 seconds to 1 minute to dry completely.
What can hot glue be used for?
Hot glue can be used for a variety of purposes, including crafting, repairs, and even electronics.
Does hot glue work on fabric?
Yes, hot glue can work on fabric. However, you need to use the right temperature setting and the appropriate hot glue stick.
Can hot glue withstand high temperatures?
It depends on the type of hot glue you’re using. Some hot glue sticks are designed to withstand high temperatures better than others.
Is hot glue toxic?
Most hot glue sticks are non-toxic, but it’s always important to read the label to make sure that it’s safe for your intended use.
What is the difference between regular hot glue and low-temperature hot glue?
The main difference between regular hot glue and low-temperature hot glue is the temperature at which they melt. Low-temperature hot glue has a lower melting point, making it a better option for heat-sensitive materials.
Can hot glue be removed?
Yes, hot glue can be removed with rubbing alcohol, acetone, or by peeling it off carefully.
How do I know if the hot glue is too old to use?
If the hot glue stick is discolored or has a strange smell, it’s likely too old to use and should be discarded.
Can hot glue be used on food containers?
No, hot glue should never be used on food containers or anything that will come into contact with food.
What happens if I touch hot glue?
You can severely burn yourself if you touch hot glue. Always handle hot glue with care and use protective measures such as gloves to prevent burns.