Glass is a versatile and beautiful medium that can be transformed into a stunning work of art with some tissue paper and glue. Whether you’re creating a colorful vase or a unique candle holder, gluing tissue paper to glass is an easy and rewarding project. However, before you get started, it’s important to know the correct steps for success. From preparing the glass to choosing the correct glue, this guide will take you through each step of the process for creating a beautiful glued glassware masterpiece. So, let’s get started!
Materials Needed
It’s time to gather the necessary materials for this project. You don’t need anything too fancy, just a few simple items that you probably have around the house. Make sure you have everything on this list to complete the project successfully. If you’re missing something, head to your local craft store or check out some of these links for more information:
What is Craft Glue?, What Glue Will Stick Fabric to Foam?, How to Paint with Watercolors, Glue, and Salt, How to Glue Fabric to Rubber, How to Glue Cotton Balls to Fabric, How to Glue Ribbon, How to Make a No Sew, No Glue Doll Dress, How to Glue Paper to Fabric, How Long for Fabric Glue to Dry?, How to Make Starch Glue.
For This Project, You Will Need:
To get started on this fun tissue paper project, you’ll need a few key materials. Check out the table below for a detailed list of everything you’ll require:
| Glassware | Your choice of glass piece to decorate |
| Tissue Paper | Various colors to match your design |
| Scissors | To cut the tissue paper to size |
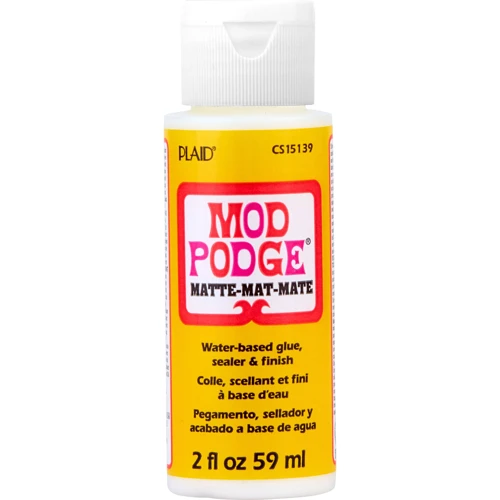
| Glue | A clear-drying glue such as Mod Podge or diluted white glue |
| Water | To dilute white glue if needed |
| Paintbrush | To apply glue mixture to the glass and tissue paper |
| Parchment Paper | To protect your work surface |
| Optional | A top coat for added durability, such as clear acrylic spray or Mod Podge Sealant |
Make sure to have everything on hand before starting your project to avoid interruptions or delays. Now that you have everything you need let’s get started!
Preparing the Glass
Before you can start gluing tissue paper onto your glassware, it is important to properly prepare the glass surface. This step is crucial in ensuring that the tissue paper adheres properly and that the finished product looks neat and professional. In this section, we will guide you through the necessary steps to prepare your glass for gluing. So, get ready to gather your materials and let’s get started!
Clean and Disassemble the Glassware
To ensure that your tissue paper adheres properly to the glass, it’s important to clean and disassemble the glassware before starting the project. This will remove any dirt, dust, or grease that may prevent the glue from sticking. Follow these steps to prepare your glass for gluing:
– Disassemble the glassware: If you’re working with a multilayered glass, make sure to separate each layer to avoid gluing them together.
– Remove any stickers or labels: Use a scraper or rubbing alcohol to remove any sticky residue from the glass.
– Clean the glassware: Wash the glass with soap and water to remove any dirt or grease. For stubborn stains, use a mild abrasive like baking soda or a sponge with a rough side.
– Dry the glassware: Make sure the glass is completely dry before applying the tissue paper. You can use a lint-free cloth or let it air dry.
By taking the time to clean and disassemble your glassware, you’ll ensure a smooth and successful gluing process. Now that your glass is clean and dry, it’s time to move on to cutting the tissue paper to size.
Cut the Tissue Paper to Size
Before applying tissue paper to your glassware, you need to cut it to the appropriate size. Make sure to measure your glassware, including the height and circumference, and add an additional half inch to each side of the tissue paper to ensure a proper fit. This will also allow for any slight discrepancies in your measurements.
Once you have the correct measurements, use a pair of scissors to carefully cut the tissue paper. For intricate designs or shapes, consider using a craft knife or scissors with a serrated edge to ensure precision. It’s important to cut the tissue paper carefully, as any jagged edges or uneven edges can be difficult to smooth out when applying the glue.
To make the cutting process easier, you can fold the tissue paper in half or in quarters before cutting. This will ensure that your cuts are even on both sides of the paper. For larger pieces of tissue paper, you may need to use a ruler to make sure your cuts are straight. If you are cutting multiple pieces of tissue paper at once, make sure to stack them neatly and secure them with a clip or rubber band to prevent them from slipping while you are cutting.
Remember, take your time when cutting the tissue paper to size. Precision will pay off in the finished product.
Applying the Glue
Now that you have prepared the tissue paper and glass, it’s time to move onto the next step: applying the glue. This is a crucial step in ensuring that the tissue paper stays securely in place on the glass surface. But with so many different types of glue available, it can be confusing to know which one to use. In this section, we’ll discuss the different types of glue that can be used for this project and guide you through the process of preparing the glue mixture. So let’s dive in and learn everything you need to know about applying glue to tissue paper and glass.
Choose Your Glue Type
Picking the right glue for your project is crucial for achieving the desired results. There are several types of glue that you can use for gluing tissue paper to glass, so it’s essential to choose the right one.
Here are some glue types you can choose from:
- Mod Podge: Mod Podge is a popular craft glue that works great for decoupage projects. It is easy to use and dries clear. It comes in different finishes such as matte, gloss, and satin. Using Mod Podge is a great option if you want to give your glassware a smooth, finished look.
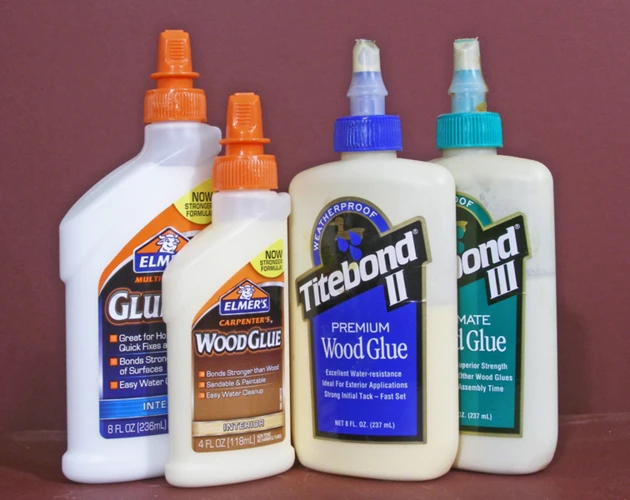
- White Glue: White glue, also known as school glue, is a great option because it is inexpensive and readily available. It dries clear and is easy to clean up with water. It’s a good option if you want to stick the tissue paper quickly and do not care about the smooth texture.
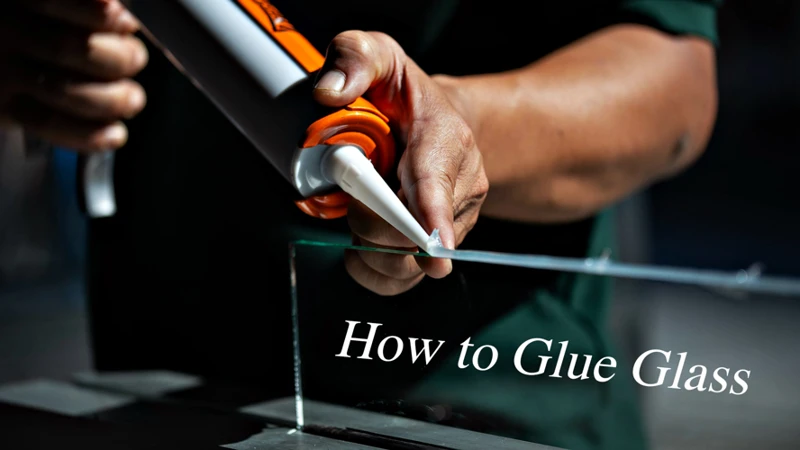
- Glass Glue: Glass glue is designed specifically for bonding glass. It forms a strong bond and dries clear and invisible. It’s a good option if you want your tissue paper project to be permanent and have the glass look clean and professional.
- Spray Adhesive: Spray adhesive is a great option if you want to cover a large surface area quickly. It sticks well to most surfaces, including glass, and dries quickly. It’s a good option if you plan on using many layers of tissue paper for your project.
Remember to choose a glue that suits your project’s needs and use it according to the manufacturer’s instructions.
Prepare the Glue Mixture
When it comes to preparing the glue mixture for gluing tissue paper onto glass, there are a few different options to consider. Each has its own strengths and weaknesses, so it’s important to choose the right one for your project. Below is a table outlining some popular glue options for this project:
| Glue Type | Strengths | Weaknesses | Additional Notes |
|---|---|---|---|
| Mod Podge | Dries clear, versatile, easy to find | Can be expensive, can leave brush marks | Mod Podge is a popular choice for this project because it can be found at many craft stores and dries clear, making it perfect for glassware. |
| White Glue | Cheap, widely available | Can dry opaque, might yellow over time | You can use white glue, such as Elmer’s, for this project by diluting it with water at a 1:1 ratio. |
| Gel Medium | Dries clear, can create a thick, textured look | Can be expensive, can leave brush marks | If you want to add texture to your project, consider using a gel medium instead. It can be found at many art supply stores. |
| Spray Adhesive | Quick and easy to use, dries clear | Can be difficult to control, can be messy | If you’re looking for a fast and easy option, spray adhesive can be an effective choice. However, it can be more difficult to control than other glue options. |
No matter which glue option you choose, it’s important to dilute it with water before applying it to the tissue paper. This will help the glue spread more easily and prevent it from drying too quickly. A good ratio is one part glue to one part water, but you may need to adjust this depending on the type of glue you’re using.
Once you’ve mixed your glue and water together, be sure to stir it well to ensure that the mixture is smooth and free of clumps. You can use a brush to apply the glue mixture to the tissue paper, or you can dip the paper directly into the glue mixture and then apply it to the glass.
Remember to work quickly when applying the glue mixture, as it can dry relatively fast. If you need to take a break, you can cover the glue mixture with a damp cloth to keep it from drying out.
Attaching the Tissue Paper
Now that you have your glassware clean and your glue mixture prepared, it’s time to attach the tissue paper to the glass. This step can be a bit tricky, but with a steady hand and a careful eye, you can create beautiful and unique designs on your glassware. Remember to take your time and follow these steps carefully to ensure a successful outcome. Let’s dive in and see how to attach your tissue paper to the glass!
Apply the Tissue Paper to the Glass
Now that your glassware is prepped and the glue mixture is ready, it’s time to apply the tissue paper. Here are the step-by-step instructions:
- Take one piece of tissue paper and lay it flat on a clean surface.
- Apply the glue mixture to one side of the tissue paper. Be sure to cover the entire surface area with a thin layer of glue.
- Carefully pick up the tissue paper and apply it to the glass. Start at one end and press the tissue paper onto the glass, smoothing out any bubbles or wrinkles as you go.
- Repeat this process with additional pieces of tissue paper, overlapping the edges slightly to create a seamless design.
- Cut any excess tissue paper from the edges of the glass with a pair of scissors.
- Continue this process until you have covered the glass completely with tissue paper and have achieved the desired look.
Remember to work slowly and carefully to avoid tearing the tissue paper. Once the glass is covered, use a soft-bristled brush to gently smooth out any remaining bubbles or wrinkles.
Congratulations! You have successfully applied tissue paper to your glassware. Now, all that’s left is to let the glue dry completely and add a top coat for added durability.
Smooth Out the Tissue Paper
Once you have applied the tissue paper to the glass, it’s important to smooth it out completely to avoid any wrinkles or bubbles. To do this, follow these steps:
- Use your fingers: Gently rub your fingers over the tissue paper in a circular motion, starting from the center and working your way outwards. This will help to remove any air bubbles and ensure that the tissue paper is fully adhered to the glass.
- Use a soft cloth: Take a soft cloth and use it to gently smooth out the tissue paper, again starting in the center and working your way outwards. Be careful not to press too hard, as this could cause the tissue paper to tear or wrinkle.
- Use a credit card: Another option is to use a credit card or other similar object to smooth out the tissue paper. Simply place the credit card over the tissue paper and gently rub it in a circular motion. This will help to remove any air bubbles and ensure that the tissue paper is fully adhered to the glass.
Remember to be gentle when smoothing out the tissue paper, as it is delicate and can easily tear or wrinkle. Take your time and make sure that the tissue paper is completely smooth before moving on to the next step. With patience and a steady hand, your glued glassware will look beautiful and professional.
Drying and Finishing
After the tissue paper has been carefully applied and smoothed onto the glass, it’s time to move onto the final stages of the project: drying and finishing. These steps are crucial to ensuring that the glue is fully set and that your newly decorated glassware is ready for use. While it can be tempting to rush through this stage, taking your time and following the correct techniques will ensure a beautifully finished product that will last. Let’s take a closer look at the essential steps to take during the drying and finishing process.
Let the Glue Dry Completely
As tempting as it may be to rush through the final steps, allowing the glue to dry completely is crucial to ensuring that your tissue paper has properly adhered to the glass. Depending on what type of glue you use and the humidity and temperature in the room, drying time can vary.
Here are a few tips to ensure that your glue dries properly:
- Check the brand of glue you are using for recommended drying times.
- Avoid moving or touching the glassware while the glue dries, as this can cause the tissue paper to shift or wrinkle.
- Place the glassware in a safe, dry location where it won’t be disturbed.
- Allow the glue to dry for at least 24 hours before handling or using the glassware.
- If you live in a humid climate, consider using a dehumidifier in the room to speed up drying time.
Remember: rushing through the drying process can result in your tissue paper peeling off or bubbles forming under the surface. Give your project enough time to dry completely, and you’ll enjoy beautiful, long-lasting results.
Finish with a Top Coat for Added Durability
After allowing the glue to completely dry, it is a good idea to apply a top coat to your glued glassware to add extra durability and protection. A top coat will not only help to keep the tissue paper intact, but it will also protect it from smudging and water damage.
Choosing Your Top Coat
There are many types of top coats to choose from, such as a clear varnish, Mod Podge, or a clear acrylic spray. Each of these options has their own pros and cons, so it’s important to choose the right one for your project.
Clear Varnish | Pros | Cons
— | — | —
Glossy finish | Long drying time
Protects against moisture | Can be difficult to apply
Non-yellowing | Strong odor
Mod Podge | Pros | Cons
— | — | —
Matte or glossy finish | Can be streaky
Quick drying time | Can bubble if not applied properly
Water-resistant | Can cause tissue paper to wrinkle
Clear Acrylic Spray | Pros | Cons
— | — | —
Easy to apply | Can be expensive
Dries quickly | May not be as durable as other options
Water-resistant | Only for indoor use
How to Apply Your Top Coat
No matter which top coat you choose, the process of applying it is generally the same. To apply a top coat:
1. Make sure the glue is completely dry before applying the top coat.
2. Follow the instructions on the top coat product you have chosen.
3. Use a clean, dry brush to apply the top coat in thin, even layers.
4. Allow each layer to dry completely before applying the next.
By taking the time to apply a top coat, you can ensure that your tissue paper is protected and your glued glassware will last for a long time.
Ideas for Using Your Glued Glassware
After you have completed gluing tissue paper on your glassware, you may wonder what to do with your new creation. Here are some ideas for using your glued glassware:
Candle holders: Place a tea light or a votive candle inside your glued glassware and light it for a romantic ambiance.
Flower vases: Put real or fake flowers in your glued glassware to display on a table or as a centerpiece during a special event.
Candy dish: Fill your glued glassware with your favorite candies and display it on your desk or at your home’s entrance for a quick, sweet treat.
Pen or brush holders: Organize your work essentials such as pens, pencils, and paintbrushes, etc., in the glued glassware to keep them handy on your work desk.
Jewelry catchalls: Show off your favorite jewelry pieces by displaying them in your glued glassware. It will keep them neat and organized in a beautiful way.
Soap dispenser: The small vase could hold a soap dispenser that is functional but can also add a pop of color or texture to your bathroom.
Christmas ornaments: Use the stuck tissue paper to decorate a glass ball to add a personal touch to your tree.
These are just a few ways to use your glued glassware. The possibilities are endless, and all you have to do is get creative.
Hints and Tips
Here are some helpful hints and tips for successfully gluing tissue paper onto glass:
1. Use good quality tissue paper
When you are selecting tissue paper for this project, be sure to choose one that is of good quality. Cheaper tissue paper may not hold up well or may bleed when exposed to glue. Look for tissue paper that is at least 2-ply and has a consistent color throughout.
2. Be gentle when applying the tissue paper
Tissue paper is delicate and tears easily, so be careful when applying it to the glass. Use a light touch and work slowly to prevent tearing. If a tear does occur, simply smooth it out as best you can and let it dry.
3. Use a flat surface to smooth out the tissue paper
When you are smoothing out the tissue paper on the glass, use a flat surface such as a credit card or spatula. This will help to prevent any wrinkles or air bubbles from forming under the tissue paper.
4. Let the glue dry completely
Before handling your newly glued glassware, be sure to let the glue dry completely. This may take up to 24 hours, depending on the type of glue you used. Do not rush the drying process, or you risk disturbing the tissue paper.
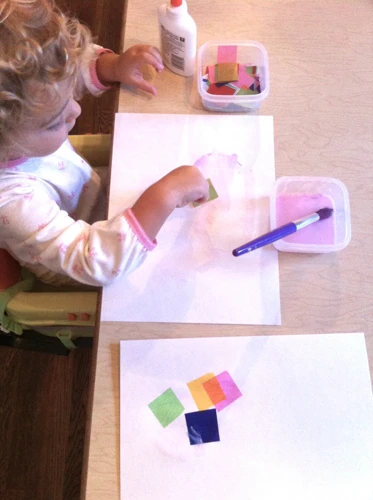
5. Experiment with different colors and patterns
This project is a great opportunity to get creative with colors and patterns. Try using multiple colors of tissue paper or layering different patterns for a unique look. You can also cut the tissue paper into different shapes and sizes for added interest.
6. Seal with clear nail polish for added durability
To make your glued glassware more durable, consider sealing it with a clear nail polish. This will help to protect the tissue paper from moisture and other elements that could cause it to peel or tear.
By following these helpful hints and tips, you can successfully glue tissue paper onto glass and create beautiful, personalized pieces of decor that you can proudly display in your home.
Conclusion
In conclusion, gluing tissue paper onto glass is a simple and fun way to create unique and beautiful glassware that can be used for various purposes. Whether you want to upcycle old jars or create new decorative pieces, this project is a great way to express your creativity. Remember to choose the right glue and prepare it properly before applying the tissue paper to the glass. Additionally, allow enough time for the glue to dry completely before handling or using the glassware. Finally, consider adding a top coat for added durability.
Overall, this project is great for all levels of crafting experience and can be enjoyed individually or with friends and family. You can use your finished product for anything from holding candles to serving drinks, or even as a colorful addition to your home decor. Don’t be afraid to experiment with different colors and textures of tissue paper to create your own unique designs.
We hope that this step-by-step guide has been helpful in teaching you how to glue tissue paper onto glass. With the right tools and techniques, you’ll be gluing tissue paper onto glass like a pro in no time! So gather your supplies, let your creativity flow, and start creating beautiful and functional works of art.
Frequently Asked Questions
What is the best type of tissue paper for this project?
Choose delicate tissue paper in your desired color. Avoid tissue paper that is too thick or has a pattern, as it may not adhere well to the glass.
Do I need special glue for gluing tissue paper on glass?
No, you can use regular white glue or decoupage glue. You can also use a mixture of glue and water for a more transparent finish.
Can I use this technique on any type of glassware?
It works best on smooth glass surfaces such as vases, jars, and candle holders. It may not work well on textured or frosted glass.
How long does the glue take to dry?
It depends on the type of glue you are using and the thickness of the glue mixture. Generally, it takes 24-48 hours for the glue to dry completely.
Can I add glitter or other embellishments to the tissue paper before applying it?
Yes, you can add small embellishments such as sequins or glitter to the tissue paper before attaching it to the glass.
What type of brush should I use to apply the glue?
Use a soft-bristled brush or a foam brush to apply the glue mixture. This will help prevent streaks and bubbles in the finished product.
Can I use colored tissue paper on clear glass?
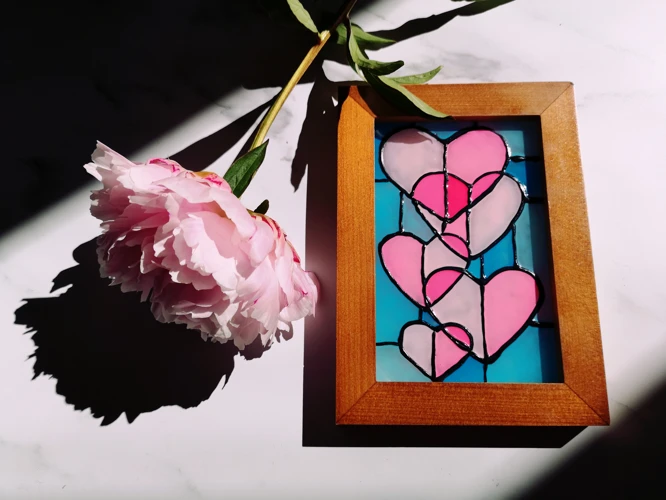
Yes, colored tissue paper works well on clear glass and can create beautiful stained-glass effects.
Do I need to seal the tissue paper with a top coat?
A top coat will add extra durability to your project and help protect the tissue paper from fading or peeling. It is recommended to use a clear, waterproof top coat.
Can I use this technique to make a mosaic pattern on the glass?
Yes, you can cut multiple pieces of tissue paper and arrange them in a mosaic pattern on the glass for a unique look.
What are some ideas for using decorated glassware?
You can use your decorated glassware as vases, candle holders, or even as decorative centerpieces. They also make great gifts for friends and family.