Have you ever found yourself in a situation where you need to glue plastic to glass, but you’re not sure how? It can be a puzzling task, especially if you’re not familiar with the right materials and techniques. But don’t fret! In this comprehensive guide, we will walk you through the steps of how to glue plastic to glass and provide tips and tricks to ensure a successful bond. Whether you’re working on a DIY project or repairing a household item, this guide will equip you with the knowledge and skills to complete the task at hand with confidence. Let’s dive in!
Before you begin
It’s important to take the necessary precautions before starting any project involving gluing plastic to glass. In order to ensure a strong and lasting bond, it’s recommended to follow a few steps before beginning. These steps include cleaning and preparing the surfaces, choosing the right adhesive, and setting up a suitable workspace. Taking these steps seriously can make all the difference in the success of your project. To learn more about how to prepare for gluing plastic to glass, check out our guide on how to use epoxy glue on metal.
Clean and Prepare the Surfaces
Properly cleaning and preparing the surfaces you’re going to glue is a crucial step in ensuring a strong bond between plastic and glass. Before you begin, gather all the necessary items to clean the surfaces. These items include:
| Clean cloth or paper towel | – This will be used to wipe down the surfaces. |
| Mild detergent or rubbing alcohol | – This will be used to remove any dust, grime, or oil from the surfaces. |
| Cotton swabs or soft-bristled brush | – This will be used to clean hard-to-reach spots and corners. |
Step 1: The first step is to remove any dirt, dust, or debris from both the plastic and glass. Begin by wiping the surfaces with a clean cloth or paper towel.
Step 2: Next, clean the surfaces with a mild detergent or rubbing alcohol. Dip a clean cloth or cotton swab in the cleaning solution, and gently wipe down both the plastic and glass surfaces. This will remove any remaining traces of grime, oil, or dirt.
Step 3: If there are hard-to-reach spots or corners, use a cotton swab or soft-bristled brush to clean them thoroughly.
Step 4: After cleaning the surfaces, let them dry completely before applying glue. If the surfaces are still wet, the glue will not adhere properly, leading to a weak bond.
By following these steps, you can ensure that your plastic-to-glass bond is strong and long-lasting. For more information on gluing different materials together, check out our articles on gluing wood to fiberglass and the best glue for bamboo.
Choosing the Right Adhesive
Choosing the right adhesive for gluing plastic to glass can be a daunting task. With so many options available, it’s important to select the one that will provide the best results. Epoxy glue, silicone adhesive, cyanoacrylate glue, plastic welding, and UV-curing adhesive are all viable options, each with its own strengths and weaknesses. In this section, we will explore each type of adhesive in detail to help you choose which one is right for your project. Let’s dive in and learn more about each of these adhesives. If you’re interested in learning more about how to glue silicone, check out our article here.
Epoxy Glue
Epoxy glue is one of the most popular and effective adhesives for gluing plastic to glass. This type of adhesive is composed of two parts – a resin and a hardener – that need to be mixed together before use. The resulting mixture creates a very strong bond that can withstand high stress and is highly resistant to water and heat.
Advantages of Epoxy Glue:
- Epoxy glue creates a very strong bond between plastic and glass.
- It is resistant to water, heat, and other environmental factors.
- It can fill gaps and cracks in the surface to create a smooth and even bond.
- It can be sanded and painted over after it has dried.
Disadvantages of Epoxy Glue:
- Epoxy glue can take a long time to dry completely.
- It requires careful mixing of the two components in order to ensure the best possible bond.
- The fumes from the mixture can be toxic and require adequate ventilation.
When using epoxy glue, it is important to make sure that the surfaces are clean, dry, and free of any dirt or debris. To ensure the best possible bond, you may want to use a sandpaper to rough up the surfaces slightly. This will help the epoxy glue adhere to the surface.
To use epoxy glue, follow these steps:
- Mix the resin and hardener according to the manufacturer’s instructions. This usually involves mixing equal parts of each component together.
- Apply the mixture to one of the surfaces using a small spatula or brush.
- Press the plastic and glass surfaces together firmly, making sure that they are properly aligned.
- Hold the surfaces in place with clamps or tape until the glue dries completely.
It is important to note that epoxy glue can take several hours to dry completely, so make sure to give it adequate time to set before handling the glued object.
If you prefer, you can use a specialized primer on the surfaces before applying the epoxy glue. This will help to create an even stronger bond and ensure that the plastic and glass surfaces stick together properly. For more information on primers, check out our article on how to glue wood to a mirror.
Epoxy glue is an excellent choice for bonding plastic to glass. Just make sure to follow the manufacturer’s instructions carefully and allow the glue to dry completely before using the glued object.
Silicone Adhesive
Silicone Adhesive: Silicone adhesive is a versatile adhesive that can be used to bond plastic to glass. It is a popular adhesive choice because it has a strong, flexible bond that can withstand vibrations and thermal expansion. Silicone adhesive is also resistant to water and UV light, making it an excellent choice for outdoor applications.
| Pros | Cons |
|---|---|
| Resistance to water and UV light | Long curing time |
| Flexible bond | Lower bond strength compared to other adhesives |
| Can withstand vibrations and thermal expansion | Not suitable for load-bearing applications |
Silicone adhesive is easy to apply and can be used to bond a wide variety of materials. However, it is important to note that silicone adhesive has a longer curing time compared to other adhesives, so it may not be the best choice if you need a quick bonding solution. Additionally, while it has a strong bond, the bond strength of silicone adhesive is lower compared to other adhesives, so it may not be suitable for load-bearing applications.
One advantage of using silicone adhesive is its resistance to water and UV light. This makes it an excellent choice for outdoor applications, such as bonding plastic to glass in a greenhouse or on a car window. Additionally, silicone adhesive can withstand vibrations and thermal expansion, making it a good choice for bonding plastic to glass in applications where these forces are present.
If you decide to use silicone adhesive, be sure to follow the manufacturer’s instructions carefully, as the curing time and application method may vary depending on the specific product. It is also a good idea to test the adhesive on a small area before applying it to a larger surface, to ensure that it will bond properly.
Internal link: If you need information on how to apply Green Glue to soundproof a room or space, check out our article on the subject.
Cyanoacrylate Glue
When it comes to bonding plastic to glass, Cyanoacrylate Glue, also known as super glue or instant glue, is a popular choice due to its fast-drying properties. It is important to note that not all cyanoacrylate glues are suitable for plastic to glass bonding, so it is crucial to choose the right one.
| Cyanoacrylate Glue | Advantages | Disadvantages |
|---|---|---|
| Loctite Super Glue | Fast-drying, strong bond | Cannot withstand extreme temperatures or heavy stress |
| Gorilla Super Glue | Strong bond, dries clear | Might not work on some types of plastic or glass |
| Super Glue Plastic Fusion Epoxy Adhesive | Specifically designed for plastic bonding, strong bond | Requires mixing before application, longer drying time compared to regular super glue |
One of the advantages of using cyanoacrylate glue is its strong bond. However, it should be noted that it might not be able to withstand extreme temperatures or heavy stress. It is also important to make sure that the plastic and glass surfaces are clean and dry before applying the glue.
Cyanoacrylate glue can be a great option for bonding plastic to glass, but it is important to choose the right type and to follow the manufacturer’s instructions carefully for the best results.
If you’re interested in learning how to glue metal to metal without welding, check out our article on that topic.
Plastic Welding
Plastic welding is a popular method for bonding plastic to glass, especially when dealing with larger and thicker plastic pieces. This method involves using heat to melt and fuse the plastic and glass together.
The advantages of plastic welding:
| Advantages | Description |
|---|---|
| Creates a very strong bond. | Plastic welding creates a bond that is often stronger than the plastic or glass itself. This makes it suitable for long-lasting and high-stress applications. |
| Leaves no adhesive residue. | Since no adhesive is used in the welding process, there is no adhesive residue left behind. This makes it a clean and neat way to bond plastic to glass. |
| Seals against leaks. | The welding process can create a leak-proof bond, making it ideal for applications where liquids or gases need to be contained. |
| Works with different types of plastic. | Unlike adhesives, plastic welding can bond different types of plastic together, regardless of whether they are compatible. |
The disadvantages of plastic welding:
| Disadvantages | Description |
|---|---|
| Requires special equipment. | Plastic welding requires the use of specialized equipment, such as a welding gun or hot air blower, which can be expensive. |
| Not suitable for thin plastic or glass. | Thinner plastic or glass can be damaged or warped by the heat generated during the welding process. |
| Not easily reversible. | Unlike adhesives, plastic welding bonds are permanent and cannot be easily undone once they are made. |
Plastic welding can be challenging for beginners, but it is a very effective method for bonding plastic to glass. If you are interested in learning more about plastic welding, there are many online resources and videos available that provide step-by-step instructions and helpful tips.
Internal link: If you want to learn more about gluing together objects made of reef rock, you can check out our article on how to glue reef rock together.
UV-curing Adhesive
UV-curing adhesive is a special type of glue that hardens when exposed to ultraviolet light. This adhesive is popular for its fast curing time and strong bond. It is ideal for bonding plastics to glass due to its great adhesion to both materials. UV-curing adhesives can come in a liquid or gel form.
| Advantages | Disadvantages |
|---|---|
| Fast curing time: UV-curing adhesive hardens within seconds of exposure to UV light, unlike other adhesives that can take hours or even days to cure. | Requires UV light: This adhesive requires a UV light source to cure and harden. Without a UV light source, the adhesive will not solidify. |
| Strong bond: When fully cured, UV-curing adhesive forms a strong bond that can withstand high levels of stress and impact. | Not ideal for wide gaps: This adhesive is not recommended for bonding materials with large gaps or uneven surfaces as it may not cure evenly. |
| Easy to use: UV-curing adhesive is easy to apply and does not require any mixing or special preparation. | Not as versatile: This adhesive may not work well on all types of plastics or glass surfaces. |
If you decide to use UV-curing adhesive, make sure to follow the manufacturer’s instructions carefully. You may also want to wear protective eyewear and gloves to avoid exposure to UV light.
Tip: Before applying UV-curing adhesive to plastic and glass surfaces, make sure they are clean and dry to ensure a strong bond. If you have any doubts, consider using a primer that is compatible with UV-curing adhesive.
If you’re interested in learning more about adhesives and their many uses, check out our articles on how to glue Depron and what glue to use on fishing rod tips.
Step-by-Step Guide to Gluing Plastic to Glass
You’ve cleaned and prepared the plastic and glass surfaces and selected the perfect adhesive to bond them together, but now what? Don’t worry, we’ve got you covered with a detailed and easy-to-follow step-by-step guide for gluing plastic to glass. Just follow these instructions carefully, and you’ll have a strong and durable bond in no time!
Step 1: Prepare Your Workspace
To ensure that your project is a success, it’s important to prepare your workspace properly before beginning the gluing process. This will help you avoid any unnecessary messes or accidents that could damage your materials or harm you. Here are some things to keep in mind when preparing your workspace:
| Step | Description |
|---|---|
| Step 1 | Gather Your Materials: Make sure you have everything you need on hand before you begin. This includes your adhesive of choice, a clean cloth, a small brush, and masking tape. |
| Step 2 | Select Your Workspace: Choose a clean, flat surface that is well-lit and well-ventilated. Avoid working in areas with high humidity, as this can affect the bonding process. Keep in mind that some adhesives give off strong fumes, so consider wearing a mask if necessary. |
| Step 3 | Clean the Surfaces: Thoroughly clean both the plastic and glass surfaces that you plan to glue together. This will help ensure a strong bond. You can use a clean cloth and rubbing alcohol or a mixture of warm water and dish soap to clean the surfaces. Just make sure they are completely dry before proceeding. |
| Step 4 | Prepare the Adhesive: Some adhesives require mixing or shaking before use. Follow the manufacturer’s instructions carefully to ensure that your adhesive is ready to use. Some adhesives may also require the use of a primer, so check beforehand to make sure you have everything you need. |
| Step 5 | Mask the Area: To keep the adhesive from spreading to unwanted areas, use masking tape to create a barrier around the edges of the surfaces you plan to glue together. This will help ensure a neat and clean finish. |
By following these steps and carefully preparing your workspace, you’ll be well on your way to a successful glue job. Remember that preparation is key to achieving a strong and lasting bond between plastic and glass.
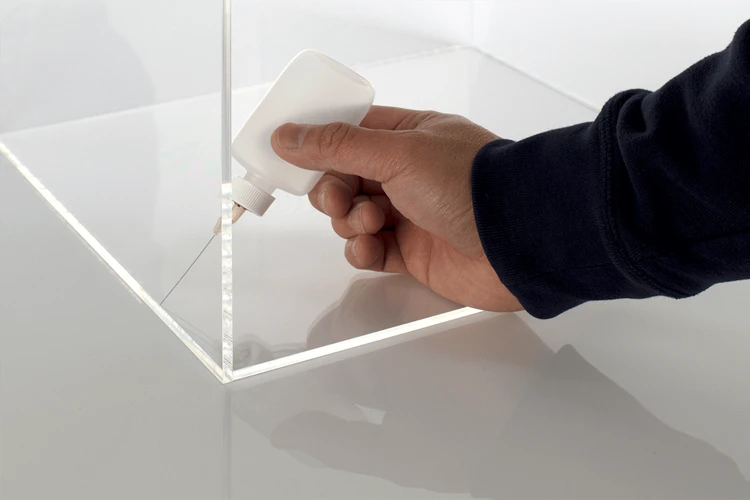
Step 2: Apply the Adhesive
When it comes to gluing plastic to glass, applying the adhesive correctly is crucial. Each type of adhesive has its own method of application, so follow the manufacturer’s instructions carefully. Here are some general guidelines to follow when applying adhesive:
1. Lay out the materials on a flat surface and ensure that both surfaces are free from dust and debris.
2. Apply the adhesive to one of the surfaces as directed by the manufacturer. Depending on the type of adhesive you are using, this may involve mixing two components together or simply applying the adhesive directly from the tube.
3. Use a small brush or applicator to spread the adhesive evenly over the surface. Be careful not to apply too much adhesive, as this can result in a messy and weak bond.
4. If the adhesive requires a curing agent or extra components, be sure to add these as directed by the manufacturer.
5. Once the adhesive has been applied, wait for the recommended amount of time for it to become tacky. This usually ranges from a few seconds to several minutes.
6. After the adhesive has become tacky, carefully place the plastic onto the glass surface, aligning it as necessary. Apply gentle pressure to ensure the bond is secure.
7. Depending on the adhesive you are using, you may need to clamp the materials together or use other methods to hold them in place while the bond sets.
8. Finally, wait for the adhesive to dry completely. This can take a few minutes to several hours, depending on the type of adhesive and the environmental conditions.
Step 3: Join the Plastic and Glass
Now that you have applied the adhesive to both surfaces, it’s time to join the plastic and glass together. This can be a delicate process, but following these steps will help ensure a strong and long-lasting bond.
Step 1: Carefully align the plastic and glass together. It’s important to do this quickly and accurately, as some adhesives can set very quickly.
Step 2: Once the plastic and glass are aligned, gently press them together. Use firm and even pressure to ensure the adhesive spreads evenly, creating a strong bond.
Step 3: You may need to hold the plastic and glass in place for a period of time, depending on the adhesive you used. Check the instructions for the recommended amount of time to hold the materials together.
We suggest using clamps or other tools to hold the materials in place during this process. This can help free up your hands and reduce the risk of accidentally moving the materials out of alignment.
To help guide you through this step, we’ve created a table highlighting some important dos and don’ts to follow:
| Do: | Don’t: |
|---|---|
| – Carefully align the plastic and glass | – Apply too much pressure and squeeze out all of the adhesive |
| – Use even and consistent pressure | – Allow any debris or other contaminants between the surfaces |
| – Use clamps or tools to hold the materials in place | – Move the materials out of alignment during the bonding process |
| – Follow the adhesive instructions for hold times | – Rush the process by removing clamps or tools too soon |
By following these guidelines and taking your time during the gluing process, you can ensure a strong and lasting bond between plastic and glass. Congratulations, you have successfully joined your plastic and glass together! Proceed to the next step to secure the bond.
Step 4: Secure the Bond
After joining the plastic and glass, it is important to secure the bond to ensure that it holds. Here are a few ways to do it:
| Method | Description |
|---|---|
| Clamp it down: | Clamp the plastic and glass together until the adhesive sets. Make sure to use protective padding to prevent damage to the surfaces. |
| Tape it up: | Use strong, durable tape to bind the plastic and glass together. This is a great option for smaller projects or if you do not have clamps available. |
| Weight it down: | Place a weight on top of the plastic and glass to apply pressure and keep them together while the adhesive sets. This is a good option for flat surfaces. |
Whichever method you choose, it’s important to leave the plastic and glass undisturbed until the adhesive has fully dried. This can take anywhere from a few hours to a few days, depending on the type of adhesive used. Be sure to consult the manufacturer’s instructions for specific drying times.
Remember, the key to a strong and durable bond is proper preparation, careful application of the adhesive, and secure bonding. By following these steps and tips, you can effectively glue plastic to glass in a variety of different projects.
Tips and Tricks
When it comes to gluing plastic to glass, using the right adhesive is only half the battle. The application process can also make or break the strength of the bond. That’s why we’ve put together some helpful tips and tricks to ensure that your plastic and glass project is a success. From using a primer to applying adhesive in thin layers, these techniques will take your gluing skills to the next level. Read on to discover our expert advice on how to glue plastic to glass like a pro.
Use a Primer
When you are gluing plastic to glass, using a primer can greatly increase the strength and durability of the bond. A primer creates a rough surface that allows the adhesive to better grip the plastic and glass, improving the adhesion. Here are some tips for using a primer effectively:
- Choose the right primer: There are several types of primers available, so make sure to choose one that is specifically designed for bonding plastic to glass. Some common primers include those that bond with cyanoacrylate or epoxy adhesives.
- Clean the surfaces: Just as you would clean the surfaces before applying adhesive, it is important to clean the surfaces before applying a primer. Use a mild soap and water to clean the plastic and glass, and dry them thoroughly before applying the primer.
- Apply the primer: Apply the primer in a thin, even layer. Follow the manufacturer’s instructions for the specific primer you are using. Some primers require you to wait a certain amount of time before applying the adhesive, so make sure to read the instructions carefully.
- Wait for the primer to dry: Once you have applied the primer, wait for it to dry completely before applying the adhesive. This can take anywhere from a few minutes to several hours, depending on the type of primer you are using.
- Reapply if necessary: In some cases, a second application of primer may be necessary. If the bond is not as strong as you would like, try applying another thin layer of primer before applying the adhesive.
Using a primer can greatly improve the strength and durability of the bond when gluing plastic to glass. Make sure to choose the right primer, clean the surfaces thoroughly, and wait for the primer to dry completely before applying the adhesive. With the right preparation and technique, your bond should be strong and secure.
Apply the Adhesive in Thin Layers
When it comes to gluing plastic to glass, it’s important to apply the adhesive in thin layers. This ensures that the bond is strong and long-lasting. Applying a thick layer of adhesive may result in a weak bond, as it may not dry or cure completely.
To apply the adhesive in thin layers, use a small brush or a toothpick. Dip the brush or toothpick into the adhesive and apply it to the surface of the plastic or glass in a thin, even layer. Do not apply too much pressure, as this can also result in a thick layer of adhesive.
It’s important to note that some adhesives may require multiple thin layers to achieve a strong bond. Follow the instructions provided with the adhesive to determine the appropriate number of layers needed.
Here is a table summarizing the important points to remember when applying adhesive in thin layers:
| Do: | Don’t: |
|---|---|
| Apply the adhesive in thin, even layers | Apply too much pressure |
| Use a small brush or toothpick to apply the adhesive | Apply a thick layer of adhesive |
| Follow the instructions provided with the adhesive | Apply the adhesive without reading the instructions |
By applying the adhesive in thin layers, you can ensure a strong bond between the plastic and glass surfaces. Remember to follow the instructions provided with your chosen adhesive, and take care to apply the adhesive evenly for the best results.
Wait for the Adhesive to Dry Completely
One of the most important parts of gluing plastic to glass is to wait for the adhesive to dry completely. Rushing this step can lead to a weak bond or even complete failure of the glue joint. The exact drying time will depend on the type of adhesive used, as well as the temperature and humidity in your workspace.
To give you a general idea of drying times, we’ve created a table comparing the drying times of different adhesives commonly used for gluing plastic to glass:
| Adhesive Type | Approximate Drying Time |
|---|---|
| Epoxy Glue | 24 hours |
| Silicone Adhesive | 24-48 hours |
| Cyanoacrylate Glue | A few minutes to a few hours |
| Plastic Welding | Immediate |
| UV-curing Adhesive | A few seconds to a few minutes |
As you can see from the table, some adhesives dry much more quickly than others. However, it’s important to keep in mind that even if an adhesive seems dry to the touch, it may not be completely cured. Take the time to wait for the adhesive to fully cure before putting stress on the bond. This will ensure that the bond is strong and durable.
If you’re unsure whether the adhesive is fully cured or not, it’s best to err on the side of caution and wait a little longer. If you rush the process and the bond fails, you may have to start over from scratch. Giving the adhesive enough time to dry completely is a crucial step in ensuring a successful bond between plastic and glass.
Do Not Rush Removing the Clamps
When it comes to gluing plastic to glass, one of the most crucial steps is securing the bond between the two materials. Clamps can be a useful tool in holding both surfaces together while the adhesive dries, but it’s important not to rush the process of removing them.
1. Avoid Disturbing the Bond
Removing the clamps too soon can cause the plastic or glass to shift or move, which can disturb the adhesive bond. This can result in a weaker bond that is more susceptible to breaking or coming apart. It’s important to give the adhesive enough time to fully dry and cure before removing the clamps.
2. Check the Adhesive Drying Time
Different types of adhesives have different drying times, so it’s important to check the manufacturer’s instructions for the adhesive you’re using. Rushing to remove the clamps can cause the bond to break if the adhesive hasn’t fully cured.
3. Be Patient
While it may be tempting to remove the clamps and test the bond as soon as possible, patience is key. Waiting for the adhesive to fully dry and cure will ensure a strong and long-lasting bond between the plastic and glass surfaces.
4. Use Caution When Removing Clamps
When it’s time to remove the clamps, it’s important to use caution and not to pull or twist the plastic or glass surfaces. This can cause the bond to break or weaken. Instead, gently and slowly loosen the clamps and carefully remove them without disturbing the surfaces.
By following these tips and not rushing the process of removing clamps, you can ensure a strong and durable bond between your plastic and glass surfaces.
Common Mistakes and How to Avoid Them
Making mistakes is a natural part of the learning process, but when it comes to gluing plastic to glass, mistakes can be costly. To help you avoid some of the most common mistakes in this process, we’ve compiled a list of tips and tricks. Paying attention to these potential pitfalls and avoiding them will help ensure that your project turns out just the way you planned it! So let’s explore how to avoid common mistakes while gluing plastic to glass.
Choosing the Wrong Adhesive
Choosing the wrong adhesive for your plastic-to-glass bonding project can lead to a weak or failed bond. To ensure a strong and long-lasting bond, it’s important to choose the right adhesive for your specific project.
Here are some common mistakes to avoid when choosing the adhesive:
| Mistake | Consequence |
|---|---|
| Not considering the materials being bonded | Choosing an adhesive that is not compatible with the plastic and glass materials can result in a weak bond or no bond at all. |
| Not considering the application | Using an adhesive that is not suited for your application can cause a bond failure under stress or heat. |
| Not researching the adhesive | Each adhesive has its own specific properties and characteristics, such as drying time, curing time, and strength. Not researching the adhesive can result in a poor choice and ultimately a failed bond. |
| Not following the manufacturer’s instructions | Each adhesive has its own instructions for use, such as surface preparation, mixing ratios, and application methods. Not following these instructions can lead to a weak bond or no bond at all. |
It’s important to choose an adhesive that is specifically designed for plastic and glass bonding. Some of the most commonly used adhesives for this type of project include:
- Epoxy glue
- Silicone adhesive
- Cyanoacrylate glue
- Plastic welding
- UV-curing adhesive
Do your research and choose the right adhesive for your specific project to ensure a strong and long-lasting bond.
Not Preparing the Surfaces Correctly
When it comes to gluing plastic to glass, one of the most common mistakes is not preparing the surfaces correctly before applying the adhesive. This can lead to a weak or ineffective bond, resulting in the plastic separating from the glass over time.
Why Surface Preparation is Important
Plastic and glass surfaces are often smooth and non-porous, making it difficult for adhesive to properly adhere. That’s why proper surface preparation is crucial. By taking the time to properly clean and prepare the surfaces, you can ensure that the adhesive will bond effectively and provide a strong hold.
How to Prepare the Surfaces Correctly
Here are the steps you should take to prepare the surfaces before applying the adhesive:
| Step | Description |
|---|---|
| 1 | Clean the surfaces with soap and water to remove any dirt or grime. |
| 2 | Dry the surfaces with a clean, lint-free cloth to remove any moisture. |
| 3 | Use a degreaser to clean the surfaces thoroughly and remove any oil or grease. Be sure to follow the instructions on the degreaser packaging. |
| 4 | Roughen the surfaces with sandpaper or a scouring pad to create a textured surface that will help the adhesive bond better. |
| 5 | Clean the surfaces again with a degreaser to remove any debris from the roughening process. |
Conclusion
If you want to ensure a strong bond between plastic and glass, it’s essential to prepare the surfaces correctly before applying the adhesive. By following the steps outlined above, you can help ensure that your adhesive will bond effectively and provide a long-lasting hold. Don’t rush this step – proper surface preparation is key to any successful adhesive bond.
Using Too Much Adhesive
When it comes to gluing plastic to glass, it’s important to remember that using too much adhesive can actually weaken the bond instead of strengthening it. Here are some reasons why using too much adhesive can be problematic:
- Longer Drying Time: If you apply too much adhesive, it will take longer to dry completely. This can result in a weak bond and may even cause the plastic to slide or move out of place before the bond is strong enough to hold it in position.
- Uneven Bond: Applying too much adhesive can also result in an uneven bond between the plastic and glass. This means that only certain areas of the surfaces will have proper bonding, while other areas will be left unglued.
- Bulky Appearance: Using too much adhesive can also make the bond appear bulky and unappealing. This is especially important if the glued surfaces are visible, such as in a decorative DIY project.
To avoid using too much adhesive, it’s important to apply it in thin and even layers. This will ensure that the surfaces are properly covered while also reducing the amount of excess adhesive that may ooze out during the bonding process. Additionally, be sure to follow the manufacturer’s instructions on how much adhesive to use for the specific materials you’re working with.
Remember, using too little adhesive can also weaken the bond, so strike a balance and apply just enough to ensure a strong and even bond between the plastic and glass.
Not Waiting for the Adhesive to Dry Completely
One of the biggest mistakes that people make when gluing plastic to glass is not waiting for the adhesive to dry completely. This can lead to a weak bond, which can cause the plastic to fall off the glass. It is essential to give the adhesive enough time to dry and set properly.
Why is it important to wait for the adhesive to dry completely?
- The adhesive needs time to set and cure properly
- The bond will be stronger if the adhesive has fully dried
- If you handle the plastic and glass before the adhesive has completely dried, you can disrupt the bond and weaken it
How long should you wait?
The drying time for different adhesives can vary. Always read the manufacturer’s instructions to determine the appropriate drying time for the adhesive you’re using. In general, you should wait at least 24 hours before handling the plastic and glass that you’ve glued together.
What can happen if you don’t wait long enough?
If you don’t wait long enough for the adhesive to dry, you run the risk of the bond failing. The plastic may fall off the glass, which can result in damage or injury. Additionally, if you try to force the bond before it’s fully dry, you can distort the shape of the plastic and/or glass, which can make it difficult to fix the bond correctly.
How can you tell if the adhesive has dried?
It can be challenging to determine if an adhesive has dried, particularly for first-time users. Here are some ways to tell if the adhesive is dry and the bond is secure:
- The adhesive is no longer tacky to the touch
- The color of the adhesive has changed to match the surrounding area or to the color specified on the adhesive packaging
- You can gently tap the plastic and glass without it moving
Conclusion
Waiting for the adhesive to dry completely is critical when gluing plastic to glass. Rushing the process can result in a weak bond that can lead to damage or injury. Be patient and follow the manufacturer’s instructions carefully to ensure that the bond is secure and will last a long time.
Conclusion
As we conclude this comprehensive guide to gluing plastic to glass, it is important to emphasize the significance of following the right techniques. There are various adhesives to choose from, and each one has its own strengths and weaknesses. Selecting the wrong adhesive or not preparing the surfaces correctly can ruin your project. However, with the right tools and materials, combined with our step-by-step guidelines, you can create a strong and long-lasting bond between plastic and glass. Remember to exercise patience and caution throughout the process, and to not rush through any of the steps. In the end, the result will be a beautiful and durable creation that you can proudly display or use for years to come.
Final Thoughts
After following the step-by-step guide and taking note of the tips and tricks and common mistakes to avoid, you should now have successfully glued plastic to glass. Remember that the key to a strong and long-lasting bond is proper preparation, choosing the right adhesive, and patience in allowing the adhesive to dry completely.
Final Words
Gluing plastic to glass can be a tricky and challenging task. However, it is essential to ensure that the bond is strong and long-lasting. Choosing the right adhesive, preparing the surfaces correctly, and following the step-by-step guide are crucial in achieving the desired results. In case you encounter some problems, don’t hesitate to seek professional help.
Additional Resources
Below are some additional resources that you can use to learn more about gluing plastics to glass:
| Resource | Description |
| Plastic Welding | A process of joining surfaces or plastics together using heat and pressure. |
| Acrylic Adhesives | Adhesives designed specifically for bonding acrylic materials. |
| Polyurethane Adhesives | Adhesives that create a strong and durable bond, ideal for use in high-stress applications. |
| Cyanoacrylate | A fast-drying adhesive ideal for bonding small parts or surfaces. |
By having these additional resources, you can further improve your knowledge and skills in gluing plastic to glass.
Additional Resources
Here are some additional resources that can help you learn more about gluing plastic to glass:
- Manufacturer’s instructions: Always refer to the packaging or instructions of the adhesive you’re using for specific guidance and safety precautions.
- Online tutorials: Check out YouTube or other online sources for video tutorials on gluing plastic to glass. You can also find forums and social media groups where people share their experiences and advice.
- Expert advice: If you’re unsure or stuck on a particular step in the process, reach out to an adhesive expert or professional for advice. They can offer guidance on which adhesive to use for your specific application.
- Product reviews: Check customer reviews of the adhesive you’re considering to make sure other users have had success with plastic-to-glass bonding.
- Practice material: Before attempting to glue the final project, practice on scraps of glass and plastic to get a feel for how the adhesive works.
- Safety precautions: When working with adhesives, it’s important to take proper safety precautions to avoid injury. Always wear gloves, work in a well-ventilated area, and follow the manufacturer’s instructions for safe use.
By taking advantage of these additional resources, you can ensure that you make informed decisions when it comes to selecting and using adhesives for bonding plastic to glass.
Frequently Asked Questions
Can plastic be glued to glass?
Yes, plastic can be glued to glass using the right adhesive and proper preparation techniques.
What type of adhesive is best for gluing plastic to glass?
There are several adhesives that can be used for gluing plastic to glass including Epoxy Glue, Silicone Adhesive, Cyanoacrylate Glue, Plastic Welding, and UV-curing Adhesive. The best one for your project will depend on the specific materials and application.
How should I prepare the surfaces before gluing plastic to glass?
You should clean both the plastic and glass surfaces with rubbing alcohol or another surface cleaner to remove any dirt or oils. Sanding the plastic surface can also help the adhesive bond better.
What are the benefits of using plastic welding?
Plastic welding can create a very strong and durable bond between plastic and glass. It is also a good option for repairing cracks or holes in plastic surfaces.
What kind of workspace do I need to glue plastic to glass?
You should work in a well-ventilated area with a clean and flat workspace. Protective gloves and eyewear may also be necessary depending on the adhesive being used.
How long does the adhesive take to dry?
The drying time will depend on the type of adhesive being used. Generally, it can take anywhere from a few minutes to several hours for the adhesive to dry completely.
Can I remove the adhesive after it has dried?
It can be difficult to remove adhesive once it has dried and bonded to the surfaces. Some adhesives may require a solvent or heat to break down the bond.
What is a primer and do I need to use one?
A primer is a type of adhesive promoter that can help improve the bond between the adhesive and surfaces being glued. It is not always necessary to use a primer, but it can be helpful in certain applications.
Can I paint over the glued plastic and glass surfaces?
Before painting over the glued surfaces, it is important to make sure that the adhesive has fully cured and the surfaces are free of any debris. It is also important to select a paint that is compatible with the adhesive being used.
What do I do if the bond between the plastic and glass fails?
If the bond fails, you may need to reapply the adhesive and follow proper preparation and bonding techniques. You may also need to consider using a different adhesive or seeking the help of a professional.