Imagine this: you’ve found the perfect piece of jewelry or accessory, but it’s missing a few stones or beads. You know you can fix it with a little glue, but you don’t want to use just any glue. You want something that’s strong, durable, and easy to use. That’s where E6000 Glue Precision Tip comes in. This powerful adhesive is perfect for all your DIY needs, but it can be a little tricky to use. In this guide, we’ll show you step-by-step how to use the E6000 Glue Precision Tip to make all your repairs and crafting projects a success.
What is E6000 Glue Precision Tip?
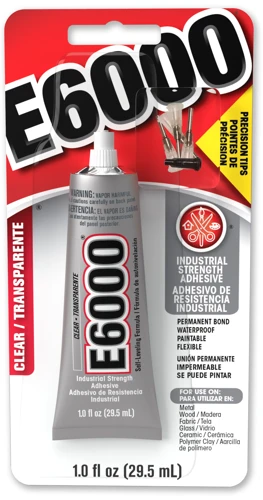
If you’re someone who loves DIY projects or is into repairing things, you’ve probably heard of E6000 Glue. But have you heard of E6000 Glue Precision Tip? This versatile adhesive has the same powerful formula as the original E6000 Glue but with a precision tip applicator, making it easier for you to use on small or intricate surfaces. In this article, we’ll explore the benefits of using E6000 Glue Precision Tip and provide you with a step-by-step guide on how to use it properly so you can get the best results possible.
Pros of E6000 Glue Precision Tip
Using the E6000 Glue Precision Tip has several advantages over other types of glue. This glue is highly popular due to its unique features that make it stand out from other adhesives. Below is a list of the pros of the E6000 Glue Precision Tip:
| Advantages | Description |
| Strong bond | The E6000 Glue Precision Tip has a superior bonding strength and can be used for a variety of applications, from craft projects to automobile repairs. |
| Waterproof | Once cured, the E6000 Glue Precision Tip creates a waterproof seal that is ideal for outdoor projects or repairs that are exposed to water. |
| Heat-resistant | The E6000 Glue Precision Tip can withstand high temperatures, making it perfect for repairs that are exposed to heat, such as fixing car engines. |
| Flexible bond | The E6000 Glue Precision Tip dries clear and flexible, ensuring that your project or repair remains intact even after prolonged use. |
| Easy to use | The E6000 Glue Precision Tip comes with a precision tip that makes it easy to apply the glue exactly where you need it, reducing the risk of mess and waste. |
If you are looking for other articles related to different types of glue, check out our article on how to glue cement or how to use UV LOCA glue on a cracked screen.
Things To Prepare Before Using E6000 Glue Precision Tip
Before using the E6000 Glue Precision Tip, it is important to prepare your tools and workspace to ensure a successful project. By taking the time to properly set up, you can avoid any mistakes and create a strong bond with your materials. This preparation includes gathering the necessary items and ensuring that your surface is clean and dry before starting. Let’s take a closer look at what you need and how to prepare your workspace. For more information on how to glue limestone together, click here.
What You Need
Before using the E6000 Glue Precision Tip, there are certain things that you need to prepare. Here’s a list of materials that you’ll need:
| E6000 Glue Precision Tip | The E6000 Glue Precision Tip comes in a tube with a small applicator that allows you to apply the glue with precision. |
| Surface to Glue | You will need to have the surface that you want to glue ready beforehand. Make sure it is clean and dry before applying the adhesive. Otherwise, the glue may not adhere properly. |
| Protective Gear | Since E6000 glue is toxic and can emit harmful fumes, it is essential to ensure that you are using it in a well-ventilated area. Wear protective gear such as gloves and goggles (especially if you’re working on a project that requires you to use a sizable amount of glue). |
| Cleaning Supplies | Have a towel or cloth ready to clean up any excess glue that may spill over. You can also use rubbing alcohol to remove any stubborn spots of adhesive. |
It’s important to remember that different projects may require different materials, so be sure to prepare accordingly. If you need more information on gluing a specific item, you can check out these helpful articles:
How to Glue a Frame to a Mirror
How to Glue Body Repair Panels
What is PUR Glue?
How to Glue Wax Together
How to Glue Mason Jar Lids
How to Glue Pool Tiles Underwater
How Long Epoxy Glue Takes to Cure
Preparation Before Using the Glue Tip
Before using the E6000 glue precision tip, it is important to properly prepare the materials and the working area to ensure the best possible results. Here are some things to keep in mind before using the glue.
| Clean the surface | Make sure the surface you plan to glue is clean, dry, and free from any debris or dust. Use a mild soap and water to clean the surface, and let it dry completely before applying the glue. |
| Protect your work area | Use a disposable plastic or paper sheet to cover your work area. This will help prevent any glue from spilling onto your work surface and making a mess. You can also use a painter’s tape to hold the objects in place. |
| Wear protective gloves | The E6000 glue is a strong adhesive that is difficult to remove from skin. It is recommended to wear disposable gloves when handling the glue. |
| Test the glue on a small area | Before applying the glue to the entire surface, it is recommended to test it on a small area. This allows you to see how the glue will react to the surface material and how long it will take to dry. |
By preparing the surface and the working area beforehand, you can ensure that the E6000 glue precision tip adheres to the surface properly and produces the desired results.
Step-by-Step Guide on Using E6000 Glue Precision Tip
Now that you have prepared the surface and the glue, it’s time to begin using the E6000 Glue Precision Tip. This step-by-step guide will take you through the process of how to apply the glue correctly and effectively. Whether you’re working on a DIY project or repairing a broken item, following these steps will ensure that your work is durable and long-lasting. With the precision tip, you can apply the glue with accuracy and ease. So let’s get started!
Step 1: Prepare the Surface and the Glue
To ensure a successful bond, it’s essential to properly prepare both the surface that you’ll be gluing and the E6000 Glue Precision Tip itself. Here are some steps to follow:
For the surface:
- Clean the surface – make sure it’s free of debris, dust, and dirt. Use a clean cloth or paper towel and alcohol to remove any oils or other residues that could prevent the glue from bonding.
- Rough up the surface – use sandpaper or a file to create a rough texture on the surface. This will help the glue adhere better.
- Warm up the surface – warm surfaces will help the glue flow more easily and bond better. Use a heat gun or a hairdryer to gently warm up the surface.
For the glue tip:
- Remove the cap – take off the cap on the E6000 Glue Precision Tip.
- Check the flow – before squeezing the glue, test the flow by squeezing a small amount onto a piece of scrap paper or cardboard.
- Snip the tip – use scissors or wire cutters to snip the tip of the glue if it’s too long or narrow. Start with a small snip and test the flow again.
- Use a pin – if the tip gets clogged, use a pin to clear it. Be careful not to damage the tip while doing this.
Remember, a properly prepared surface and glue tip will help ensure a strong, long-lasting bond.
Step 2: Apply the Glue
Once you have prepared the surface and the glue, it’s time to apply the E6000 Glue Precision Tip.
Step-by-step:
- Squeeze the tube gently: Slowly and gently squeeze the tube, allowing the glue to flow onto the surface. Be careful not to apply too much pressure or the glue may spill over and create a mess.
- Use the precision tip: The precision tip that comes with the E6000 Glue allows you to apply the glue exactly where you need it. This is especially useful for smaller surfaces and intricate details.
- Apply a small amount of glue: Start by applying a small amount of glue to the surface. Remember, a little goes a long way, and too much glue can cause the bond to be weaker.
- Spread the glue: Use a toothpick, craft stick, or the tip of the glue cap to spread the glue evenly across the surface. Make sure not to miss any spots, as this may weaken the bond.
- Clamp the surfaces together: If using the glue to bond two surfaces together, press them firmly together and hold them in place for at least 24 hours to allow the glue to fully cure.
Remember to work in a well-ventilated area and wear gloves to avoid getting the glue on your skin. Also, be careful not to let the glue come into contact with your eyes or mouth. If accidental contact occurs, seek medical attention immediately.
Step 3: Wait for the Glue to Dry
After applying the glue, you need to wait for it to dry before moving on to the next step. This allows the glue to set properly and ensures the best results. The drying time depends on the surface and the amount of glue used. Here’s a table showing the approximate drying times for typical materials:
| Material | Drying Time |
|---|---|
| Wood | 24 to 72 hours |
| Metal | 24 to 72 hours |
| Glass | 24 to 72 hours |
| Plastic | 24 to 72 hours |
| Fabric | 24 to 72 hours |
Note: These are general guidelines and actual drying times may vary depending on factors such as temperature and humidity. It’s important to check the glue manufacturer’s instructions for specific drying times.
During the drying process, make sure to keep the glued item stable and undisturbed. Moving or handling the item too soon can cause the glue to shift and weaken the bond. If possible, leave the item in a stable position to allow the glue to fully dry.
Do not attempt to force dry the glue by using heat or other methods. This can cause the glue to dry unevenly and weaken the bond. Allow it to dry naturally for the best results.
Once the glue has dried completely, it should be strong and secure. If you notice any areas that are still tacky or not fully dry, give it additional time to dry before handling.
Step 4: Clean Up Any Excess Glue
After waiting for the E6000 Glue Precision Tip to dry, you may notice some excess glue around the area where you applied it. It’s important to clean up this excess glue to ensure a neat and professional finish. Here are the steps for cleaning up any excess glue:
- Start by wiping away any excess glue with a disposable cloth or paper towel. Be sure to remove as much glue as possible.
- If there is still some glue remaining, use a small amount of rubbing alcohol on a cotton swab or cloth to gently rub away the excess glue.
- For any stubborn glue that is still left behind, use a sharp tool such as a toothpick or a craft knife to carefully scrape away the excess glue. Be careful not to damage the surface underneath.
- After cleaning up the excess glue, wipe the area down with a clean cloth or cotton swab dipped in rubbing alcohol to ensure that there are no remaining traces of glue.
Remember to complete this step soon after the glue has dried, as it will be much harder to remove once it has fully set. With these simple steps, you can achieve a clean and professional finish for your project.
Tips and Tricks on Using E6000 Glue Precision Tip
If you’re looking for ways to improve your E6000 Glue Precision Tip experience, then you’re in the right place. In this section, we’ll share some useful tips and tricks that will help you use the glue tip more efficiently and effectively. Whether you’re a newbie or an experienced user, these tips and tricks will surely come in handy. So, let’s dive in and explore some of the best practices for using the E6000 Glue Precision Tip!
How to Avoid Clogs in the Glue Tip
Taking care of your E6000 Glue Precision Tip is important to ensure that it stays in good condition and is always ready when you need it. Clogs in the glue tip can be a common problem for users. Here are some tips on how to avoid clogs and keep your glue tip in great working condition:
1. Use the glue frequently: One of the best ways to avoid clogs in the glue tip is to use it frequently. This means that the glue is always flowing through the tip, which helps prevent it from drying out and clogging the opening.
2. Clean the tip after use: Whenever you finish using your E6000 glue, make sure to clean the tip to prevent any excess glue from drying and clogging the opening. You can use a clean cloth or paper towel to wipe the tip clean.
3. Store it properly: When you’re not using your E6000 Glue Precision Tip, store it upright with the cap tightly closed. This helps prevent any air from entering and drying out the glue inside.
4. Use a pin: If you do notice a clog in your glue tip, you can use a fine pin or needle to gently clear the opening. Be careful not to damage the tip in the process.
5. Use a cleaning solution: If a pin does not work, you can try using a cleaning solution specifically designed for E6000 glue. Apply a small amount to the tip and let it sit for a few minutes before wiping it clean with a cloth or paper towel.
Following these tips will help prevent clogs in your E6000 Glue Precision Tip and ensure that it’s always ready to use when you need it.
How to Store the Glue Tip
After using E6000 Glue Precision Tip, proper storage is crucial to ensure that the glue does not dry out and become unusable. Here are some tips on how to store the glue tip:
| Tip | Description |
|---|---|
| Cap It Tight | Make sure to cap the glue tip tightly after each use. This will prevent air from getting in and drying out the glue. |
| Store Upright | It is recommended to store the glue tip upright to prevent the glue from settling and clogging the tip. This will also prevent accidental spills or leaks. |
| Keep in a Cool, Dry Place | Store the glue tip in a cool, dry place away from direct sunlight or heat. High temperatures or humidity can cause the glue to dry out or lose its effectiveness. |
By following these storage tips, you can ensure that your E6000 Glue Precision Tip stays in good condition and is ready to use whenever you need it. It’s also important to note that the glue has a shelf life of 2-3 years, so make sure to use it before it expires.
Conclusion
In conclusion, using E6000 Glue Precision Tip can be a game-changer for your DIY projects and repairs. Its precision tip allows for precise application, making it easier to use than regular glue. With its strong and durable hold, it can bond various materials together, making it a versatile adhesive for all your needs.
Before using the glue, it is important to prepare your surface and the glue itself. Make sure to gather all the necessary materials and follow the proper precautions to ensure your safety and the effectiveness of the glue.
The step-by-step guide provided in this article can help you use E6000 Glue Precision Tip easily and effectively. By following these simple steps, you can bond materials together with ease.
Additionally, some tips and tricks were provided to help you avoid any potential clogs and store the glue tip properly. These tips can help extend the life of your glue and ensure its effectiveness for future projects.
Overall, E6000 Glue Precision Tip is a reliable adhesive to have in your toolkit. With its versatility and ease of use, it can be used for various projects and repairs. By following the steps and tips provided in this article, you can get the most out of your E6000 Glue Precision Tip and create projects with confidence.
Frequently Asked Questions
What surfaces can E6000 Glue Precision Tip be used on?
E6000 Glue Precision Tip can be used on a wide variety of surfaces, including glass, metal, wood, plastic, and more.
How long does it take for E6000 Glue Precision Tip to dry?
E6000 Glue Precision Tip typically takes 24-72 hours to fully cure and reach maximum strength.
Can E6000 Glue Precision Tip be used on outdoor projects?
Yes, E6000 Glue Precision Tip is waterproof and heat-resistant, making it suitable for outdoor projects.
Is E6000 Glue Precision Tip toxic?
E6000 Glue Precision Tip contains chemicals that can be harmful if ingested or inhaled, so it is important to use it in a well-ventilated area and avoid direct skin contact.
Can E6000 Glue Precision Tip be painted over?
Yes, E6000 Glue Precision Tip can be painted over once it has fully cured.
Can E6000 Glue Precision Tip be sanded?
Yes, once E6000 Glue Precision Tip has fully cured, it can be sanded or drilled if needed.
What is the shelf life of E6000 Glue Precision Tip?
E6000 Glue Precision Tip has a shelf life of approximately 2 years if stored in a cool, dry place.
Can E6000 Glue Precision Tip be removed once it has bonded?
E6000 Glue Precision Tip can be difficult to remove once it has bonded, especially from porous or uneven surfaces.
Can E6000 Glue Precision Tip be used on fabrics?
Yes, E6000 Glue Precision Tip can be used on fabrics and is often used for appliqué, hemming, and making repairs to clothing.
Is E6000 Glue Precision Tip flammable?
Yes, E6000 Glue Precision Tip is flammable and should be kept away from heat sources and open flames.