Metal is a common material used in various DIY projects, but joining pieces of metal can be a difficult task. This is where epoxy glue comes in handy. Epoxy glue is a two-part adhesive that creates a strong and durable bond between materials. If you’re wondering how to use epoxy glue on metal, you’re in the right place. In this guide, we’ll take you through the entire process, from preparing the surface to curing and finishing the bond. By the end of this article, you’ll have all the information you need to successfully use epoxy glue on metal. Ready to get started? Let’s dive in!
What is Epoxy Glue?

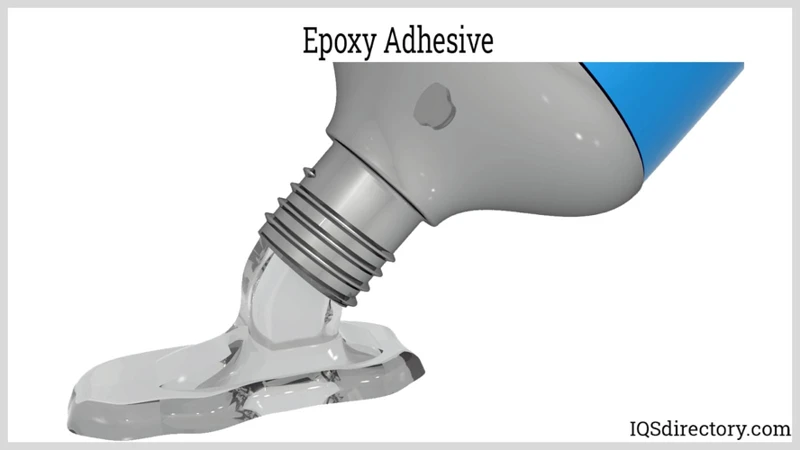
Epoxy glue is a versatile adhesive that is commonly used for metal bonding. It provides a strong and durable bond that can withstand exposure to water, heat, and chemicals. Epoxy glue is a two-part adhesive that consists of a resin and a hardener. When mixed together, they create a chemical reaction that causes the mixture to harden and cure. Epoxy glue is often used in industrial settings, as well as for DIY projects at home. If you’re unfamiliar with epoxy glue, check out this article to learn more about it and how it can be used for metal bonding.
How Does Epoxy Glue Work?
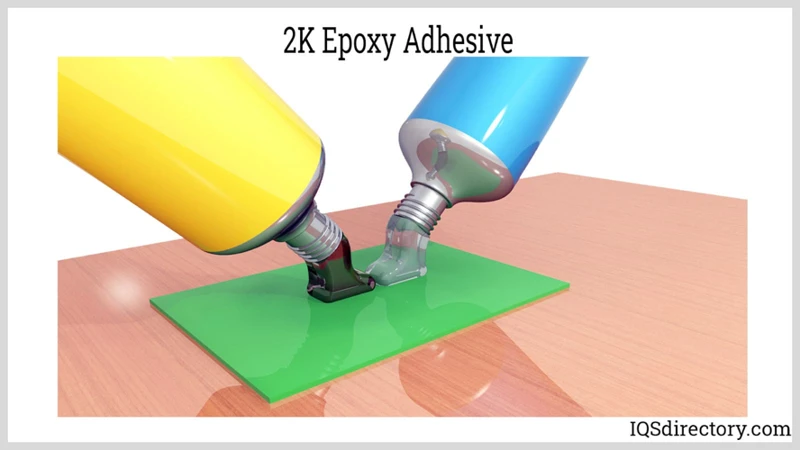
Epoxy glue is a two-part adhesive that consists of a resin and a hardener. When mixed together in the correct proportion, a chemical reaction takes place, causing the epoxy to harden and cure over time. The resin and hardener molecules cross-link to form a rigid, durable, and strong bond.
The chemistry behind the epoxy glue can be explained by the molecules of resins and hardeners. Epoxy resins are typically made from a combination of epichlorhydrin and bisphenol-A. The hardeners, often made from polyamine, an aliphatic amine, or cycloaliphatic amine, interact with a reactive site on the epoxy resin molecule to form a highly cross-linked polymer that creates the adhesive bond.
Unlike other adhesives, such as superglue or PVA glue, which dry and harden by evaporating solvents or water, the curing process of epoxy glue is not dependent on evaporation. Instead, it relies on a chemical reaction that produces heat, which then accelerates the reaction further.
The curing process of epoxy glue takes several hours to complete, as the chemical bond created needs time to fully develop and solidify. Once cured, the bond is tough, resilient, and resistant to water, heat, and other environmental factors.
Epoxy glue is known for its excellent bonding strength, which is attributed to how it hardens and cures. The cross-linking of molecules results in a strong and stable bond, particularly when used on metal surfaces.
However, it is important to note that successful bonding with epoxy glue requires proper preparation of the metal surface and precise mixing of the two components. Mixing in incorrect proportions, inadequate surface preparation, or improper curing can weaken or even break the bond.
Always follow the manufacturer’s instructions carefully and refer to the mixing and curing times recommended for the specific product being used.
Internal link: /what-is-resin-glue/
Advantages of Using Epoxy Glue on Metals
Epoxy glue is a popular choice for bonding metals due to its numerous advantages. Unlike other types of glue, epoxy glue provides high strength bonding, making it ideal for securing metal objects. It offers water and heat resistance properties, ensuring the bond lasts even in harsh conditions. Its durability also makes it suitable for long-term use. Let’s take a closer look at why these qualities make epoxy glue an excellent choice for metal bonding projects.
High Strength Bonding
When it comes to bonding metal surfaces, high strength is a must. Epoxy glue is known for its high strength bonding capabilities, making it a popular choice for metal bonding projects. One of the reasons for its high strength bonding is its ability to fill gaps and cracks between two surfaces, creating a strong and solid bond. In fact, some types of epoxy glue can provide a bond stronger than the metal itself.
Tensile strength test results for epoxy glue on metal:
| Epoxy glue product | Tensile strength (psi) |
|---|---|
| Product A | 4,500 |
| Product B | 5,000 |
| Product C | 6,200 |
As shown in the table above, different brands and types of epoxy glue have different tensile strength levels. It is important to choose the right product that suits your project needs.
However, it is worth noting that the strength of the bond is also affected by the surface preparation and application process. Proper surface preparation and application, combined with high strength epoxy glue, can result in a reliable and long-lasting bond between metal surfaces.
Allowing enough time for the epoxy glue to dry and cure is crucial for achieving the high strength bonding capabilities. Rushing the process or applying too much pressure on the surface before the glue is fully cured can compromise its strength.
Water and Heat Resistance
Epoxy glue is known for its exceptional water and heat resistance. Once cured, it forms a strong and stable bond that can withstand harsh environments. This makes it an ideal adhesive for use on metal surfaces that will be exposed to moisture, heat, or both.
Water Resistance: When used on metal, epoxy glue creates a waterproof seal that prevents moisture from penetrating the bonded area. This is because the cured epoxy resin is non-porous which means it does not allow the passage of water molecules. This makes it suitable for use on outdoor metal items such as garden tools, outdoor furniture, boats, and metal roofs.
Heat Resistance: Epoxy glue is also well known for its high heat resistance. Once cured, it can withstand temperatures of up to 300°F (150°C). This means that it can be used on metal surfaces that will be exposed to high temperatures, such as engine parts, cookware, and piping systems.
It’s important to note that the heat and water resistance of epoxy glue depend on its correct application and curing. Any deviation from the recommended preparation, mixing, and application guidelines may compromise the adhesive’s ability to resist heat and water.
To ensure maximum heat and water resistance of the bond, it’s recommended to use epoxy glue that is specifically designed for such applications. Heat-resistant epoxy glue is specially formulated to withstand high temperatures, making it ideal for use on metal surfaces that will be exposed to heat.
The water and heat resistance of epoxy glue on metal surfaces make it a highly reliable adhesive. When properly used and cured, it can create long-lasting bonds that withstand the toughest conditions.
Durability
When it comes to durability, epoxy glue is one of the strongest adhesive options available in the market for bonding metal. The cured epoxy has high resistance to impact and can withstand heavy loads. The adhesive is highly resistant to wear and tear, making it a perfect bonding option for metal surfaces that undergo frequent use.
Epoxy glue also has excellent resistance to environmental factors such as heat, water, and chemicals. This makes it suitable for use in industries and applications that require a durable and long-lasting bonding solution. For example, it can be used to bond metal parts of automotive engines, aerospace components, and marine equipment.
However, it is important to keep in mind that the durability of the bond depends on several factors, including the preparation of metal surface, the correct mixing of the components, and the curing process. To ensure maximum durability, it is crucial to follow the manufacturer’s instructions carefully and apply the adhesive according to the recommended technique.
It is important to note that epoxy glue can become brittle over time and may break down under extreme environmental conditions. If bonding metal for outdoor or high-stress applications, it is essential to choose a high-quality epoxy glue that is specifically formulated for these applications and can withstand harsh weather conditions.
The durability of epoxy glue makes it an excellent option for bonding metal surfaces that require long-lasting and strong bonds. It provides high strength bonding, excellent resistance to wear and tear, and can withstand exposure to environmental factors such as heat, water, and chemicals. If you want to ensure the highest level of durability for your epoxy glue, it is recommended to use a high-quality product, follow the manufacturer’s instructions, and test the cured bond after the recommended curing time.
Preparing the Metal Surface
Before applying epoxy glue to your metal surface, it is crucial to prepare the surface properly. Cleaning the Surface and Sanding the Surface are two essential steps that must not be skipped. It is crucial to remove any oil, grease, rust, or other impurities from the surface to ensure maximum bonding strength. Let’s dive into these steps in more detail below. For more information on thinning epoxy glue, check out this article on thinning epoxy glue.
Cleaning the Surface
Properly cleaning the surface beforehand is crucial to ensure a strong bond between two pieces of metal using epoxy glue. Any dirt or grime on the surface may compromise the bond, so it is important to clean the surface thoroughly using the right materials. Below is a table summarizing the items needed to clean the metal surface:
| Materials | Description |
|---|---|
| Denatured alcohol | A fast-evaporating solvent that helps dissolve dirt, grease, and oil on the surface. |
| Clean rags or paper towels | Used to apply the denatured alcohol and wipe the surface clean. |
| Cotton swabs | Used to clean hard-to-reach areas on the surface. |
To clean the metal surface, start by dampening a clean rag or paper towel with denatured alcohol. Gently rub the surface to remove any dirt, grease, or oil that may be present. For hard-to-reach areas, use a cotton swab moistened with denatured alcohol.
It is important to note that some metals may require different cleaning procedures depending on the type of metal and the condition of the surface. For instance, aluminum may require additional steps such as sanding or using a wire brush to remove oxidation or other surface impurities.
Once the surface is clean, inspect it for any remaining residue or particles. Use a clean rag or cotton swab to remove any remaining debris from the surface.
Properly cleaned surfaces will ensure a strong bond when using epoxy glue on metal. Be sure to follow all safety precautions and manufacturer instructions when applying epoxy glue to the metal surface.
Sanding the Surface
When it comes to metal surfaces, sanding is an essential step before applying epoxy glue. Sanding prepares the surface by creating a texture that helps the glue adhere, and it also removes any dirt, rust, or corrosion that could weaken the bond. Here are some important details to consider when sanding your metal surface:
| Step | Description |
|---|---|
| 1 | Choose the Right Sandpaper Grit: Selecting the correct grit (coarseness) of sandpaper is an important part of the process. For optimal bonding, use sandpaper with a grit of 120 or higher. Avoid sandpaper with too fine of a grit, as it may not create the necessary texture on the surface. |
| 2 | Clean the Surface: Before sanding, ensure that the surface is completely clean and dry. Use a degreaser or alcohol to remove any oils or dirt that may be present. |
| 3 | Sand the Surface: Use a circular motion to sand the surface. Ensure that the grit is evenly distributed across the surface, and sand thoroughly until the metal has a slightly rough texture. |
| 4 | Clean Again: After sanding, clean the surface once more to remove any dust or debris. A microfiber cloth works well for this step. |
| 5 | Inspect the Surface: After sanding, inspect the surface to ensure that it has an even, slightly rough texture. If it appears too smooth, repeat the sanding process. |
It’s important to follow these steps carefully, as properly sanding the metal will ensure a strong bond between the surface and the epoxy glue. If you have any doubts about the process or if it seems too difficult, don’t hesitate to reach out to a professional for assistance.
Now that you know how to prepare the surface, it’s time to move on to mixing and applying the epoxy glue. But before that, why not check out our article on how to glue starboard?
Mixing and Applying Epoxy Glue
Mixing and applying epoxy glue can be a bit tricky, but with proper technique and attention to detail, you can create a strong and durable bond on metal. Before you start, make sure to read the manufacturer’s instructions carefully. It’s also helpful to have all your tools and materials ready and organized. In this section, we will guide you through the steps of measuring, mixing, and applying the epoxy glue to ensure a successful bond. Once you master these steps, you’ll be able to tackle any metal bonding project with confidence. But before we jump in, let’s take a look at some frequently asked questions related to using epoxy glue. If you are interested in other types of glues, check out our article on what is the best glue for aluminum to wood?
Measuring the Components
Accurate measurement of the components is essential in obtaining effective bonding with epoxy glue. Often, epoxy adhesives come in two parts, namely the resin and hardener, which must be in the correct proportion to one another for optimal bonding results. Before measuring the components, it is crucial to know the required mixing ratio, which can be found on the adhesive packaging or in the instructions.
To measure the components, use measuring cups or syringes that are clean and dry. Avoid using used measuring cups as they may have some residue that could affect the accuracy of the measurement. It is also necessary to have a flat surface where the cups or syringes can stand while measuring to obtain accurate readings.
Begin by measuring the resin. Use a measuring cup or syringe to dispense the required amount of resin, keeping in mind the mixing ratio. Ensure that you measure the resin precisely and not estimate it as different amounts of resin can impact the adhesive strength.
The next step is to measure the hardener. Similar to measuring the resin, use a new cup or syringe to measure the hardener accurately. Remember the mixing ratio and follow it to the letter.
It is paramount to mix the components in a clean environment, free from any debris, dust particles or other contaminants. Ensure that the mixing area is well-lit to avoid any inaccuracies in measuring or mixing the adhesive components.
Keep in mind that epoxy adhesive has a limited working time, and mixing too much adhesive may result in its hardening before it can be applied. Mixing small amounts of adhesive at a time can help to reduce wastage and ensure that you use the mixed adhesive before it hardens.
Knowing the right measurement for the components and following the mixing ratio is vital in obtaining a durable bond when using epoxy glue. By measuring the components accurately, it ensures that the adhesive mixture has the right proportion for maximum bonding strength. In the next step, we will discuss how to mix the epoxy components for optimal results.
Mixing the Components
Before mixing the components of the epoxy glue, it is important to read the manufacturer’s instructions carefully. This will ensure that the epoxy glue is mixed in the correct proportions.
To start mixing the components, first, take the recommended amount of each component and place them on a clean and dry surface. Make sure to wipe off any excess moisture or contaminants, as this can affect the bonding ability of the epoxy glue.
Note: It is important to mix the components in the exact ratio recommended by the manufacturer. Mixing an incorrect ratio can result in a weak bond.
Next, using a clean and dry mixing container, mix the two components thoroughly. A disposable mixing container can be used to ensure cleanliness and prevent contamination. Mix for 2-3 minutes and ensure that both components are blended evenly, as uneven mixing can result in weak bonds.
Tip: Rubber gloves should be worn during mixing to prevent contamination and to protect skin from coming into contact with the chemicals present in the epoxy glue.
Once mixed, the epoxy glue will begin to harden and cure. This process cannot be stopped once it has started, so it is important to apply the glue as soon as possible after mixing.
If the epoxy glue is not used immediately after mixing, it will harden and become unusable. Any excess glue should be discarded following the manufacturer’s recommendations.
Following these steps for mixing the components of the epoxy glue will ensure a strong bond for your metal project. For more information on other types of adhesives, check out these helpful links:
- How Strong is Super Glue on Plastic?
- What is PL Glue?
- How to Glue Acrylic to Glass
- How to Glue Clay to Wood
Applying the Epoxy Glue
Once you have mixed the epoxy glue components, the next step is to apply it on the metal surface.
To ensure proper bonding, apply the epoxy glue on the surface area using a spatula or brush. Make sure to spread it evenly and cover the entire surface area.
Be cautious not to apply too much epoxy as it can result in messy overflow and extended curing time. It’s recommended to apply multiple thin layers instead of one thick layer.
If you need to bond two pieces of metal, place the two surfaces together, applying gentle pressure to ensure intimate contact and squeeze out any air pockets. The longer the pieces stay in contact, the stronger the bond will be.
After the epoxy glue has been applied, let it sit undisturbed for a few minutes before removing any excess material. This will allow the epoxy glue to spread out evenly and settle more effectively.
During the curing process, prevent the metal surface from moving or being disrupted to ensure a strong bond.
If necessary, use clamps to hold the two pieces in place. Leave the clamps on until the epoxy glue has fully cured, per the manufacturer’s instructions.
The curing time for epoxy glue can vary depending on the specific brand and environmental conditions. Refer to the manufacturer’s directions for recommended curing time and temperature for best results.
Once the epoxy glue has fully cured, inspect the bond for any signs of weakness or imperfections. If the bond is not strong enough, you may need to reapply the epoxy glue and start the process over again.
Remember, proper application and curing of the epoxy glue is crucial to achieve a strong bond on metal surfaces.
Removing Excess Epoxy Glue
After applying the epoxy glue onto the metal surface, it is important to remove any excess glue to ensure a clean and smooth finish. Excess epoxy glue can be easily removed with the use of a scraper or a putty knife.
Before removing the excess glue, it is crucial to wait until the glue begins to dry, so it is easier to scrape off. This usually takes about 30 minutes to an hour, depending on the type of epoxy used.
To remove the excess epoxy glue, place the scraper or putty knife at a 45-degree angle and gently scrape off the excess glue. Be careful not to apply too much pressure as this can damage the metal surface.
If there are still small traces of epoxy glue left after scraping, use a cloth or rag dipped in acetone or rubbing alcohol to wipe away the remaining glue. However, one should carefully avoid applying too much acetone or rubbing alcohol as it may damage the metal surface.
It is vitally important to keep in mind that removing excess epoxy glue from the metal surface is crucial to ensure a clean and perfect finish. Any leftover excess glue can cause an uneven surface, which will later show up when sanding or finishing the surface.
By following the above steps to remove excess epoxy glue, one can guarantee a durable and reliable bond that will last for years to come.
Curing and Finishing
Once you’ve successfully applied the epoxy glue to the metal surface, you’ll need to give it time to cure properly and finish the surface to ensure a smooth and professional-looking result. The curing process is an essential step that allows the epoxy glue to fully bond with the metal, creating a highly durable and long-lasting hold. In this section, we’ll explore the key factors that contribute to successful curing and provide some essential tips for finishing your epoxy glue project with precision. So, grab your protective gear and let’s get started!
Allowing the Epoxy Glue to Cure
Once you have applied the epoxy glue to the metal surface, you need to allow it to cure properly to achieve the desired level of bonding strength. This process is time-consuming, but crucial to ensure the epoxy glue achieves maximum strength. Here are some steps that you can follow while allowing the epoxy glue to cure:
- Check the manufacturer’s instructions: The curing time of an epoxy glue can vary depending on the specific product you are using. Hence, it is imperative to check the manufacturer’s instructions for curing time and ensure that you let the glue cure for at least the amount of time specified.
- Allow the glue to set before moving: While it is tempting to check if the bond has set, it is advisable to let the glue rest and avoid any movements for at least 24 hours. This will ensure that the bond strength is optimal.
- Avoid exposing the bond to heat or water: It is important to ensure that the bonded metal surface is not exposed to heat or water within the first 24-48 hours of the curing process. This will prevent any damage to the bond and ensure that it cures perfectly.
- Store the metal in a safe place: After applying the epoxy glue, it is best to store the metal in a safe place where it cannot be exposed to any external forces until the curing process is complete.
Following these steps will help ensure that the epoxy glue bonds the metal surface strongly and durably. Any damage or movement during the curing process can result in a poor bond and, as a consequence, reduce the strength of the bond. So, if you want to achieve maximum strength and durability, ensure that you follow all the necessary precautions and let the epoxy glue cure properly.
Sanding and Finishing the Bonded Surface
After the epoxy glue has cured, it’s time to sand and finish the bonded surface to achieve a smooth and polished look. Here are the steps you need to follow:
| Step 1: | Start by using a coarse grit sandpaper, with a grit of 60 or 80, to remove any excess epoxy and level the surface. |
| Step 2: | Once you have leveled the surface, switch to a finer grit sandpaper, such as 120 or 220, to smooth the surface and remove any scratches left by the coarse sandpaper. |
| Step 3: | After sanding, wipe the surface with a clean cloth to remove any dust or debris. |
| Step 4: | Next, use a polishing compound or automotive wax to buff the surface and create a shiny finish. |
| Step 5: | For larger surfaces, you may want to use a power buffer with a foam pad to achieve a more even and precise finish. |
It’s important to note that you should avoid using water to wet sand the epoxy surface, as this can cause the epoxy to become cloudy and ruin the finish. Additionally, make sure to wear a respirator mask and protective gloves to avoid inhaling any dust particles or getting polishing compound on your skin.
By following these steps, you can achieve a smooth and polished finish on your bonded metal surface, making it not only strong but also aesthetically pleasing.
Tips and Precautions
As with any DIY project, it’s essential to take the necessary precautions and safety measures when working with epoxy glue. Here are some helpful tips and precautions to keep in mind before and during the process to ensure a successful and safe bonding experience.
Working in a Well-Ventilated Area
When using epoxy glue on metal, it is important to work in a well-ventilated area. This is because the fumes produced by the glue may be harmful if inhaled in large quantities. In order to avoid any potential health hazards, follow these guidelines:
| Tip | Explanation |
|---|---|
| Use a Respirator | Wearing a respirator can help filter out any harmful fumes. Make sure the respirator fits properly and is rated for organic vapors. |
| Open Doors and Windows | Opening doors and windows can help to increase airflow and reduce the concentration of fumes in the area. |
| Use a Fan | Positioning a fan near the work area can help to circulate air and further reduce the concentration of fumes. |
| Take Breaks | It is important to take frequent breaks when working with epoxy glue. This will give you a chance to go to a different area where you can breathe fresh air. |
By following these tips, you can help to reduce your exposure to harmful fumes and work safely when using epoxy glue on metal.
Wearing Protective Gear
When handling epoxy glue for metal, it is important to wear protective gear to avoid any potential harm. The following are some items that should be worn when using epoxy glue:
- Gloves: Wear disposable gloves to prevent skin irritation and possible allergic reactions. Make sure to choose gloves that are resistant to chemicals and are appropriate for the type of epoxy you will be using.
- Safety glasses: Epoxy glue can cause eye irritation and possible damage if it comes into contact with the eyes. Wearing safety glasses will help to protect your eyes and prevent any accidents.
- Respirator: Epoxy glue has a strong smell and can emit harmful fumes. To avoid inhaling these fumes, it is recommended to wear a respirator when working with epoxy. Choose a respirator that is designed to filter out the specific types of fumes that you will be exposed to.
- Clothing: Wear old clothing that covers your skin to protect yourself from any accidental spills or splashes of the epoxy glue.
It is important to note that the type of protective gear required may vary depending on the type of epoxy glue being used and the specific project that you are working on. Always follow the manufacturer’s instructions and recommended safety precautions. Remember to handle epoxy glue with care to ensure a successful and safe bonding experience.
Storing Epoxy Glue Properly
To ensure that your epoxy glue stays in good working condition, it is important to store it properly. Here are some tips to follow when storing your epoxy glue:
- Store in a cool, dry place: Epoxy glue should be stored in a cool, dry place away from direct sunlight. Exposure to heat can cause the glue to harden and become unusable.
- Keep containers tightly closed: Make sure the lid on the epoxy glue container is tightly closed to prevent air from getting in. Air can cause the glue to dry out and lose its effectiveness.
- Separate components: If your epoxy glue comes in separate components, such as a resin and hardener, keep them separate until you are ready to use them. This will prevent them from reacting and hardening prematurely.
- Store upright: Store your epoxy glue containers upright and not on their sides. This prevents the glue from leaking and getting on other surfaces.
- Check expiration date: Be sure to check the expiration date on your epoxy glue before use. Expired glue may not work effectively.
By following these tips, you can ensure that your epoxy glue remains in good condition and is ready to use when you need it. Proper storage can also extend the lifespan of your glue, saving you money in the long run.
Testing the Bond
Once you’ve applied the epoxy glue to the metal surface, it’s important to test the bond to ensure a strong and secure hold. There are a few different ways to test the bond, including:
| Test Method | Description |
|---|---|
| Visual Inspection | Upon curing, examine the bond visually to ensure there are no gaps or cracks between the metal and the epoxy glue. |
| Shear Test | Apply force to the bond perpendicular to the surface to test its resistance to shear stress. Use a force gauge to measure the force required to break the bond; a strong bond should require a high force. |
| Tensile Test | Apply force to the bond in opposite directions parallel to the surface to test its resistance to tensile stress. Use a force gauge to measure the force required to break the bond; a strong bond should require a high force. |
Note: It’s important to follow the manufacturer’s instructions for curing time and temperature before testing the bond. Testing the bond too soon or exposing it to excessive stress before it has fully cured can compromise its strength.
If any issues are found during testing, it may be necessary to remove the existing bond and reapply the epoxy glue. However, if the bond passes all tests, you can proceed with confidence that your metal project will have a strong and durable hold.
Conclusion
In conclusion, using epoxy glue on metal surfaces is a great way to achieve a strong and long-lasting bond. With its unique chemical composition, epoxy glue can withstand extreme temperatures, water exposure, and harsh conditions, making it ideal for a variety of metal applications.
By following the step-by-step guide outlined in this article, you can ensure that your epoxy glue application is successful and produces a strong bond that will withstand the test of time. Remember to always prep your metal surface properly by cleaning and sanding it, and to mix and apply the epoxy glue carefully and accurately.
In addition, take the necessary precautions when working with epoxy glue, such as ensuring proper ventilation and wearing protective gear. It’s also important to properly store your epoxy glue to ensure that it stays fresh and effective for future use.
Finally, always test the bond before using your newly bonded metal for its intended purpose. By following these tips and guidelines, you can ensure a successful epoxy glue application every time.
Frequently Asked Questions
Can epoxy glue be used on all metals?
Epoxy glue can be used on most metals including steel, aluminum, brass, copper, and bronze. However, it may not adhere well to certain types of coated metals.
What is the maximum temperature resistance of epoxy glue?
The maximum temperature resistance of epoxy glue can vary between brands but is generally around 300-350°F (150-175°C).
How long does it take for epoxy glue to cure?
The curing time for epoxy glue can range from several minutes to several hours depending on the brand and the ambient temperature. However, it usually takes around 24 hours for the bond to reach its full strength.
Can I sand the surfaces after applying epoxy glue?
Yes, you can sand the surfaces after applying epoxy glue. However, it is recommended to wait until the bond is fully cured before sanding. This will ensure a smooth and even finish.
Can epoxy glue be used for outdoor applications?
Yes, epoxy glue is suitable for outdoor applications because it is water-resistant and UV-stable. However, it is important to choose a brand that is specifically designed for outdoor use.
What is the shelf life of epoxy glue?
The shelf life of epoxy glue can vary between brands but is generally around 1-2 years if stored properly in a cool, dry place.
Can I use epoxy glue to bond two different types of metals?
Yes, you can use epoxy glue to bond two different types of metals. However, it is important to choose a brand that is suitable for both metals and to properly prepare the surfaces beforehand.
Is epoxy glue safe to use?
When used properly, epoxy glue is generally safe to use. However, it is important to work in a well-ventilated area, wear protective gear, and avoid skin contact.
Can I paint over epoxy glue?
Yes, you can paint over epoxy glue once it has cured. However, it is recommended to lightly sand the surface beforehand to ensure better adhesion.
How much epoxy glue should I use per square inch?
The amount of epoxy glue needed per square inch can vary depending on the brand and the thickness of the bond required. However, it is recommended to follow the manufacturer’s instructions and to use a minimal amount to avoid excess glue and potential weak spots.