Have you ever been in the middle of an exciting fishing trip only to have your fishing rod tip come loose or completely fall off? It’s a frustrating experience that can ruin your day out on the water. Choosing the right glue for your fishing rod tip is crucial to prevent any damage, ensure proper fishing performance, and increase the longevity of your gear. But with so many options on the market, it can be overwhelming to make the right choice. In this comprehensive guide, we will break down the different types of glue for fishing rod tips, how to apply them properly, and factors to consider when selecting the best one for your needs. So, let’s dive in and make sure you’re prepared for your next fishing adventure.
Why Choosing the Right Glue is Important
Choosing the right glue for your fishing rod tip may seem like a small detail, but it can greatly impact your overall fishing experience. Using the wrong type of glue can lead to damage, decreased performance, and a shortened lifespan of your rod. That’s why it’s important to understand the different types of glue available and their specific uses. In this comprehensive guide, we’ll explore the reasons why choosing the right glue is crucial, as well as provide tips for maintaining your fishing rod tip. So, let’s dive in and make sure your rod is always ready for your next big catch! And if you’re curious about gluing other materials, check out our article on how to glue jade back together.
Preventing Damage
Using the right glue can help prevent damage to your fishing rod tip. A secure tip ensures that your line won’t snap, causing you to lose your catch. Two-Part Epoxy, Hot Glue, and UV Resin are among the strongest glues you can choose from. These adhesives have high bonding strength that can keep the rod tip secure on the blank. They also have water-resistant properties, making them ideal for fishing. In addition, Polyurethane glue is another excellent choice for preventing damage as it has excellent shock-absorbing properties. It helps to prevent the tip from falling off when your rod accidentally hits or bumps into hard surfaces.
On the other hand, some types of glue, such as superglue and silicone, are not as effective as the aforementioned glues. Superglue has a less strong bond, and over time, it can turn brittle and break, causing the rod tip to detach. Meanwhile, silicone glue doesn’t harden completely, making the bond less secure than other options.
Preventing damage to your fishing rod tip is crucial to ensuring that your fishing experience remains enjoyable and successful. Choosing the right glue is just one piece of the puzzle. To prevent further damage to your fishing gear, you may want to check out some of our other articles, such as How to Glue Terracotta, How to Glue Wood to Brick, or How to Glue Slate Together, depending on your needs.
Ensuring Proper Fishing Performance
Choosing the right glue for your fishing rod tip is essential for ensuring proper fishing performance. The rod tip is a crucial component of the fishing rod, as it is where the line connects and the fisherman feels the bites. The right glue will keep the rod tip securely in place, preventing it from shifting or coming loose during use.
Table: Types of Glue and Their Benefits for Ensuring Proper Fishing Performance
| Type of Glue | Benefits for Fishing Performance |
|---|---|
| Two-Part Epoxy | Extremely strong and durable, withstands harsh conditions and heavy fish, ideal for heavy-duty rods or those used for big game fishing. |
| Hot Glue | Quickly sets and hardens, creates a strong bond, ideal for minor repairs or temporary fixes while fishing. |
| Superglue | Creates an almost instant bond, works well for minor repairs or when time is limited, ideal for small or lightweight rods. |
| UV Resin | Hardens quickly with UV light, creates a strong and durable bond, perfect for small and delicate rods. |
| Silicone | Flexible, great for shock and vibration absorption, ideal for rods used in rough conditions or for those targeting larger fish. |
| Polyurethane | Highly durable and shock-resistant, ideal for heavy-duty rods or those used in rough conditions. |
| Contact Cement | Creates a strong and permanent bond, perfect for heavier rods or those used for big game fishing. |
As the table shows, each type of glue offers unique benefits for fishing performance. It is important to consider factors such as strength, flexibility, and shock resistance when selecting a glue for your fishing rod tip. For example, two-part epoxy is ideal for heavy-duty rods or those used for big game fishing, while silicone is great for rods used in rough conditions or for targeting larger fish.
Using the right glue for your fishing rod tip can mean the difference between a successful day on the water and a frustrating one. By choosing the appropriate glue and ensuring a secure and durable bond, you can fish with confidence and peace of mind.
Increasing Longevity
Using the appropriate glue on your fishing rod tip can significantly increase the longevity of your equipment and save you money in the long run. Epoxy, UV Resin, Silicone, and Polyurethane are the most reliable options for increasing the lifespan of your rod tip.
Let’s take a look at the best glue options in terms of increasing longevity in this html table:
| Type of Glue | Longevity Performance |
|---|---|
| Two-Part Epoxy | Provides a strong and durable bond that can keep the rod tip in place for years, even with frequent use. |
| UV Resin | Boasts excellent durability and strength, resistant to moisture, and can protect the tip from harmful UV light. |
| Silicone | Can flex and bend without cracking, which gives the fishing rod more flexibility, extending its lifespan. |
| Polyurethane | Can remain flexible even when exposed to extreme temperatures without cracking, keeping the rod tip in place for long periods. |
As you can see, these four glue options offer excellent longevity performance, which can help prolong the life of your fishing equipment. Regularly cleaning and maintaining your rod tip, along with utilizing the right glue, can help protect against wear and tear, corrosion, and breakage.
If you’re interested in other types of glues, we have articles on what glue to use for gems, how to glue a silicon substrate to silicon, how to glue PTFE, how to use Bondic glue, and how to glue a guitar neck which may be helpful for your other projects or hobbies.
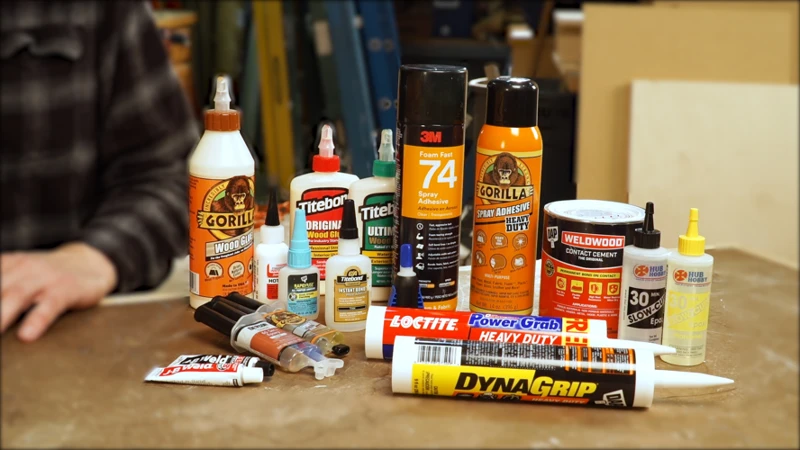
Types of Glue for Fishing Rod Tip
When it comes to selecting the right glue for your fishing rod tip, it can be overwhelming with the wide range of options available in the market. It is crucial to choose the correct adhesive that can bond your fishing rod tip and its blank securely. The type of glue you choose can impact the performance, durability, and longevity of your fishing rod. In this article, we will explore seven different types of glues commonly used for fishing rod tips and how to apply them correctly.
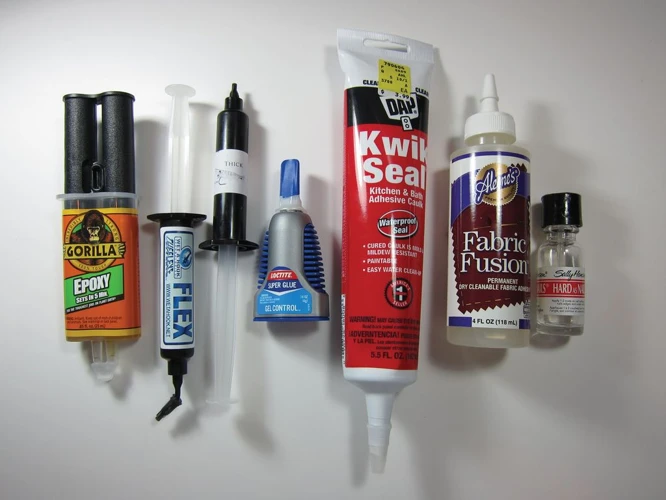
1. Two-Part Epoxy
Two-part epoxy is a popular choice among avid anglers for repairing and securing fishing rod tips. This type of glue is a high-performance adhesive that is made up of two parts – the resin and the hardener. When mixed together, they create a strong bond that can withstand a lot of force and stress.
One of the main advantages of two-part epoxy is its excellent bonding strength . It can hold up even in extreme conditions like heavy rain, saltwater, and fierce tugs from large fish. Additionally, this glue is waterproof , making it ideal for use in marine environments.
Using two-part epoxy for repairing or attaching a fishing rod tip is relatively straightforward. First, thoroughly clean the rod tip and blank with rubbing alcohol or acetone and allow it to dry completely. Then, mix the resin and hardener together according to the manufacturer’s instructions. Apply the glue to the tip and press it onto the end of the blank. Hold it in place for a few minutes until the adhesive sets.
While two-part epoxy is known for its incredible strength and durability, there are some factors to consider when using it. Viscosity is one of these factors – this glue tends to be quite thick and can be difficult to work with, especially when it comes to applying it in tight spaces. The setting time can also be an issue – it typically takes several hours for the adhesive to fully cure, which can be a drawback for anglers seeking a quick fix.
If you’re looking for a glue that will help ensure a solid bond for your fishing rod tip, two-part epoxy can be an excellent choice. It offers remarkable strength, excellent waterproofing ability, and is often used by professional rod builders. However, it is important to take into account its viscosity and extended setting time when using two-part epoxy.
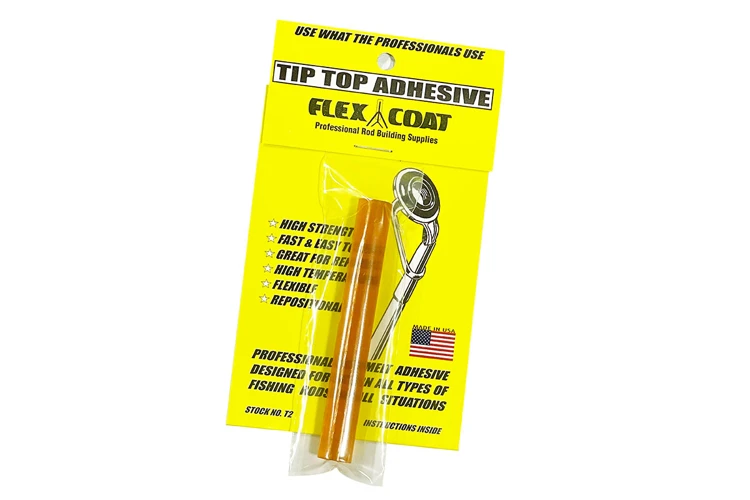
2. Hot Glue
Hot glue is a popular choice among anglers for its quick-drying properties and ease of use. This type of glue is made from thermoplastic that is melted and applied to the fishing rod tip using a hot glue gun. Once applied, the glue dries within seconds, allowing anglers to get back to fishing in no time.
Advantages of Hot Glue for Fishing Rod Tips
Hot glue has some advantages over other types of glue when it comes to repairing a fishing rod tip. Here are some of the benefits of using hot glue for fishing rod tips:
| Advantages of Hot Glue | Explanation |
|---|---|
| Quick Setting Time | Hot glue dries within seconds, making it ideal for quick repairs on the go. |
| Easy to Use | Hot glue is easy to apply and can be used by anglers of all skill levels. |
| Low Cost | Hot glue is an affordable option for anglers who want to repair their fishing rods without breaking the bank. |
Disadvantages of Hot Glue for Fishing Rod Tips
While hot glue may be a convenient choice for anglers, it does have some disadvantages to keep in mind. Here are some of the drawbacks of using hot glue for fishing rod tips:
| Disadvantages of Hot Glue | Explanation |
|---|---|
| Not as Strong as Other Types of Glue | Hot glue is not as strong as other types of glue, such as epoxy, which may result in the fishing rod tip becoming loose over time. |
| Not Weather Resistant | Hot glue can melt or become brittle in extreme temperatures, which may cause the fishing rod tip to break or become loose. |
| May Not Be Compatible with All Materials | Hot glue may not adhere well to certain materials, making it ineffective for certain types of fishing rod tips. |
It’s important to consider both the advantages and disadvantages of hot glue before using it on your fishing rod tip. While it may be a quick and easy solution for minor repairs, it may not be the best choice for more serious damage. As with any glue, it’s essential to follow the manufacturer’s instructions for best results.
3. Superglue
Superglue, also known as cyanoacrylate, is a quick-drying adhesive that can be a good choice for repairing a fishing rod tip. It is a strong adhesive that sets quickly and forms a sturdy bond. However, it is important to note that superglue may not provide the same level of durability and flexibility as other types of glue.
Advantages:
– Dries quickly: Superglue sets in seconds, making it a good choice for a quick repair job.
– Strong bond: Superglue forms a strong bond between the rod tip and the blank, which can help prevent breakage.
– Easy to find: Superglue is widely available at most hardware stores and online.
Disadvantages:
– Brittle: Superglue can become brittle over time, which can make the bond less effective.
– Not ideal for heavy use: Due to its lack of flexibility and durability, superglue may not be the best choice for heavy use fishing rods or those subjected to high stress.
– Difficult to remove: Once it sets, superglue can be difficult to remove without damaging the rod.
| Pros | Cons |
| Dries quickly | Brittle over time |
| Strong bond | Not ideal for heavy use |
| Easy to find | Difficult to remove |
It is important to note that superglue can also be used in combination with other types of glue for added strength and flexibility. For example, using superglue as a base and then applying a layer of epoxy can provide a strong and durable bond.
Important Note: Before using superglue or any other type of glue on your fishing rod, it is recommended that you test the glue on a small inconspicuous area first to ensure that it does not damage or discolor the rod. Additionally, always follow the manufacturer’s instructions for use and safety precautions.
If you are looking for information on gluing an undermount sink, check out our guide on how to glue an undermount sink.
4. UV Resin
[]
UV resin is a type of adhesive that can be a great choice for repairing your fishing rod tip. This glue is known for its ability to cure quickly when exposed to UV light, making it an ideal choice for those who need a fast and efficient repair.
Advantages:
- Fast curing time
- Strong bond
- Waterproof
- Can be used on a variety of materials like plastic and metal
One of the main advantages of UV resin is its fast curing time. Unlike other types of adhesives, UV resin can cure in just a few minutes when exposed to UV light. This is especially helpful for those who need to make a quick repair while out fishing.
In addition to its fast curing time, UV resin also forms a strong bond with your fishing rod tip. This means that once it’s cured, it will hold the tip securely in place and prevent it from coming loose again in the future.
Another advantage of UV resin is that it is waterproof. This is important for fishing because your rod is exposed to water on a regular basis. With UV resin, you can be confident that your repair will hold up even when it’s exposed to water.
Finally, UV resin can be used on a variety of materials, including plastic and metal. This makes it a versatile choice for those who need to repair different types of fishing rods.
Disadvantages:
- Requires UV light to cure
- Can be messy to work with
- May not be as strong as other types of adhesives
- Relatively expensive
One of the main disadvantages of UV resin is that it requires UV light to cure. This means that if you’re repairing your fishing rod tip indoors, you’ll need to have access to a UV light source in order to cure the adhesive.
Another potential drawback of UV resin is that it can be messy to work with. This adhesive is thin and runny, so it can be difficult to control while you’re applying it. Additionally, if you accidentally get it on your skin or clothing, it can be difficult to clean up.
While UV resin forms a strong bond, it may not be as strong as other types of adhesives like epoxy. This means that if you’re repairing a particularly heavy or large fishing rod tip, you may want to consider using a different type of adhesive for added strength.
Finally, UV resin is relatively expensive compared to other types of adhesives. This means that it may not be the most cost-effective choice for those who are on a tight budget.
UV resin can be a great choice for repairing your fishing rod tip, especially if you need to make a quick repair while out on the water. However, it’s important to weigh the advantages and disadvantages of this adhesive before deciding if it’s the right choice for your needs.
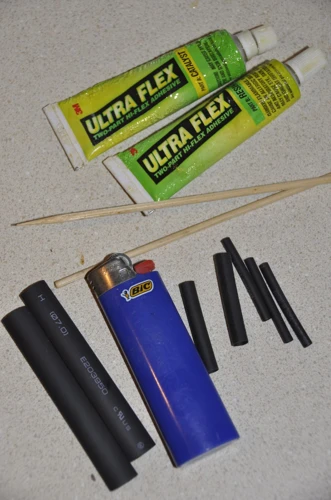
5. Silicone
Silicone is another type of glue that you can use on your fishing rod tip. It contains silicone adhesives or sealants that have high flexibility and waterproofing properties, making them ideal for fishing in wet conditions. Unlike some other types of glue, silicone doesn’t dry up and become brittle, which is why it’s an excellent choice for rod tip repairs.
Here are some of the pros and cons of using silicone glue on your fishing rod tip:
Pros:
- Highly adhesive and waterproof
- Flexible and durable
- Resistant to extreme temperatures
- Non-corrosive and non-toxic
Cons:
- Takes a long time to cure, usually 24-48 hours
- Not as strong as some other types of glue
- Difficult to remove if you make a mistake
If you decide to use silicone to repair your fishing rod tip, follow these steps:
| Step | Description |
|---|---|
| Step 1 | Prepare your work space and gather your materials. |
| Step 2 | Clean the rod tip and blank with rubbing alcohol or acetone. |
| Step 3 | Apply a small amount of silicone glue to the tip of the rod. |
| Step 4 | Press the tip onto the blank and hold it in place until the glue sets. |
| Step 5 | Allow the glue to cure for at least 24 hours. |
When choosing a silicone glue for your fishing rod tip repair, look for a product that’s specifically designed for this application. You can find silicone glue at most hardware or fishing supply stores.
Silicone glue is a great choice for repairing your fishing rod tip, especially if you plan to fish in wet or humid conditions. Just be sure to follow the steps carefully and allow enough time for the glue to cure properly.
6. Polyurethane
Polyurethane glue is a strong and versatile adhesive that has gained popularity among rod builders. It has a high level of water resistance and is ideal for use in wet environments. Plus, it creates a strong bond that can withstand the stress placed on the rod tip during casting and reeling in fish.
Advantages:
- Polyurethane glue is highly durable and can last for a long time.
- It has excellent water resistance and is ideal for use in wet environments.
- It can be sanded and painted over to provide a seamless finish that will match the rest of your rod.
Disadvantages:
- Polyurethane glue can take a long time to dry completely. It may need overnight setting time to cure properly.
- The glue has a relatively short shelf life and may not be viable for future repairs.
- It is a bit more difficult to work with than some other adhesive types such as two-part epoxy and hot glue.
It is essential to note that polyurethane glue should not be used on plastic rod tips as it can cause melting and deformation. It is, however, an excellent choice for metal and ceramic rod tips. Before using this adhesive type, be sure to read the manufacturer’s instructions carefully and follow them accordingly to ensure the best results.
To apply polyurethane glue on the fishing rod tip, first, prepare your workspace by covering the area with a cloth or newspaper to protect it from spills and smudges. Clean the rod tip and blank thoroughly with a clean cloth to remove any dirt or debris that may interfere with bonding. Next, apply a small amount of the glue evenly to the rod tip’s base and the bottom of the blank. Press the tip onto the blank and hold it in place for a few minutes until it sets.
While polyurethane glue is an excellent choice for bonding fishing rod tips, it’s essential to consider factors such as strength, flexibility, viscosity, and weather resistance when choosing an adhesive to ensure optimum performance. Regular cleaning, proper storage, and periodic inspection of your rod can also help extend its lifespan and prevent damage.
7. Contact Cement
Contact cement is another popular type of glue that you can use on your fishing rod tip. It is a type of adhesive that creates a very strong and permanent bond between two surfaces when they are pressed together. Here are some of the benefits and drawbacks of using contact cement:
Benefits
- Creates a very strong bond that is hard to break.
- Dries quickly and is ready to use within a few minutes.
- Can be used on a variety of surfaces, including metal, wood, and plastic.
- Is resistant to water, heat, and chemicals, making it a good choice for use on a fishing rod.
Drawbacks
- Can be messy to work with, as it requires both surfaces to be coated with glue and then allowed to dry before being pressed together.
- May not bond well with certain types of plastics, so it’s important to test it on a small area before using it on your entire fishing rod tip.
- Can be difficult to remove once it has dried, so it’s important to use it carefully and avoid getting it on areas where it isn’t needed.
Contact cement can be a good choice for those who are looking for a strong, permanent bond that can withstand water, heat, and other harsh conditions. However, it’s important to use it carefully and make sure that it is appropriate for your specific fishing rod tip.
How to Apply Glue to Your Fishing Rod Tip
Now that you’ve chosen the right glue for your fishing rod tip, it’s important to know how to apply it properly. Proper application of glue can mean the difference between a secure, long-lasting repair and a weak repair that could fail when you need it the most. Here, we will walk you through the steps to apply glue to your fishing rod tip to ensure a solid and lasting repair. From preparing your work space to attaching the tip, we’ve got you covered. Let’s get started!
Step 1: Prepare Your Work Space
Before beginning the process of gluing the fishing rod tip, it is important to ensure that your workspace is prepared for the task at hand. Following these simple steps can help to create a clean and organized work environment that will make the process smoother and more efficient.
Firstly, set up your workspace in a well-lit and well-ventilated area to allow for proper visibility and air flow. This can help to prevent mistakes and ensure safety during the process. Additionally, choose a flat and stable surface to work on, such as a table or workbench, to prevent accidents or damage to the rod.
Here are some tips for preparing your workspace:
- Clear your workspace of any unnecessary clutter or debris that can get in the way and cause accidents.
- Gather all the necessary tools and materials before starting the job, such as the glue, the rod tip, the blank, cleaning supplies, and gloves.
- Protect your workspace by covering it with a protective plastic sheet or a drop cloth to prevent any spilled glue or debris from damaging it.
- Put on your gloves to prevent any glue or other substances from getting on your hands, which can be difficult to remove and irritating to your skin.
By taking the time to properly prepare your workspace, you can set yourself up for success and ensure the job is completed smoothly and efficiently.
Step 2: Clean the Rod Tip and Blank
Before applying glue to your fishing rod tip, it is important to clean both the tip and the blank to ensure proper adhesion. Here are the steps to properly clean your rod tip and blank:
| Step 1: | Use a soft, dry cloth to gently wipe any debris or dust from the rod tip and blank. This will ensure that the glue will adhere properly to the surface. |
| Step 2: | If there is any dirt or oil on the surfaces, use an alcohol wipe or rubbing alcohol to clean them. This will remove any residue and ensure that the tip adheres tightly to the blank. |
| Step 3: | Allow the surfaces to dry completely before applying the glue. This is important as any moisture or dampness can weaken the bond between the tip and the blank. |
Not properly cleaning your rod tip and blank can result in a weak bond that may break or loosen over time. Taking the time to clean these surfaces properly will ensure that your fishing rod is strong and lasts longer. Remember to follow these steps every time you need to replace a fishing rod tip or repair a broken one.
Step 3: Apply the Glue
Once you have cleaned the fishing rod tip and blank, you can start applying the glue. Here are the steps you need to follow:
- Choose the right glue: Before applying the glue, make sure you have selected the most appropriate type of glue for your fishing rod tip. Refer to the previous section to know which type of glue would work best for you.
- Prepare the glue: If you are using a two-part epoxy, you need to mix the resin and hardener. Follow the manufacturer’s instructions to mix the glue in the correct proportion. If you are using hot glue or superglue, you can skip this step.
- Apply the glue: Take the glue and apply it evenly on the end of the rod tip. Make sure you don’t apply too much or too little glue. If you are using a two-part epoxy, do not mix more glue than you need as it will harden quickly and become unusable.
- Attach the tip: Once the glue has been applied, carefully place the rod tip onto the blank. Make sure it is properly aligned and snugly fits onto the blank.
- Wipe off excess glue: Wipe off any excess glue that may have oozed out during the attachment process. Use a cotton swab or a paper towel to wipe off the glue before it hardens.
- Apply pressure: Apply some pressure to the rod tip to ensure good adhesion. You can use your fingers or a clamp to hold the tip in place while the glue dries.
Remember to be patient while applying the glue and give it enough time to dry completely. Rushing the process can lead to a poorly attached rod tip that is prone to damage. Follow these steps carefully and get the most out of your fishing rod.
Step 4: Attach the Tip
After you have applied the glue to both the fishing rod tip and the blank, it’s time to attach the tip. Here are the steps involved in attaching the tip to the blank:
- Step 1: Position the fishing rod tip onto the blank. Make sure that it’s aligned correctly and positioned at the desired angle.
- Step 2: Gently slide the tip onto the blank until it reaches the point where the glue has been applied.
- Step 3: Once you have aligned the tip to your satisfaction, firmly press the tip into place. This will ensure that the glue adheres properly.
- Step 4: Use a clamp or rubber band to hold the tip in place while the glue dries. This will help to prevent any shifting or movement of the tip while the glue sets.
- Step 5: Let the glued fishing rod tip and blank sit until the glue has fully cured. Be sure to follow the manufacturer’s recommended curing time for your specific glue.
It’s important to note that rushing the curing process can result in problems later on. Be patient and allow the glue to properly set before moving on to using your fishing rod.
Step 5: Allow the Glue to Cure
After successfully attaching the fishing rod tip, the next step is to allow the glue to cure. This is an important step since allowing the glue to cure properly will ensure that the fishing rod functions efficiently and is strong enough to withstand the wear and tear of fishing. However, the curing time varies depending on the type of glue used. Here’s a table that highlights the approximate curing time for each type of glue.
| Type of Glue | Approximate Curing Time |
|---|---|
| Two-Part Epoxy | 24 to 48 hours |
| Hot Glue | A few minutes to an hour |
| Superglue | A few seconds to a minute |
| UV Resin | A few minutes under a UV lamp |
| Silicone | 24 hours |
| Polyurethane | 8 to 24 hours |
| Contact Cement | 5 to 10 minutes |
Note: The curing time may vary based on temperature and humidity. It’s important to follow the manufacturer’s instructions for the best results.
Once the glue has cured, make sure that it’s completely dry and hard to the touch. Avoid handling the fishing rod until you’re certain that the glue has fully cured. Touching the glue too soon could cause the bond to weaken, resulting in the tip falling off or becoming loose while fishing.
Allowing the glue to cure is an essential step in the fishing rod repair process. By following the recommended curing time for the glue that you’ve used, you’ll ensure that your fishing rod is sturdy and functional.
Factors to Consider When Choosing a Glue for Your Fishing Rod Tip
When it comes to choosing the right glue for your fishing rod tip, there are several factors to consider in order to ensure the best results. You’ll want to think about the strength and flexibility of the glue, its viscosity and setting time, and its weather resistance. Additionally, the cost and user-friendliness of the glue may be important factors to consider as well. Let’s explore each of these factors in more detail to determine which glue will work best for your needs.
Strength
When it comes to choosing a glue for your fishing rod tip, strength should be one of your main considerations. You want a glue that can withstand the pressure and stress that will be placed on your fishing rod during use. Here are some factors to consider when looking for a strong glue:
- Bonding Capacity: The bonding capacity of a glue is the amount of weight it can hold without breaking. When choosing a glue, make sure to check the bonding capacity and select one that can handle the weight of your fishing rod tip.
- Type of Material: The strength of the glue will also depend on the materials it is bonding. Some glues work better with certain materials than others. For instance, two-part epoxy glue is known for its strong bonding capacity with fiberglass and graphite.
- Adhesion: The adhesion of a glue refers to its ability to stick to a surface. For maximum strength, choose a glue with a strong adhesion that will stick to the rod tip and blank.
- Resilience: The resilience of a glue refers to its ability to maintain its strength even under stress. Look for a glue that remains strong even when exposed to various weather elements such as heat, humidity, and cold.
When considering the strength of a glue, it’s also important to note that sometimes a stronger glue is not necessarily better. A glue that is too strong may make it difficult to make repairs or adjustments to your fishing rod tip in the future. If you plan to work on your fishing rod tip in the future or want to be able to remove the tip for any reason, a glue with medium strength is preferable.
Flexibility
When choosing the right glue for your fishing rod tip, another important factor to consider is flexibility. The flexibility of the glue will determine how well it will hold up against the pressure put on the rod while fishing. A glue that is too brittle may crack or break under stress, causing the rod tip to come loose. On the other hand, a glue that is too flexible may not provide enough support and may allow the tip to move around too much.
To give you a better idea of which types of glue are more or less flexible, we’ve put together the following table:
| Glue Type | Flexibility |
|---|---|
| Two-Part Epoxy | High |
| Hot Glue | Low to Medium |
| Superglue | Low |
| UV Resin | Medium |
| Silicone | High |
| Polyurethane | High |
| Contact Cement | Low to Medium |
As you can see, two-part epoxy, silicone, and polyurethane are the most flexible types of glue, while superglue and contact cement are the least flexible. Hot glue and UV resin fall somewhere in the middle, with medium flexibility.
Choosing a glue with the appropriate level of flexibility for your fishing rod tip is crucial to ensuring that it can withstand the stresses of fishing. Be sure to consider both the material of the rod tip and the type of fishing you plan to do, as this will affect the amount of pressure put on the tip.
Viscosity
One important factor to consider when choosing a glue for your fishing rod tip is its viscosity. This refers to how thick or thin the glue is and can affect how well it spreads and adheres to the surface.
Thick viscosity glues tend to be more durable and offer better gap filling capabilities. They are better suited for larger gaps and rougher surfaces. Examples of thick viscosity glues include two-part epoxies and polyurethane.
Thin viscosity glues are better suited for smooth surfaces and small gaps, as they can spread more easily. Examples of thin viscosity glues include superglue and contact cement.
It’s also important to note that some glues have medium viscosity, such as hot glue and silicone. These can offer a good balance between gap filling and ease of application.
Here’s a breakdown of the viscosity for each type of glue mentioned in this guide:
| Type of Glue | Viscosity |
| ————–|————|
| Two-Part Epoxy | Thick |
| Hot Glue | Medium |
| Superglue | Thin |
| UV Resin | Thin |
| Silicone | Medium |
| Polyurethane | Thick |
| Contact Cement | Thin |
Consider the type of surface you need to adhere to and the size of any potential gaps before selecting a glue based on its viscosity. A strong and secure bond will depend on choosing the right viscosity for the job.
Setting Time
When it comes to the setting time of fishing rod tip glue, there is a trade-off between speed and strength. Different types of glue have varying setting times, with some drying very fast while others take more time to cure. As a result, it’s essential to consider the desired balance between strength and speed of bond when choosing the right glue for your fishing rod tip.
Below is a table that outlines the setting time of some common types of glues used for fishing rod tips:
| Type of Glue | Fastest Setting Time | Slowest Setting Time | Average Setting Time |
|---|---|---|---|
| Two-Part Epoxy | 5 minutes | 24 hours | 4-6 hours |
| Hot Glue | 30 seconds | 5 minutes | 1-2 minutes |
| Superglue | 10 seconds | 24 hours | 5-10 seconds |
| UV Resin | 2 minutes | 24 hours | 10-15 minutes |
| Silicone | 30 minutes | 24 hours | 8-10 hours |
| Polyurethane | 10 minutes | 24 hours | 4-6 hours |
| Contact Cement | 5 minutes | 24 hours | 20-30 minutes |
It’s important to note that the setting time of a glue is dependent on various factors such as humidity, temperature, and the amount of glue applied. A faster setting time may not necessarily indicate a stronger bond, as some types of glues require more time to fully cure and reach their optimum strength. So, it’s important to follow the manufacturer’s instructions and be patient during the curing process to achieve the desired bond strength.
Weather Resistance
When choosing a glue for your fishing rod tip, one important factor to consider is its ability to withstand various weather conditions. You want a glue that can hold up even in the most extreme temperatures and weather conditions, as fishing often involves spending time outdoors in harsh environments.
Here are some weather resistant glue options:
- Two-Part Epoxy: This type of glue is known for its ability to withstand a wide range of temperatures and weather conditions. It is often used for boat repairs and other outdoor applications, making it a great choice for fishing rod tips.
- UV Resin: UV resin is also highly weather resistant and won’t break down or deteriorate under harsh weather conditions. Additionally, it cures quickly when exposed to UV light, making it a popular choice for quick fishing rod tip repairs.
- Polyurethane: Polyurethane glues are known for their strength and durability, as well as their resistance to weather and water. They are a good choice for fishing rod tips that will be frequently exposed to water and harsh weather conditions.
It’s important to keep in mind that while some glues may be weather resistant, they may not be completely waterproof. It’s crucial to store your fishing rod properly, and to avoid leaving it in water for extended periods of time.
When choosing a weather-resistant glue for your fishing rod tip, it’s also important to consider how it may impact the flexibility and sensitivity of the rod. While a strong and durable glue may be desirable for withstanding harsh weather conditions, it may also hinder the sensitivity of the rod. It’s important to find a glue that strikes a balance between strength and flexibility.
Cost
When it comes to choosing the right glue for your fishing rod tip, cost can be a factor to consider. Different types of glue vary in cost, and it’s important to balance the quality of the glue with your budget. Here’s a comparison chart of the cost of popular glues for fishing rod tips:
| Type of Glue | Cost (per ounce) |
|---|---|
| Two-Part Epoxy | $$-$$$ |
| Hot Glue | $ |
| Superglue | $ |
| UV Resin | $$-$$$ |
| Silicone | $-$$ |
| Polyurethane | $-$$ |
| Contact Cement | $-$$ |
As seen in the table, hot glue and super glue are the cheapest options, while two-part epoxy, UV resin, silicone, polyurethane, and contact cement are moderately priced. Keep in mind that while cheaper glue options may save you money in the short term, they may not be as durable and may require more frequent repairs or replacements, ultimately costing you more in the long run. It’s important to consider the value of investing in a higher-quality glue that will ensure the longevity and performance of your fishing rod.
User-Friendliness
When it comes to choosing the right glue for your fishing rod tip, user-friendliness is an important factor to consider. Some adhesives may be difficult to work with, making the application process challenging for individuals who are new to fishing rod repairs or who have limited experience with adhesives.
Here are some user-friendly glues to consider for your fishing rod tip:
- Hot glue: Hot glue is a widely-used adhesive due to its ease of use. It is applied with a hot glue gun, which melts the glue stick and allows it to be applied to the fishing rod tip without the need for mixing or preparing.
- Superglue: Superglue is another adhesive that is easy to work with. These types of adhesives come in small tubes, making them easy to apply precisely where they are needed. They also have a quick setting time, allowing you to repair your fishing rod tip in no time.
- Contact Cement: Contact cement is a user-friendly adhesive that is often used in carpentry and woodworking projects. It is a rubber-based adhesive that is applied to both surfaces to be bonded and allowed to dry. Once dry, the two surfaces are pressed together, forming a strong bond.
It is important to choose an adhesive that you are comfortable working with to ensure that your fishing rod tip repair is successful. Consider your level of experience with adhesives and choose an adhesive that suits your skill level. With the right glue, anyone can repair their fishing rod tip quickly and easily.
Tips for Maintaining Your Fishing Rod Tip
Now that you know how to choose and apply the right glue for your fishing rod tip, it’s important to learn how to maintain it. After all, prevention is better than cure, and some simple tips can help you avoid costly repairs or replacements. Here are some essential tips to ensure that your fishing rod tip stays in top condition and performs optimally on your next fishing trip.
1. Regular Cleaning
Maintaining the longevity of your fishing rod tip requires regular cleaning. Over time, dirt, grime and salt build-up can accumulate and cause damage to the rod. It is recommended to clean your fishing rod after every use or at least once a month, even if it’s not used often. Here are some tips on how to properly clean your fishing rod tip:
| Step | Description |
|---|---|
| 1 | Remove Any Debris: Use a soft-bristled brush or a cloth to remove any dirt or debris that has accumulated on the rod tip. |
| 2 | Wash the Rod Tip: Fill a bucket with warm water and mild soap. Dip a cloth in the solution and gently clean the rod tip. Be careful not to scrub too hard or use abrasive materials as they can damage the rod’s finish. |
| 3 | Rinse: Rinse the rod tip with clean water to remove any soap residue. Use a towel to dry the rod tip thoroughly. |
| 4 | Inspect: Once the rod tip is dry, inspect it for any damage. Look for any cracks, chips, or scratches that may require repair. |
By incorporating regular cleaning into your routine maintenance, you can help extend the life of your fishing rod tip. Remember to also avoid using harsh chemicals and store the rod properly in a dry place away from direct sunlight to further protect it from damage.
2. Avoiding Stress on the Rod Tip
Your fishing rod tip is a crucial component that requires proper care to function optimally. One way to maintain this is by avoiding putting undue stress on the rod tip. Stress can cause the rod tip to break or weaken, which can be frustrating and expensive to fix. Here are some ways to avoid stressing the rod tip:
| Technique | Explanation |
|---|---|
| Proper casting technique | Make sure to use the correct casting technique for your fishing rod and pay attention to the weight of your lure or bait; casting too hard or with too much weight can cause unnecessary strain on the rod tip. |
| Avoid jerking the rod | When reeling in your catch, avoid jerking the rod to try to get the fish in faster. Doing so can cause stress and could potentially snap the rod tip. |
| Watch your surroundings | Avoid casting when there are obstacles in your way, such as trees or rocks, to prevent your line from getting snagged and causing undue stress on the rod tip. |
| Proper storage | When storing your fishing rod, make sure to do so in a secure and upright position to prevent the rod from getting bent or damaged, which can lead to stress on the rod tip. |
By following these techniques and properly maintaining your fishing rod, you can extend the life of your rod tip and avoid the frustration of having to replace or repair it. Remember to always handle your fishing rod with care to ensure that it functions optimally for years to come.
3. Proper Storage
As important as using the proper glue and maintaining your fishing rod tip is proper storage. Storing your rod in the right conditions can ensure it lasts for years to come. Here are some tips for proper storage:
| Tips for Proper Storage |
|---|
| 1. Keep it dry: Before storing your fishing rod, make sure it is completely dry. Moisture can cause damage to the materials over time. |
| 2. Store it in a cool, dry place: Avoid storing your rod in areas with high humidity and fluctuating temperatures, such as an attic or damp basement. |
| 3. Use a rod sleeve or case: Protect your rod from scratches or dents by storing it in a rod sleeve or case. This will also prevent it from collecting dust. |
| 4. Store vertically: When storing your rod, make sure it is standing vertically with the tip up. This will help prevent the blank from warping over time. |
| 5. Keep it out of direct sunlight: Avoid displaying your fishing rod in sunlight or near windows where it could be exposed to UV rays that can damage the materials. |
| 6. Store it in a secure location: To prevent accidental damage, store your fishing rod in a location where it won’t be bumped or knocked over, such as a closet or garage. |
By following these simple tips, you can ensure that your fishing rod tip stays in top condition and ready to use when you need it. Proper storage is just one aspect of taking care of your fishing gear, but it can make a big difference in the long run.
4. Periodic Inspection
Regular inspection is a crucial part of maintaining fishing rods, particularly the tips. It helps to identify any issues before they become severe and cause damage or reducing the fishing rod’s longevity. Below are some key areas to assess during periodic inspection.
| Inspection Area | What to Look For |
|---|---|
| Bend | Inspect the rod tip for any signs of bending. Be sure to check the angle and alignment of the tip. If there’s any deviation, it means that the fishing rod’s structural integrity is compromised, and the tip needs to be replaced immediately. |
| Cracks | Inspect the tip for any signs of cracks. These could be hairline or deep, and it’s essential to address them promptly. If left unattended, cracks can spread and cause severe damage to the rod tip. |
| Gaps | Check the area where the tip is attached to the rod blank. Look for any gaps or spaces between the tip and the blank. Even the slightest separation can lead to the tip coming loose with time. Gluing the tip down can help address this issue. |
| Nicks or Scratches | Inspect the tip for any nicks or scratches. These could expose the rod tip’s inner surface to the environment, reducing its longevity and performance. If you notice any nicks or scratches, consider repairing them immediately. |
| Corrosion | Check for any signs of rust or corrosion on the tip. These could be caused by exposure to water, abrasive elements, or humidity. If left unaddressed, corrosion can weaken and damage the tip, leading to potential breakage. |
By taking the time to inspect your fishing rod tip regularly, you can identify issues before they become severe and reduce the need for costly repairs. This also ensures that you can continue to enjoy your fishing experiences without worrying about the condition of your fishing gear.
5. Quick Repairs
Quick repairs can be a lifesaver on a fishing trip. When you’re out on the water and a problem arises with your fishing rod tip, having the right tools and materials on hand can make all the difference. Here are some quick and easy repair tips to keep your fishing rod tip functioning properly:
1. Keep a Repair Kit Handy: Pack a small repair kit in your tackle box that includes various types of glue, spare fishing rod tips, and a small multi-tool or pliers.
2. Use a Portable UV Light: A portable UV light can cure UV-activated resin quickly and efficiently, making it an excellent option for quick repairs on the go.
3. Use Electrical Tape: If you don’t have access to glue, electrical tape can be a temporary fix to hold a broken fishing rod tip together until you can make a proper repair.
4. Don’t Overlook Simple Solutions: Sometimes, the best solution is the simplest. For example, if your fishing rod tip is loose, adding a small amount of adhesive putty to the base can help snug it up and keep it in place.
5. Know When to Seek Professional Help: While quick repairs are certainly valuable, there may be times when more serious damage has occurred that requires the expertise of a professional. If you’re unsure about the extent of the damage or how to properly repair it, don’t hesitate to seek help from a fishing rod repair specialist.
By keeping these quick repair tips in mind, you can be better prepared to handle any issues that may arise with your fishing rod tip while out on the water. Just remember to always prioritize safety and take the time to make proper repairs whenever possible.
Conclusion
In conclusion, choosing the right glue for your fishing rod tip is crucial. Not only can it prevent damage and ensure proper fishing performance, but it can also increase the longevity of your rod. There are various types of glue available for use ranging from two-part epoxy to hot glue, super glue, UV resin, silicone, polyurethane, and contact cement. Each type of glue has its respective strengths and weaknesses, and it’s essential to consider factors such as strength, flexibility, viscosity, setting time, weather resistance, cost, and user-friendliness when making your selection.
When applying glue to your fishing rod tip, it’s vital to prepare your workspace, clean the rod tip and blank, apply the glue, attach the tip, and allow the glue to cure. By following these steps and taking good care of your fishing rod tip with regular cleaning, avoiding stress and proper storage, periodic inspection, and quick repairs, you can ensure that your fishing rod will last for years to come.
Remember, a little bit of effort and attention can make a massive difference in your fishing rod’s lifespan and performance. So, take your time and choose the right glue for your fishing rod tip, follow the necessary steps, and enjoy your next fishing trip without any worries or concerns about your equipment.
Frequently Asked Questions
1. Can I use regular glue on my fishing rod tip?
No, regular glue is not suitable for use on a fishing rod tip as it does not provide the necessary strength, flexibility, and resistance to water and weather.
2. What is the best glue for repairing a broken fishing rod tip?
The best glue for repairing a broken fishing rod tip is two-part epoxy. It provides strong and lasting bond and dries to a hard and flexible finish.
3. Is hot glue a good choice for a fishing rod tip?
Hot glue can be used on a fishing rod tip, but it is not as strong and durable as other types of glue. It can be a good temporary fix, but you will need to use a stronger glue in the long run.
4. Can superglue be removed from a fishing rod tip?
Superglue can be removed from a fishing rod tip by using acetone or nail polish remover. However, be careful not to let the acetone or nail polish remover come into contact with the rod blank as it can damage the finish.
5. How long does it take for UV resin to cure on a fishing rod tip?
UV resin usually takes around 5-10 minutes to cure on a fishing rod tip. However, curing time can vary depending on the brand and type of resin used, as well as the strength of the UV light source.
6. What is the advantage of using silicone glue on a fishing rod tip?
Silicone is a good choice for a fishing rod tip because it is flexible, water-resistant, and can withstand extreme temperatures. It also adheres well to most materials, making it a versatile choice for many types of repairs.
7. Is contact cement suitable for repairing a fishing rod tip?
Contact cement can be used for repairing a fishing rod tip, but it is not the best choice as it can become brittle over time and may not provide the necessary flexibility for the rod to perform properly.
8. How do I choose the right viscosity of glue for my fishing rod tip?
The viscosity of glue you choose for your fishing rod tip depends on the size of the tip and the type of repair you need to make. Thicker glue is better for larger tips or for filling in gaps, while thinner glue is better for smaller tips or for making precise repairs.
9. Can I apply glue to my fishing rod tip in cold weather?
Cold weather can affect the drying and curing times of glue on a fishing rod tip. It is best to avoid applying glue in temperatures below 10°C or using a glue that specifically states it can be used in cold temperatures.
10. How often should I inspect and maintain my fishing rod tip?
It is recommended to inspect and maintain your fishing rod tip after each use to detect any signs of damage or wear. Regular cleaning and proper storage can help prevent damage and prolong the life of your fishing rod tip.