Have you ever painted a room or a piece of furniture only to notice later that the edges and corners are messy, stained, or damaged? It can quickly ruin the look and feel of your project, causing frustration and disappointment. However, there is a solution to prevent these issues and achieve a seamless finish: masking. But what is masking exactly? And why is it so crucial for painting? In this article, we’ll explore the definition and purpose of masking, the importance of using it before painting, the types of masking techniques and materials available, as well as tips on how to mask effectively and avoid common mistakes. Whether you’re a DIY enthusiast or a professional painter, this guide will help you master the art of masking and achieve stunning results.
What is Masking?
When embarking on a painting project, achieving a clean, polished finish is essential. One way to achieve this is through masking, a technique used to protect specific areas from paint, stains, and damage. Masking can involve various materials and techniques and has several important purposes. Let’s delve deeper into what masking is and what it can do for your painting project. To learn more about specific types of masking tape and their uses, see our guide on masking tape types and uses.
Definition
Masking is a technique that is commonly used before painting to protect certain areas and create clean paint lines. It involves covering and protecting surfaces that are not meant to be painted. This can include door frames, windows, electrical outlets, and even floors. Masking is done with a variety of materials such as masking tape, plastic drapes, and paper covers.
Masking tape is a common material used for masking. It is designed to adhere to surfaces and create a barrier between the surface and the paint. The tape also helps to create a smooth and sharp line when painted over. The tape is easy to apply and remove, making it ideal for small jobs. There are different widths of masking tape available, which makes it easy to choose the one that fits the width of the surface being masked. Some masking tapes are designed to be left in place for several days without damaging the surface or leaving residue behind.
Plastic drapes and paper covers are also used for masking larger areas or protecting floors and furniture. These materials are commonly used during interior painting projects to prevent paint from getting on floors and furniture. Plastic drapes can be cut to size and taped to walls and ceilings to protect against paint dust and debris. Paper covers are used to protect floors and furniture from paint drips and spills. Both are quick and easy to use.
Masking is a crucial step in the painting process that can help to save time and effort in clean-up, protect surfaces from damage and stains, and create a professional-looking finish. By utilizing different types of masking techniques and materials, including masking tape, plastic drapes, and paper covers, one can easily achieve the desired results. So, before starting your next painting project, make sure to properly mask your surfaces to achieve a clean and professional look.
Purpose
As mentioned earlier, masking is the process of covering or protecting certain areas of a surface while painting. The purpose of masking is to ensure that the paint only goes where it needs to go, resulting in a clean and professional finish.
Masking is particularly important when painting areas with multiple colors, designs, or patterns. Without masking, the colors may bleed into each other or overlap, resulting in an unprofessional look. Masking also helps prevent paint from seeping under the edges of an object, such as a stencil or a logo.
Another purpose of masking is to protect surfaces from damage and stains. For example, when painting a room, it is important to mask the windows, floors, and furniture to prevent paint splatters from ruining the surfaces. Additionally, masking can help protect surfaces that do not require painting, such as handles, keyholes, or switches.
Finally, masking can save time and effort in the clean-up process. By masking off areas in advance, the painter can simply remove the masking material and discard it, eliminating the need for tedious touch-ups or clean-ups. This can also reduce the risk of accidentally smudging or damaging the paint during clean-up.
Masking is an essential step in painting and can have a significant impact on the quality and efficiency of the finished product. Different masking techniques and materials can be used depending on the specific project requirements. To learn more about different masking techniques, you can read our article on creative masking tape paint designs. It is also important to avoid certain mistakes when masking to ensure the best possible outcome, which we will discuss later in this article.
The Importance of Masking before Painting

Masking is an essential preparatory step in the painting process. Whether you’re painting a wall, furniture, or any other surface area, masking can make a big difference in the end result. The importance of masking lies in its ability to maintain the integrity of the surfaces or areas that are not meant to be painted. By using the right materials and methods, you can protect your work area from unwanted stains, over-spray, and other kinds of damage. In this way, you can achieve a clean and professional finish that meets your expectations. Let’s look closer at why masking is important before painting and what benefits it brings.
Keeps the Finished Look Clean and Crisp
Painting a room can be a fun DIY project, but it can quickly turn into a nightmare if not done carefully. When it comes to painting, the smallest mistakes can be noticeable, and one of the biggest mistakes is getting paint in areas where it shouldn’t be. That’s where masking comes in – and it’s incredibly important, especially if you want your finished product to look clean and crisp.
Masking involves covering up areas that you don’t want to paint, typically with tape or a protective covering. By doing this, you can ensure that the paint goes only where you want it to go, and it stays off any surfaces you want to keep paint-free. By keeping the lines between painted and unpainted surfaces sharp and well-defined, you can create a more polished, professional-looking finish.
One of the biggest advantages of masking before painting is that it helps you avoid the frustration of having to go back and redo areas that were accidentally painted or covered in paint splatter. It’s much easier to prevent mistakes from happening than it is to fix them after the fact. Plus, by avoiding these mishaps, you’ll save yourself time and money in the long run.
In addition to helping you achieve a clean, crisp finished look, masking also helps you protect areas from damage and stains, and saves you time and effort during clean-up. By taking the time to mask your surfaces before painting, you can ensure that your finished product looks as professional and polished as possible.
It’s important to note, however, that not all masking techniques are created equal. Some methods of masking can lead to damage or staining if done improperly. It’s essential to select the right materials and techniques when masking to ensure that you get the results you’re looking for. To learn more about proper masking techniques, check out our article on how to remove masking tape without damaging surfaces or our article on how to use masking tape to create crisp paint lines.
Protects Areas from Damage and Stains
When painting a room or object, it’s important to protect certain areas from damage and stains. Masking can help accomplish this task, making sure that areas that shouldn’t be painted, such as trim or adjacent walls, are not unintentionally covered in paint. Here are a few specific reasons why masking is important for protecting areas from damage and stains:
- Prevents paint from getting on surfaces that shouldn’t be painted: When you are painting a wall or furniture, invariably you will have to deal with a few hard-to-reach areas or surfaces that you don’t want to paint over, such as hinges or doorknobs. Masking these areas with tape or plastic covers will keep them clean and paint-free.
- Protects adjacent surfaces from spills and drips: Even the most careful painter will sometimes experience spills and drips, especially when working with a roller or paintbrush. By masking floors or nearby surfaces with plastic covers or drop cloths, you can easily contain spills and prevent paint from damaging the flooring or furniture.
- Prevents damage to delicate surfaces: Sometimes the paint can be particularly caustic, and can damage surfaces that are not intended to be painted. Damage can range from chipping and peeling to discoloration or even warping. By masking these surfaces with appropriate materials, you can ensure that they are protected from the paint and the harsh chemicals that make it up.
By protecting surfaces and areas from damage and stains, masking can help ensure that your painting project goes smoothly and stays tidy. It’s a simple, yet effective technique that can save you time, effort, and money on repairs and replacements.
Saves Time and Effort in Clean-Up
When painting a room or surface, the last thing you want after the job is done is an exhausting clean-up process. This is where proper masking comes in handy. By taking the time to mask off areas that should not be painted, you can save a tremendous amount of time and effort in post-painting clean up.
Here are some ways that masking can save you time and effort in clean-up:
- Minimizes Clean-Up – When masking is done correctly, the areas that require clean-up after painting are minimized. Instead of having to wipe down entire surfaces, you only need to remove masking materials.
- Prevents Paint Spatter – Layers of masking protect surfaces from paint spatter, which is a common occurrence during painting. Less spatter means less clean-up.
- Decreases Drying Time – When masking, it is essential to remove the tape or plastic promptly after painting. Doing so decreases drying time, and you can avoid the frustration of paint sticking to masking materials.
- Protects Baseboards, Moldings, and Trims – Masking baseboards, moldings, and trims prevent paint from sticking or dripping onto these decorative features. By doing so, you save time in trying to remove dried paint from these delicate areas.
- Reduces Paint Build-up – Repeat coats of paint on surfaces can cause paint build-up or drips, which requires a lot of time-consuming sanding or scraping. Masking off these areas means less paint build-up, and less cleaning.
Using the proper masking techniques and materials can help you save a lot of time and effort during the clean-up process. Remember to take the necessary steps and time to mask off areas before beginning a painting project – it’s worth it!
Types of Masking Techniques and Materials
When it comes to masking before painting, there are different techniques and materials you can use to achieve the desired result. Taping, draping and covering, and spraying are some of the most popular methods for masking. Each technique requires specific materials and considerations to ensure that the surfaces are protected and the painting is clean and crisp. In this section, we will explore each technique in detail to help you make an informed decision when choosing the appropriate masking technique and material for your painting project.
Taping
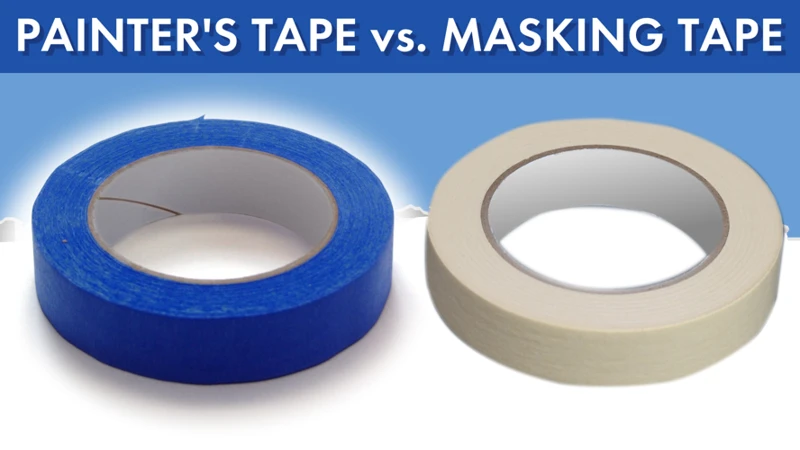
One of the most common and widely used masking techniques is taping. It involves using masking tape to cover and protect specific areas from paint. Masking tape is a type of pressure-sensitive adhesive tape that is specifically designed for masking off surfaces during painting.
There are different types of masking tape available, including general purpose tape and high-performance tape. General purpose tape is suitable for most painting projects, while high-performance tape is more durable and provides better adhesion, making it suitable for longer-term projects or more challenging surfaces.
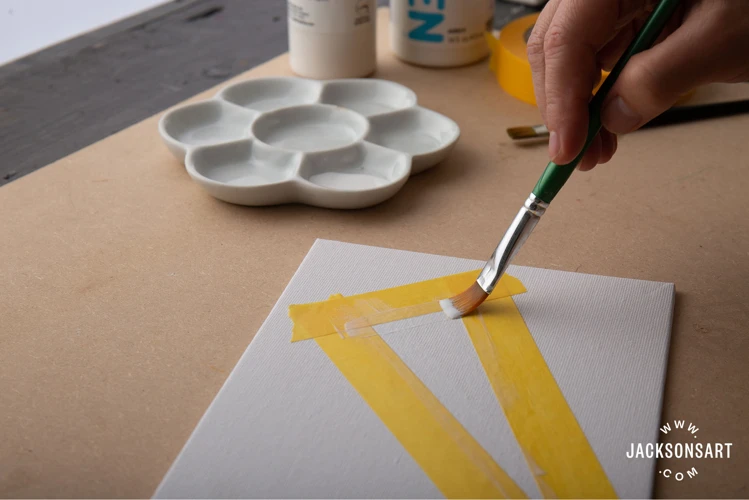
To properly use masking tape, it is important to select the right width of tape for the job. A wider tape is better for covering larger areas or creating straight lines, while a narrower tape is better for more detailed work.
When applying masking tape, it is important to make sure that the surface is clean and dry before applying the tape. This will ensure that the tape adheres properly and prevents any paint from seeping through. Once the tape is applied, it is important to press firmly along the edges to make sure that it is securely adhered to the surface.
After painting is complete, the masking tape should be removed carefully and slowly to avoid any damage to the surface or any paint peeling off. To make removal easier, it is recommended to remove the tape while the paint is still slightly wet.
Taping is a versatile and easy-to-use masking technique that can be used for a variety of painting projects. By selecting the right tape and applying it correctly, it can help create crisp and clean paint lines, while protecting the surface from any unwanted paint.
| Advantages | Disadvantages |
|---|---|
| Easily accessible and widely available | May not adhere well on certain surfaces |
| Can be used for a variety of projects | May leave residue when removed |
| Creates crisp and clean paint lines | May require multiple layers for full coverage |
Draping and Covering
Another technique for masking during painting is draping and covering. This method involves using various materials to cover and protect surfaces that aren’t meant to be painted. Drop cloths are commonly used to cover floors and furniture. They come in a range of materials such as canvas, plastic, and paper. Drop cloths are especially useful when dealing with messy painting projects, such as when using spray paint.
Tarpaulins are another popular material for draping and covering. These heavy-duty waterproof sheets are perfect for outdoor painting projects. They can be secured with pegs or weights to ensure they don’t move during the painting process.
Plastic sheeting is another material used for draping and covering. This is an affordable and easy-to-handle material that is ideal for covering large surfaces such as walls or windows. One advantage of using plastic sheeting is that it can be cut to size, making it more adaptable to painting projects with a variety of different surfaces.
While draping and covering with drop cloths, tarpaulins, or plastic sheets may seem like a simple enough task, it’s important to take care when setting up your workspace. Ensure that the materials are secured properly so that they don’t move or slip during the painting process. It’s also important to ensure that the materials are positioned far enough away from the painting area to ensure that they don’t get splattered with paint. Taking these precautions will ensure that the painting project is successful, and that surrounding areas are protected from any unwanted paint splatters or damage.
Spraying
Spraying is another popular technique to mask for painting. It involves the use of a sprayer to apply a thin, even layer of paint or primer to a surface. This technique is best for large surfaces, such as walls or ceilings, where a roller or brush would leave uneven streaks or marks.
When using a sprayer, it is important to properly protect surrounding areas from overspray and ensure that the sprayer is functioning correctly before use. This can be accomplished by covering the areas with plastic or masking paper and testing the sprayer on a small area before beginning the project.
One advantage of using a sprayer for masking is that it can save time and effort compared to other techniques. Because the spray is applied quickly and evenly, there is less need for touch-up work, and the project can be completed more quickly. However, this technique does require some skill and experience to achieve a professional, finished look.
When using a sprayer for masking, it is important to maintain a consistent distance from the surface and ensure that the sprayer is held level to avoid drips or uneven application. It is important to wear appropriate safety gear, such as a respirator and eye protection, to avoid inhaling the paint fumes or overspray.
Spraying is a popular technique for masking large surfaces and can save time and effort in the painting process. However, it does require skill and experience to achieve professional results, and proper safety precautions should always be taken when using a sprayer for painting.
| Advantages | Disadvantages |
| Saves time and effort | Requires more skill and experience |
| Provides even, consistent coverage | Can be messy and require extra clean-up |
| Can be used for large surfaces | Requires proper safety gear and precautions |
How to Mask for Painting
Now that we understand the importance of masking before painting, let’s explore the process in detail. The act of masking may seem straightforward, but even the slightest mistake can ruin the finished product. It is important to follow a series of steps to ensure the masking is done properly. In this section, we will discuss how to mask for painting, including how to clean and prepare the surface, selecting appropriate materials, and applying and removing the mask.
Clean and Prepare the Surface
Before you begin the process of masking for painting, it is important to ensure that the surface you are going to paint is clean and properly prepared. Here are some essential steps to follow in order to clean and prepare your surface for masking:
- Remove any loose debris: First, remove all loose debris, such as dirt and dust, from the surface using a dusting cloth, a vacuum cleaner or a brush. This will ensure that the masking tape correctly adheres to the surface.
- Clean the surface: Next, clean the surface thoroughly using soap and water or a surface cleaner to remove any oil, grease, or other contaminants. Be sure to dry the surface completely before applying the masking tape.
- Repair any damages: If there are any damages or cracks on the surface, it is important to repair them before masking. Use a putty knife to fill in any holes or cracks with the appropriate filler and let it dry as per the manufacturer’s instructions. Sand the surface once it is dry to create a smooth finish.
- Use appropriate sandpaper: If you’re painting over a glossy or smooth surface, it’s important to give the surface some “tooth” so that the paint will adhere properly. To do this, use a fine grit sandpaper (between 120 and 220 grit) to roughen the surface and create a more textured finish. Be sure to wipe away any dust created by the sanding process before masking.
- Mask off any areas that don’t require painting: Before you begin painting, it’s important to cover or mask off any areas that don’t require painting. This includes things like trim, baseboards, window frames, and any other fixtures that could be damaged by paint. Use painter’s tape or masking tape to cover these areas and ensure that they’re completely covered.
By taking these steps to properly prepare your surface for masking, you’ll be able to achieve a clean and professional-looking finished result that will last for years to come.
Select Appropriate Masking Materials
Selecting appropriate masking materials is crucial to achieving a high-quality paint job. Without the right materials, paint can seep under the masking and cause unsightly blemishes on the finished product. Here are some commonly used masking materials and their appropriate applications:
| Material | Application |
|---|---|
| Painter’s tape | For use on walls, trim, and other smooth surfaces. Removes cleanly and easily without damaging surfaces or leaving residue. |
| Frog tape | For use on textured surfaces like stucco, brick, and concrete. Creates a barrier that prevents bleeding and provides a crisp edge. |
| Cloth tape | For use on rough surfaces like wood or concrete. Provides a strong hold without leaving residue. |
| Masking paper | For use on large surfaces like floors or walls. Made of heavy-duty paper that resists tearing and can be easily taped down. |
| Plastic drop cloths | For use on furniture or floors. Resistant to spills and splatters, and easily disposable. |
When selecting masking materials, it’s important to consider the surface being painted, the type of paint being used, and the length of time the masking will need to be in place. Using the wrong materials can lead to frustration and a subpar finished product. By choosing the right materials for each application, you can ensure that your paint job looks clean and professional.
Apply and Remove the Masking
Applying and removing masking materials can be a bit tricky but is an important step in achieving a clean and professional paint job. Here are the steps to follow when applying and removing masking materials:
- Cut the masking material to size: Depending on the type of masking material you are using, you may need to cut it to the desired size and shape before applying it to the surface. Use a sharp pair of scissors or a utility knife to cut the material to size, being careful to avoid cutting into the surface you are protecting.
- Apply the masking material: Once the masking material is cut to the correct size, carefully apply it to the surface you want to protect. Be sure to press down firmly on the edges to create a good seal and prevent paint from seeping underneath.
- Remove the masking material: After the paint has dried, carefully remove the masking material. Depending on the type of material used, this may involve peeling it off slowly or cutting it away with a utility knife. Be careful not to damage the surface being painted or leave any residue behind.
- Clean up any residue: If any masking material residue is left behind, use a cleaning solution appropriate for the surface being painted to remove it. This will prevent it from interfering with the finished paint job or attracting dirt and grime over time.
Properly applying and removing masking materials requires patience and attention to detail, but it is an important step in achieving a professional-looking and long-lasting paint job.
Mistakes to Avoid when Masking
When it comes to masking for painting, it’s important to be aware of the common mistakes that can occur during the process. These mistakes can result in a less than professional finish, damages or stains on surfaces that were not meant to be painted, and can even lead to additional time and effort spent in clean-up.
Avoid using incorrect or low-quality masking materials. Using the wrong type or quality of masking tape or paper can lead to bleeding or damaging of the surfaces you are working on. Low-quality materials can also lead to the adhesive residue being left behind, which can be difficult to remove.
Avoid applying masking materials to dirty or dusty surfaces. Always make sure to clean and properly prepare the surface before applying the masking. Any dirt, dust, or debris can prevent the masking materials from adhering properly, which can lead to paint bleeding or peeling.
Avoid leaving masking materials for too long. Leaving masking tape or paper for too long can cause it to adhere too strongly to the surface, which can lead to additional time and effort spent in removing it. It can even result in damages to the surface you were trying to protect.
Avoid using too much masking material. It’s important to use an appropriate amount of masking material to avoid wasting it or causing additional issues. Using too much tape or paper can create a buildup that can lead to uneven paint coverage or paint bleeding.
Avoid rushing the masking process. Take your time when applying and removing the masking materials to ensure that you achieve a clean and professional finish. Rushing the process can lead to mistakes, which can result in additional time and effort spent fixing them.
By being aware of these common mistakes, you can ensure a successful masking process that will result in a clean and professional finish, save you time and effort, and protect the surfaces you are working on.
Conclusion
In conclusion, masking for painting is a crucial step that should not be overlooked if you are aiming for a clean, professional-looking finish for your painting project. It not only helps keep areas that you do not want painted clean and undamaged, but it also saves you time and effort when it comes to cleaning up after the project is done.
There are several different types of masking techniques and materials that you can use depending on your project, including taping, draping and covering, and spraying. It is important to select the appropriate materials for the job, so make sure to do your research and gather the necessary supplies before starting your project.
Before applying the masking, it is important to properly clean and prepare the surface to ensure that the masking adheres properly and does not peel off or leave residue. Pay attention to the details, such as edges and corners, to ensure that the masked areas are completely covered and protected.
When applying the masking, make sure to take your time and apply it carefully to avoid any mistakes or imperfections. Once the project is complete, be sure to remove the masking promptly and carefully to avoid any damage to the painted surface.
To achieve the best results, it is important to avoid common mistakes when masking, such as using the wrong type of tape or not removing the masking in a timely manner. By following these tips and techniques, you can achieve a flawless finish and feel proud of your painting project.
Frequently Asked Questions
What is the difference between masking and taping?
Masking involves blocking off or covering certain areas of a surface to protect it from paint, while taping refers specifically to using adhesive tape to create edges or borders for painting.
What materials can be used for masking?
Materials for masking include painter’s tape, masking tape, plastic sheeting, paper, drop cloths, and specialized masking products such as liquid masking solutions.
Why is it important to clean and prepare the surface before masking?
A clean and prepared surface ensures that the masking adheres properly and effectively blocks areas from paint, resulting in a cleaner and crisper finished look.
What are some mistakes to avoid when masking?
Avoid stretching or applying masking material too tightly, leaving gaps or uncovered areas, using masking material that is not appropriate or strong enough for the surface or type of paint being used, and leaving masking material on for too long.
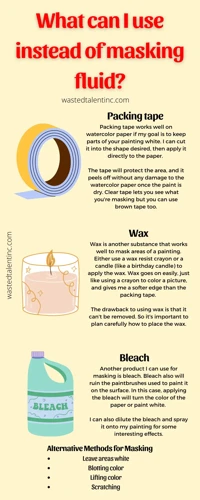
What are some alternatives to masking with tape?
Draping and covering with plastic sheeting or drop cloths can be used for larger areas, while spraying on a liquid masking solution or using specialized masking products can be used for more intricate or delicate areas.
Can masking be used for non-painting purposes?
Absolutely! Masking can be used for a variety of tasks such as protecting surfaces during sanding, cleaning or repairs, and even for creating stencils or patterns for other creative projects.
What is the purpose of masking in spray painting?
Masking is critical in spray painting to prevent over-spray from reaching unwanted areas, resulting in a cleaner and more precise finished look.
What are some safety precautions to take when masking for painting?
Be sure to wear personal protective equipment such as gloves and safety glasses when using potentially harmful chemicals or materials, and always read and follow instructions carefully.
How can I ensure that the masking will not peel or lift during painting?
Make sure that the surface is clean and dry before applying the masking, and let the paint dry completely before removing the masking materials slowly and carefully.
Can masking materials be reused?
It depends on the type of material used and the condition it is in. However, it is generally recommended to use new masking materials for each project to ensure the best results.