Starting a new project can be exciting, but sometimes, the finishing part can be a gruesome task. If you have just finished painting a room, you might be wondering about how to remove masking tape without damaging the paint. The thought of taking off the tape carefully may seem simple, but if not done correctly, it can ruin your entire project. That’s why it’s crucial to understand the best practices for removing tape without damaging your walls or making extra work for yourself. In this article, we’ll outline step-by-step instructions, alternative methods, tips and tricks, and everything you need to know to remove masking tape like a pro.
Why Removing Masking Tape Carefully is Important
When it comes to painting, we tend to focus all our attention on getting the perfect paint lines, choosing the right colors, and applying the paint evenly. However, many of us forget that the removal process of masking tape can be just as important as the application process. If you don’t remove the tape carefully, you risk damaging the paint and ruining your hard work. In this section, we’ll explain why removing masking tape careful is crucial when it comes to protecting your walls and avoiding extra work. Let’s dive in.
Protect Your Walls
When painting a room, it is important to protect your walls from getting damaged by paint or other harmful substances. This is where using masking tape comes in handy. Masking tape is used to cover the areas that you do not want to paint or protect from damage. However, you need to be careful while removing masking tape to avoid damaging your walls or paint. Here are a few ways that you can protect your walls while removing masking tape:
- Be Gentle: When removing the masking tape, you need to be gentle to avoid damaging the paint or the wall. You can start by using your fingers to gently lift a corner of the tape and slowly pull it back at a 45-degree angle. This will help you avoid any unnecessary force or pressure on the wall that can potentially damage it.
- Use the Right Type of Masking Tape: There are various types of masking tapes available in the market that serve different purposes. Make sure to use the right type of masking tape for the surface you’re painting on. For instance, if you’re painting on delicate surfaces, use painter’s tape that is specifically designed for delicate surfaces. Choosing the right masking tape will ensure that it will not leave any residue or lift the paint from the wall when removed.
- Avoid Leaving the Tape on for Too Long: While leaving the tape on for too long may seem like a good idea, it can actually make the removal process more difficult. The longer you leave the tape on, the stronger the adhesive becomes, which can lead to paint peeling off with the tape when removed. Try to remove the tape within 24 hours of application to avoid any unnecessary damage.
By following these simple tips, you can remove masking tape easily without worrying about damaging your walls or paint. If you want to learn more about masking tape, check out our article on the different types and uses of masking tape or get creative with some fun and unique paint designs.
Prevent Extra Work
Using masking tape when painting helps to keep the paint within the lines and results in a neater finish without going over onto surfaces that should not be painted. However, if the tape is not removed carefully, it can cause extra work and even damage the painted surface.
One common problem when removing masking tape is when the paint comes off with it, leaving an uneven edge or, even worse, a hole in the surface. This can require extra work and materials to repair, which is time-consuming and costly.
Another problem can arise if the tape is left on for too long, making it harder to remove, and even leaving behind a sticky residue that can be difficult to clean. This can also cause extra work, as the surfaces might need cleaning and repainting.
To prevent this extra work and damage, there are steps that can be taken to remove the masking tape without causing damage to the painted surfaces. These steps include using heat, removing the tape at a 45-degree angle, and cleaning up any residue with water and detergent.
It is important to take the time to remove the tape slowly and carefully while following these steps to prevent any extra work or damage to the painted surface, making the painting process efficient and stress-free.
By following these simple tips, removing masking tape can be a breeze, and the painted surface will be left looking perfect. For more information on masking tape for painting, check out our comprehensive guide on masking tape and how to use it for painting or learn more about how to achieve clean paint lines with masking tape in our article on masking tape for perfect paint lines.
What You Will Need
Before attempting to remove masking tape from painted surfaces, it’s important to gather a few supplies. Here are the things you will need:
1. Utility Knife: You will need a utility knife or a pair of scissors to cut the edges of the tape.
2. Hairdryer: If the tape is stubborn, a hairdryer can be used to soften the adhesive.
3. Soft Cloth: A soft, lint-free cloth will be useful for wiping away any residue or dirt.
4. Water and Detergent: If there is any sticky residue left after removing the tape, a mixture of warm water and detergent can be used to clean it up.
5. Putty Knife: A putty knife can be used to peel off any stubborn pieces of tape.
6. Olive Oil: If you prefer to use an alternative method for removing tape, olive oil can be used to loosen the adhesive.
These supplies are easy to find and can be purchased at your local hardware store or online. Having them on hand will make the process of removing masking tape without damaging the paint much easier and more efficient.
Step-by-Step Instruction
Now that you understand why it’s crucial to remove masking tape carefully, let’s dive into a step-by-step guide for doing so. By following these simple yet effective instructions, you can ensure that your paint remains intact and flawless. Pay close attention to each step, and take your time to complete the process thoroughly. With a little patience and effort, you’ll be able to remove masking tape without damaging the paint in no time!
Step 1: Determine When to Remove Masking Tape
Knowing when to remove masking tape is crucial in ensuring that your paint job is free of defects caused by misplaced tape removal or leaving it on too long. Here are some steps to determine when to remove the masking tape:
- Check the manufacturer’s instructions: Different masking tapes have different optimal period of time for removal. Some may need to be removed immediately while others can be left on for up to a week. It’s essential to read the tape’s instructions and follow them carefully.
- Observe the drying time: The drying time for the paint depends on several factors such as the type of paint and the environmental conditions. As a general rule, wait at least 24 hours before removing masking tape from freshly painted surfaces. However, a longer drying time may be necessary depending on the paint and environmental conditions. You can performing a “tack test” by pressing your finger gently onto the painted surface. If no paint sticks to your finger, then it is dry enough for tape removal.
- Inspect the tape: Prior to removal, inspect the tape to ensure that it hasn’t become too adhered to the surface; if it has, it may pull up the paint or leave adhesive residue behind. If you notice that the tape has started to peel off on its own, it’s time to remove it. If the tape is still firmly adhered, it may be necessary to wait a little longer before removing it.
By following these steps, you can guarantee the best possible outcome for your project and avoid any unwanted damage to your paint job.
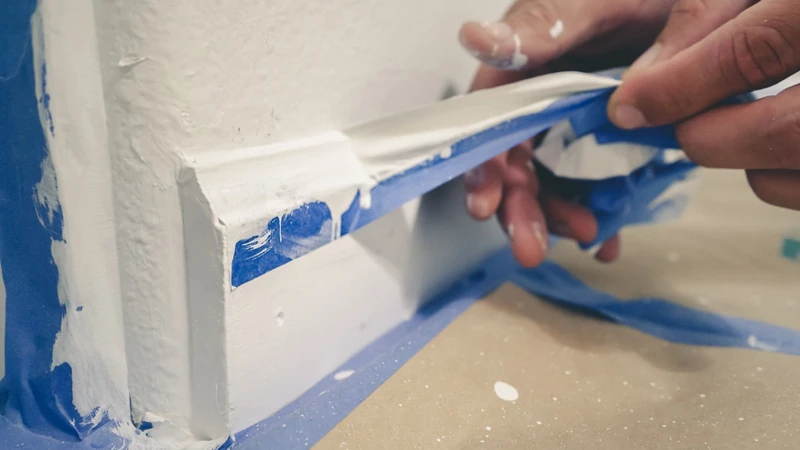
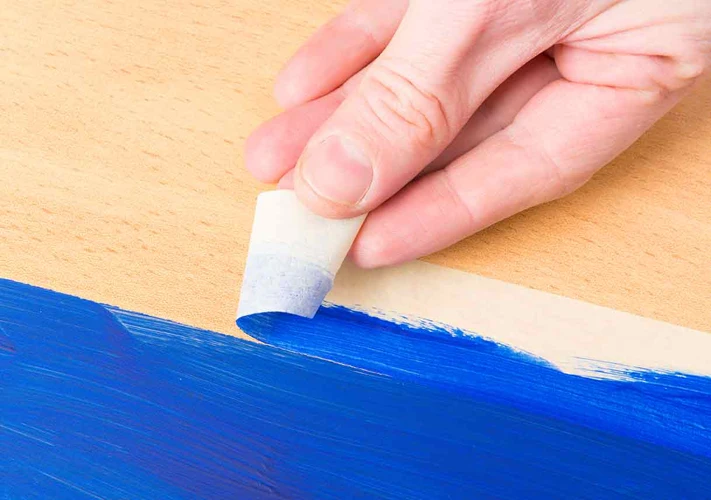
Step 2: Remove the Tape Slowly and Carefully
When it comes to removing masking tape without damaging the paint, it is important to be slow and careful. Here are the detailed steps you should follow:
| Step | Description |
|---|---|
| 1 | Hold the tape at a 45-degree angle: Start by holding the tape at a 45-degree angle, and slowly peel it back on itself. This will help to avoid any sudden tearing or ripping, which can cause damage to the paint. |
| 2 | Peel the tape back slowly: When peeling back the tape, do it slowly and gently to prevent any undue force that can remove the paint with it. Pulling too hard too quickly can cause the paint to rip or peel off. |
| 3 | Use your fingers or a scraper: You can use your fingers to gently press down on the surface of the tape as you peel it back to help it release from the surface. If necessary, a plastic scraper or putty knife can be used to help lift the tape off the surface. Be careful not to use any metal scrapers or blades, as they can scratch the paint. |
| 4 | Remove the tape slowly and steadily: Continue peeling the tape back at a steady pace until it is completely removed. Avoid pulling too hard or too quickly, as this can cause damage to the paint surface. If the tape begins to tear or rip, stop and use a scraper to lift the remaining pieces off the surface. |
Remember that removing masking tape can be a delicate process, and it is worth taking the time to do it right. Rushing the process or using excessive force can lead to damage or the need for extra touch-up work.
Step 3: Use Heat to Remove Stubborn Tape
When dealing with stubborn masking tape that refuses to come off, using heat is a helpful technique for removal. Here are the steps to follow:
- Prepare the necessary tools: a hairdryer and a plastic or metal scraper.
- Hold the hairdryer about 2 inches away from the tape and turn it on to the highest heat setting.
- Direct the heat towards the tape, moving the hairdryer in a back-and-forth motion for about a minute.
- Caution: Be careful not to overheat the tape or the wall, as this can cause damage.
- Using the scraper, gently lift the edge of the tape and carefully peel it away from the surface.
- If the tape still doesn’t come off easily, repeat the process, being careful not to damage the surface or paint.
- Note: Using heat to remove masking tape may not be suitable for all types of surfaces. Test on a small area first to ensure that it does not cause any damage.
By using heat to remove stubborn masking tape, you can avoid the frustration of peeling away small bits of tape at a time, which can damage the paint and take up extra time. However, this method requires patience and care to ensure that the wall or surface is not damaged.
Step 4: Clean up Any Sticker Residue with Water and Detergent
After removing the masking tape, there may be residues of sticker or adhesive on the painted surface. To clean up any sticky residue left behind, follow these simple steps:
- Step 1: Mix some warm water with a small amount of mild detergent or dish soap in a bowl or container.
- Step 2: Dip a soft cloth or sponge into the soapy water solution and gently rub it over the adhesive residue.
- Step 3: If the residue is stubborn and doesn’t come off easily, use a plastic scraper or an old credit card to gently scrape it off.
- Step 4: Once the residue is gone, wipe the surface with a clean, damp cloth to remove any soap or cleaner residues.
It’s important to avoid using harsh chemicals or abrasive tools when removing adhesive residue, as they can damage the paint. Stick to mild soap and warm water, and use a soft cloth or sponge to gently scrub the area. Always test on a small, inconspicuous area first to make sure the soap doesn’t damage the paint. Once you’re done cleaning up the residue, the surface should be smooth and clean, with no trace of stickiness left behind.
Alternative Methods
If the traditional method of removing masking tape isn’t working for you, don’t panic. There are other ways to get the job done without damaging the paint. In fact, many people swear by alternative methods that are both effective and easy to implement. Below are some creative solutions that use everyday items you might have lying around the house. So, if you’re struggling to remove masking tape from your walls or furniture, try these alternative methods before giving up.
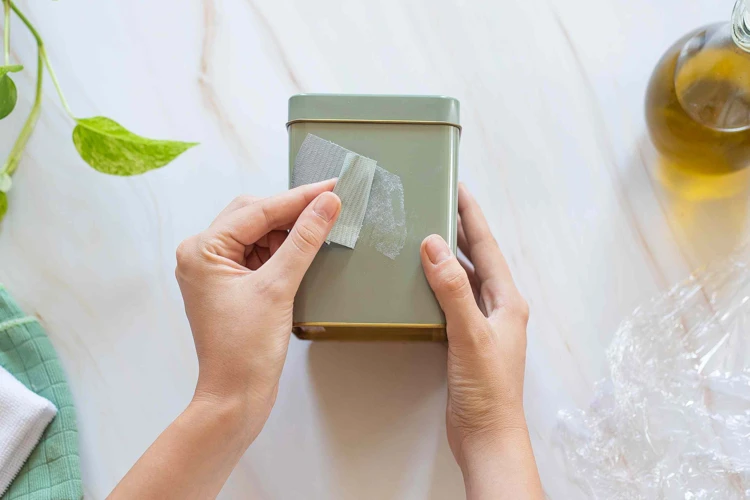
Use Olive Oil to Remove Masking Tape
An alternative method for removing masking tape without damaging the paint is to use olive oil. This method is particularly useful if the tape has been left on for a long time or has become very sticky. Here are the steps to follow:
- Apply olive oil: Dip a cotton ball or swab in olive oil and apply it directly onto the tape. Make sure that the oil is applied evenly and covers the entire tape.
- Let it sit: Leave the olive oil on the tape for at least 30 minutes. This will help to loosen the adhesive and make it easier to remove the tape without damaging the paint.
- Remove the tape: Slowly and carefully pull the tape off the wall at a 45-degree angle. If the tape is still difficult to remove, repeat the process of applying olive oil and waiting for it to soak in.
- Clean up: Once the tape is removed, clean up any excess olive oil with a cloth or paper towel. Then, clean the surface with a mild detergent and warm water to remove any remaining residue.
It is important to note that while olive oil is a gentle and natural method for removing masking tape, it may not work as effectively as other commercially available products. It is also important to test this method on a small, inconspicuous area before applying it to the entire surface. If there is any damage or discoloration, stop using olive oil and try a different method.
Use a Hairdryer to Warm the Tape
An effective way to remove masking tape without damaging the paint is to use a hairdryer to warm up the adhesive. This method is particularly useful for stubborn tape that doesn’t easily budge, as the heat loosens the bond between the tape and the surface. Here’s how to do it:
| Step 1: | Plug in your hairdryer and turn it on to a medium heat setting. |
| Step 2: | Hold the hairdryer about 2-3 inches away from the tape. |
| Step 3: | Move the hairdryer back and forth over the length of the tape for 30 seconds to 1 minute. |
| Step 4: | Using your fingers or a plastic scraper, slowly peel off the tape at a 45-degree angle. |
| Step 5: | If the tape leaves any residue, use a mixture of warm water and detergent to clean it off. |
It’s important to keep the hairdryer moving and not to concentrate the heat on one spot for too long, as this could damage the paint. This method works best on flat surfaces, such as walls or doors, rather than curved or intricate surfaces, which may require a different technique.
By using a hairdryer to warm the tape, you can effectively remove it without damaging the paint, saving you time and money on touch-ups or repainting. Remember to always be careful when using heat near a painted surface, and test the method on a small area before applying it to a larger section.
Use a Putty Knife to Peel Off the Tape
If you are having trouble removing masking tape from your walls or other surfaces, using a putty knife can be a helpful alternative method. This option is especially useful for instances where the tape has been left on for too long or has become stuck due to different weather conditions or humidity. The putty knife allows for minimal damage to the surface, compared to other harsher removal methods.
Here are the steps to follow when using a putty knife:
| Step 1: | Start by locating the edge of the masking tape, and gently lift it with your fingers or a putty knife. |
| Step 2: | Once you have lifted the edge, slide the putty knife underneath the tape, ensuring that the blade is flat against the surface. |
| Step 3: | Gently wiggle the knife back and forth to loosen the adhesive. If the tape is difficult to remove, use slow and steady pressure until the tape begins to release. |
| Step 4: | Continue to slide the putty knife under the tape and gently lift it off, taking care not to damage the surface. If necessary, repeat this process until all the tape is removed. |
| Step 5: | After the tape has been removed, use a damp cloth or sponge to clean the area and remove any adhesive residue. |
Tips:
It is important to use a putty knife with a flat blade to minimize any surface damage. If you do not have a putty knife, you can try using a plastic scraper or credit card instead. Remember to proceed slowly and carefully to avoid any damage to the surface.
Tips and Tricks
As you reach the end of this article on removing masking tape without damaging the paint, it is important to keep in mind some tips and tricks to ensure successful removal without any unwanted damages. These small but crucial steps can make all the difference in achieving a seamless finish that you can be proud of. Keep reading to learn these important tips and tricks that will help you remove masking tape with ease and confidence.
Remove the Tape at a 45-Degree Angle
When removing masking tape, it is important to do it at a 45-degree angle. Doing so can help prevent damage to the paint and ensure a clean and smooth removal process. Removing the tape at an incorrect angle can cause the tape to tear, leaving behind small pieces that can be difficult to remove.
To remove the tape correctly, start at one end of the tape and slowly peel it off at a 45-degree angle. Use your other hand to hold down the surface near the tape to prevent it from being pulled off as well. The slower you remove the tape, the less likely it is to tear or leave residue behind.
It is also important to make sure that the tape is not pulled too quickly or too aggressively. This can cause the tape to stretch and leave behind a sticky residue or even damage the surface underneath. A smooth, steady pull at a 45-degree angle is the best way to ensure a successful removal.
Summary: When removing masking tape, always remove it at a 45-degree angle. This helps prevent damage to the paint and ensures a clean removal process. Use a slow and steady motion to peel the tape off and avoid pulling too aggressively.
Use a Premium-Quality painter’s tape
When it comes to masking tape, using a premium-quality painter’s tape is essential for achieving clean paint lines and easy removal. Here are some reasons why a high-quality tape is worth the investment:
- Less Likely to Leave Residue: Low-quality tape can leave a sticky residue on your walls, making it difficult to remove without damaging the paint. A premium tape, on the other hand, is specially designed to have a low-tack adhesive that releases easily, leaving behind a clean surface.
- Better Adhesion: High-quality painter’s tape is engineered with stronger adhesion, ensuring it stays in place throughout the painting process without lifting or peeling.
- Reduced Bleed-Through: Cheap masking tape can allow paint to bleed through, resulting in messy, uneven lines. A premium tape has a built-in barrier that prevents paint from seeping underneath.
- Multiple Surfaces: Quality painter’s tape is versatile and can adhere to a variety of surfaces including painted walls, wood, glass, metal and more.
- Easy Application: Premium-quality tape is designed to be easy to apply, preventing wrinkles and air bubbles that can cause uneven lines.
Investing in a quality masking tape will not only make the painting process easier, but it will also save you time and money by preventing the need for touch-ups or repainting caused by damaged surfaces. Remember to choose a tape that is specifically designed for painting and read the manufacturer’s instructions carefully to ensure the best results.
Remove Tape within 24 Hours of Application
It is important to remove masking tape within 24 hours of application to prevent damage to the paint and the surface beneath it. Leaving the tape on for too long can cause the adhesive to harden and bond with the surface. This makes it difficult to remove the tape without damaging the paint or leaving behind residue.
To avoid this issue, it is best to remove the tape as soon as possible after painting is complete. This is especially true if the room temperature is high or if the humidity is low, as this can cause the adhesive to dry out more quickly.
Here are some tips to help remind you to remove the tape within 24 hours:
- Set an alarm or reminder on your phone or calendar
- Put a note next to the tape as a reminder
- Make a mental note to check on the tape periodically
- Plan your painting project so that you have enough time to remove the tape within 24 hours
By removing the tape within 24 hours of application, you can ensure that your paint job looks great and your surfaces remain undamaged. Remember to take your time and be careful when removing the tape to prevent any accidental damage or residue left behind.
Avoid Using Tape on Newly Painted Surfaces
Avoid Using Tape on Newly Painted Surfaces:
It’s crucial to avoid using tape on newly painted surfaces, especially if it’s still wet. Here are some reasons why:
- Peeling: If the tape is removed too soon, it can cause the freshly painted surface to peel or chip off. This can ruin the finish and leave unsightly marks on the walls.
- Sticking: If the tape is left on for too long, it may stick to the painted surface, making it difficult to remove without damaging the paint underneath.
- Drying Time: Most paints take around a week to dry fully. Using tape during this period can cause the paint to lift and ruin the finish.
- Adhesion: The adhesive on masking tape can react with the chemicals in wet paint, causing it to lose its adhesion properties. This may result in the tape falling off, leaving paint smudges or patches where the paint bled through the tape.
To avoid these problems, it’s best to wait at least a week after painting before applying masking tape. This will ensure that the paint has dried fully and won’t be damaged when the tape is removed. If you need to mask off an area before painting, consider using a low-tack painter’s tape that won’t damage the surface or leave adhesive residue.
Test on a Small Area First
When removing masking tape, it is important to test on a small area first to avoid damaging the paint. This is a crucial step because certain types of paint or surfaces may react differently to the adhesive on the tape.
Before you remove masking tape from a large area, test a small corner or inconspicuous area first. This will help you determine how the surface will react to the adhesive and avoid any potential damage.
To test on a small area, apply the tape as you normally would and let it sit for the same amount of time as you would for the larger area. Gently peel off the tape from the corner or edge and observe the surface for any signs of damage.
In the case of any damage, try using an alternative method or adhesive that is designed for delicate surfaces. It is better to be safe than sorry, so taking this extra step will give you peace of mind and prevent any potential costly repairs.
Below is a table outlining some materials and surfaces that may require testing:
| Materials | Surfaces |
|———–|———-|
| Oil-based paint | Wood, metal, and some plastics |
| Latex paint | Drywall, plaster, and some plastics |
| Wallpaper | Painted or unpainted drywall |
| Stucco or textured walls | High gloss paint or surfaces |
| Delicate surfaces | Furnishings or electronics |
By testing on a small area first, you can save yourself time, money, and effort in the long run. Taking the extra step to ensure the paint is not damaged by the adhesive will result in a seamless finish and a successful DIY project.
Conclusion
In conclusion, removing masking tape without damaging the paint can seem like a daunting task, but with the right tools and techniques, it can easily be accomplished. By following the step-by-step instructions outlined in this article, you can easily remove masking tape from your walls without any concerns of damaging the paint.
It’s important to remember to always remove the tape carefully and at a 45-degree angle to avoid accidents. Additionally, using premium-quality painter’s tape, removing the tape within 24 hours of application, and avoiding using tape on newly painted surfaces are all important tips to remember.
There are also alternative methods like using olive oil, a hairdryer, or a putty knife to remove stubborn tape, and testing on a small area first can be particularly helpful.
Overall, taking the time to carefully remove masking tape can save you from costly repairs and extra work down the line. So don’t rush the process and follow the simple steps outlined in this article, and you’ll have a beautifully painted room in no time!
Frequently Asked Questions
How long should I wait before removing masking tape?
You should remove masking tape within 24 hours of application to avoid damaging the paint.
Can I use any type of tape for masking?
No, it’s important to use premium-quality painter’s tape to prevent damage to your walls.
What should I do if the tape won’t come off easily?
You can use heat to make the tape more pliable and easier to remove.
Can I remove masking tape from a freshly painted surface?
Avoid using tape on newly painted surfaces to prevent damage or peeling of the paint.
Can I use olive oil to remove masking tape?
Yes, olive oil can be a helpful alternative method for removing stubborn tape residue.
Should I pull the tape off at a certain angle?
Yes, it’s best to remove the tape at a 45-degree angle to prevent damage to the paint.
What should I do if there is sticker residue left behind?
You can clean up any residue with a mixture of water and detergent.
Am I at risk of damaging the paint if I remove the tape too quickly?
Yes, removing the tape too quickly can cause damage to the paint or leave behind sticky residue.
Is it normal to have some tape residue left behind after removal?
It’s common to have some residue left behind, but it can be cleaned up easily with the right tools.
How can I prevent the need for masking tape removal in the first place?
You can prevent the need for masking tape removal by using a steady hand and high-quality brushes or rollers.