As DIY enthusiasts, we often find ourselves in need of adhesives to complete our projects. With so many options available in the market, it can be overwhelming to decide which one to use. Have you heard of Tylo glue? It’s a multi-purpose adhesive that can come in handy for various crafts and repairs. In this guide, we will take a closer look at what Tylo glue is, its benefits, and how to make it at home. Follow along and discover this useful adhesive that might just become your new go-to.
Why use Tylo Glue?
Considering the effectiveness of adhesives in different materials, Tylo glue is one of the most beneficial options one could consider for various projects. As opposed to other types of glues, Tylo glue has several benefits that make it useful for different materials and purposes, whether it is for crafting, household repairs or DIY projects. In this section, we will discuss what Tylo glue is, its benefits, and where it is often used, thus helping you understand why this type of glue is a great option.
What is Tylo glue?
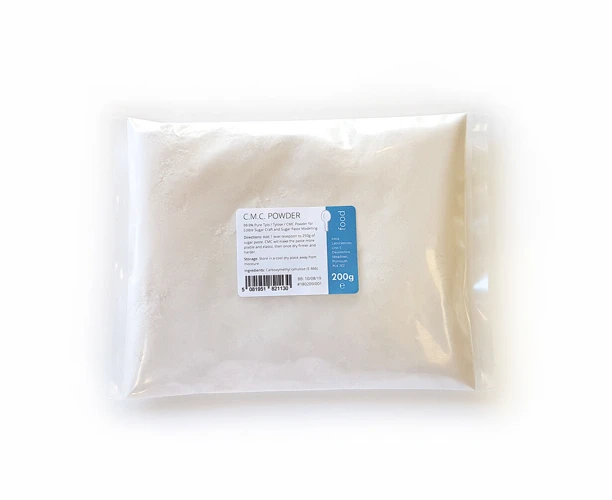
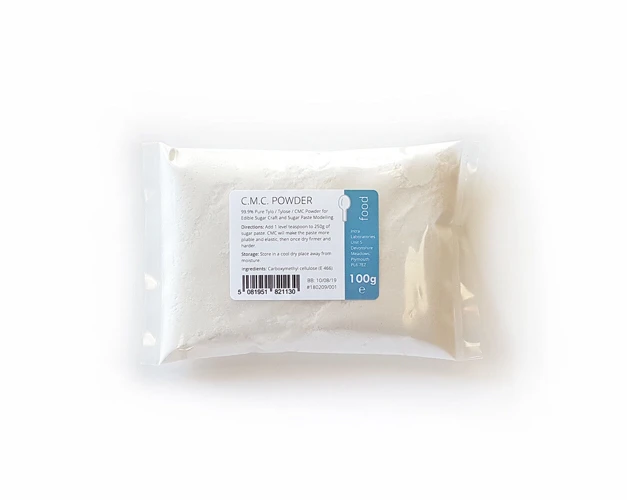
Tylo glue, also known as Tylose glue or CMC glue, is a type of adhesive that is commonly used in the world of baking and cake decorating. The main ingredient in Tylo glue is Carboxymethyl cellulose (CMC), which is a food-grade, water-soluble gum that is derived from natural cellulose.
CMC is a versatile ingredient that is often used as a thickener, emulsifier, and stabilizer in the food industry. It is commonly found in processed foods, such as ice cream, sauces, and baked goods, where it helps to improve texture and consistency.
When used as an adhesive, CMC is often combined with water and a small amount of glycerin to create Tylo glue. This mixture creates a strong, flexible, and durable glue that can be used to attach fondant decorations to cakes, create sugar flowers, and even assemble gingerbread houses.
Although Tylo glue is primarily used in the baking industry, it can also be used in a variety of other applications, such as paper crafts, woodworking, and glasswork. Its water-soluble properties make it easy to clean up, and its strong bonding capabilities make it an excellent choice for many different projects.
If you want to learn more about how to use Tylo glue in your crafting or baking projects, keep reading!
Benefits of Tylo glue
Tylo glue, also known as CMC glue, offers several impressive benefits, which make it a popular choice for many crafters and home artisans. Below are some of the significant advantages of using Tylo glue:
| Benefits of Tylo glue |
|---|
| Non-Toxic |
| Suitable for Edible Applications |
| Excellent Binding Strength |
| Minimal Shrinkage |
| Resistant to Bacteria and Fungi Growth |
| Easy to Mix and Apply |
| Safe for Children to Use |
| Economical |
One of the most significant benefits of Tylo glue is that it is a non-toxic adhesive. This feature makes it safe to use when handling food because it does not contain harmful chemicals that could cause food contamination. Thus, this glue is perfect when making edible crafts like cake decorations, candies, and pastries. The glue ensures that the food remains firm and stable, maintaining its shape and design.
Another advantage is that Tylo glue has excellent binding strength, making it ideal for a wide array of craft projects. Once the glue dries, it creates a strong, durable bond that remains intact even under harsh conditions. Thus, it is a reliable adhesive option when working with various materials like wood, paper, glass, and fabrics.
Tylo glue has minimal shrinkage, which means it does not change its volume or shape significantly during the drying process. This feature ensures that the pieces you are working on maintain their original look and shape.
This glue is also resistant to bacteria and fungi growth, making it an ideal option for outdoor projects or in high-moisture environments. Additionally, it is easy to mix and apply, so you can use it on different surfaces without fuss.
Lastly, Tylo glue is economical and safe for children to use. It is an affordable adhesive option that delivers excellent results, and parents do not have to worry about their kids’ safety while using it.
If you want to know how to laminate paper with glue, Tylo glue can give you satisfying results.
Where to use Tylo glue
Tylo glue, also known as tylose glue, is a versatile adhesive that can be used in a variety of applications. Here are some examples of where to use tylo glue:
- Sealing envelopes: Tylo glue is perfect for sealing envelopes, as it forms a strong bond that dries clear. Check out our guide on how to make envelope glue using tylo glue!
- Attaching glass to other surfaces: Tylo glue is perfect for attaching glass beads to a wine bottle or for attaching glass to wood. Learn more about how to attach glass to wood without glue using tylo glue.
- Gluing posters: Tylo glue won’t damage delicate posters and won’t leave any residue or staining behind. Discover our tips for gluing posters using tylo glue.
- Other crafting applications: Tylo glue can also be used for a range of other crafting applications, from attaching embellishments to cards to creating DIY slime.
- General household repairs: For household repairs, tylo glue can often be used as a substitute for other adhesives, such as superglue or white glue. However, it’s important to note that it may not be suitable for all applications. Check out our article on which glue to use for different materials to learn more.
Remember to always test the adhesive on a small, inconspicuous area before applying it to your project. If you have any doubts about whether tylo glue is suitable for a particular application, consult the manufacturer’s instructions or seek advice from a professional. Additionally, be sure to follow our tips for keeping glue bottles from clogging and our guide on how to seal an envelope without glue to ensure you get the best results possible.
How to Make Tylo Glue
Making your own Tylo glue is an excellent way to save money and ensure that your glue is always fresh and ready to use. By following these step-by-step instructions, you will be able to create a strong adhesive that can be used for a variety of projects. Whether you need to glue envelope liners or attach glass beads to a wine bottle, this homemade Tylo glue is the perfect solution. So, let’s gather the necessary ingredients and get started!
Ingredients Required
To make Tylo glue, you will need a few basic ingredients that are easily available. Here is a list of the ingredients required for making Tylo glue:
| Tylo Powder | To make Tylo glue, you will need Tylo powder, also known as Tylose powder or CMC powder. This is a food additive that is commonly used as a thickener, stabilizer, or emulsifier. |
| Water | Water is the main ingredient required for making Tylo glue. Without water, you cannot make the glue. |
| Container | You will need a container to mix the Tylo powder and water. Make sure the container is clean and dry before you use it. |
| Spoon | You will need a spoon to mix the Tylo powder and water. Make sure the spoon is clean and dry before you use it. |
| Stove | You will need a stove to boil the water. Make sure the stove is clean and dry before you use it. |
It is essential to have all these ingredients before you start making the Tylo glue to avoid any inconvenience. You can easily find Tylo powder at any supermarket or baking supply store. If you don’t have Tylo powder, you can’t make Tylo glue. It’s as simple as that.
Now that you know the ingredients required let’s move on to the next section on how to make Tylo glue.
Note: If you are looking for projects to use with Tylo glue, check out our detailed articles on how to glue envelope liners and how to glue glass beads to a wine bottle.
Instructions for Making Tylo Glue
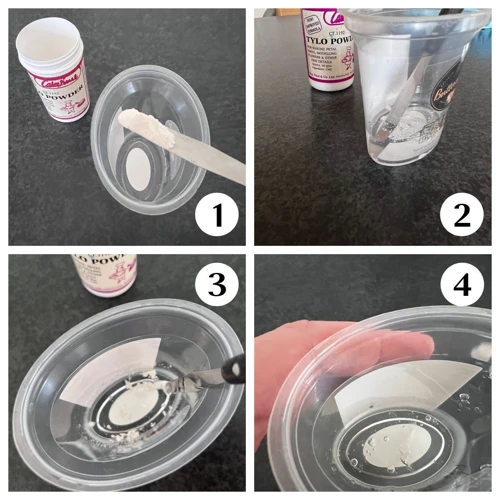
To make Tylo glue, you can follow these simple instructions:
Step 1: In a mixing bowl, combine 1 tablespoon of Tylo powder and 4 tablespoons of lukewarm water.
Step 2: Stir the mixture thoroughly until the powder has dissolved completely.
Step 3: Add 1/2 cup of cold water to the mixture and stir again.
Step 4: Heat the mixture over low heat, stirring constantly, until it thickens to a pudding-like consistency.
Step 5: Remove the mixture from heat and allow it to cool to room temperature.
Step 6: Once the mixture has cooled, it is ready to use as Tylo glue.
It’s important to note that Tylo glue has a shelf life of approximately 2-3 weeks when stored in an airtight container in the refrigerator. Additionally, it’s recommended to only make the amount of glue needed for your current project to ensure the best possible results.
Table of Ingredients Required
| Ingredients | Measurements |
|---|---|
| Tylo powder | 1 tablespoon |
| Lukewarm water | 4 tablespoons |
| Cold water | 1/2 cup |
By following these simple instructions and using the ingredients listed above, you can easily make Tylo glue at home. Tylo glue is a versatile and effective adhesive that is perfect for use in a variety of craft and baking projects. However, it’s important to always follow precautions when using any type of glue or adhesive and to use in well-ventilated areas.
How to Use Tylo Glue
After making your own Tylo glue, it’s time to put it to use. But how exactly do you use it? Don’t worry, we’ve got you covered. In this section, we will provide a step-by-step guide on how to use Tylo glue. We’ll also highlight some precautions you need to keep in mind while using it. So, let’s get started and learn how to make the most of your homemade Tylo glue!
Step-by-Step Guide
Once you have made your own Tylo glue, you can start using it for various projects that require strong and effective adhesive. Here is a step-by-step guide on how to use Tylo glue:
| Step | Instructions |
|---|---|
| 1 | Make sure that the surfaces you want to glue together are clean, dry, and free from any debris or dust. This will make sure that the glue adheres properly. |
| 2 | Apply a small amount of Tylo glue to one of the surfaces. Remember, a little goes a long way, so don’t overdo it. |
| 3 | Press the two surfaces together firmly. Make sure that you apply pressure evenly to the entire area of the surfaces that are glued together. You can use clamps or weights to hold the surfaces together until the glue sets. |
| 4 | Allow the glue to dry completely. This may take several hours depending on the humidity and the temperature of the surroundings. |
| 5 | Trim any excess glue that may have squeezed out during the bonding process. You can use a sharp knife or sandpaper to remove the excess glue. |
It is important to follow these steps carefully to ensure that the bond is strong, durable, and long-lasting. Tylo glue can be used for a variety of materials including paper, wood, cardboard, fabric, and many other porous surfaces.
Note: Do not exceed the recommended amount of glue, as this can lead to weakened bonds. It is also important to store your Tylo glue in a cool, dry place away from direct sunlight and heat sources. Always keep it out of reach of children and pets.
By using this step-by-step guide for using Tylo glue, you can achieve the desired results in your projects and make sure that they last longer.
Precautions for Using Tylo Glue
Before using Tylo glue, it’s important to take necessary precautions to ensure your safety and the effectiveness of the product. Here are some precautions you should keep in mind when using Tylo glue:
- Use in a well-ventilated area: Tylo glue can give off fumes that can be harmful if inhaled for an extended period of time. It’s recommended to use the glue in a well-ventilated area to allow the fumes to disperse.
- Avoid skin and eye contact: Tylo glue can cause skin irritation if it comes in contact with the skin, and severe eye irritation if it gets in the eyes. It’s important to wear gloves and safety goggles when handling the glue.
- Keep out of reach of children: Tylo glue should be stored in a secure location that is out of reach of children. The glue can be harmful if ingested, and children could accidentally ingest it if left unsupervised.
- Avoid using near open flames: Tylo glue is flammable and should not be used near open flames or heat sources.
- Do not mix with other chemicals: Tylo glue should not be mixed with other chemicals or substances, as this could result in a chemical reaction that is dangerous.
By following these precautions, you can safely and effectively use Tylo glue for your desired purpose. Remember to always read the label and instructions carefully before using any adhesive product, and if you experience any adverse reactions or side effects, seek medical attention immediately.
Tips for Making and Using Tylo Glue
Here are some tips for making and using Tylo Glue that can help you get the best results:
1. Follow the instructions closely: To make Tylo Glue, it is essential to follow the instructions closely and maintain the ratio of all the ingredients. You can experiment with the recipe after understanding its basic principles.
2. Test a small area first: Before applying Tylo Glue to a large surface, it’s always better to test it on a small area first to make sure it works effectively on the particular material.
3. Apply glue in a well-ventilated area: When working with glue, it’s important to apply it in a well-ventilated area because certain fumes and vapors can be harmful to your health.
4. Allow sufficient drying time: Depending on the material you are using, Tylo Glue can take anywhere from a few hours to overnight to dry properly. Make sure you give it enough time to dry before using or handling the object.
5. Store glue properly: Tylo Glue should be stored in an airtight container with a lid and kept in a cool, dry place to ensure maximum shelf life.
6. Don’t apply too much glue: Over-application of glue can lead to a mess and may even weaken the bond. Use small amounts of glue and apply it evenly.
7. Clean up excess glue immediately: If any glue oozes out while applying, clean it up immediately with a damp cloth. Once the glue dries, it’s difficult to remove and can ruin the finished product.
8. Use caution with heat: Tylo Glue should not be exposed to high temperatures or open flames. Doing so might weaken the glue’s adhesive strength.
By following these tips, you can improve your experience of making and using Tylo Glue. Whether you are making new products or repairing broken pieces, using Tylo Glue correctly is essential to ensure the best possible results.
Conclusion
In conclusion, learning how to make Tylo glue is a valuable skill for any DIY enthusiast or professional woodworker. Tylo glue is an excellent alternative to other types of adhesives, thanks to its strong bonding capabilities, versatility, and ease of use.
With just a few simple ingredients and a little bit of patience, you can create a reliable and economical adhesive that can be used for a wide range of applications, from carpentry and woodworking to arts and crafts.
Remember that Tylo glue is water-based, so it is non-toxic and environmentally friendly. Additionally, Tylo glue has a long shelf life, so you can store it for future use without worrying about it going bad.
When using Tylo glue, it’s important to follow the instructions carefully and take proper precautions to avoid any potential health hazards. With a little bit of care and attention, you can enjoy the benefits of this versatile adhesive without any unwanted mishaps.
In conclusion, making and using Tylo glue is a simple and effective way to ensure strong and reliable bonds for all your woodworking and crafting needs. Give it a try, and see for yourself how easy it is to create a high-quality adhesive at home.
Frequently Asked Questions
What is the difference between Tylo glue and other types of glue?
Tylo glue is a type of adhesive that is resilient and durable, making it perfect for use in high-stress areas. It is also water-resistant and can be used both indoors and outdoors.
Can you make Tylo glue at home?
Yes, you can make Tylo glue at home using a few simple ingredients. The recipe is easy to follow and only takes a few minutes to prepare.
What are the ingredients needed to make Tylo glue?
The main ingredient needed to make Tylo glue is Tylose powder. Other ingredients required are warm water, a plastic container, and a spoon for mixing.
How long does it take to make Tylo glue?
The entire process of making Tylo glue should take no longer than 10 minutes. This includes mixing the ingredients and letting the mixture sit for a few hours to thicken.
What are some precautions to be taken when using Tylo glue?
It is important to keep Tylo glue away from children and pets. Additionally, it is recommended that you wear gloves while working with the adhesive as it can be sticky and difficult to remove from your skin.
What are some common uses for Tylo glue?
Tylo glue can be used to glue together fondant or sugar paste decorations for cakes, as well as in the creation of paper mache and other crafts projects. It can also be used as a binding agent for natural materials such as wood, bamboo and straw.
Can Tylo glue be used for clothing repairs?
Although Tylo glue is not designed for use on fabrics, it may be used as a temporary fix for minor clothing repairs. However, if the fabric requires a more permanent solution, it is best to use a specialized fabric glue.
Can Tylo glue be used to repair broken ceramic or glass objects?
No, Tylo glue is not recommended for use on ceramic or glass objects as it is not strong enough to withstand the bonding pressure required for such materials.
How long does it take for Tylo glue to completely dry?
The drying time for Tylo glue varies depending on the amount used and the humidity levels in your environment. Typically, it takes approximately 24 to 48 hours for the glue to fully cure and set.
What are some tips for storing Tylo glue?
It is recommended that you store Tylo glue in an airtight container at room temperature to prevent the mixture from drying out. Avoid storing the glue in a damp environment as exposure to moisture can cause the adhesive to become lumpy and unusable.