Discovering the world of do-it-yourself projects can be both exhilarating and rewarding. One of the most versatile and fun crafts to explore is the creation of a DIY paper mache mask. This artistic endeavor not only allows for a great deal of creativity and personal expression but also provides a hands-on experience that can be enjoyed by individuals of all ages.
Benefits of Crafting Paper Mache Masks
Engaging in the process of crafting paper mache masks offers numerous benefits. It is an affordable hobby that utilizes simple materials, often already present in your home. It fosters imagination, improves hand-eye coordination, and can even serve as a therapeutic activity to relieve stress. Additionally, the masks you create can be used for various events, such as Halloween, masquerade balls, or as a distinctive piece of art.
Paper Mache Mask Ideas for Inspiration
When it comes to paper mache mask ideas, the possibilities are boundless. From animal faces and mythical creatures to cultural icons and abstract designs, you can let your imagination run wild. Researching historical masks, exploring fantastical characters, or even drawing inspiration from the natural world are excellent starting points for your homemade mask with glue.
Materials Needed for Your Paper Mache Project
Before diving into your paper mache project, gathering all necessary materials is essential. The basic supplies include newspaper, a balloon or mask form, a mixing bowl, a brush, and, of course, glue. Additional items such as paint, feathers, sequins, and ribbons will be needed for decoration later on.
Choosing the Right Glue for Your Paper Mache Mask
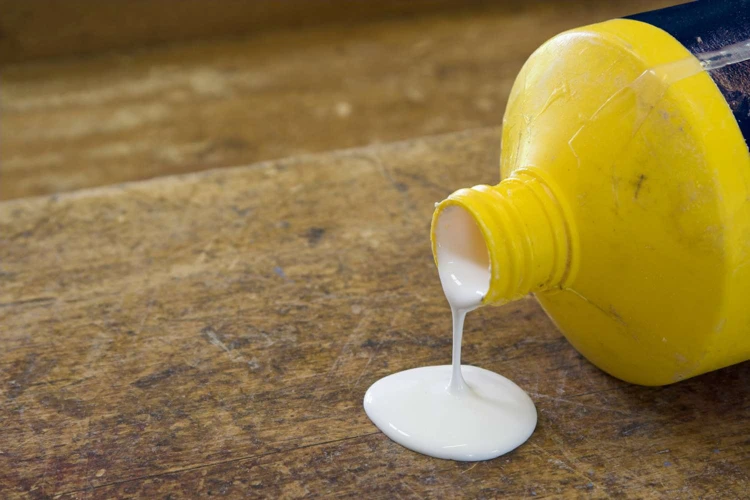
Selecting the proper adhesive is crucial for your project’s success. A glue-based paper mache is preferred for its strength and ease of use. White PVA glue, often used in schools, is a popular choice as it dries clear and can be easily diluted with water to create the perfect consistency for your paper mache mixture.
Easy Paper Mache Recipe for Homemade Masks
An easy paper mache recipe is the backbone of a successful mask-making project. The process is straightforward, and once you’ve mastered the basic mixture, you can begin to create paper mache masks of all shapes and sizes.
Prepping Your Paper Mache Mixture
To start, you’ll need to prepare your paper mache mixture. This typically involves mixing one part water with one part PVA glue to form a smooth adhesive. Stir this mixture until it reaches a uniform consistency. Tear your newspaper into strips — these will be dipped into the adhesive to form the layers of your mask.
Alternatives for a Glue-Based Paper Mache
While glue-based paper mache is a popular choice, alternatives do exist. Some crafters opt for a flour and water mixture or even starch. These options can work well, but for the sake of durability and ease of use, a homemade mask with glue often yields the best results.
Creating the Base for Your DIY Paper Mache Mask
The foundation of your mask is as crucial as the layers that will follow. A sturdy base will help in shaping your design and providing a canvas for your creativity.
Using a Balloon as a Mask Mold
Inflating a balloon to the desired size and shape offers an ideal mold for your mask. Once your paper mache strips are applied and dried, the balloon can be popped, leaving behind the perfect hollow form for your artistic expression.
Crafting a Mask Form with Recycled Materials
For those environmentally conscious, creating a mask form with recycled materials such as old cereal boxes or cardboard can be a fulfilling alternative. Shaping these materials into a base form can be done with scissors and tape before applying your paper mache.
Applying Paper Strips to Create Your Mask
With your base ready, it’s time to start the application process. This stage will truly begin to transform your materials into a work of art.
Techniques for Layering Paper Strips
- Dip a strip of paper into the glue mixture, ensuring it’s thoroughly coated.
- Remove excess adhesive by running the strip between your fingers.
- Apply the strip smoothly onto your mold, overlapping edges for strength.
Tips for a Smooth Finish
For a smooth finish, be patient and meticulous in your application. Smoothing out bubbles and wrinkles as you go will lead to a professional-looking result. Aim to cover your form with at least three layers, allowing each layer to dry completely before adding the next.
Shaping and Detailing Your Paper Mache Mask
Once the basic shape of your mask is in place, you can begin to add the intricate details that will bring it to life.
Adding Facial Features and Contours
Using additional paper mache strips or even cardboard cutouts, you can create pronounced features such as noses, eyebrows, and cheekbones. Attaching these before your final layers ensures they blend seamlessly into your design.
Customizing Masks for Kids and Adults
When creating a paper mache mask for kids, consider making the design more simplistic and sturdy. Adults may appreciate more intricate, delicate features that cater to sophisticated themes or specific character traits.
Drying and Removing Your Paper Mache Mask
Drying is a critical phase in the mask-making process. It solidifies your efforts and sets the stage for decoration.
Ensuring Even Drying for Best Results
Place your mask in a well-ventilated area away from direct sunlight to dry evenly. Drying times can vary, but typically it’s best to wait 24 hours before removing the mask from the form. Patience here is key to prevent any warping or cracking.
Decorating Your Paper Mache Mask
Now that your mask is dry and sturdy, you can unleash your creativity with colors and embellishments.
Painting and Color Techniques
Acrylic paints are ideal for decorating your mask. They offer a wide range of colors and dry quickly. Consider using a primer to help the colors stand out. Techniques such as sponging, stenciling, or dry-brushing can add texture and depth to your design.
Adding Embellishments and Accessories
Embellishments like ribbons, beads, feathers, or sequins can transform your mask from a simple project to a stunning piece of art. Use a strong adhesive to attach these elements securely.
Sealing and Preserving Your Paper Mache Mask
To ensure the longevity of your mask, sealing it with a protective coat is essential.
Protective Coats for Durability
Applying a varnish or sealant will protect your mask from moisture and wear. This step will not only preserve your mask but also give it a professional finish, enhancing the colors and adding a protective shine.
Conclusion: Unleashing Creativity with Your Homemade Mask
Your DIY paper mache mask is now complete, a testament to your creativity and craftsmanship. Whether it’s for a costume, decoration, or simply the joy of creating something with your own hands, the experience of making a paper mache mask is both fulfilling and enjoyable.
Displaying and Using Your Paper Mache Mask
Consider displaying your mask as a conversation piece or using it to complement a costume. The skills you’ve honed in this process can also be applied to future crafting endeavors, as the techniques are versatile and widely applicable in the world of DIY projects.
FAQs: Mastering the Art of Paper Mache Masks
Common questions often arise when delving into paper mache mask-making. These inquiries can range from the type of glue to use, the best way to apply paper strips, or how to achieve a smooth finish. Consult the FAQs section to gain further insights and tips on perfecting your technique.
If you’re a DIY enthusiast or love crafting, you might be interested in the versatility of glue in different projects. While you’re exploring how to make a paper mache mask with glue, don’t miss out on other creative uses of glue we’ve covered. Learn the technique of giving your paintwork a vintage look with our guide on how to crackle paint with glue. If you’re into costume making or cosplay, you might appreciate our tutorial on how to make a wig cap with glue. And for those who need an adhesive putty for mounting or sticking objects temporarily, check out our DIY solution on how to make Blu Tack with glue. Each article is packed with step-by-step instructions to help you on your next glue-based project!
Additional Resources and Tutorials
For those seeking further guidance, a wealth of resources and tutorials are available online. These can provide step-by-step instructions, visual aids, and creative ideas to enhance your paper mache mask tutorial experience. Diving into these resources can offer additional inspiration and help refine your skills in this rewarding craft.