Have you ever needed Blu Tack but found yourself without any? Or perhaps you’ve run out and don’t feel like making a trip to the store. The good news is that you can make your own Blu Tack with glue, and it’s easier than you might think. Not only is this a cost-effective solution, but you can also customize the texture and tackiness to your liking. In this guide, we’ll show you how to make Blu Tack with glue in just a few simple steps using common household supplies. So, let’s get started and make some stress-relieving, poster-hanging, all-purpose sticky goodness!
Materials Needed
Before you start making your own Blu Tack, you need to make sure you have all the necessary materials. This homemade sticky putty is easy and fun to create with just a few basic supplies that you may already have at home. Here’s a list of what you’ll need to begin the process:
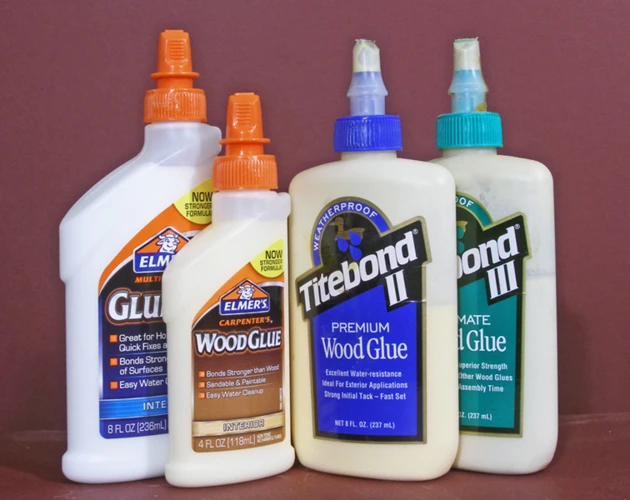
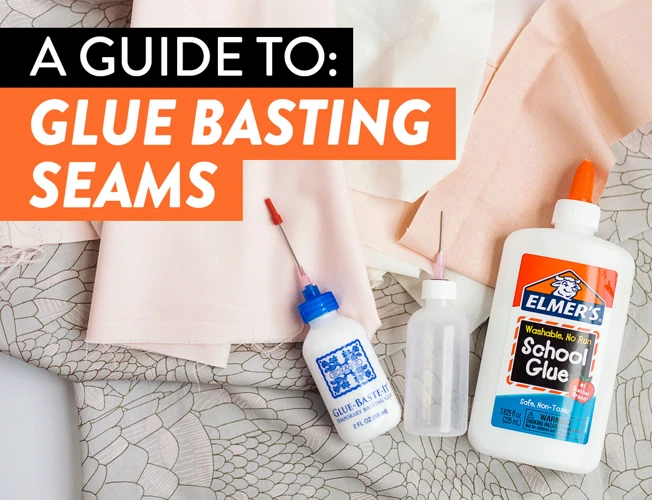
- Glue: You can use any kind of PVA glue, but we recommend white school glue for optimal results.
- Cornstarch: This is the secret ingredient that will help thicken the glue mixture and give it the tackiness you desire.
- Bowl: A mixing bowl is necessary for preparing and mixing the ingredients.
- Spoon or spatula: You’ll need a utensil to stir and knead the mixture together.
- Sealable container: Prepare a storage container to keep your homemade Blu Tack in good condition and prevent it from drying out.
If you’re missing any of these materials, check your local craft store or online marketplace for affordable options. But before you start gathering the supplies, let’s move on to the step-by-step guide on how to make Blu Tack with glue.
List of Materials
Making your own Blu Tack with glue is a quick and easy process, but you’ll need a few materials to get started. Here’s a list of everything you’ll need:
- White Glue: You’ll need a bottle of white glue, such as Elmer’s, to make this recipe. Other types of glue may not work as well.
- Cornstarch: Cornstarch is added to the glue to help give the Blu Tack its stretchy, moldable texture.
- Food Coloring (optional): If you want to add color to your Blu Tack, you can use a few drops of food coloring to the mixture.
- Bowl: You’ll need a bowl to mix the glue and cornstarch together.
- Spoon or spatula: Use a spoon or spatula to mix the ingredients together.
- Sealable Container: A sealable container is necessary for storing your homemade Blu Tack once it’s been made. You can use a plastic bag or a Tupperware container for this purpose.
Before you get started, gather all of these materials in one place so that you have everything you need within reach. One thing to note is that this recipe is for making “glue tack” and not solid glue blocks. If you are interested in making solid glue blocks, then check out our article on how to make glue blocks.
Step-by-Step Guide
After gathering all the necessary materials for making Blu Tack, it’s time to put everything together in a step-by-step process. This guide will walk you through the process and help you create your very own adhesive putty. With easy-to-follow instructions, you’ll be able to make Blu Tack in no time. Whether you’re using it for hanging posters or keeping things steady on a desk, this DIY Blu Tack recipe is an excellent alternative to the store-bought version. Just follow the steps below and you’ll have a batch of Blu Tack ready to use in minutes!
Step 1: Pour the Glue
When making Blu Tack out of glue, the first step is to pour the glue into a bowl. Make sure to use a good quality glue for the best results. White glue generally works best, but clear glue can also be used. Pour enough glue into the bowl to make the desired amount of Blu Tack. It’s important to note that the amount of Blu Tack you end up with will be less than the amount of glue you start with, so keep this in mind when measuring out your glue. Be sure not to skimp on the glue, as this will affect the final texture and tackiness of your Blu Tack.
A helpful tip is to use a wooden stirrer or popsicle stick to transfer the glue from the bottle to the bowl, as this will make it easier to control and prevent spills. Once you’ve poured the glue, make sure to put the cap back on the glue bottle to prevent it from drying out.
It’s important to note that there are other types of glue you can make on your own too, such as non-drying sticky glue or spray glue. For example, if you’re playing the game 7 Days to Die and need to make glue, you can follow our article on how to make glue in 7 Days to Die. Or, if you’re looking to make glue blocks for stairs, our article on how to make glue blocks for stairs might be helpful.
Step 2: Add Cornstarch
After pouring the glue into a mixing bowl, it’s time to add the cornstarch. Cornstarch acts as a thickening agent that gives the Blu Tack its texture and malleable properties. It’s important to measure the cornstarch accurately to avoid any unwanted outcomes.
| Materials needed: | Amount: |
|---|---|
| White glue | One cup |
| Cornstarch | Two cups |
Using a mixing spoon, slowly add the cornstarch to the glue while stirring constantly. It’s essential to make sure that the cornstarch is fully incorporated into the glue. If not mixed properly, the Blu Tack could become lumpy and difficult to mold.
It’s important to note that the amount of cornstarch used will determine the tackiness of the Blu Tack. If the mixture is too sticky, add more cornstarch. On the other hand, if the mixture is too dry and crumbly, add small amounts of glue until the desired texture is achieved.
Once the cornstarch is fully mixed with the glue, move on to the next step. But first, if you want to learn how to make glue for other DIY projects like building stairs or creating crafts, you can check out our article on how to make glue blocks for stairs.
Step 3: Knead the Mixture
After adding the cornstarch to the glue, it’s time to knead the mixture. This step is crucial in creating the perfect texture for your Blu Tack.
To start, scoop the mixture out of the bowl, and place it onto a smooth surface for kneading. A countertop or cutting board will work well. Sprinkle a small amount of cornstarch onto the surface to prevent sticking as you knead.
Then, using your hands, begin to knead the mixture by folding it over and pushing it down with your palms. Repeat this motion several times until the mixture becomes smooth and pliable.
If the mixture is too sticky, add additional cornstarch, a little bit at a time, until you reach the desired consistency. Keep in mind that the more cornstarch you add, the firmer the Blu Tack will be.
Continue to knead the mixture until it is no longer sticky and can be pulled apart without breaking. This may take a few minutes, so be patient.
Once the mixture is smooth and easy to work with, you’re ready to move on to the next step. It’s important to note that if you don’t knead the mixture enough, the Blu Tack may not be as effective at holding objects in place.
If you’re having trouble with the kneading process, there are several alternative recipes for making sticky and flexible glue that you may want to try. Alternatively, you can experiment with different ratios of glue and cornstarch to achieve the desired texture.
In the next step, we’ll test the tackiness of the Blu Tack to ensure it’s ready to use.
Step 4: Test the Tackiness
After you have kneaded the cornstarch and glue mixture thoroughly, it’s time to test the tackiness of your homemade Blu Tack. The level of tackiness needed will depend on what you plan to use the Blu Tack for.
To test the tackiness of your Blu Tack, take a small piece and gently press it onto a surface. If it sticks and holds, but can also be easily removed without leaving any residue, then you have successfully made Blu Tack. Congratulations!
However, if the Blu Tack is too sticky and will not come off the surface easily, then you will need to add more cornstarch and knead it in. On the other hand, if the Blu Tack is not sticking at all, then add more glue and knead it in until you reach the desired tackiness.
Note: It’s important to get the tackiness just right for the task at hand. If you’re using the Blu Tack to hang posters or decorations, a slightly less sticky consistency may be preferred to ensure the items can be easily removed without damaging the surface they were attached to. However, if you want to use the Blu Tack to hold heavier items, like photo frames, you may want to add a little more glue to make it stronger.
Pro-Tip: If you’re finding it difficult to get the tackiness level right, try experimenting with different ratios of glue to cornstarch. It may take a bit of trial and error, but you’ll soon find the perfect combination that works for you.
If you’d like to learn about making other types of glue, check out our articles on how to make glue in 7 Days to Die, how to make spray glue, and how to make super glue in The Escapist.
Step 5: Store the Blu Tack
After making your homemade Blu Tack, it’s important to properly store it so you can continue to use it again and again. Here are some tips on how to store your Blu Tack for optimal use:
| Tip | Explanation |
|---|---|
| Use a sealable container | Storing your Blu Tack in an airtight container will ensure that it stays fresh and pliable for future use. You can use a small plastic Tupperware container or a resealable plastic bag to store your Blu Tack in. |
| Avoid extreme temperatures | Blu Tack is sensitive to temperature, so it’s important to avoid storing it in areas that are either too hot or too cold. For example, don’t store your Blu Tack near radiators or air conditioning units. Instead, store it in a cool, dry place. |
| Keep it away from direct sunlight | Direct sunlight can cause Blu Tack to dry out and become brittle. It’s important to store it in a shaded area or inside a container to avoid any direct sunlight exposure. |
| Don’t mix old and new batches | If you have two different batches of Blu Tack, don’t mix them together. The tackiness of the two batches may be different and could cause issues when in use. Store them separately to avoid mixing. |
By following these tips for storing your Blu Tack, you can ensure that it stays fresh and pliable for future use. Additionally, keep in mind that Blu Tack has a shelf life of about two years, so make sure to store only as much as you need for future use.
Tips and Tricks
Now that you’ve learned how to make Blu Tack with glue, it’s time to dive into some tips and tricks to ensure your finished product is the best it can be. Whether you’re using it to hang up posters or keep your desk organized, these simple suggestions will make your Blu Tack even more effective and efficient. So, let’s explore some helpful pointers that will take your Blu Tack-making game to the next level!
Use White Glue for Best Results
When making Blu Tack at home, it’s important to choose the right type of glue for the best results. While any type of glue can work, we recommend using white glue. Why white glue? Let’s take a closer look.
White glue, also known as school glue, is a water-based adhesive that dries clear. It’s commonly used in arts and crafts, and it’s easy to find at any craft store or online. Here are some reasons why white glue is the best choice for making Blu Tack:
| Reason | Explanation |
|---|---|
| Easy to Find | White glue is readily available at craft stores, office supply stores, and online. |
| Dries Clear | When making Blu Tack, you want a glue that will dry clear so that it doesn’t leave any residue on the surfaces you use it with. |
| Water-Based | White glue is water-based, which means that it’s easy to work with and easy to clean up with just soap and water. |
| Bonding Strength | White glue has a strong bonding strength, which means that your homemade Blu Tack will be able to hold up against various materials for an extended period. |
Of course, you can experiment with other types of glue, like clear glue or glitter glue, but keep in mind that some glues may not have the same bonding strength or may leave behind residue. For best results, stick with using white glue when making your own Blu Tack.
Use a Sealable Container for Storage
When it comes to storing your homemade Blu Tack, it’s important to keep it in a sealable container to prevent it from drying out or picking up dirt and debris. An airtight container such as a small plastic container with a lid or a resealable bag will work perfectly.
Here are some tips for storing your Blu Tack:
- Make sure the container is completely clean and dry before placing the Blu Tack inside.
- Roll the Blu Tack into a ball shape and flatten it slightly before storing it.
- If you plan on storing the Blu Tack for an extended period of time, consider adding a few drops of baby oil or vegetable oil to keep it soft and malleable.
- Label the container with the date you made the Blu Tack to keep track of its age.
- Store the Blu Tack in a cool and dry place away from direct sunlight.
- When you’re ready to use the Blu Tack again, simply roll it in your hands to warm it up and make it more pliable.
By storing your homemade Blu Tack properly, you can extend its lifespan and ensure it’s always ready to use whenever you need it.
Experiment with Different Ratios
When making Blu Tack with glue, the ratio of glue to cornstarch can greatly affect the outcome of the final product. The recommended ratio is 2 parts glue to 1 part cornstarch, but it’s worth experimenting with different ratios to find what works best for you.
Here are some ratios to try:
- 1 part glue to 1 part cornstarch – This will create a firmer and less sticky tack, which may be better suited for certain tasks.
- 2 parts glue to 2 parts cornstarch – This will result in a more rubbery consistency, which may be useful for creating molds or impressions.
- 3 parts glue to 1 part cornstarch – This ratio will produce a tack that’s very sticky and pliable, perfect for hanging lightweight items or securing objects.
Don’t be afraid to experiment with different ratios to find what works best for the project you have in mind. Keep in mind that the humidity and temperature of your environment can also affect the final outcome, so it’s important to take note of these factors when tinkering with the ratio.
Pro tip: If your Blu Tack is too sticky, simply add more cornstarch. Conversely, if it’s too dry and crumbly, add more glue. It’s all about finding the perfect balance for your needs.
Conclusion
In conclusion, making Blu Tack with glue is a simple and cost-effective way of creating a versatile and reusable adhesive substance. With just a few basic materials and some simple steps to follow, you can create your own Blu Tack at home without having to rely on store-bought options. Not only is this method affordable and convenient, but it also allows for customization and experimentation with different ratios and ingredients to achieve the desired level of stickiness and texture.
To ensure the best results, it is important to use white glue and to store your Blu Tack in a sealable container to prevent it from drying out. Additionally, don’t be afraid to try different ratios of glue and cornstarch to find the perfect balance of adhesiveness and malleability.
Overall, making Blu Tack with glue is a fun and practical DIY project that can be enjoyed by people of all ages. So next time you find yourself in need of an adhesive solution, consider making your own Blu Tack using this step-by-step guide. You may just be surprised at how easy and effective it can be!
Frequently Asked Questions
Can I make Blu Tack with any type of glue?
It’s best to use white glue for making Blu Tack as it has the right consistency and tackiness for the job.
Do I need to add cornstarch?
Yes, cornstarch is an important ingredient in creating the right texture and consistency for the Blu Tack.
What’s the best ratio of glue to cornstarch?
You can start with a 2:1 ratio of glue to cornstarch and adjust as needed to get the desired consistency.
Can I add food coloring to the Blu Tack?
Yes, you can add food coloring to the mixture to give it some color if desired.
How long does it take to knead the mixture?
You’ll need to knead the mixture for several minutes until it becomes smooth and pliable. This can take anywhere from 5 to 10 minutes.
Can I store the Blu Tack in the refrigerator?
No, it’s best to store the Blu Tack at room temperature in a sealable container to keep it fresh and supple.
How do I remove Blu Tack residue from surfaces?
You can gently roll the Blu Tack residue into a ball and dab it over the area to lift it off. You can also use a cleaning solution and a cloth to wipe away any remaining residue.
Is Blu Tack safe for children to use?
Blu Tack is generally safe for children to use, but it’s important to supervise young children to make sure they don’t swallow it.
Can I use the Blu Tack for hanging objects?
While Blu Tack can be used for light objects, it’s not recommended for hanging heavy items as it may not be strong enough to hold them in place.
Can I reuse Blu Tack?
Yes, you can reuse Blu Tack multiple times, just make sure to knead it until it becomes pliable before each use.