Introduction
When it comes to crafting, having reliable glue is a must-have. However, store-bought glue can be expensive, not to mention filled with chemicals that may not be ideal for certain projects. That’s where making your own glue blocks come in handy. With just a few materials and some easy-to-follow steps, you can have your own homemade glue blocks that are perfect for a variety of crafting needs. Let’s dive into how to make glue blocks in an easy guide.
What Are Glue Blocks?
Glue blocks are small, solid blocks of glue that can be used for a variety of tasks. They are typically made by mixing glue and water or other agents together, pouring the mixture into molds, and allowing it to dry and harden. Once the blocks are fully cured, they can be used like regular glue by breaking off a piece of the block and applying it to the surface that needs to be bonded.
Glue blocks are particularly helpful for:
- Arts and crafts projects
- DIY repairs
- Small woodworking projects
They can often be easier and less messy to use than other forms of glue, as they do not require tubes or other dispensers that can become clogged or damaged. Because they come in solid form, they can be stored more easily than liquid glues, which can dry out over time.
In general, glue blocks offer several advantages over other types of glues:
- They are convenient for small, quick projects
- They can be made in a variety of shapes and sizes for specific tasks
- They often have a longer shelf life than liquid glues
- They can be less messy to work with
Making your own glue blocks is simple and cost-effective. By following a few basic steps, you can create your own blocks of glue that are customized to your specific needs. If you are interested in learning more about making glue blocks, check out our guide to making glue blocks for stairs or our article on making blu tack with glue.
Why Make Your Own Glue Blocks?
Why make your own glue blocks? There are a number of benefits to making your own glue blocks at home. For one, it can be a cost-effective solution for those who use a lot of glue in their crafting or art projects. Buying pre-made glue blocks at a craft store can quickly add up in cost, especially if you need a lot of them. When you make your own, you can save money and have control over the quality of the ingredients used.
Making your own glue blocks also allows you to customize the shape, size, and color of the blocks to fit your needs. Plus, you can experiment with different scents to make them more pleasant to use. Additionally, making your own glue blocks can be a fun and engaging DIY project, especially for those who enjoy working with their hands.
Another advantage of homemade glue blocks is that you can ensure that they are made from non-toxic, natural ingredients. Many store-bought glue blocks may contain harmful chemicals that can be harmful to you or the environment. When you make your own, you know exactly what ingredients you are using and can choose safer options.
Finally, making your own glue blocks gives you a sense of independence and self-sufficiency. You don’t have to rely on store-bought options and can take pride in making something useful from scratch. It’s a great way to hone your crafting skills and learn something new.
By making your own glue blocks, you can save money, customize the shape and color, ensure you’re using safe ingredients, and feel a sense of independence and self-reliance. Ready to give it a try? Let’s get started with the materials you’ll need.
Materials Needed
Before you begin making glue blocks, it is essential to ensure that you have all the necessary materials at hand. Some of these materials can be easily found in your local craft store or hardware store. Here is a list of items that you will need to create your own glue blocks:
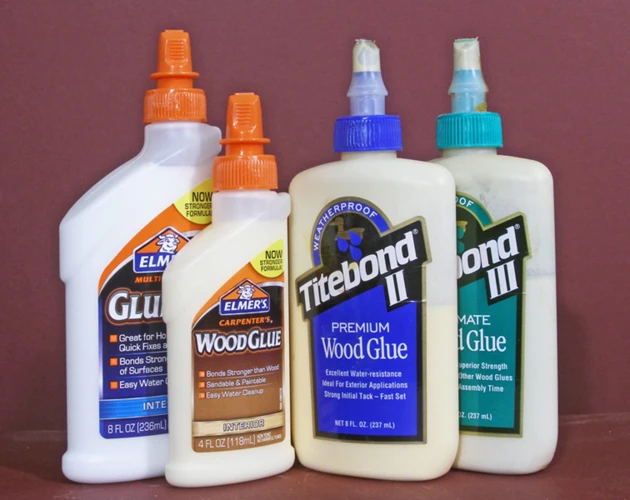
1. Glue: The main ingredient for making glue blocks is glue, obviously. You can use any type of glue that you prefer, but it is important to choose the right type for your specific needs. For example, if you need a strong adhesive for bonding wood, then you may want to use wood glue. If you are looking for a versatile adhesive, then you may want to try white glue or PVA glue.
2. Water: Water is needed to dilute the glue and reduce its viscosity, making it easier to mix and pour into molds. It is important to use distilled water to prevent any impurities from affecting the properties of your glue blocks.
3. Mold: A mold is essential for creating the shapes of your glue blocks. You can use silicone molds, ice cube trays, or other molds that are heat-resistant and non-stick.
4. Measuring cups and spoons: Accurate measurements are important to ensure that the consistency of the glue is just right and that it dries properly. Use measuring cups and spoons to measure the glue and water according to the recipe.
5. Stirring utensil: A stirring utensil, like a popsicle stick or a plastic spoon, is used to mix the glue and water thoroughly.
6. Release agent: A release agent, like cooking spray or petroleum jelly, can be applied to the molds to prevent the glue from sticking.
Once you have all your materials ready, you can begin making your glue blocks. But before that, if you need to know how to make a different kind of glue, you can check out these links: how to make glue in 7 days to die, how to make non-drying sticky glue, how to make spray glue, and how to make super glue in the escapist.
Step-by-Step Guide
Now that you have your materials ready, it’s time to start making your own glue blocks! With this step-by-step guide, you’ll be able to create a batch of glue blocks in no time. Follow each step carefully, and soon you’ll have high-quality glue blocks that will work wonders in your crafting projects. Let’s get started!
Step 1: Gather Materials
Before you start making your glue blocks, it’s important to gather all the necessary materials. Here is a list of items you’ll need:
| Materials: | Descriptions: |
| 1. Glue | You can use any type of glue for this project, but white glue is the most common. |
| 2. Water | You’ll need water to thin out the glue. |
| 3. Molds | You can use silicone ice cube trays, candy molds, or any other type of mold that is safe for use with glue. |
| 4. Mixing bowl | A mixing bowl is necessary to mix the glue and water. |
| 5. Measuring cup | You’ll need a measuring cup to measure out the glue and water accurately. |
| 6. Stirring tool | A stirring tool can be a spoon, a popsicle stick, or a chopstick. |
| 7. Optional: color and scent | If you want to add color or scent to your glue blocks, you’ll need food coloring and essential oils. |
Make sure to choose a well-ventilated area to work in, and protect your work surface with a plastic or vinyl tablecloth. Once you have all your materials gathered, you’re ready to move on to the next step.
Step 2: Mix the Glue
Mixing the glue is a crucial step in making your own glue blocks. Here’s a table that outlines the materials you’ll need and the steps for mixing the glue:
| Materials | Amounts |
|---|---|
| Water-based glue | 1 cup |
| Water | 1/4 cup |
| Gelatin powder | 1 tablespoon |
Once you have the materials, follow these steps to mix the glue:
1. In a small saucepan, heat the water until it begins to boil.
2. Remove the pan from the heat and add the gelatin powder. Stir until the gelatin dissolves completely.
3. Add the glue to the pan and stir until the mixture is smooth and there are no lumps.
4. Let the mixture cool slightly before pouring it into the molds.
It’s important to mix the glue thoroughly to ensure that it sets properly and creates a strong bond. The addition of gelatin powder helps to create a firm and pliable consistency that is perfect for using in a variety of crafting projects.
Be sure to use water-based glue for this recipe, as other types of glue may not work as well with the gelatin powder. Experiment with different ratios of glue and powder to achieve the consistency and strength that works best for you.
Step 3: Pour into Molds
After you’ve mixed your glue solution, it’s time to pour it into the molds. This step is crucial, as it determines the shape and size of your glue blocks. Here are the steps to follow:
| Step | Instructions |
|---|---|
| 1 | Choose your molds. You can use silicone candy molds, soap molds, or even ice cube trays. Just make sure they are clean and dry before pouring. |
| 2 | Place the molds on a flat surface. This will prevent any spills or unevenness while pouring. |
| 3 | Slowly pour the glue solution into the molds. Be careful not to overfill them. |
| 4 | If desired, you can add color or fragrance to the solution at this point. |
| 5 | Tap the molds gently on the flat surface to release any bubbles. |
| 6 | Allow the molds to sit undisturbed for at least 24 hours. This will give the glue blocks enough time to dry and harden. |
It’s important to note that the amount of glue solution you pour into each mold will depend on the size of the mold and the intended use of the glue blocks. If you plan on using them for small paper crafts, you can use smaller molds. However, if you need a larger glue block for bigger projects, use larger molds.
Step 4: Let Dry
Once the glue and other ingredients have been poured into the molds, it is time to let them dry. This is an essential step in the process of making glue blocks as it ensures that the shapes and consistency of the blocks are retained uniformly. Below are some tips to make sure that the drying process goes smoothly:
- Give enough time to dry: The drying time can vary based on the temperature and humidity of your environment, but usually, it will take at least 24 hours to dry completely. It is recommended to let the glue blocks dry for a minimum of 24-48 hours before removing them from the molds.
- Don’t rush: As tempting as it may be to remove the glue blocks from the molds sooner, it is important to remember that rushing this step can cause the blocks to break easily. Patience is the key to ensuring that the glue blocks are well formed and well set.
- Avoid Disturbance: Place the molds in a safe, undisturbed location where they can dry without any interference. Ensure the molds are placed on a flat surface to avoid any shifting while drying. This way, the glue blocks will attain the correct shape and consistency they are supposed to have.
- Check occasionally: While the glue blocks are drying, it is a good idea to check on them periodically to ensure that they are drying evenly and haven’t developed any cracks or splits. If you notice any cracks, you may need to remake the glue blocks.
By following these tips, you can ensure that your glue blocks will dry properly, and be ready for use once they have fully set. Remember that the drying process should not be rushed so that the glue blocks remain strong and have the consistency they need for their intended purpose.
Step 5: Remove from Molds
Now that your glue blocks have fully dried, it’s time to remove them from the mold. This step requires some precision and care to avoid damaging the blocks. Here’s a step-by-step guide:
- Inspect the molds: before attempting to remove the blocks, take a close look at the molds to ensure that the glue has completely set. If there are any wet or soft spots, give the blocks more time to dry.
- Gently twist: starting with one corner, gently twist the mold to loosen the glue block. Avoid pulling or yanking on the block, as this can cause it to break or deform.
- Use a knife or spatula: if the block doesn’t come out easily, use a small knife or spatula to loosen the edges and coax it out of the mold. Carefully slide the tool between the glue and the mold, taking care not to scratch or damage the block.
- Trim excess glue: after removing the glue block from the mold, you may notice some excess glue around the edges. Use a knife or scissors to carefully trim away any rough or uneven spots.
- Store your glue blocks: once you’ve removed the blocks from the molds and trimmed them as necessary, you can store them in an airtight container or plastic bag until you’re ready to use them.
With these steps, you should be able to successfully remove your glue blocks from the molds without damaging them. Remember to take your time and be gentle, as these blocks can be delicate and prone to breaking if mishandled.
Tips and Tricks
As you venture into making your own glue blocks, there are some essential tips and tricks that you need to know to ensure a successful outcome. From choosing the right mold to storing the finished product, these tips will help you make the most of your homemade glue blocks. So, take a moment to review these suggestions and see how they can help you create the perfect glue blocks for all your crafting needs.
Choosing the Right Mold
One important factor when making your own glue blocks is choosing the right mold. There are a few things to consider when selecting a mold for your glue blocks.
Material: The mold’s material is crucial to ensure that the glue blocks will easily pop out without sticking to the sides. Silicone is a popular and easy-to-clean material that works well for making molds. Another option is flexible plastic molds, but they may not always release the glue blocks easily.
Size: The mold’s size will depend on how many glue blocks you want to make at once. Larger molds may be more convenient, but smaller molds allow for more precision and control.
Shape: Molds come in a variety of shapes, including circles, squares, and hearts. Consider the final use of your glue blocks when choosing a shape. For example, if you plan to use the blocks for scrapbooking, a heart shape might be appropriate.
Quantity: Some molds allow for multiple cavities, so you can make multiple glue blocks at once. Consider how many you need to make and choose a mold that accommodates your needs.
Customization: Some molds come with features that allow for customization, such as the ability to insert a label or add a design to the mold itself. These molds can add an extra personal touch to your glue blocks.
When choosing a mold, it’s important to read reviews and consider the quality of the mold. Cheap molds may warp or break easily, so investing in a higher-quality mold may save you time and frustration in the long run.
Here is a table summarizing the important factors to consider when choosing a mold for your glue blocks:
| Factor | Considerations |
|---|---|
| Material | Silicone is a popular and easy-to-clean option |
| Size | Consider how many glue blocks you want to make at once |
| Shape | Consider the final use of your glue blocks |
| Quantity | Some molds allow for multiple cavities |
| Customization | Some molds come with features that allow for personalization |
By considering these factors, you can choose the perfect mold for your DIY glue blocks.
Adding Color and Scent
One of the great things about making your own glue blocks is the ability to customize them to fit your personal preferences. Adding color and scent to your glue blocks can make crafting even more enjoyable. Here are some tips for adding color and scent to your glue blocks:
- Use Food Coloring: Adding a few drops of food coloring to your glue mixture can give your glue blocks a fun and vibrant color. Just be sure not to add too much so that the glue remains strong and effective.
- Try Essential Oils: Essential oils not only add a pleasant scent to your glue blocks, but they also offer a range of benefits such as relaxation and focus. Be sure to use high-quality essential oils and add them sparingly to avoid overpowering the glue’s natural smell.
- Experiment with Glitter: For a little extra sparkle and texture, try adding glitter to your glue mixture before pouring it into the molds. You can also mix in other small decorative items such as beads or confetti.
- Consider Natural Additives: For a more eco-friendly approach, consider adding natural additives such as dried flowers or herbs to your glue mixture. This can give your glue blocks a unique scent and texture while also adding a touch of nature to your crafts.
Adding color and scent to your glue blocks can take your crafting to the next level. But remember to use these additives in moderation to maintain the effectiveness of your glue blocks. Experiment with different combinations and have fun customizing your glue blocks to fit your own personal style.
Storing Your Glue Blocks
Once your glue blocks have properly dried, it’s important to store them properly to ensure they stay effective for future use. Here are some key tips to keep in mind:
| Tip | Description |
| Airtight Container | Store your glue blocks in an airtight container to prevent them from drying out. Mason jars or small plastic containers work well. |
| Cool, Dry Place | Avoid storing your glue blocks in areas that are too warm or humid, as this can affect their consistency and adhesive properties. Instead, keep them in a cool, dry place like a closet or pantry. |
| Avoid Direct Sunlight | Direct sunlight can also impact the efficacy of your glue blocks. Store them in a dark area or use opaque containers to protect them from light exposure. |
| Labeling | Be sure to label your glue blocks with the date they were made, as well as any additional information about the color or scent added. This will help you keep track of their shelf life and ensure you are using them before they expire. |
| Shelf Life | The shelf life of glue blocks varies depending on the ingredients used and storage conditions. As a general rule, they should last at least six months when stored properly. |
By following these storage tips, you can ensure your glue blocks are always ready for your next crafting project.
Conclusion
As we come to the end of this guide, it’s time to reflect on the valuable information we’ve covered regarding creating your own glue blocks. From carefully selecting the right materials to following the step-by-step process, you now have the knowledge and skills necessary to tackle this DIY project with confidence. Let’s take a moment to recap some of the key takeaways.
Final Thoughts
As a final note, making your own glue blocks is not only cost-effective but also allows you to customize your glue blocks according to your needs and preferences. By following the step-by-step guide and tips mentioned above, you can create high-quality glue blocks with ease. Here’s a summary of the key takeaways from this article:
| Key Takeaways |
| • Glue blocks are small, solid blocks of glue that can be dissolved in water. |
| • Making your own glue blocks is a cost-effective and customizable solution. |
| • Choose the right mold and add color and scent for a more personalized touch. |
| • Store your glue blocks in a dry and cool place for longer shelf life. |
Making glue blocks might seem like a daunting task, but with the right materials and steps, it can be a fun and rewarding DIY project. Have fun experimenting with different molds, colors, and scents to create unique and functional glue blocks that suit your needs. With these blocks at your disposal, you’ll be able to tackle any crafting or DIY project with confidence. So, go ahead and give it a try!
Frequently Asked Questions
How long does it take for glue blocks to dry?
Drying time can vary depending on the type of glue and mold used, but it usually takes anywhere from 12 to 24 hours.
What kind of glue should I use to make glue blocks?
It’s best to use a white glue that dries clear, such as Elmer’s glue or PVA glue.
Can I add color to my glue blocks?
Yes, you can add food coloring or acrylic paint to your glue mixture before pouring it into the molds.
How do I store my glue blocks?
Store your glue blocks in an airtight container to prevent them from drying out. You can also add a wet sponge or piece of paper towel to the container to help keep the blocks moist.
Can I add a scent to my glue blocks?
Absolutely! You can add essential oils or fragrance oils to your glue mixture before pouring it into the molds.
What kind of molds should I use?
You can use any silicone mold that is non-stick and heat-resistant. Candy molds or soap molds work well for making glue blocks.
Can I reuse the molds after making glue blocks?
Yes, silicone molds can be reused multiple times. Just make sure to wash them thoroughly before using them again.
What are some creative ways to use glue blocks?
Glue blocks can be used for a variety of crafts, including paper mache, collage, and even as a substitute for glue sticks or liquid glue.
Can I make different shapes and sizes of glue blocks?
Yes, you can use different molds to make glue blocks in a variety of shapes and sizes.
Are glue blocks safe for kids to use?
Glue blocks are generally safe for kids to use, but adult supervision is still recommended as with any crafting activity.