Vinyl baseboards can add a finishing touch to any room, but knowing how to install them properly can be a challenge for even the most experienced DIY-ers. Gluing vinyl baseboard is one of the most popular methods of installation, but it’s not as simple as just applying some adhesive and sticking the baseboard onto the wall. To help make this process less daunting, we’ve created a step-by-step guide that will outline everything you need to know about how to glue vinyl baseboard properly. From preparation to installation, we’ll cover it all and provide tips and tricks along the way to ensure that your project turns out perfectly.
Step 1: Preparation

Before you start the process of gluing vinyl baseboard, it is essential to prepare the area properly. This is crucial for ensuring that the baseboard adheres well and remains in place. In this step, we will discuss the necessary preparations that need to be made to ensure a successful installation. From cleaning the area to protecting surrounding areas, let’s dive into the details. For more information on gluing laminate edging, check out our guide.
Clean the Area
Proper preparation is key to ensuring a successful vinyl baseboard installation. One of the critical steps is to clean the area where the baseboard will be installed. Dust, dirt, and debris can prevent the adhesive from properly bonding with the wall, leading to a weak installation that may loosen over time. To clean the area effectively, follow these steps:
| Step | Instructions |
|---|---|
| Step 1: | Remove any existing baseboards, if necessary, to expose the wall. |
| Step 2: | Using a dustpan and brush or vacuum, remove any loose debris, dust, and dirt from the wall. |
| Step 3: | Wash the wall with warm water and mild dish soap. Use a sponge or rag to scrub the wall, paying particular attention to any areas with stubborn dirt or residue. |
| Step 4: | Rinse the wall with clean water and let it dry thoroughly before proceeding with the baseboard installation. |
By taking the time to clean the area properly, you can ensure that the adhesive will bond effectively with the wall, providing a secure and long-lasting baseboard installation. If you’re working on a larger project that involves installing vinyl flooring or wall panels, be sure to follow our guides on how to install glue-down vinyl sheet flooring and what glue to use for wall panels.
Protect the Surrounding Areas
When preparing to glue vinyl baseboard, it’s crucial to protect the surrounding areas. This will prevent any damage to the walls, floors, or any other surface around the baseboard. Here are some tips to protect the surrounding areas when gluing vinyl baseboard:
- Use Painter’s Tape: Cover the edges of the wall and floor where they meet with painter’s tape. This will prevent the glue from getting on the wall or the floor. Be sure to press the tape firmly to create a tight seal.
- Lay Down a Drop Cloth: Use a drop cloth on the floor to catch any excess adhesive or debris that may fall during the process. This will make cleaning up much easier once you have finished applying the adhesive.
- Wear Protective Gear: Wear protective gear, such as gloves and goggles, to avoid getting any glue on your skin or in your eyes.
By following these steps, you can ensure that the area surrounding the vinyl baseboard remains safe and clean from any glue or excess debris. For more information on gluing vinyl flooring or other materials, check out how to glue carpet, how to repair glue down engineered hardwood, or how to re-glue vinyl flooring for additional guidance related to gluing different materials.
Step 2: Cut the Baseboard
After cleaning and protecting the area, the next step is to cut the baseboard to the appropriate length. It’s important to measure the length of the wall accurately before cutting the boards. The cut should not be too short or too long as either can lead to an uneven installation.
To make the cutting process easier, use a baseboard miter saw. This saw is specifically designed for cutting baseboards to create clean and precise angles. When using the saw, make sure you keep your fingers a safe distance away from the blade.
If you don’t have a miter saw, you can use a manual saw or a jigsaw instead. When cutting, use firm and even pressure and take your time to ensure a straight cut. And to avoid damaging the wall, place a piece of cardboard or drop cloth behind the baseboard while cutting it.
Once you have cut the baseboards to the appropriate length, sand down any rough edges to create a smooth surface. And if you need to connect two pieces of baseboard, use a 45-degree cut along the end of each piece to create a seamless joint.
Cutting the baseboard is an important step in the installation process, and taking the time to ensure accurate and precise cuts will make the entire process smoother.
If you’re struggling with cutting the baseboard or need more information on the process, check out this helpful guide on how to install bamboo flooring with glue.
Step 3: Apply the Adhesive
Once you have your baseboards cut to the proper size, it’s time to start applying the adhesive. This step is crucial to ensuring that your baseboards stay securely in place for years to come. Using the right type of adhesive is important, as it not only needs to bond well with both the wall and the baseboard, but also needs to be able to withstand everyday wear and tear. In this step, we’ll cover some important tips for selecting and applying the adhesive properly. So let’s get started and make sure you use the right products and techniques to achieve a professional-looking finish.
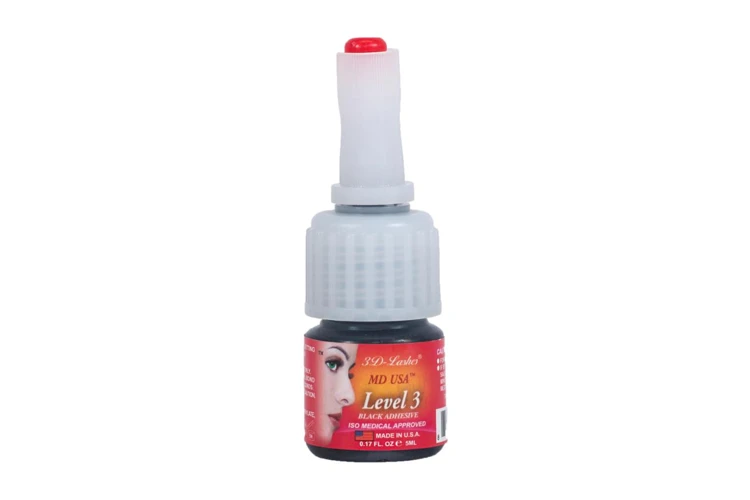
Select the Right Adhesive
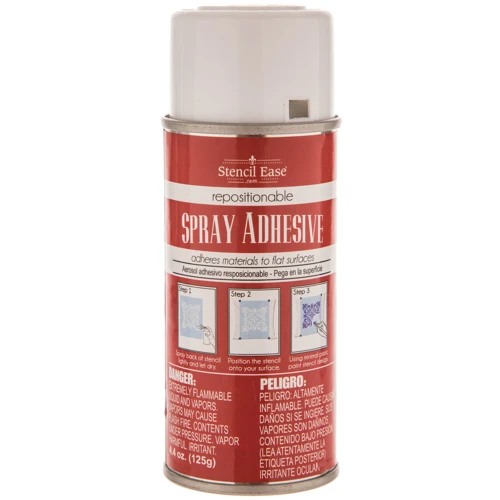
When it comes to choosing the right adhesive for your vinyl baseboard project, you have a few different options to consider. Some people prefer to use construction adhesive, which is a heavy-duty glue that bonds well with a variety of surfaces, including vinyl. Others prefer to use a specifically-formulated vinyl adhesive, which may be more expensive, but can provide a stronger and longer-lasting bond.
If you need advice on which type of adhesive to use or have any doubts regarding your project, don’t hesitate to contact a professional installer or hardware store specialist for assistance. They can give you recommendations on the best adhesive depending on the type of baseboard and wall surface you plan to glue it to.
Apply the Adhesive
Before applying the adhesive, make sure the area you’ll be working on is clean and free of dust and debris. Then, apply the adhesive as directed on the container. It is usually recommended to apply the adhesive in a zigzag pattern along the back of the baseboard. This ensures that the adhesive is spread evenly along the entire length of the baseboard.
Make sure not to apply too much adhesive, as it can create lumps or bumps under the baseboard that will affect the appearance of your finished project. After applying the adhesive, it’s time to move on to the next step, installing the baseboard.
If you want to learn more about glue and adhesives, check out our article on how to glue plywood together, how to glue down an RV rubber roof, or how to repair glue-down vinyl plank flooring.
Select the Right Adhesive
When it comes to selecting the right adhesive for your vinyl baseboard, it’s important to choose a product that will provide a strong and lasting hold. Here are a few options to consider:
| Adhesive Type | Pros | Cons |
|---|---|---|
| Contact Cement | – Provides a strong, permanent hold – Ideal for vinyl baseboards |
– Requires careful application to avoid mistakes – Can produce strong fumes during installation |
| Construction Adhesive | – Easy to apply – Works well on a variety of surfaces |
– May take longer to dry than contact cement – May not provide as strong a hold as contact cement |
| Epoxy | – Provides a very strong bond – Can be used on a variety of surfaces |
– May be more expensive than other adhesives – Requires careful mixing and application |
No matter which adhesive you choose, make sure to carefully follow the manufacturer’s instructions for mixing, application, and drying time. This will help ensure that your vinyl baseboard stays securely in place for years to come.
Apply the Adhesive
The next step after selecting the right adhesive is applying it to the vinyl baseboard. Here’s how you can do it:
- Prepare the adhesive: Follow the instructions on the adhesive container for the right preparation procedure.
- Apply the adhesive: Using a caulking gun, start applying the adhesive at the center of the vinyl baseboard and work outward. Make sure that you apply enough adhesive onto the baseboard so that it can stick properly to the wall.
- Apply the adhesive in sections: It’s best to apply the adhesive in small sections to prevent it from drying out before you can install the baseboard.
- Spread the adhesive: Use a putty knife to spread the adhesive evenly onto the back of the baseboard. This will help the baseboard stick better onto the wall.
- Repeat the process: Repeat the process of applying and spreading the adhesive until you cover the entire length of the baseboard.
Note: Be sure to work quickly while applying the adhesive, as it can dry out fast. Also, avoid getting the adhesive on your hands or skin, as it can be difficult to remove. In case of contact, use a solvent recommended by the adhesive manufacturer to remove it.
Step 4: Install the Baseboard
Now that you have cut the vinyl baseboard to the appropriate length, it’s time to install it. This step is crucial in ensuring that your baseboard stays firmly in place for years to come. Before you start, make sure you have all the tools and materials you need, and take the time to prepare the area properly. The installation process can seem daunting at first, but with the right approach, you’ll have it finished in no time. Let’s dive into the details.
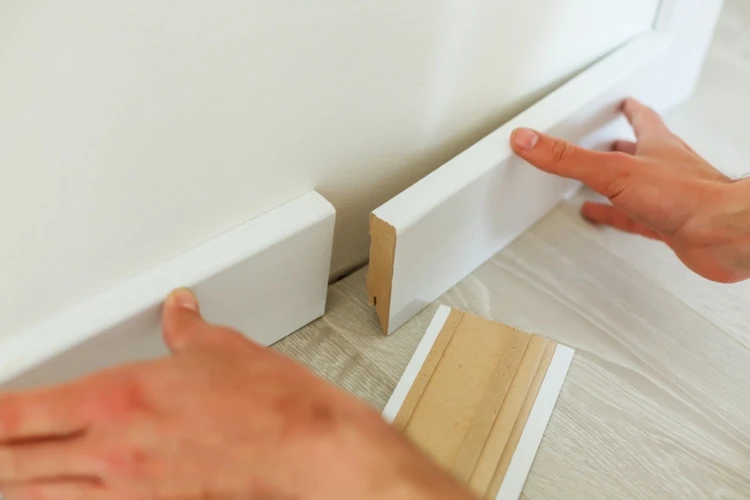
Align and Press the Baseboard
After applying the adhesive to the back of the vinyl baseboard, you can now proceed to install it. The first step in installing the baseboard is to align and press it into place.
Step 1: Align the Baseboard
Start by aligning the baseboard along the wall, making sure that it is straight and level. You can use a level to ensure that the baseboard is straight and not crooked. You can also use spacers to ensure that the baseboard is even along its length.
Step 2: Press the Baseboard
Once you have aligned the baseboard, firmly press it into place using your hands. Use a rubber mallet to gently tap the baseboard into place, ensuring that it adheres to the wall.
Step 3: Check for Gaps
Check for any gaps between the baseboard and the wall. Use a putty knife to push any excess adhesive into the gaps. This will ensure that the baseboard is securely attached to the wall.
To help visualize this process, here is a table summarizing the steps for aligning and pressing the baseboard into place:
| Step | Action |
|---|---|
| 1 | Align the baseboard along the wall |
| 2 | Press the baseboard firmly into place using your hands |
| 3 | Tap the baseboard into place with a rubber mallet |
| 4 | Check for any gaps between the baseboard and the wall |
| 5 | Push excess adhesive into any gaps using a putty knife |
By following these steps, you can ensure that your vinyl baseboard will be securely installed and look great in your space.
Secure the Baseboard
Once you have aligned and pressed the vinyl baseboard into place, it’s time to secure it properly. A properly secured baseboard will not only look good but will also last longer. Here are some ways to ensure that your baseboard is well secured:
| Method | Description |
| Nails | One of the most popular and easiest ways to secure a baseboard is to use nails. Use a hammer and finish nails that are at least 1.5 inches in length. Space the nails out every 12 inches along the length of the baseboard. Make sure to countersink the nails, so the nail heads do not protrude. |
| Construction Adhesive | If you want to avoid the holes caused by nails, you can use construction adhesive. Simply apply a bead of adhesive to the back of the baseboard. Then, carefully press it into place. Apply a temporary support to hold it on the wall while the adhesive dries. Once the adhesive is dry, remove the support and enjoy your newly installed baseboard. |
| Double-Sided Tape | If you’re looking for a quick and easy way to secure your baseboard, consider using double-sided tape. Look for a heavy-duty tape that is specifically designed for baseboards. Peel off the backing paper and press the tape onto the back of the baseboard. Then, carefully press the baseboard into place. Be aware that using tape, especially in high-traffic areas, may not be the most solid or long-lasting option. |
Whichever method you choose, make sure that the baseboard is flush against the wall and doesn’t move once you have secured it. If you experience any problems, such as visible gaps or warping, be sure to address them before proceeding. By securing your baseboard properly, you can be confident that it will last for years to come.
Step 5: Let the Adhesive Dry
Once the vinyl baseboard is securely in place, the adhesive needs time to dry properly. This is a crucial step and should not be rushed. It’s important to allow sufficient drying time to ensure that the baseboard doesn’t come loose and that it stays firmly fixed in place.
Timing is Key: Depending on the type of adhesive you use, the drying time may vary. In most cases, it is recommended to leave the baseboard untouched for at least 24-48 hours to allow the adhesive to dry completely. This means no cleaning or moving of furniture in the area where the baseboard has been installed.
Avoiding Any Disturbance: During this drying period, it’s important to keep the area as free from disruption as possible. Avoiding walking along the baseboard and keep children and pets away to avoid any accidental movement. Make sure the air circulation in the room is appropriate, as it can facilitate the drying process.
Testing the Adhesion: After the recommended time, test the baseboard’s adhesion by lightly pressing on it with your fingers to ensure that it is fully bonded to the surface. If it moves or comes loose even slightly, it is a sign that the adhesive hasn’t dried completely and you need to give it more time to dry.
Finishing: Once you’re sure that the baseboard is firmly fixed in place, you can begin the final touches. Remove any protective coverings you placed earlier and polish the baseboard, if needed. Sit back and admire your newly installed vinyl baseboard, knowing that you have completed the job successfully.
Tips and Tricks
As you embark on your vinyl baseboard project, there are some tips and tricks that can make the process easier and ensure that your end result is as professional-looking as possible. By following these suggestions, you can avoid common mistakes and achieve a more polished look. Here are some of the most helpful tips and tricks to keep in mind as you work.
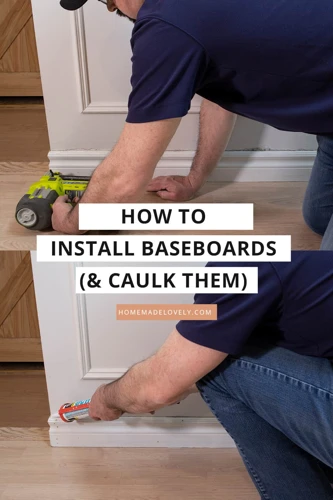
Use Baseboard Miter Saw
When it comes to installing vinyl baseboards, using a baseboard miter saw can be incredibly helpful. This tool ensures that your cuts are precise and accurate, resulting in a smooth and seamless installation. Here are some tips for using a baseboard miter saw effectively:
| Tip | Description |
|---|---|
| Adjust the Angle | Before cutting, make sure the angle on your miter saw matches the angle of your walls. This will help you achieve tight-fitting corners. |
| Secure the Baseboard | To prevent the baseboard from slipping during the cut, be sure to secure it in place with clamps or a vice. This will help ensure a straight and accurate cut. |
| Double Check Measurements | Measure twice, cut once. It’s important to double check your measurements before making any cuts to avoid errors that can be costly to fix. |
| Take Your Time | While using a miter saw can save time, it’s important to proceed with caution. Rushing through cuts can lead to mistakes or even injuries. Take your time and stay focused on the task at hand. |
By following these tips, you can use your baseboard miter saw to achieve precise cuts, resulting in a professional-looking installation.
Remove Excess Glue Immediately
When gluing vinyl baseboards, it’s not uncommon for some excess glue to squeeze out from underneath the baseboard during installation. While this may seem like a minor issue, it’s important to address it immediately to avoid any unsightly blemishes on the surface of the baseboard.
To remove excess glue before it dries and hardens, follow these simple steps:
- Grab a clean rag or paper towel and gently wipe away any excess glue that you see.
- If the glue has already begun to harden, use a plastic scraper to gently remove it from the surface of the vinyl baseboard.
- Be careful not to apply too much pressure while scraping, as this could damage the baseboard. Instead, use a light touch and take your time to ensure that all excess glue is removed.
- Pro Tip: If you’re having trouble removing excess glue from hard-to-reach areas, try using a cotton swab or toothbrush to gently wipe it away.
If you leave excess glue on the surface of the vinyl baseboard, it can dry and harden, leaving an unsightly and difficult-to-remove stain. By taking the time to remove excess glue immediately, you can avoid this issue and keep your vinyl baseboards looking clean and professional.
Conclusion
In conclusion, gluing vinyl baseboard is a fairly simple task that can be done by anyone. You just need to have the right tools and materials, follow the steps closely, and take the necessary precautions to ensure a successful installation. By properly preparing the area, cutting the baseboard to size, selecting the right adhesive, and securely installing the baseboard, your vinyl baseboard will look great and last for years to come.
However, it’s important to keep in mind that there are certain tips and tricks that can make the process even easier. For example, using a baseboard miter saw can help ensure precise cuts, while removing excess glue as soon as possible can prevent it from drying and ruining the appearance of the baseboard.
Remember, the key to a successful installation is taking your time and being patient. Rushing through the process or cutting corners can lead to mistakes, which can be costly to fix. By following this step-by-step guide and using the tips and tricks provided, you’ll be able to glue your vinyl baseboard with confidence and achieve a professional-looking finish. So why wait? Get started on your project today and enjoy the beautiful results!
Frequently Asked Questions
1. How long does it take for the adhesive to dry?
The drying time depends on the type of adhesive you use. However, it usually takes around 24 hours to fully dry.
2. Can I glue vinyl baseboard to a painted surface?
Yes, you can glue vinyl baseboard to a painted surface, but it is important to ensure that the surface is clean and dry before application.
3. Do I need to measure the baseboard before cutting?
Yes, it is important to measure the length of the wall and cut the baseboard to fit. This will ensure a precise and neat installation.
4. Can I use regular glue to stick the baseboard to the wall?
No, it is recommended to use a specific adhesive for vinyl baseboards. This will ensure a strong and long-lasting bond.
5. Can I paint vinyl baseboards after installation?
Yes, you can paint vinyl baseboards after installation by using a special paint that is designed for vinyl surfaces.
6. Do I need to remove the old baseboards before installing vinyl baseboards?
No, you can install vinyl baseboards over the existing baseboards as long as they are clean and in good condition.
7. How do I remove excess adhesive from the baseboard?
You can remove excess adhesive immediately after installation using a damp cloth or sponge. If the adhesive has dried, you can use a scraper to remove it.
8. Can I install vinyl baseboards in a bathroom?
Yes, vinyl baseboards are water-resistant and can be installed in bathrooms and other humid areas.
9. How do I ensure a seamless joint between two baseboards?
You can ensure a seamless joint by using a miter saw to cut the ends of the baseboards at a 45-degree angle, creating a precise joint.
10. Can I install vinyl baseboards on uneven walls?
Yes, you can install vinyl baseboards on uneven walls by using shims to level the baseboards, ensuring a neat and professional finish.