Introduction
The process of gluing carpet may seem daunting at first, but with the right tools and techniques, it can be a straightforward and rewarding DIY task. Whether you’re renovating a room or installing new carpet, knowing the correct steps to follow can help ensure your carpets look clean, seamless, and professional. In this guide, we’ll take you through each stage of the process, from preparation to maintenance, and provide expert advice on how to glue your carpet with ease. So, let’s get started!
Why Glue Carpet and How It Works
Why Glue Carpet and How It Works
Gluing carpet is an excellent way to secure it to the floor and prevent movement and wrinkles. It is suitable for most types of carpets, especially those with lightweight backing and those in high-traffic areas where tacking alone may not be enough.
The glue used in carpet installation is typically made of synthetic latex and comes in both solvent and water-based formulas. It works by creating a strong bond between the carpet backing and the subfloor, ensuring that the carpet stays firmly in place.
There are numerous advantages to using adhesive to install carpet, including:
| Advantages | Explanation |
| Increased Durability | Gluing carpet eliminates the movement of loose fibres and prevents premature wear and tear |
| Reduced Noise | Glue acts as a sound barrier and significantly reduces noise levels compared to floating floors |
| Improved Appearance | Gluing eliminates wrinkles, bulges & uneven lines and gives professional looking finish |
| Better Comfort | Glued carpets are softer and more comfortable underfoot than those laid using other methods |
| Increased Life Span | Carpets laid using glue have a longer lifespan than other types of installation to experience |
However, gluing carpet requires careful preparation, application, and maintenance to achieve the best results. Below are detailed instructions on how to glue your carpet effectively.
If you have any doubt with the process of gluing carpet, you can get help from a professional carpet fitter. Alternatively, you can find several video examples on youtube on how to use adhesive to affix your carpet with the floor.
Tools and Materials Needed
For a successful carpet gluing project, you will need to have the right tools and materials. Here is a list of the essential items you will need:
| Materials | Tools |
|---|---|
| Carpet: Measure your room and purchase enough carpet to fit the area. | Utility Knife: For cutting the carpet. |
| Adhesive: Choose the adhesive recommended for your specific type of carpet and subfloor. | Measuring Tape: Use this to measure your room and cut your carpet to the right size. |
| Carpet Seam Tape: For joining multiple pieces of carpet together. | Chalk Line: Use this to mark straight lines on the subfloor. |
| Notched Trowel: For spreading the adhesive evenly on the subfloor. | Straight Edge: A long, straight board to help cut the carpet straight. |
| Knee Kicker: A tool used to stretch the carpet and make it tight. | Staple Gun: Used to secure the carpet to the subfloor if necessary. |
| Carpet Roller: For pressing the carpet into the adhesive after installation. | Protective Gear: Gloves, eye goggles and a dust mask to protect yourself while working with the adhesive and carpet. |
It is important to have all the materials and tools you need before you begin the project so that you can work efficiently and effectively. If you have any doubts about which adhesive to use for your carpet and subfloor, consult with a professional or refer to the manufacturer’s instructions.
Preparation
Before gluing your carpet down, proper preparation is key to ensuring a successful installation that lasts for years to come. This phase involves several steps that include preparing the floor surface, measuring and cutting the carpet, and seaming the carpet if necessary. Taking the time to prepare your surface correctly can help prevent any potential issues down the line. Let’s dive into the preparation process to help ensure your carpet installation is a success! If you’re interested in other gluing projects, check out our guide on how to glue plywood together.
Preparing the Floor Surface
Before you can start gluing your carpet, it’s important to prepare the floor surface to ensure a smooth and long-lasting installation. Follow these steps to properly prepare your floor surface:
1. Remove any existing flooring: If there is any existing flooring on the surface, like old carpet or vinyl, make sure to remove it and clean the surface thoroughly. This will ensure that the new carpet will adhere to a clean and even surface.
2. Clean the floor: Once the existing flooring is removed, sweep and vacuum the floor to remove any dirt or debris. Then, using a mild detergent and warm water, scrub the floor with a stiff-bristle brush to remove any remaining dirt, grease, or adhesive residue. Rinse the floor with clean water and dry completely.
3. Check for evenness: Use a straight edge to check for any unevenness in the floor surface. If there are any bumps or low spots, fill them in with a self-leveling compound. This will ensure that the carpet is installed on a level surface and prevent it from wrinkling or buckling.
4. Allow the floor to dry completely: After cleaning and leveling the floor, it’s important to let it dry completely before applying any adhesive. This will ensure that the adhesive bonds properly to the floor surface.
By following these steps, you can prepare your floor surface for a successful carpet installation. Remember, proper preparation is key to a long-lasting and professional-looking installation.
For more information on gluing different materials, check out our guides on how to glue tiles, how to glue artificial grass, and how to glue down vinyl tile. Additionally, if you’re curious about the strength of different types of glue, check out our guide on how strong Titebond wood glue is and our guide on what the best exterior glue is.
Measuring and Cutting Your Carpet
Before you can glue your carpet, you need to make sure it fits your space perfectly. This requires careful measuring and cutting of your carpet. If you don’t measure correctly, you may end up with areas of your floor uncovered or with excess carpet that needs to be trimmed away. Follow these steps for measuring and cutting your carpet to ensure a perfect fit:
Step 1: Measure Your Room
Start by measuring the length and width of your room. Make sure you measure the widest points, as this will ensure you have enough carpet to cover the entire area. Once you have these measurements, add a few inches to each dimension to allow for trimming and cutting.
Step 2: Measure Your Carpet
After measuring your room, roll out your carpet and place it in the same direction as you plan to install it. Measure your carpet, taking care to add a few extra inches to each dimension. This will ensure you have enough carpet to work with when trimming and cutting.
Step 3: Cut Your Carpet
Using a sharp utility knife, cut your carpet to the appropriate size. Use a straightedge to ensure your cuts are even and straight. Be sure to leave a few extra inches on each side to allow for trimming and cutting during installation.
Step 4: Trim Edges
After the carpet is cut, use your knife to trim any excess edges. Make sure the edges are straight so that your carpet will fit tightly against the walls and other obstacles.
By following these steps to measure and cut your carpet, you can ensure a perfect fit for your floor. Remember to add a few extra inches to your measurements to allow for trimming and cutting. If you have excess carpet after installation, use a utility knife to trim it away. For more information about installing flooring, check out our articles on how much tile glue do I need, how long does LVT glue take to dry, and how to install glue-up shower walls.
Seaming the Carpet
When installing carpet in a large room or an area that has multiple pieces of carpet, it’s important to seam the pieces together to create a seamless look. Seaming can be a bit tricky, but with the right tools and technique, you can achieve a professional-looking result.
Tools and Materials Needed:
| Item | Description |
| Carpet knife | A tool used for cutting carpet to the desired size and shape. |
| Straight edge | A tool used to ensure that carpet cuts are straight and even. |
| Seam tape | A double-sided tape that is used to hold carpet seams together. |
| Seam roller | A tool used to press down on the seam tape, helping it adhere to the carpet. |
Step-by-Step Guide:
1. Begin by laying out the pieces of carpet that need to be seamed together. Use a straight edge and a carpet knife to ensure that the cuts are straight and even.
2. Once the pieces of carpet are cut to size, place seam tape along the edges that will be joined together. Make sure that the tape is placed beneath the edges of the carpet so that it won’t show once the carpet is installed.
3. Use a seam roller to press down on the tape, ensuring that it adheres to both pieces of carpet. Apply pressure to the entire length of the seam, making sure that the tape is securely in place.
4. Fold one piece of carpet over onto the other so that the edges with the tape meet. Use the seam roller once again to press down on the seam, helping to fuse the two pieces of carpet together.
5. Finally, trim any excess carpet or seam tape using a carpet knife. Be sure to cut at a slight angle to ensure that the seam is not visible.
By following these steps, you can create a seamless carpet installation that looks great and will last for years to come. Remember to take your time and be careful when seaming carpet, as mistakes can be difficult to fix.
Application
The moment has finally arrived to apply your carpet after all the preparation work. This is the most exciting part of the process, as it’s where you begin to see your hard work come to fruition. However, this part of the process requires careful attention to detail to ensure a smooth and long-lasting application. So, let’s get started on choosing the right adhesive, applying it correctly, and laying your carpet with precision.
Choosing the Right Adhesive
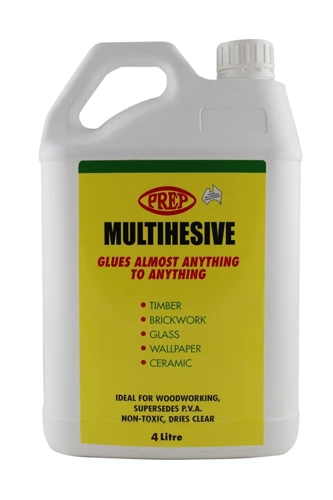
When it comes to choosing the right adhesive for your carpet, there are a variety of factors to consider. The type of carpet you have and the surface you’ll be gluing it to are two of the most important factors to keep in mind when making your selection. Below is a breakdown of some of the most common types of carpet adhesives and their advantages and disadvantages:
| Adhesive Type | Advantages | Disadvantages |
|---|---|---|
| Latex | – Easy to apply – Dries relatively quickly – Non-toxic – Great for most carpet types – Can be used on concrete or wood surfaces |
– May not be suitable for high-traffic areas – Not recommended for outdoor use – Susceptible to water damage – May release harmful fumes during application and drying |
| Acrylic | – Dries quickly – Resistant to water damage – Suitable for a variety of surfaces – Non-toxic |
– May not be suitable for high-traffic areas – May emit strong odor during application and drying – Can be difficult to remove once applied |
| Solvent-Based | – Highly durable – Can be used in high-traffic areas – Suitable for outdoor use – Resistant to water damage |
– May release harmful fumes during application and drying – Can be difficult to apply and clean up – Not suitable for all carpet types – Can damage certain surfaces (such as vinyl) |
| Epoxy | – Highly durable – Resistant to water damage – Suitable for a variety of surfaces – Can be used in high-traffic areas |
– Can be difficult to apply and clean up – May release strong odor during application and drying – Not suitable for all carpet types – Expensive |
It’s important to note that there are also adhesive options specifically designed for certain types of carpet, such as marine carpets or outdoor carpets. Be sure to research any specific recommendations for your particular carpet type to ensure the best possible outcome. Additionally, always follow the manufacturer’s instructions carefully for both application and safety precautions.
Applying the Adhesive
Properly applying the adhesive is arguably the most crucial step in the carpet glueing process. The type of adhesive you use will depend on the type of carpet and its backing, as well as the surface it will be glued to.
| Type of Carpet | Type of Adhesive |
|---|---|
| Tufted Carpet | Latex-based adhesive |
| Woven Carpet | Two-part epoxy adhesive |
| Felt-backed Carpet | Polymer-based adhesive |
Before applying the adhesive, make sure that the subfloor is completely dry and free of any debris. This will ensure maximum adhesion. Follow the manufacturer’s instructions for mixing and applying the adhesive.
Pro Tip: Use a notched trowel to spread the adhesive. This tool ensures that an even layer of adhesive is applied, and allows air to escape when the carpet is laid.
Start at the center of the room and work towards the walls, applying the adhesive in manageable sections. Use a measuring tape to ensure that each section is of the same length. Apply enough adhesive to lay down the carpet section, but not so much that it puddles.
Perplexity Tip: Applying too much adhesive can cause the carpet to buckle and create air pockets underneath, leading to a less than satisfactory finish.
Use a hand roller to press the carpet firmly into the adhesive. This step is crucial as it ensures that the carpet is properly glued to the subfloor, without any air pockets. Pay special attention to seams or areas where the carpet meets the wall.
Pro Tip: Allow the adhesive to dry for at least 24 hours before using the room. Walking on the carpet too soon can cause it to shift and create wrinkles.
By using the right adhesive and following the manufacturer’s instructions for application, you can ensure a strong bond between the carpet and subfloor, resulting in a long-lasting and attractive installation.
Laying the Carpet
After you have applied the adhesive and allowed it to dry to the point where it is tacky but not wet, it is time to lay the carpet.
First, start with one corner of the room and roll out the carpet with the backing side facing up. Remember to leave a few inches of excess carpet around the edges of the room to allow for trimming.
Next, use a carpet roller or your hands to firmly press the carpet into the adhesive. Start at the center and work your way out towards the edges, making sure to eliminate any air pockets or wrinkles as you go. Be sure to press down on the seams of any carpet pieces that were seamed together.
Once the carpet is in place, use a carpet cutter or utility knife to trim the excess around the edges of the room. Take care to make these cuts as straight and clean as possible. If you are installing carpet on stairs, be sure to trim the carpet to fit the width of each step.
Table: Tips for Laying Carpet
| Tip | Description |
|---|---|
| Use a carpet knee kicker | This tool can help you properly stretch the carpet into place for a snug, secure fit. |
| Work quickly | Many carpet adhesives will dry quickly, so it is important to work at a steady pace and avoid stopping once you have started. |
| Trim carefully | Take the time to carefully trim excess carpet around the edges of the room, paying special attention to corners and doorways. |
| Protect wall edges | Using a carpet edge trimmer can help protect wall edges and provide a clean, professional finish. |
| Don’t rush | Take your time to ensure that the carpet is properly aligned and secure, and that there are no visible wrinkles or bubbles. |
Remember, laying carpet can be a complex and time-consuming process. If you are not comfortable doing this yourself, it is always a good idea to seek the help of a professional carpet installer to ensure that the job is done right the first time.
Maintenance and Troubleshooting
After successfully gluing your carpet, it’s important to take good care of it to maintain its beauty and longevity. Additionally, sometimes you may face some issues with your carpet that need troubleshooting. In this section, we’ll cover crucial maintenance tips to keep your carpet looking fresh and clean, as well as common problems and how to resolve them effectively. Let’s dive in and see how you can keep your carpet in optimal condition.
Maintaining Your Carpet
Once you’ve successfully glued your carpet, it is important to take care of it to ensure it lasts for a long time. Here are some tips for maintaining your carpet that will keep it looking clean and fresh:
| Tip | Description |
|---|---|
| Regular vacuuming | Vacuum your carpet at least once a week to remove dirt, dust, and debris. Use a high-quality vacuum cleaner that has a good suction power and rotating brush head. |
| Spot cleaning | If you spill something on your carpet, attend to it as soon as possible. Blot the spill with a clean cloth and use a mild detergent solution, if necessary. Avoid using harsh cleaning chemicals. |
| Deep cleaning | Every once in a while, your carpet would require a deep cleaning. You can hire a professional carpet cleaner or rent a steam cleaner to do it yourself. Make sure you follow the manufacturer’s instructions and use a cleaning solution that is safe for your carpet. |
| Protective measures | Place doormats at the entrance to your home to prevent dirt and debris from getting inside. You can also ask guests to remove their shoes before walking on the carpet. |
| Regular maintenance | Inspect your carpet regularly for signs of wear and tear, such as fraying edges or loose threads. Trim any loose fibers to prevent further damage. |
By following these tips, you can extend the life of your carpet and keep it looking new for many years. It’s important to note that proper maintenance is also important for your health, as carpets can harbor dirt, dust, and allergens that can cause respiratory problems.
Troubleshooting Common Issues
It’s important to recognize that even with proper installation, unexpected issues may arise with your carpet. Here are some common problems that you may encounter and how to troubleshoot them:
| Issue | Cause | Solution |
|---|---|---|
| Wrinkles or Bubbles in the Carpet | Poor installation or insufficient adhesive | Smooth out the affected area and reapply adhesive as needed |
| Loose or Frayed Edges | Inadequate seaming or trimming during installation, or natural wear and tear over time | Use a carpet edge trimmer to clean up frayed edges, and re-seam or re-trim the affected area as needed |
| Carpets that are Separating from Subfloors or Stairs | Inadequate adhesive, incorrect adhesive for the specific subfloor material, or moisture issues | Remove affected area, clean and dry the subfloor, and reapply adhesive with a new piece of carpet |
| Stains or Spills on Carpet | Food or drink spills, pet accidents, or tracked-in dirt and debris | Address the stain or spill immediately and use a recommended carpet cleaner or spot treatment to remove the stain |
| Uneven Wear or Traffic Patterns | Natural wear and tear over time, or uneven foot traffic on certain parts of the carpet | Rotate furniture or change walking paths to distribute foot traffic more evenly, and consider professional carpet cleaning or repair services |
| Unpleasant Odors | Moisture issues, pet odors, or build-up of dust and debris in the carpet fibers | Vacuum regularly, address any moisture or pet odor issues immediately, and consider professional carpet cleaning services or using odor-reducing products |
By being aware of these common issues and their corresponding solutions, you can ensure that your carpet stays in great condition for years to come. If you’re still experiencing problems with your carpet, don’t hesitate to consult a professional for assistance.
Conclusion
In summary, successfully gluing carpet requires proper preparation, the right materials, and careful application. By following the steps outlined in this guide, you can effectively glue your carpet in place, creating a beautiful and long-lasting floor covering.
It is important to note that safety should always be a top priority when working with adhesives. Always follow the manufacturer’s instructions and wear appropriate protective gear such as gloves and a mask to avoid inhaling any harmful fumes.
When choosing an adhesive, take into consideration the material of the subfloor and carpet, as well as the location of the room. For example, a high traffic area may require a stronger adhesive than a low traffic area.
Regular maintenance, such as vacuuming and spot cleaning, can help keep your carpet looking its best. In the event of any issues, such as loose seams or bubbles, troubleshoot the problem immediately to prevent further damage.
In conclusion, with the right tools, materials, and technique, gluing carpet can be a successful project for any DIY enthusiast. Don’t be afraid to ask for help or consult a professional if needed. Happy gluing!
Frequently Asked Questions
Can I glue carpet on any type of flooring?
No, you should only glue carpet on subfloors made of concrete, wood, or plywood. Avoid gluing carpet directly onto vinyl or asphalt subfloors.
What type of adhesive should I use for gluing carpet?
For most carpets, a latex-based or solvent-based adhesive works best. Be sure to read the manufacturer’s instructions and choose the appropriate adhesive for your specific carpet and subfloor.
Can I install carpet without using adhesive?
Yes, you can use other methods such as tacking or stretching to install carpet without adhesive. However, gluing is a popular and effective method that provides a strong and long-lasting bond.
How do I prepare the floor surface before gluing the carpet?
You should thoroughly clean the subfloor, remove any old adhesive residue, fill in any cracks or holes, and let the surface dry completely before applying the new adhesive.
What type of tools do I need for gluing carpet?
You’ll need basic tools such as a carpet knife, measuring tape, chalk line, trowel, and adhesive applicator. You may also need a seam roller, power stretcher, and knee kicker depending on the complexity of the job.
What is seaming the carpet and why is it important?
Seaming is the process of joining two strips of carpet together to create a seamless finish. It’s important to ensure a snug fit and avoid gaps or overlaps. This also helps to prevent tripping hazards and extends the life of your carpet.
How do I apply adhesive to carpet?
You can either trowel the adhesive onto the subfloor or use an adhesive applicator to distribute an even layer of adhesive onto the back of the carpet. Follow the manufacturer’s instructions for the recommended amount and spread rate.
How long does it take for the adhesive to dry?
The drying time for carpet adhesive varies depending on the type of adhesive and the environmental conditions. Typically, it takes anywhere from 24 to 72 hours for the adhesive to fully cure. Avoid walking on the carpet during this time.
How do I maintain my glued carpet?
To maintain your glued carpet, regularly vacuum and remove any stains or spills as soon as possible. Avoid using harsh chemicals or abrasive cleaning tools that could damage the adhesive or carpet fibers.
What should I do if I encounter issues with my glued carpet?
If you encounter issues such as wrinkles, bubbles, or lifting, consult with a professional carpet installer for advice. It may be necessary to re-glue or replace sections of the carpet to fix these issues.