Introduction
When it comes to creating stunning, unique decor pieces or even functional items, lava rock can be a fantastic material to work with. Whether you are planning a DIY project or trying to repair a broken piece, gluing lava rock together requires careful consideration and the right tools. In this guide, we will explore everything you need to know about gluing lava rock together, from what it is and why it is used, to the best glue types, preparation techniques, and expert tips for achieving successful results. So, let’s dive in!
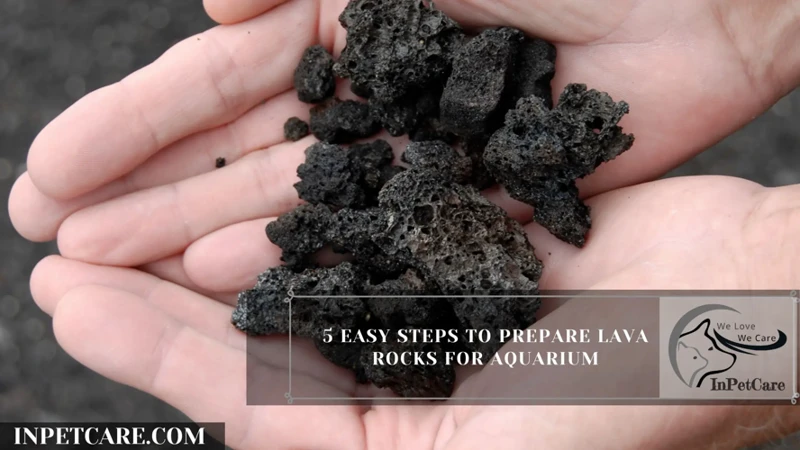
What is Lava Rock?
Lava rock is a type of volcanic rock that is formed when molten lava solidifies rapidly after it flows from a volcano. It is a highly porous material that is lightweight and is resistant to heat and chemicals. Lava rock is commonly used in landscaping, in aquariums as a substrate and in construction for decorative purposes.
The Benefits of Lava Rock:
- Lava rock is a natural and eco-friendly material that is completely biodegradable and recyclable.
- It is a durable material that can withstand harsh weather conditions such as extreme heat, cold, wind and rain.
- Lava rock has excellent drainage properties and can absorb and retain moisture, making it a great choice for gardening and landscaping projects.
- It is a great medium for plant growth as it has many natural trace minerals that are beneficial for healthy plant growth.
- Lava rock is highly porous which makes it an excellent material for use in aquariums as a filtration media.
If you want to learn more about gluing other materials, check out our article on how to glue carbon fiber.
Why Glue Lava Rock?
When creating a lava rock structure or repairing a broken lava rock item, gluing the pieces together can be an excellent solution. Using glue on lava rock can be more convenient and practical than using other methods, such as drilling into the rock to attach wires, for example. Gluing the rock can provide a more seamless finish, it can be more affordable and easier to apply.
What are the benefits of gluing Lava Rock?
- Easy: Gluing lava rocks together is easy and can be done in a matter of minutes. It does not require any special skills or equipment.
- Affordable: Using glue to fix lava rock structures or sculptures can be cost-effective and more affordable than other means. The price of a suitable glue is usually lower than the price of drilling equipment and special wires.
- Efficient: Gluing the lava rock together can create a more seamless finish, which makes it visually more appealing. It also provides a more robust bond that can last a long time.
- Less invasive: Drilling into a lava rock to attach it to another base or item can be invasive and may cause damage to the rock. When you use glue, there is no drilling involved, which preserves the integrity of the rock structure.
- Faster: Drilling can be time-consuming and more tedious, while using glue can save you a lot of time.
For the best results, it is essential to choose the right glue and ensure that the rocks are clean and dry before application. Some of the best glue options include epoxy, cyanoacrylate, and silicone. Each of these glues has different properties and bonding strengths, which will need to be considered before choosing the right glue for your lava rock project or repair. You can further explore specific glue options in the following sections of the article:
– How Strong is Gorilla Glue Epoxy?
– How Strong is Epoxy Glue?
– What Glue for Acrylic?
Choosing the Right Glue
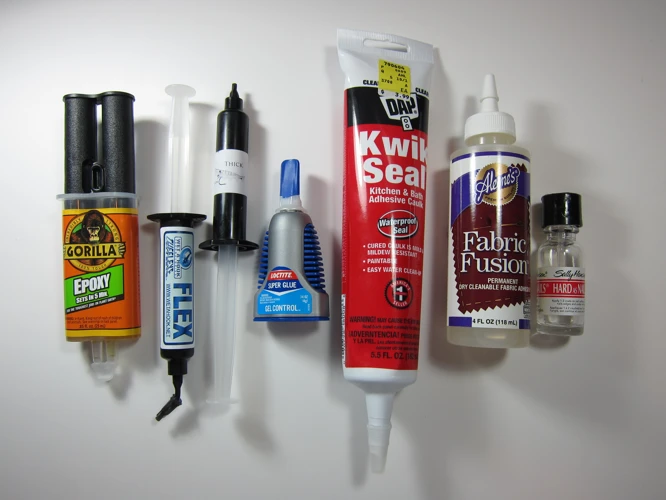
Selecting the appropriate adhesive for your lava rock project can be a daunting task, with so many different options available on the market. Each type of glue has distinct advantages and disadvantages. For instance, some adhesives work well in high temperatures and harsh environments, while others are more suitable for applications with minimal stress. It is essential to choose the right glue for the job to achieve the desired outcome. In the following sections, we will discuss the most common types of adhesives recommended for gluing lava rock and compare them to help you make an informed decision.
Epoxy
One of the most popular glues for attaching lava rock is epoxy. It is a two-part adhesive that creates an incredibly strong bond and can fill gaps between the rocks. Epoxy is also resistant to water, heat, and chemicals, making it an ideal choice for outdoor or indoor use. Here are some of the advantages and disadvantages of using epoxy for gluing lava rock:
| Advantages | Disadvantages |
|---|---|
| Creates a very strong bond that is resistant to water, heat, and chemicals | Requires mixing two parts together, which can be messy and time-consuming |
| Can fill gaps between the rocks for a more secure hold | Drying time can take up to 24 hours |
| Can be sanded or painted over once it dries | Not flexible once it hardens, so it may crack if the rocks shift over time |
When using epoxy to glue lava rock together, it is important to make sure that the surface of each rock is clean and dry. Mixing the two parts of the epoxy together thoroughly before application will ensure the best and strongest bond possible. Additionally, be sure to apply the epoxy in a well-ventilated area and wear appropriate gloves and eye protection.
If you’re looking for more information on the strength of epoxy glue, you can check out our article onhow strong epoxy glue is.
Cyanoacrylate
One of the most popular types of glue for DIY and small-scale projects is cyanoacrylate, also known as super glue. This type of glue has a fast-drying time and can create a strong bond between surfaces.
Advantages of Cyanoacrylate:
- Fast-drying time
- Creates a strong bond between surfaces
- Easy to use
- Works well with small objects or surfaces
- Can be used to fill in small gaps
However, cyanoacrylate glue has a few limitations. It may not be the best choice for larger objects or surfaces, as it can be brittle and may not hold up to heavy use or stress. Additionally, it can be difficult to remove from surfaces if you make a mistake or need to reposition the lava rock pieces.
Precautions:
- Use in a well-ventilated area to avoid breathing in fumes.
- Avoid contact with skin or eyes.
- Wear gloves and eye protection.
- Keep out of reach of children and pets.
When working with cyanoacrylate glue to attach lava rock pieces, it is essential to prepare the surfaces correctly. Clean and dry the surfaces thoroughly, and sand the surfaces to create a rough surface for the glue to adhere to.
Step-by-Step Guide:
- Clean and dry surfaces thoroughly
- Sand the surfaces with fine-grit sandpaper
- Apply a small amount of glue to one surface
- Press the surfaces together firmly and hold for 30 seconds
- Allow the glue to dry for at least an hour before handling the glued pieces
- Monitor the glue bond and make sure that the surfaces are holding together well before using the glued lava rock in any applications
Cyanoacrylate glue can be an excellent choice for smaller lava rock projects where a fast-drying, secure bond is essential. Remember to follow all precautions and monitor the bond carefully to ensure that the pieces are holding together as expected. If you need further guidance on gluing a specific material together, consider checking out our guide on how to glue lawn mower seat back on.
Silicone
When it comes to gluing lava rock together, silicone is a popular choice due to its flexibility and resistance to water. It’s important to note that not all types of silicone adhesives are suitable for lava rock as some may not bond well with porous surfaces. It’s important to choose a high-quality adhesive that is specifically designed for stonework. One option is the GE Silicone II Granite and Stone Adhesive, which is specifically formulated for bonding stone surfaces.
To use silicone adhesive, first, you need to make sure that the surface of the lava rock is clean and free of any debris or dust. Use a clean, dry cloth to wipe the surface down. Then, apply a thin layer of the silicone adhesive to one of the surfaces that you want to glue together. Make sure to apply the adhesive evenly and cover the entire surface.
Once you’ve applied the adhesive, press the two surfaces firmly together, making sure to align them properly. It’s important to apply enough pressure to ensure that the two surfaces are securely bonded. Then, use clamps to hold the two surfaces together while the adhesive dries.
Note: It’s important to check the specific drying time and curing recommendations for the silicone adhesive that you choose. Generally, silicone adhesive takes longer to dry and cure than other types of adhesives.
While using silicone adhesive can be a great option for gluing lava rock, it’s important to keep in mind that it may not be as strong as other types of adhesives such as epoxy. Additionally, silicone adhesive may not be the best choice if you need to glue large or heavy pieces of lava rock together. In those cases, you may want to consider a stronger adhesive such as metal to leather glue or body repair panel glue.
Comparison and Recommendations
Comparison and Recommendations:
When it comes to gluing lava rock, there are three main types of glue to choose from: epoxy, cyanoacrylate, and silicone.
- Epoxy: Epoxy is a popular choice for bonding lava rock due to its strong and durable hold. It’s a two-part adhesive that must be mixed together before application. Epoxy is heat-resistant and waterproof, making it a great choice for outdoor lava rock projects.
- Cyanoacrylate: Also known as super glue, cyanoacrylate is a fast-drying adhesive that forms an extremely strong bond. It’s easy to use and dries clear, but it’s not as heat-resistant as epoxy. If you’re working with small pieces of lava rock, cyanoacrylate can be a good choice.
- Silicone: Silicone adhesive is flexible and ideal for creating a secure but pliable bond. It’s great for projects where some movement or flexibility is needed, such as attaching lava rock to a contoured surface. However, it’s not as strong as epoxy or cyanoacrylate.
It’s important to choose the right type of glue based on the specifics of your lava rock project. Epoxy is recommended for larger lava rock pieces or outdoor use, while cyanoacrylate is better for small or intricate projects. If flexibility is needed, silicone is a good choice. Remember to follow the manufacturer’s instructions carefully, and consider wearing protective gloves when working with glue. If you need further help with gluing other materials, such as Bakelite or window glass, check out our articles on how to glue Bakelite and how to glue window glass.
Preparing the Lava Rock
Before you start gluing your lava rock together, it is important to prepare the surface of the rocks properly. This step is crucial in ensuring a strong bond, and can make all the difference in the longevity of your project. Cleaning the surface and sanding the rocks are both critical steps to ensure the glue adheres properly. In the following sections, we will discuss the proper techniques for each step, so that you can prepare your lava rock with confidence before applying glue.
Cleaning the Surface
Before applying glue to your lava rock, it is crucial to clean the surface properly. This helps ensure that the glue will adhere well and create a strong bond. Here are the steps you need to follow to clean the surface of your lava rock:
| Step | Description |
|---|---|
| Step 1 | Remove any Loose Debris: Begin by removing any dust, dirt, or other debris from the surface of the lava rock. You can use a soft-bristled brush or a damp cloth for this purpose. Make sure you remove all the loose particles from the surface. |
| Step 2 | Wash with Soap and Water: Next, wash the surface of the rock with warm soapy water. You can use any mild detergent for this purpose. Scrub the surface gently with a soft brush to remove any stubborn dirt or stains. |
| Step 3 | Rinse and Dry: Rinse the rock surface thoroughly with water to remove all the soap. Then, pat it dry with a clean towel. Make sure the surface is completely dry before applying any glue. |
It is important to note that you should not use any harsh chemicals or solvents to clean the lava rock as they can damage the surface and affect the glue’s performance. By following these cleaning steps, you can ensure that your lava rock surface is clean and ready for gluing.
If you want to learn more about different types of glue for this project, you can check out our article on What is Rubber Glue?
Sanding the Surface
When it comes to gluing lava rock, sanding the surface is an important step to ensure proper adhesion. Lava rock has a porous surface that can make it difficult for glue to penetrate, especially if the rock is not properly cleaned. Sanding the surface of the lava rock can help create a rough texture that provides more surface area for the glue to adhere to.
Tools for Sanding Lava Rock
To sand the surface of your lava rock, you will need some simple tools:
| Tool | Purpose |
|---|---|
| 80-grit sandpaper | To create a rough texture |
| Sanding block | To ensure a flat surface |
| Safety glasses | To protect your eyes from flying debris |
Technique for Sanding Lava Rock
When sanding the surface of your lava rock, it’s important to follow these steps:
- Wear your safety glasses to protect your eyes from flying debris.
- Wrap the sandpaper around the sanding block to ensure a flat surface.
- Begin sanding the surface of the lava rock with the 80-grit sandpaper. Apply pressure evenly across the surface of the rock.
- Continue sanding the surface of the rock until you have created a rough texture. The texture should feel slightly rough to the touch.
- Wipe the rock down with a damp cloth to remove any debris.
Once you have sanded the surface of the lava rock, it’s important to move quickly to the next step of the process. Sanding can create a lot of debris, so make sure to wipe down the rock to remove any leftover sanding dust. This will ensure that the glue can bond properly to the clean, sanded surface.
Applying the Glue
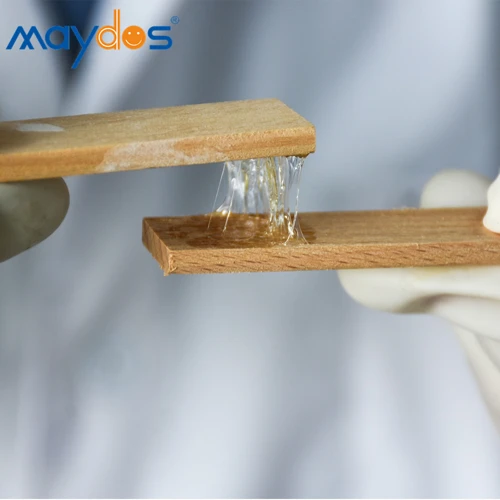
It’s now time to get to the fun part: applying the glue. This is where you’ll see the pieces start to come together and take shape. But before you begin, it’s important to note that the application process can vary based on the type of glue you’ve chosen. Additionally, a steady hand and patience will be the key to success. So, let’s dive into the steps you should take to ensure a strong and secure hold between your lava rock pieces.
Step-by-Step Guide
Here is a step-by-step guide on how to glue lava rock together for a variety of purposes:
Step 1: Start by selecting the appropriate glue for your specific application. Read the manufacturer’s instructions carefully and ensure that the glue is compatible with both the lava rock surface and the material you are gluing to.
Step 2: Clean the surface of both the lava rock pieces and the object you are gluing them to. Use a soft brush and water to remove any dust, dirt or debris. If necessary, use a damp cloth to wipe down the surfaces.
Step 3: Sand the surface of the lava rock to create a rough texture that will help the glue adhere better. Use a fine-grit sandpaper and gently sand the surface until it feels slightly rough to the touch.
Step 4: Apply a thin layer of glue to the surface of one of the lava rock pieces using a brush or dropper. Be careful not to apply too much glue, as this can cause the pieces to slide around or create a mess.
Step 5: Carefully place the other lava rock piece on top of the glue-coated surface, aligning it properly with the first piece. Press down firmly with your hands to ensure that the pieces bond together securely.
Step 6: Use clamps or weights to hold the pieces in place while the glue dries. Follow the manufacturer’s instructions for drying time, usually 24-48 hours.
Step 7: Once the glue has dried completely, remove the clamps or weights and inspect the bond carefully. If necessary, apply a second layer of glue to any areas that appear weak or uneven.
Step 8: Allow the second layer of glue to dry completely before handling the glued lava rock structure.
Following these simple steps can help create a strong and durable bond between lava rock surfaces. Remember to only use recommended adhesives and always follow the manufacturer’s instructions for best results.
Drying and Curing
After you have applied the glue to your lava rock, it’s important to make sure it properly dries and cures before handling it. Rushing or mishandling the drying and curing process can lead to weak bonds and potential damage to your project. In this section, we will discuss the necessary steps to ensure a successful drying and curing process for your glued lava rock. So, let’s explore the best practices and tips for this crucial step in the process.
How Long to Wait
After applying the glue to the lava rock, it is crucial to allow sufficient time for drying and curing. The curing process is essential to achieving a stable bond between the lava rocks. Different types of glue have different drying and curing times, so it is vital to choose the right one for the job.
To assist in determining the length of time for drying and curing, the following table provides a general guideline for each type of glue:
| Glue Type | Drying Time | Curing Time* |
|---|---|---|
| Epoxy | 5-10 minutes | 24-72 hours |
| Cyanoacrylate** | 10-30 seconds | 24-48 hours |
| Silicone | 24-48 hours | 24-72 hours |
* Curing time may vary depending on temperature, humidity, and the thickness of the glue layer.
** Cyanoacrylate glue is not recommended for outdoor use as it can be affected by temperature and humidity changes.
It is essential to follow the manufacturer’s instructions for drying and curing times. Rushing the process may result in an unstable bond that may fail over time. Once the lava rock pieces have been glued together, it is best to give them at least a full day before handling them to ensure that the glue has thoroughly cured. During this time, it is necessary to store the glued lava rocks in a dry, warm environment, as humidity and low temperatures may lengthen the curing time.
Using a digital thermometer and hygrometer to measure temperature and humidity can help in determining the optimal conditions for curing the lava rock. These devices can be adjusted to alarm when specific conditions are met, providing helpful reminders to check on the curing progress.
Patience is key when waiting for the glue to dry and cure. Cutting corners may result in a faulty bond that may cause the lava rock structures to break apart. By following the recommended drying and curing times and storing the glued lava rocks in the correct conditions, the bond will be durable and long-lasting.
Tips for Successful Curing
With a little care and attention, you can ensure that your lava rock bonding project turns out as expected. Here are some tips for successful curing:
| Tip | Explanation |
|---|---|
| Allow Enough Drying Time | It is important to allow the glue sufficient time to dry before the project is moved or disturbed. If you move the lava rock too soon, it may result in a failed bond. |
| Use Adequate Pressure | Applying adequate pressure to the glued surfaces can help ensure a strong bond. Consider using a clamp or other tool to apply additional pressure while the glue cures. |
| Apply in a Warm Area | Certain types of glue, such as epoxy, may cure more quickly in warmer temperatures. Consider applying the glue in a warm area to speed up the curing process. |
| Avoid Humidity | Humidity can slow down the curing process for some types of glue. Try to perform the work in an area with low humidity to speed things up. |
| Be Aware of Moisture | Certain types of glue, like cyanoacrylate, can be sensitive to moisture. If there is too much moisture present, the glue may not bond as expected. Take care to keep the lava rock dry during the curing process. |
| Don’t Rush | Rushing the process can lead to a weak bond or failed project. Take your time and follow the manufacturer’s recommendations for drying and curing time to ensure success. |
By following these simple tips and taking care during the curing process, you can increase the likelihood of success with your lava rock bonding project. Remember to exercise patience, apply adequate pressure, and keep an eye on temperature and humidity for the best results.
Conclusion
After reading this complete guide on how to glue lava rock together, we hope you feel more confident tackling your next lava rock project. With the right glue and preparation, you can create stunning and unique designs for your home or garden. Remember to choose the right glue, prepare the surface properly, and follow the step-by-step guide for best results.
Ultimately, the key to successful lava rock gluing is patience and attention to detail. Rushing the process or cutting corners will likely result in a failed project. But if you take your time, follow the instructions, and have a little bit of creativity, the end result will be well worth the effort.
Keep in mind that glueing lava rock together can be a messy process, so be sure to protect your work surface and wear gloves if necessary. And if you’re unsure about any step of the process, don’t hesitate to seek out additional resources or guidance.
Overall, we hope this guide has been helpful and informative for you. With the right tools, technique, and mindset, glueing lava rock together can be a fun and rewarding DIY project that you can be proud of. Happy crafting!
Frequently Asked Questions
What types of lava rock can be glued together?
Any type of untreated natural lava rock can be glued together using the methods outlined in this guide.
Do I need to use a special glue for lava rock?
No, you can use a variety of different types of glue. Epoxy, cyanoacrylate, and silicone are all effective options.
Why is it important to clean and sand the surface before gluing?
Cleaning and sanding the surface of the lava rock ensures that the glue adheres properly and creates a strong bond.
Can I use lava rock glue for other types of stone?
No, the techniques described in this guide are specifically for gluing lava rock. Different types of stone may require different methods or types of glue.
Can I use glue to repair a broken lava rock?
Yes, glue can be used to repair a broken lava rock as long as the pieces fit together well and the surface has been properly prepared.
Is it possible to remove glue from lava rock without damaging it?
It can be difficult to remove glue from lava rock without causing damage, so it’s best to avoid using too much glue or making mistakes during the gluing process.
How long does it take for the glue to dry?
The drying time will depend on the type of glue used, the temperature and humidity in the environment, and the size of the lava rock. Allow at least 24 hours for the glue to fully dry.
Can I use lava rock glue for outdoor projects?
Yes, as long as the glue is rated for outdoor use and can withstand exposure to moisture and other environmental factors.
What should I do if the glue doesn’t hold?
If the glue doesn’t hold, you may need to reapply or try a stronger type of glue. Make sure the surface is clean and properly sanded before attempting to reglue.
Is gluing lava rock a permanent solution?
When done correctly, gluing lava rock can create a permanent bond. However, it’s important to note that any glued object may eventually break or fail over time.