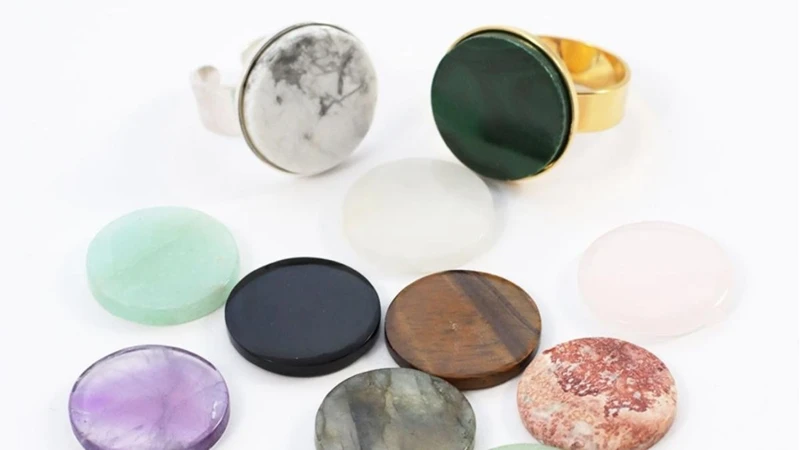
Have you ever been mesmerized by the beauty of glass cabochons but wished they had a certain image or design on them? Well, the good news is that you can easily add your desired images to glass cabochons with just a few materials and some know-how. Gluing images to glass cabochons is a fantastic way to create unique jewelry pieces or decorate small objects. But how exactly can you do it? This step-by-step guide will provide you with tips and tricks on how to glue images to glass cabochons in a way that will have everyone wondering where you bought them.
Materials Needed
When it comes to gluing images to glass cabochons, you’re going to need a few materials to get started. Some of these materials you may already have on hand, while others you may need to purchase. Here are the materials you’ll need:
1. Glass cabochons: You can purchase glass cabochons from various craft stores or online. Make sure you choose the correct size for your images.
2. Images: You’ll need to print or cut out the images you want to use for your cabochons. You can use photographs, scrapbook paper, or any other type of flat image you’d like.
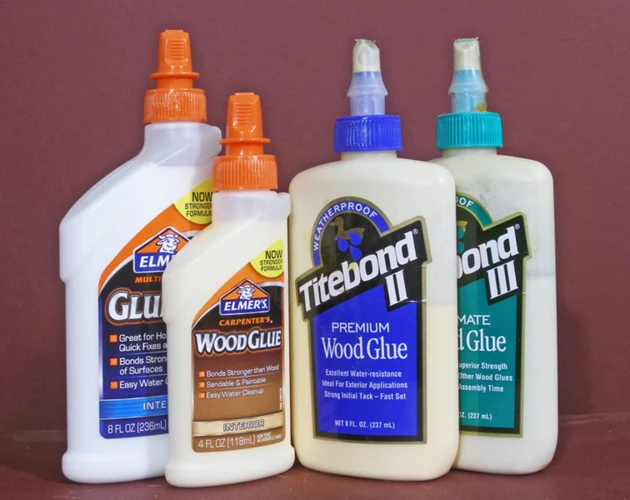
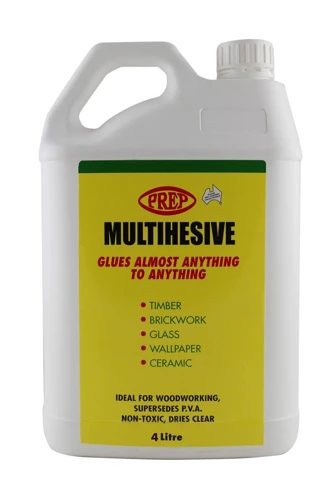
3. Glue: Choosing the right glue is critical for the success of your project. You can use various types of glue, including epoxy resin, clear-drying craft glue, or E6000. If you’re unsure which glue to use for your specific project, do some research or ask for recommendations at your local craft store.
4. Scissors: You’ll need scissors to cut out your images to fit the size of the cabochons.
5. A small paintbrush: You’ll need a small paintbrush to apply the glue to the cabochons.
6. A clean cloth: You’ll need a clean cloth to clean and dry the cabochons before applying the glue.
7. Bail or finding: You’ll need a bail or finding to attach to the back of your cabochon to turn it into a pendant or charm.
8. Optional: Epoxy resin: If you want to give your cabochons a glossy finish, you can use epoxy resin. You can find instructions on how to make waterproof glue with epoxy resin here.
Make sure you have all of these materials on hand before starting your project to ensure everything goes smoothly!
Preparation
Before beginning the process of gluing images to glass cabochons, it is important to properly prepare the materials involved. Failure to do so could result in a sloppy or unsightly finished product. In this section, we will discuss the necessary steps to take before starting the gluing process. From cleaning the cabochons to cutting the images to size, these preparation steps will help ensure a successful project. It is also important to choose the right glue for the job. If you are unsure which glue to use, refer to our article on what E6000 glue is used for or what acrylic glue is. Additionally, be sure to note the drying time of your glue before beginning the project. If you need more information on drying times, check out our article on how long acrylic glue takes to dry.
Cleaning the Cabochons
Before attaching any images to your cabochons, it’s important to start with a clean surface. Cleaning the cabochons properly will ensure that the glue adheres well. Here are the steps to follow for cleaning the cabochons:
- Wipe the surface of the cabochons using a lint-free cloth to remove any dust or debris.
- Mix warm soapy water in a bowl and place the cabochons in it for a few seconds.
- Take the cabochons out of the soapy water and rinse them under running water.
- Wipe the cabochons dry with a lint-free cloth.
- If there are any stubborn dirt marks, use a soft toothbrush to gently scrub the surface of the cabochons.
After following these steps, make sure that there are no fingerprints or grease on the surface of the cabochons. Any residue that is left on the cabochons could create a barrier that prevents the glue from sticking properly. It’s vital to make sure that the cabochons are completely clean before applying any glue.
Now that the cabochons are clean, you’re ready to move onto the next step, which is cutting the images.
Internal link: What is RTV glue?
Cutting the Images
To create beautiful and professional-looking glass cabochons, it is important to cut the images with precision. Here are some tips for cutting the images for your cabochons:
| Materials | Steps |
|---|---|
| Printed images | Print out your desired images on high-quality paper, such as photo paper. Make sure to size the images according to the size of your cabochons. |
| Scissors or craft knife | Using a sharp pair of scissors or a craft knife, carefully cut out the images. It is important to cut smoothly and evenly around the edges to avoid any bumps or gaps when gluing the image to the cabochon. If using a craft knife, use a cutting mat to protect your work surface. |
| Tracing paper or pencil | If you’re not confident with freehand cutting, you can use tracing paper to trace around the cabochon onto the image. Cut out the traced image and place it on the cabochon to see if it fits properly. Adjust the image as necessary, using the pencil to mark where you need to trim. |
| Angled cuts | For round cabochons, use angled cuts to make the image fit better. Take the scissors and cut small V-shapes around the edges of the image, making sure to leave enough edge to overlap the cabochon. This will help the image conform to the curve of the glass. |
Cutting the images for your cabochons requires some patience and a steady hand, but with these techniques, you can be sure to get a perfect fit every time. Now that you have your images cut out, it’s onto the next step: gluing them onto the cabochon. If you want to learn how to glue other materials, check out our guide on how to glue fiberglass.
Gluing the Images
Now that you’ve prepared the cabochons and cut the images to size, it’s time to glue them together. This step requires patience and precision to ensure a flawless final product. The right glue can make a significant difference in holding the image in place and avoiding air bubbles. Let’s delve into the process of gluing images to glass cabochons with useful tips to guarantee your success.
Choosing the Right Glue
When it comes to gluing images to glass cabochons, choosing the right glue is essential for a successful project. Not all adhesives are created equal, and certain craft glues that work well on paper or fabric may not work well for glass and images.
Here are some options to consider when choosing the right glue for this project:
- E6000: This industrial-strength adhesive is waterproof, heat-resistant, and dries clear. It is a popular choice for jewelry making and other crafts that require a strong bond.
- Aleene’s Tacky Glue: This white craft glue is a great option for those who prefer a non-toxic adhesive. It is suitable for use on paper, fabric, and other lightweight materials, and it dries clear.
- Glossy Accents: This clear, dimensional adhesive dries to a glossy finish and can be used to seal and adhere images to cabochons. It is easy to use and creates a strong bond.
It’s important to keep in mind that different glues may have different drying times, so make sure to read the label and follow the manufacturer’s instructions. Additionally, it’s a good idea to test the glue on a small area before using it on your entire project to make sure it is compatible with the materials you are using.
If you’re unsure which glue to use, experimentation and research are key. Don’t be afraid to try a few different types to see which one works best for your specific project.
Applying the Glue
When it comes to applying the glue to the cabochon and image, it’s important to use the right amount of glue to avoid any excess that could cause a mess. It’s recommended to use a small brush or toothpick to apply the glue onto the cabochon so you can control the amount and keep it from spreading outside of the cabochon’s edges.

When applying the glue, be sure to focus on the center of the cabochon and avoid getting any glue on the edges. This is where you will apply the epoxy resin later on to give it a finished look.
It’s important to note that different types of glue have different drying times, so make sure to read the instructions on the glue you choose. It’s also important to avoid touching the glue once it’s been applied, as this can leave fingerprints or smears.
If you accidentally apply too much glue, use a cotton swab or cloth to gently remove the excess. Remember, it’s better to start with less glue and add more if needed rather than to have to remove excess glue later on.
One useful tip is to lay the cabochon and image on a flat surface during the glue application process to ensure that they stick together without any wrinkles or bubbles. This can also help with positioning the image correctly on the cabochon.
Proper application of glue is crucial to achieving a successful cabochon creation. If you’re having trouble with gluing other materials, such as Styrofoam to metal or rocks together, be sure to check out our other helpful articles on how to glue Styrofoam to metal and how to glue rocks.
Positioning the Image
Positioning the image on the cabochon is a crucial step in this process. It is essential to center the image so that it looks stunning. Here are some easy steps to follow to get the perfect placement:
Step 1: Apply a small drop of glue onto the flat side of the cabochon.
Step 2: Pick up the image using a pair of tweezers. It’s best to hold the image by its edges, so you don’t smudge it with your fingers.
Step 3: Carefully place the image onto the glue, making sure to center it perfectly. Use gentle pressure to spread the glue evenly and ensure that the image adheres to the cabochon surface.
Step 4: If needed, adjust the image’s position slightly until it is centered correctly. You can use a toothpick or a pair of tweezers to reposition it gently.
Step 5: Once you are satisfied with the position, press down on the image’s edges to ensure that it sticks firmly to the cabochon. You can use a soft cloth or your fingers for this step.
Step 6: Let the cabochon dry for at least 24 hours before proceeding to the next step. This will ensure that your image is securely bonded to the cabochon’s surface.
| Step | Action |
|---|---|
| Step 1 | Apply a small drop of glue onto the flat side of the cabochon. |
| Step 2 | Pick up the image using a pair of tweezers. |
| Step 3 | Carefully place the image onto the glue, making sure to center it perfectly. |
| Step 4 | If needed, adjust the image’s position slightly until it is centered correctly. |
| Step 5 | Press down on the image’s edges to ensure that it sticks firmly to the cabochon. |
| Step 6 | Let the cabochon dry for at least 24 hours before proceeding to the next step. |
Pro Tip: It’s essential to work on a flat surface and have all the materials you need nearby before starting the gluing process. This will make your workflow smoother and more efficient. Additionally, avoid touching the glue once it is applied as it can leave fingerprints on the image’s surface, ruining the final result.
Drying Time
Once you have positioned the image on the cabochon and the glue applied, it is important to let it dry completely. The drying time may vary depending on the type of glue used, the temperature and humidity levels of your workspace, and the thickness of the glue layer. Here are some tips to ensure the images are properly dried and secured:
- Read the instructions: Different types of glue will have varying drying times, so be sure to read the label on your bottle to get an idea of how long you should wait before handling the cabochon.
- Avoid moving the cabochon: Once you’ve positioned the image on the cabochon and applied the glue, try not to move it around. This can cause the image to shift and ruin your design.
- Give it enough time: Generally, it is best to let the cabochon dry overnight to ensure that the glue has completely set. If you are in a hurry, you could use a hair dryer set on low heat to speed up the drying process.
- Check for completely dry: Before moving on to the finishing steps, make sure that the glue is completely dry. Check for any tackiness or stickiness by gently touching the surface of the cabochon with your finger. If it does not stick, it is dry.
By following these tips, you can be sure that your images are properly secured to the cabochon and will not come loose when the jewelry is worn. Patience is key when it comes to drying time, so be sure to give your cabochons enough time to dry completely.
Finishing the Cabochons
As you near the end of your glass cabochon crafting project, it’s time to focus on the finishing touches to make your creations shine and stand out. The final steps of finishing the cabochons are crucial to ensuring that your hard work pays off and your pieces have a professional and polished look. From trimming the edges to adding epoxy resin and attaching the bail or finding, each step of the finishing process requires attention to detail and patience. In this section, we will cover the necessary steps for finishing off your glass cabochons, so you can proudly display or wear your handmade creations.
Trimming the Edges
After applying the images to the glass cabochons, the excess paper around the edges needs to be trimmed. You can use scissors or a craft knife to do this. However, it is important to be careful to avoid cutting the actual image or the glass.
Here are some tips for trimming the edges:
- Start by cutting off the corners of the paper. This will make it easier to cut the curved edges.
- Hold the cabochon up to the light to see any areas that need to be trimmed.
- Make small cuts and check frequently instead of cutting off too much at once.
- Keep the cuts as close to the edge of the cabochon as possible for a clean look.
- If you are using scissors, use a pair with a fine tip to make it easier to get into tight spaces.
- Rotate the cabochon as you cut to ensure that you are trimming evenly.
- Be patient and take your time—rushing can lead to mistakes.
Trimming the edges is an important step to give the cabochons a polished look. If the edges are left jagged or uneven, it can detract from the beauty of the finished piece. Take the time to trim carefully and you’ll have a stunning finished product.
Adding Epoxy Resin
Adding epoxy resin to your glass cabochons is an optional step, but it can add a beautiful finishing touch to your project. Epoxy resin can create a clear, glass-like coating over your image, protecting it from wear and tear and giving it a professional look. Here are the steps for adding epoxy resin to your glass cabochons:
Materials needed:
- Epoxy resin
- Disposable mixing cups
- Stir sticks
- Small paintbrush
- Blowtorch or heat gun
1. First, mix the epoxy resin according to the package instructions. It’s important to mix it thoroughly to ensure that it will cure properly. Pour equal amounts of the resin and hardener into a disposable mixing cup and mix well using a stir stick.
2. Using a small paintbrush, apply the resin to the surface of your image and the surrounding glass. Make sure to apply it evenly and cover the entire surface.
3. Use a blowtorch or heat gun to remove any air bubbles that may have formed in the resin. Hold the torch or gun about 4-6 inches away from the surface of the cabochon and move it in a circular motion to heat the surface. This will help to release any trapped air bubbles.
4. Let the cabochon dry completely for at least 24 hours. During this time, the resin will cure and harden, creating a durable and long-lasting finish.
5. After the resin has cured, you may notice that it has formed a slight dome over the image. If you wish to flatten the surface, you can sand it down using sandpaper or a small rotary tool.
Adding epoxy resin is an optional step, but it can make a big difference in the appearance and durability of your glass cabochons. With a little patience and care, you can achieve a beautiful, professional-looking finish that will last for years to come.
Attaching the Bail or Finding
Once you have finished attaching the image to the glass cabochon, the next step is to attach a bail or finding to turn it into a jewelry piece. A bail is a metal component that is used to connect the cabochon to a chain or bracelet. Findings are small metal pieces that are used to attach cabochons to jewelry pieces.
Materials Needed:
| Item | Description |
| Bails or Findings | Choose the type and size appropriate for your jewelry piece and cabochon |
| Glue | Use the same glue you used to attach the image to the cabochon |
| Toothpick or Small Brush | For applying glue |
| Charms or Beads (Optional) | For decoration purposes |
Steps:
- Choose a bail or finding that will match the size of your cabochon.
- Apply a small amount of glue to the back of the bail or finding using a toothpick or small brush.
- Securely press the bail or finding onto the back of the cabochon and hold in place for a few seconds to ensure it sticks.
- Allow the glue to fully dry according to the manufacturer’s instructions.
- If desired, add additional decoration to the jewelry piece such as charms or beads.
Attaching a bail or finding is the final step in turning your image and glass cabochon into a beautiful and unique jewelry piece. With these easy steps and a little creativity, you can make a wide variety of beautiful, handmade jewelry items.
Tips and Tricks
When it comes to gluing images to glass cabochons, there are a few tips and tricks that can make the process easier and more effective. Here are some things to keep in mind:
Choose the Right Images: When selecting images to use for cabochons, it’s important to choose images that will look good when reduced in size and viewed through the glass. Images with a lot of fine detail or text may be difficult to see clearly, so it’s best to choose bold, high-contrast images with simple shapes and designs.
Experiment with Image Placement: Before gluing an image to a cabochon, experiment with different placements to see what looks best. Try centering the image, off-centering it, or placing it diagonally. You can also try layering multiple images for a more complex look.
Avoid Air Bubbles: When applying glue to the cabochons, be sure to do so in a thin, even layer and avoid creating air bubbles. Air bubbles can distort the image and make it difficult to see clearly through the glass.
Clean Up Excess Glue: If you accidentally apply too much glue to the cabochon, be sure to clean up any excess before it dries. Use a toothpick or Q-tip to carefully remove any excess glue from around the edges, and wipe away any excess from the top of the cabochon with a damp cloth.
Use Protective Gear: Some types of glue can be harmful if they come into contact with skin or eyes, so be sure to wear gloves and protective eyewear when working with them. It’s also a good idea to work in a well-ventilated area to avoid inhaling any fumes.
Allow Ample Drying Time: Finally, be sure to allow ample drying time for the cabochons before handling and finishing them. Depending on the type of glue used, this may take anywhere from a few hours to overnight. Rushing the drying process can result in the image shifting or coming loose from the cabochon.
By following these tips and tricks, you can create beautiful, professional-looking glass cabochons with ease. It may take a bit of practice to get the hang of it, but with a little patience and experimentation, you’ll be able to create stunning pieces that showcase your unique style and creativity.
Conclusion
After following the steps outlined in this article, you should have successfully glued images to glass cabochons and created beautiful jewelry or other crafts. Remember to be patient during the process and take your time to ensure that everything is done correctly.
Using the right materials is key to success, so make sure you have gathered all the necessary supplies before starting. Clean your cabochons thoroughly and cut your images precisely, as these steps will impact the quality of your finished product.
Choosing the right glue is also important. Use a clear and waterproof glue that can adhere to both glass and paper, such as E6000. Apply it carefully and avoid using too much, as excess glue can be difficult to remove.
Positioning the image on the cabochon is a critical step, and it’s helpful to use a pair of tweezers or other tools to ensure precision. Allow ample drying time before proceeding to ensure the image stays in place.
Trimming the edges and adding epoxy resin will give your cabochons a professional finish. Be careful not to trim too much and avoid cutting the image itself.
Finally, remember to have fun with the process. Gluing images to glass cabochons is an art form, and experimentation and creativity are encouraged. If at first you don’t succeed, don’t be discouraged. Practice makes perfect, and the more you work with these materials, the better your results will be.
In conclusion, follow these steps and tips, gather your supplies, and create something beautiful. Whether it’s jewelry, home decor, or other crafts, gluing images to glass cabochons is a fun and rewarding activity that anyone can enjoy.
Frequently Asked Questions
What type of images can be used for glass cabochons?
You can use any type of image that will fit within the cabochon’s diameter. Printed paper designs work well, but you can also use photos, magazine clippings, or even fabric as long as they are flat.
What is the best glue to use for glass cabochons?
E6000 glue is the most recommended glue for glass cabochons because it dries clear and has a strong adhesive that will keep the image in place.
How long does it take for the glue to dry?
It usually takes approximately 24 hours for the glue to fully dry, so make sure to give yourself enough time when preparing to glue the images.
What is the best way to trim the image edges?
Using a sharp pair of scissors or a craft knife is the best way to trim the excess paper from the edges of the cabochon. Be careful not to cut into the glass or get too close to the edge.
What if the image wrinkles when being placed on the cabochon?
If the image wrinkles when being placed on the cabochon, gently lift it up and try again. If the wrinkles persist, try using a hairdryer to help smooth out the image before gluing it down.
Can I use resin instead of glue?
Yes, you can use epoxy resin as an alternative to glue. It will give the cabochon a glossy finish and will help seal the image in place.
What is the best way to clean the cabochons?
Wiping the cabochons with a microfiber cloth or a soft cloth that won’t leave fibers behind is the best way to clean the cabochons. If there is any debris that won’t come off with a dry cloth, use a damp cloth with a tiny amount of dish soap on it to clean it off.
What types of jewelry can I make with glass cabochons?
You can make a variety of jewelry with glass cabochons, including necklaces, earrings, bracelets, and even rings. The possibilities are endless.
Can I add other embellishments to the cabochons?
Yes, you can add other embellishments such as rhinestones, beads, or small charms to the cabochons. Just make sure they are securely glued down and won’t fall off.
Do glass cabochon jewelry pieces make good gifts?
Yes, glass cabochon jewelry pieces make great gifts for family and friends. They’re unique, easy to make, and can be personalized with different images or designs.