Acrylic is a versatile and widely used material in various industries such as construction, automotive, and electronics. However, bonding acrylic can be a tricky process without the proper adhesive. With a plethora of options available, choosing the right glue for acrylic can be overwhelming. This comprehensive guide will explore the different types of glue for acrylic, factors to consider when choosing one, and provide a step-by-step guide on how to glue acrylic effectively. By the end of this article, you’ll have a better understanding of which adhesive to use for your specific acrylic bonding needs.
Types of Glue for Acrylic
When it comes to gluing acrylic, choosing the right type of glue is crucial for ensuring a strong and long-lasting bond. With the wide variety of adhesives available, it can be difficult to determine which one to use. Different types of glue have their own unique strengths and weaknesses, and picking the wrong one could result in a weak or broken bond. In this section, we’ll take a closer look at some of the most popular types of glue for acrylic, including epoxy adhesives, cyanoacrylate (super glue), solvent-based cement, methyl methacrylate (MMA), UV-curing adhesives, double-sided tapes, and acrylic adhesives. Each one has its own characteristics and is suited for particular applications, so read on to find out which one is the best fit for your needs.
Epoxy Adhesives
Epoxy adhesives are a popular choice when it comes to gluing acrylics. These adhesives consist of two separate components – resin and hardener – that need to be mixed before application. Once mixed, they create a strong and durable bond that can withstand a wide range of environments and temperatures.
Epoxy Adhesives Pros and Cons
Here are some of the pros and cons of using epoxy adhesives for acrylic:
| Pros | Cons |
|---|---|
| – Very strong and durable bond – Can be used for various materials |
– Can be messy to work with – Longer setting and curing time (24-48 hours) – May yellow over time when exposed to UV light |
When to Use Epoxy Adhesives for Acrylic
Epoxy adhesives are a great choice for bonding acrylics when a strong and long-lasting bond is required. They can be used for a variety of projects and are especially useful when bonding acrylic to other materials such as wood, metal, and glass. Since they have a longer setting and curing time, they allow for more time to adjust and position the pieces before the bond sets.
How to Use Epoxy Adhesives for Acrylic
Here are the steps to follow when using epoxy adhesives for acrylic:
1. Clean the surfaces: Make sure the surfaces to be bonded are clean and dry.
2. Mix the epoxy: Follow the manufacturer’s instructions and mix the resin and hardener together.
3. Apply the epoxy: Apply a small amount of the mixed epoxy onto one of the surfaces to be bonded.
4. Position the pieces: Carefully position the pieces together and hold in place for a few minutes to allow the bond to set.
5. Allow to cure: Leave the pieces to cure, following the manufacturer’s instructions. Epoxy adhesives typically require 24-48 hours to fully cure.
When using epoxy adhesives, it’s important to follow the manufacturer’s instructions for mixing and application. Overuse can lead to messiness, so it’s best to apply small amounts at a time and work in sections.
If you need to bond acrylic to other materials and are wondering which glue to use, check out our guide on what is the best glue for aluminum to wood.
Cyanoacrylate (Super Glue)
Cyanoacrylate, also known as “super glue” is a popular adhesive for acrylic due to its fast-drying nature and strong bond. It works by bonding quickly with the surface and creating a strong, tight hold. However, it is important to note that cyanoacrylate works best on small, clean surfaces and may not be as effective on larger areas.
Pros:
- Fast-drying: Cyanoacrylate sets and dries quickly, typically within seconds.
- Strong bond: This glue creates a tight hold that is ideal for small, clean surfaces.
Cons:
- Brittle: Cyanoacrylate is a brittle adhesive and may not hold up well under stress or with heavy use.
- Not ideal for larger surfaces: This glue may not be as effective on larger areas due to its fast-drying nature.
- Odor: The fumes from cyanoacrylate can be strong and may cause irritation.
When using cyanoacrylate on acrylic, it is important to follow the manufacturer’s instructions carefully. Clean the surface thoroughly before applying the glue and use sparingly to avoid excess buildup. Be cautious when using this adhesive as it can bond quickly and can be difficult to remove once dry.
If you need to glue plastic to concrete, our article “How to Glue Plastic to Concrete” may be helpful.
Solvent-based Cement
Solvent-based Cement is a fast-drying adhesive that is specifically designed for bonding acrylic. It usually comes in liquid form and is applied by brush or needle applicator. The cement works by melting the surface of the acrylic, creating a strong bond when the two pieces are pressed together. When using solvent-based cement, it is essential to take precautions as it contains toxic fumes and should be used in a well-ventilated area with protective gloves.
Here are some advantages and disadvantages of using solvent-based cement:
Advantages:
- Fast-drying: solvent-based cement has a shorter drying time compared to other adhesives.
- Strong bond: the cement melts the surface of the acrylic, making the bond incredibly strong.
- Deep penetration: the cement can penetrate deep into the material, making it ideal for application on porous surfaces.
- Water-resistant: solvent-based cement creates a water-resistant bond, making it effective in bonding materials that are exposed to water or moisture.
Disadvantages:
- Requires caution: solvent-based cement contains toxic fumes, and protective gear should be worn when using it.
- Not transparent: the cement is usually white or opaque and cannot be used in applications where transparency is essential.
- No room for error: once the two pieces are joined together, there is no room for error since the bond is incredibly strong and cannot be undone without breaking the acrylic.
- Incompatible with some materials: some materials do not react well to solvent-based cement and may dissolve or become distorted when they come into contact with it.
Tip: It is essential to follow the manufacturer’s instructions carefully when using solvent-based cement. The cement works best when used on clean and dry surfaces.
If you want to learn how to glue acrylic successfully, check out our step-by-step guide on how to glue mason jar lids.
Methyl Methacrylate (MMA)
Methyl Methacrylate (MMA) is a two-part adhesive that is highly effective at bonding acrylic. It is a popular choice for commercial and industrial applications due to its strength, durability, and fast curing time. When the two parts of the adhesive are mixed, the reaction generates a lot of heat that speeds up the curing process. Here are some of the pros and cons of using MMA for gluing acrylic:
Pros:
- MMA creates a very strong bond, making it ideal for structural applications.
- It is highly resistant to impact, chemicals, and temperature changes.
- The curing time is very fast, usually within a few minutes or hours.
- It can be used for bonding large areas of acrylic.
Cons:
- The fumes generated during the curing process can be harmful, so it needs to be used in a well-ventilated area.
- The adhesive is very runny, which can make it difficult to work with on vertical surfaces.
- The two parts of the adhesive need to be mixed in the correct ratio; otherwise, it can affect the strength of the bond.
- It can be quite expensive compared to other types of adhesives.
If you decide to use MMA for gluing acrylic, make sure you follow the manufacturer’s instructions carefully. Mixing the two parts of the adhesive incorrectly can result in a weak bond that can fail over time. Additionally, always wear protective equipment such as a respirator, gloves, and eye protection when working with MMA, as the fumes can be harmful.
Internal link: If you’re looking for information on how to glue stone to stone, check out our article on how to glue stone to stone.
UV-curing Adhesives
UV-curing adhesives are a type of glue for acrylic that use ultraviolet light to cure the adhesive and create a strong bond. These adhesives are often used in industries such as electronics, optics, and medical equipment where a fast curing time and precise application are required.
Advantages of UV-curing Adhesives
One of the main advantages of UV-curing adhesives is their fast curing time. The adhesive sets almost instantly when exposed to UV light, which allows for efficient production and reduces the time spent waiting for the adhesive to cure.
UV-curing adhesives are known for their strength and durability. They form a strong bond with acrylic surfaces that can withstand harsh environmental conditions. Also, these adhesives are resistant to yellowing and discoloration over time, which makes them ideal for applications where aesthetics are important.
Disadvantages of UV-curing Adhesives
One of the main drawbacks of UV-curing adhesives is that they require a specific UV light source to cure properly. This can make them more challenging to work with in certain situations where adequate lighting is not available or possible.
UV-curing adhesives are also quite expensive in comparison to other types of glue for acrylic. Additionally, once the adhesive has been cured, making any adjustments or modifications can be difficult and require the use of specialized equipment.
Applications of UV-curing Adhesives
UV-curing adhesives are primarily used in applications where a fast curing time and precise application are required. They are commonly used in the manufacturing of electronics such as printed circuit boards, where the adhesive needs to be applied in a precise and controlled manner.
Another common application for UV-curing adhesives is in the medical equipment industry. The adhesive can be used to bond acrylic components in medical devices such as lab-on-a-chip devices and diagnostic equipment that require a high level of precision and reliability.
Summary
UV-curing adhesives offer a fast curing time and strong bond for acrylic surfaces, making them ideal for applications such as electronics and medical devices. Despite their high cost, they are an excellent choice for projects where a precise and strong bond is required.
If you want to know more about bonding acrylic to different surfaces such as shells or ceramics, you can read our articles on how to glue shells to a mirror or how to glue ceramic pot. You can also learn about the differences between super glue and PVA glue by reading our article on what is the difference between PVA glue and epoxy glue.
Double-sided Tapes
Double-sided tapes are another option for bonding acrylic sheets. They are convenient and easy to use, requiring no mixing or curing time. They consist of a thin strip of adhesive coated on both sides of a flexible carrier, which is usually made of foam or film. Double-sided tapes can be a good choice for bonding light-duty and small-sized acrylic parts where a strong mechanical bond is not required.
However, it is essential to select a tape that is specifically designed for use with acrylic, as some tapes may not provide strong adhesion or may cause the acrylic to become brittle over time. When choosing a double-sided tape for acrylic, look for one that is acrylic adhesive based to ensure a strong bond and resistance to yellowing.
Keep in mind that double-sided tapes may not be suitable for bonding thicker or heavier acrylic parts, as they may not provide enough strength to hold the weight of the object. Additionally, the bond strength of double-sided tapes may weaken over time or when exposed to temperature changes or moisture.
Here is a comparison table for the different types of glue for acrylic:
| Type of Glue | Advantages | Disadvantages |
|---|---|---|
| Epoxy Adhesives | Good bonding strength, durable, resistant to temperature and chemicals | Long curing time, requires mixing, not transparent |
| Cyanoacrylate (Super Glue) | Fast-drying, easy to use, transparent | Brittle, low bonding strength, may not be waterproof |
| Solvent-based Cement | Fast-drying, good bonding strength | Strong odor, requires ventilation, not suitable for outdoor use |
| Methyl Methacrylate (MMA) | Fast-curing, high bonding strength, resistant to impact and weather | Expensive, requires mixing, difficult to remove, toxic |
| UV-curing Adhesives | Fast-curing, transparent, good bonding strength | Requires UV light source, may not bond well with colored acrylic |
| Acrylic Adhesives | Transparent, good bonding strength, resistant to chemicals and weather | Expensive, requires mixing, may bond poorly with oily surfaces |
| Double-sided Tapes | Convenient, easy to use, no curing time, good for light-duty bonding | May not provide strong bond for thicker or heavier parts, may weaken over time or when exposed to temperature changes or moisture |
For further information on glue for plastic, check out our article on what is the best super glue for plastic. If you are wondering whether super glue is waterproof when dry, our article on is super glue waterproof when dry has got you covered. And if you want to know how long does epoxy glue last, our article on how long does epoxy glue last has all the details you need.
Acrylic Adhesives
Acrylic adhesives are often considered as the best glue for acrylic due to their remarkable bonding properties, high transparency, and resistance to moisture and chemicals. They are mainly used for bonding two transparent surfaces, especially in the manufacturing of aquariums, display cases, and other similar applications that require a clear, invisible bond.
One of the best things about acrylic adhesives is that they offer exceptional strength and durability, making them ideal for bonding acrylics, polycarbonates, and other plastics. They are also available in both two-part and one-part formulations, depending on the specific application and bonding requirements.
Acrylic adhesives come in different grades and strengths. Here are some of the best acrylic adhesives available in the market:
| Product Name | Strength (PSI) | Drying Time | Transparency | Application Method |
|---|---|---|---|---|
| Permabond A011 | 4,000 | 24 hours | Clear | Syringe |
| Scigrip 16 | 3,500 | 5-20 minutes | Clear | Brush or Applicator |
| Devcon Titanium Putty | 8,000 | 4 hours | Opaque | Putty Stick |
Permabond A011 is a two-part acrylic adhesive that offers exceptional bonding strength of up to 4,000 PSI. It is highly resistant to moisture and chemicals, making it perfect for bonding plastics, metals, and other similar substrates. The adhesive comes in a syringe dispensing system, which makes it easy to apply accurately, and has a drying time of 24 hours.
Scigrip 16 is a one-part, clear acrylic adhesive with a bonding strength of up to 3,500 PSI. The adhesive dries quickly, usually within 5 to 20 minutes, and can be applied using a brush or applicator. It is perfect for bonding acrylics, polycarbonates, and other plastics in applications that require a clear, transparent bond.
Devcon Titanium Putty is an opaque, two-part acrylic adhesive that is ideal for bonding metals, ceramics, and plastics. It has a remarkable bonding strength of up to 8,000 PSI and is highly resistant to chemicals and heat. The putty stick dispensing system makes it easy to apply accurately, and the adhesive has a drying time of 4 hours.
When using acrylic adhesives, it is essential to follow the manufacturer’s instructions carefully, including the recommended curing time, proper surface preparation, and application methods. This will help ensure a strong and lasting bond between the two substrates and avoid any potential damages or failures.
Acrylic adhesives are an excellent option for bonding acrylics, polycarbonates, and other plastics due to their high bonding strength, clarity, and resistance to moisture and chemicals. There are different types and grades of acrylic adhesives available in the market, so it’s essential to choose the best one that fits your specific application needs.
Factors to Consider When Choosing a Glue for Acrylic
Choosing the right glue for acrylic can be a daunting task, especially since there are various factors to consider. Each glue type has its own unique features that make it suitable for specific applications. Understanding what to look for when choosing a glue can help you get the best bond strength and durability. In this section, we will discuss the key factors you need to consider when selecting a glue for acrylic. From bond strength to drying time, we will cover the important aspects that affect the bonding quality to help you make an informed decision.
Bond Strength
When choosing a glue for acrylic, one of the most important factors to consider is its bond strength. The bond strength refers to the force required to pull apart the two pieces of acrylic joined by the adhesive. This is especially crucial when gluing acrylic for applications that require strength and durability, such as automotive parts or signage.
Different types of adhesives have varying levels of bond strength. Here is a comparison of some popular options:
| Adhesive Type | Bond Strength |
|---|---|
| Epoxy Adhesives | High |
| Cyanoacrylate (Super Glue) | Medium |
| Solvent-based Cement | Low to Medium |
| Methyl Methacrylate (MMA) | High |
| UV-curing Adhesives | Medium to High |
| Double-sided Tapes | Medium |
| Acrylic Adhesives | High |
It is important to note that the bond strength can also be affected by other factors such as the surface preparation, the amount of adhesive used, and the curing time. It is recommended to follow the manufacturer’s instructions carefully for optimal bond strength.
Ultimately, the level of bond strength required for your project will depend on its specific application. Consider the weight, stress, and environment that the glued acrylic will be exposed to before selecting a glue with the appropriate bond strength.
Drying Time
When considering which glue to use for your acrylic project, the drying time is an important factor to take into consideration. The drying time can vary greatly depending on the type of glue used. Some glue types can dry in as little as a few seconds, while others may take several hours or even days to fully cure.
Below is a table outlining the average drying times for common acrylic adhesives:
| Glue type | Average drying time |
|---|---|
| Epoxy adhesives | 24-48 hours |
| Cyanoacrylate (Super Glue) | 10-30 seconds |
| Solvent-based cement | 30-60 minutes |
| Methyl Methacrylate (MMA) | 10-15 minutes |
| UV-curing adhesives | A few seconds under UV light |
| Double-sided tapes | Instantaneous |
| Acrylic adhesives | 30-60 minutes |
It’s important to note that the drying time can be influenced by several factors, including the temperature and humidity of the environment, the thickness of the adhesive layer, and the type of acrylic being glued. In some cases, it may be necessary to allow the glue to dry for longer than the average times listed above to ensure a strong bond.
When planning your project, be sure to take into account the drying time of the adhesive you plan to use and allow enough time for it to fully cure before handling or using the acrylic. Rushing the drying process can result in a weak bond or even complete failure of the adhesive.
Viscosity
When choosing the best glue for acrylic, viscosity is an important factor to consider. Viscosity refers to the thickness or consistency of the adhesive. Here are some points to consider when it comes to viscosity:
1. Thick vs. Thin Viscosity
Acrylics have a low surface energy which means that thick adhesives tend to work well for bonding them. However, thin adhesives with low viscosity also work well and can seep into small gaps and crevices for a stronger bond. It depends on the specific application and the materials being bonded.
2. Control
Thick adhesives with high viscosity provide better control and are less likely to drip or run. Thin adhesives, on the other hand, are more difficult to control and can make a mess if not used properly.
3. Application
The viscosity of the adhesive can affect the application method. Thick adhesives are typically applied with a squeeze bottle or syringe, while thin adhesives are applied with a brush or needle applicator.
4. Set Time
Thick adhesives may take longer to set and cure, while thin adhesives can set quickly. This is an important consideration when time is of the essence. It’s important to read the product instructions before purchasing the adhesive.
When selecting a glue for acrylic, it’s important to consider the viscosity of the adhesive and how it will affect the bonding process. The right viscosity can make or break the success of your project.
Transparency
When it comes to acrylic, one of the most important factors to consider when choosing a glue is its transparency. This is because acrylic, being a clear plastic, requires a glue that will not affect its transparency or clarity. Here is a table comparing the transparency of different types of glue for acrylic:
| Glue Type | Transparency |
|---|---|
| Epoxy Adhesives | Good to Excellent |
| Cyanoacrylate (Super Glue) | Excellent |
| Solvent-based Cement | Fair |
| Methyl Methacrylate (MMA) | Excellent |
| UV-curing Adhesives | Good to Excellent |
| Double-sided Tapes | Good |
| Acrylic Adhesives | Excellent |
As you can see, some types of glue for acrylic are more transparent than others. Cyanoacrylate (super glue) and acrylic adhesives are the most transparent, while solvent-based cement is the least transparent. Epoxy adhesives, UV-curing adhesives, and methyl methacrylate (MMA) fall in the middle.
It’s important to note that even the most transparent of glues can still affect the clarity of acrylic if applied incorrectly or in too large of a quantity. It’s best to follow the manufacturer’s instructions for application and to use the minimum amount of glue necessary to create a strong bond.
Resistance to Temperature, Moisture, and Chemicals
When choosing a glue for acrylic, one important factor to consider is its resistance to temperature, moisture, and chemicals. Acrylic is often used in applications where it may be exposed to extreme temperatures or harsh chemicals, and it’s important to select a glue that can withstand these conditions.
Here are some things to keep in mind:
- Temperature resistance: Depending on the application, the glue may need to withstand high or low temperatures. Check the manufacturer’s specifications to ensure that the glue can handle the temperatures it will be exposed to.
- Moisture resistance: Acrylic is often used in outdoor or wet environments, so the glue must be able to resist moisture. Look for a glue that has a strong water-resistant bond.
- Chemical resistance: Depending on the application, the acrylic and glue may be exposed to chemicals such as acids, solvents, or oils. The glue must be able to resist breakdown or weakening in the presence of these chemicals.
- UV resistance: If the acrylic and glue will be exposed to sunlight, it is important to select a glue that is UV resistant. Otherwise, the glue may weaken or discolor over time.
It is important to keep in mind that no glue is completely impervious to environmental conditions. However, by selecting a glue with strong resistance to temperature, moisture, and chemicals, you can help ensure that your acrylic project is durable and long-lasting. Be sure to carefully read the manufacturer’s specifications and instructions to ensure that you are using the glue properly and that it is appropriate for your specific application.
Application Method
When it comes to choosing the best glue for acrylic, it is important to consider the application method of the glue. Different adhesives have different application methods, and choosing the right one can make a big difference in the overall success of your project.
Below is a table that outlines the recommended application methods for each type of acrylic adhesive:
| Adhesive Type | Application Method |
|---|---|
| Epoxy Adhesives | Mix equal parts of the resin and hardener and apply to the surface with a brush or syringe. |
| Cyanoacrylate (Super Glue) | Apply a small amount of glue to one surface and press the two surfaces together. The glue should bond almost instantly. |
| Solvent-based Cement | Apply the cement to both surfaces and then press the two surfaces together. Use a clamp to hold the two surfaces in place until the glue dries. |
| Methyl Methacrylate (MMA) | Mix the two components together and apply the mixture to the surface with a brush or syringe. |
| UV-curing Adhesives | Apply a small amount of adhesive to one surface and then use a UV lamp to cure the glue. Once the glue is cured, press the two surfaces together. |
| Double-sided Tapes | Peel off the backing from one side of the tape and apply it to one surface. Then, peel off the backing from the other side of the tape and press the two surfaces together. |
| Acrylic Adhesives | Apply a small amount of adhesive to one surface and then use a brush or roller to spread the adhesive over the entire surface. Then, press the two surfaces together. |
Before applying any type of adhesive to your acrylic project, be sure to read the manufacturer’s instructions carefully and follow them closely. Failure to do so can result in a weak bond or other issues.
In addition to the application method, it is also important to consider the other factors outlined in this guide when choosing the best glue for your acrylic project. By taking all of these factors into account and choosing the right adhesive and application method, you can ensure a strong and long-lasting bond for your acrylic project.
Step-by-Step Guide: How to Glue Acrylic
Gluing acrylic can seem like a daunting task, but with the right materials and techniques, it can be done with ease. In this section, we will walk you through a step-by-step guide on how to glue acrylic. By following these instructions carefully, you will be able to achieve a strong bond and create a seamless look for your project. So let’s get started!
Cleaning
Before you begin gluing acrylic, it’s crucial to make sure that the surfaces to be bonded are free from dirt, grease, and other contaminants. Cleaning the surfaces properly will ensure a strong bond and prevent the glued pieces from falling apart over time. Here are the steps to follow:
| Step | Description |
|---|---|
| Step 1: | Wipe the surface of the acrylic with a clean, dry cloth to remove any loose dust or debris. |
| Step 2: | Prepare a cleaning solution by adding a few drops of dish soap or a small amount of ammonia to a bucket of warm water. Do not use harsh chemicals or solvents that may damage the acrylic surface. |
| Step 3: | Dampen a soft, lint-free cloth or sponge with the cleaning solution, and wipe the surface of the acrylic in a circular motion. Avoid using too much pressure or scrubbing vigorously as this can scratch the surface. |
| Step 4: | Rinse the surface of the acrylic with clean water to remove any remnants of the cleaning solution. |
| Step 5: | Dry the surface of the acrylic with a clean, dry cloth. Make sure that there are no streaks or moisture left on the surface before proceeding to the next step. |
By following these cleaning steps, you’ll ensure that the acrylic surfaces are free from contaminants that can weaken the bond and lead to eventual failure. Be sure to avoid using alcohol-based cleaners or harsh chemicals that can cause damage to the acrylic surface.
Surface Preparation
Before applying any glue to the acrylic surfaces, it is important to properly prepare the surfaces for bonding. Failure to do so can result in weaker bonds and even complete bond failure. Here are the steps to follow for surface preparation:
- Clean the surfaces: Use a mild detergent or soap and water to clean the surfaces of all dirt, dust, oil, and grease. Be sure to rinse thoroughly and allow the surfaces to dry completely before proceeding.
- Sand or buff the surfaces: Create a rough texture on the surfaces by sanding or buffing them using a fine-grit sandpaper or emery cloth. This allows the adhesive to better grip onto the surfaces and create a stronger bond. Be sure to remove any sanding residue before gluing.
- Apply a solvent: Occasionally, certain acrylic surfaces may have a coating that may prevent optimal bonding. In these cases, a solvent like acetone or methyl ethyl ketone (MEK) can be applied to the surfaces to remove the coating. Be sure to test the solvent on a small, inconspicuous area first to ensure it does not damage or melt the acrylic.
- Mask off the surfaces: To prevent accidental bonding, use painter’s tape or masking tape to cover any areas that should not be glued.
Following these surface preparation steps can ensure a strong bond between the acrylic surfaces and the chosen adhesive.
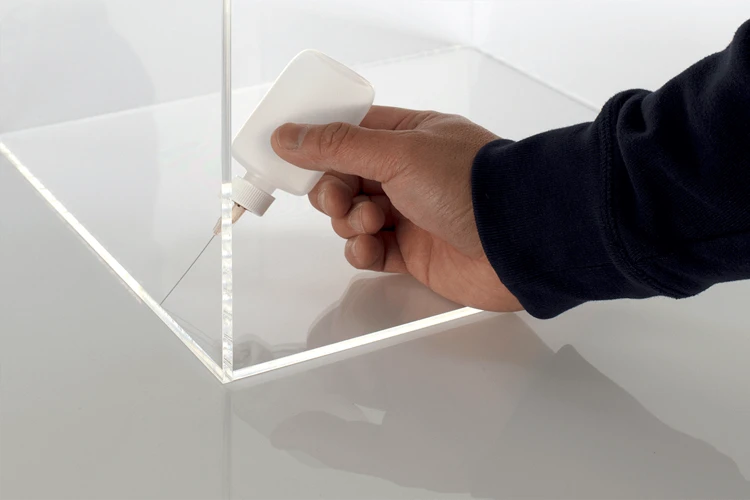
Gluing
To glue acrylic properly, follow the steps below:
- Step 1: Apply the glue to one of the surfaces that will be joined together.
- Step 2: Distribute the glue evenly using a brush, q-tip, or toothpick, making sure that no excess glue is left on the surface.
- Step 3: Press the two surfaces together with gentle, firm pressure.
- Step 4: Clamp or hold the parts in place until the glue dries completely.
It’s important to note that the drying time and curing time will vary depending on the type of glue and the environmental conditions. Before removing the clamps or moving the glued acrylic, make sure the glue is completely dry and cured based on the manufacturer’s recommendation.
Additionally, it’s crucial to avoid touching the glued surfaces before they dry thoroughly. Any fingerprints or smudges can affect the bond strength and the final appearance of the acrylic joint.
If you’re using solvent-based cement, which works by melting the acrylic to form a bond, you should take extra precautions. Firstly, apply the glue following the same steps mentioned above. Then, using a syringe, carefully apply the solvent-based cement directly into the joint, avoiding excess glue.
It’s important to note that solvent-based cement can be hazardous if inhaled or ingested, so working in a well-ventilated area and wearing protective gear such as gloves and a mask is recommended.
Drying and Curing
Once you have applied the glue, it’s important to allow it to dry and cure properly to ensure a strong and durable bond between the acrylic pieces. Here are a few tips for drying and curing the glue for the best results:
- Follow the manufacturer’s instructions: Different types of glue have different drying and curing times. Be sure to read the label and follow the instructions carefully.
- Allow enough time: Don’t rush the drying and curing process, as this can weaken the bond. Most glues require at least 24 hours to fully cure, but some may take longer.
- Apply consistent pressure: While the glue is drying, apply consistent pressure to the acrylic pieces to ensure a tight bond. You can use clamps or heavy objects for this purpose.
- Avoid disturbing the joint: Once the glue is drying, avoid moving or disturbing the joint until it’s fully cured. This can cause the pieces to shift and weaken the bond.
By following these steps, you can ensure that your acrylic pieces are properly glued and will have a strong and durable bond for years to come.
Conclusion
In conclusion, choosing the right glue for acrylic is crucial to ensure a strong and long-lasting bond. With so many types of glue available in the market, it can be overwhelming to decide which one to use. However, considering factors such as bond strength, drying time, viscosity, transparency, resistance to temperature, moisture, and chemicals, and the application method can help narrow down the options.
Epoxy adhesives are ideal for bonding large surfaces and are highly resistant to impact, pressure, and chemicals. Cyanoacrylate (super glue) is excellent for bonding small surfaces quickly but is not recommended for load-bearing applications. Solvent-based cement is easy to use and creates a strong bond, but the fumes can be harmful. Methyl Methacrylate (MMA) is ideal for load-bearing applications and creates a bond stronger than the acrylic itself, but it requires a longer curing time. UV-curing adhesives are perfect for bonding clear acrylic and for applications where fast drying is required. Double-sided tapes are easy to use and leave no residue, but they may not be strong enough for load-bearing applications. Lastly, acrylic adhesives are specifically designed for bonding acrylic and are highly transparent, providing a strong and long-lasting bond.
When gluing acrylic, it is essential to follow a step-by-step guide to ensure a successful bond. This includes cleaning and preparing the surfaces and applying the glue using the appropriate method, such as a brush or a syringe. Drying and curing time must also be considered to avoid compromising the bond’s strength.
In summary, when choosing a glue for acrylic, it’s vital to consider the factors mentioned above and follow a step-by-step guide when applying the adhesive. By doing so, you can ensure a strong bond that will last for years to come.
Frequently Asked Questions
What is the best glue for acrylic?
There are several types of glue that work well with acrylic, but it ultimately depends on the specific application. Epoxy adhesives, cyanoacrylate (super glue), and solvent-based cement are all popular options.
Is super glue good for acrylic?
Cyanoacrylate, also known as super glue, can work well with acrylic. However, it’s important to note that it may not provide a strong enough bond for larger or heavier pieces.
Can you use hot glue on acrylic?
Hot glue can work on acrylic, but it may not provide a strong enough bond for larger or heavier pieces. It’s best used for small projects or as a temporary fix.
How do you prepare acrylic for bonding?
Clean the surface of the acrylic with a mild detergent and water, and then wipe it down with rubbing alcohol. Sand the surface to create a rough texture, which will help the glue adhere better.
How long does it take for acrylic glue to dry?
The drying time for acrylic glue depends on the type of glue being used. Some dry within minutes, while others may take several hours to fully cure.
Can you glue broken acrylic?
Yes, you can glue broken acrylic. However, the strength of the bond will depend on the severity of the break and the type of glue being used.
What is the strongest adhesive for acrylic?
Methyl methacrylate (MMA) is considered one of the strongest adhesives for acrylic. It creates a durable bond and can be used for large or heavy pieces.
Can you use acrylic glue on other materials?
Some acrylic glues can be used on other materials, but it’s important to check the manufacturer’s instructions to ensure compatibility.
How do you remove glue from acrylic?
Glue can be removed from acrylic using a mixture of warm water and mild detergent, or rubbing alcohol. Avoid using harsh chemicals or abrasive materials, as they can damage the surface of the acrylic.
How long does it take for acrylic glue to fully cure?
The curing time for acrylic glue depends on the type of glue being used and the size and weight of the pieces being bonded. Some can fully cure within a few hours, while others may take several days.