Have you ever wondered how to glue styrofoam to metal? It can be a tricky task, as these two materials have very different properties. But fear not, in this article we will provide you with a step-by-step guide on how to glue styrofoam to metal successfully. We will cover everything from choosing the right glue to testing the bond strength. Whether you are working on a DIY project or repairing an industrial item, this guide will help ensure a strong and durable bond. So, let’s dive in and discover the ins and outs of gluing styrofoam to metal.
Why Use Glue Instead of Other Adhesives?
Using glue to bond Styrofoam to Metal surfaces has many advantages over other adhesive types. Glue creates a strong and reliable bond between these two materials, making it perfect for various DIY projects. Some other adhesives, like tape or double-sided adhesive, may not work as well because they often lose their grip over time. Glue can handle different temperatures and still maintain its hold, even during extreme weather conditions. In comparison to welding, using glue is a cost-efficient and easy process, requiring minimal equipment. Unlike nails, screws, or fasteners, glue offers a clean and seamless finish for your project.
However, it is important to note that not all glue types are appropriate for this task. The success of the project mainly depends on choosing the right glue. Some adhesives may even cause the Styrofoam to melt, creating a weak bond. It is essential to use the correct adhesive for each unique project.
If you are looking for more information on bonding other materials, there are many similar guides available online. For example, you can check out our guide on how to glue paper to Plexiglass or how to glue Lexan.
What Makes Glue Different?
If you’re wondering why you should use glue instead of other adhesives to attach Styrofoam to metal, the answer lies in the unique properties of glue. Unlike other adhesives that may not be able to withstand certain types of stress or environmental factors, glue can offer a strong and reliable bond between two surfaces. However, not all glues are created equal, and understanding the differences between them is essential for a successful project. For more information on the different types of glue, check out our guide on PVA glue vs. Epoxy glue.
What Other Factors Should You Consider?
When considering glue as an adhesive for attaching Styrofoam to metal, there are several factors to keep in mind to ensure a strong and lasting bond. One important factor is temperature. Depending on the glue type, some may require a certain temperature range to be effective. For example, if using hot glue, your workspace should be at a warm enough temperature to avoid having the glue harden too quickly.
Another crucial factor is humidity. The amount of moisture in the air can affect how well certain types of glue adhere to surfaces. If working in a humid environment, it may be necessary to use a stronger adhesive or take additional steps to ensure that the surfaces are completely dry before gluing.
Additionally, it is important to consider the weight of the materials being glued together. If working with heavier pieces of Styrofoam or metal, a stronger glue or a larger amount of glue may be needed for a secure bond. On the other hand, smaller pieces may require less glue for a strong hold.
The application method should also be considered. Some glues require specific application techniques to be effective. For example, with contact cement, it is important to apply the glue to both surfaces and allow it to dry slightly before pressing the surfaces together. Other adhesives, like hot glue, require a continuous application of pressure until the glue has hardened.
Lastly, curing time should be considered. Different types of glue take different amounts of time to fully cure, and some may take longer than others. Taking this into account can help you plan your project timeline and avoid disturbing the bond before it has fully set.
Considering these factors can make a significant difference in the strength and durability of the bond between Styrofoam and metal. If you are looking for information on gluing other materials, such as rocks to wood or pottery, check out our other helpful guides, like “How to Glue Pottery” or “How to Glue Rocks to Wood”.
Choosing the Right Glue
Choosing the Right Glue:
When it comes to gluing Styrofoam to metal, choosing the right glue is crucial to a successful bond. Not all adhesives are created equal, and some may even harm the Styrofoam or metal surfaces. It’s important to choose a glue that is specifically designed for use on these two materials.
Types of Glue That Work Best on Styrofoam and Metal:
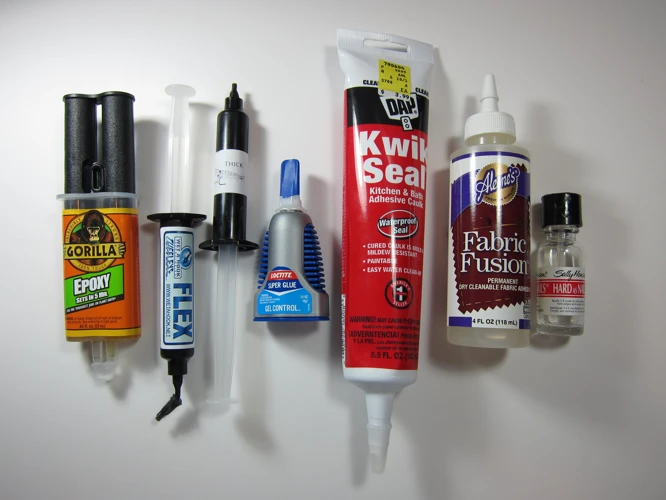
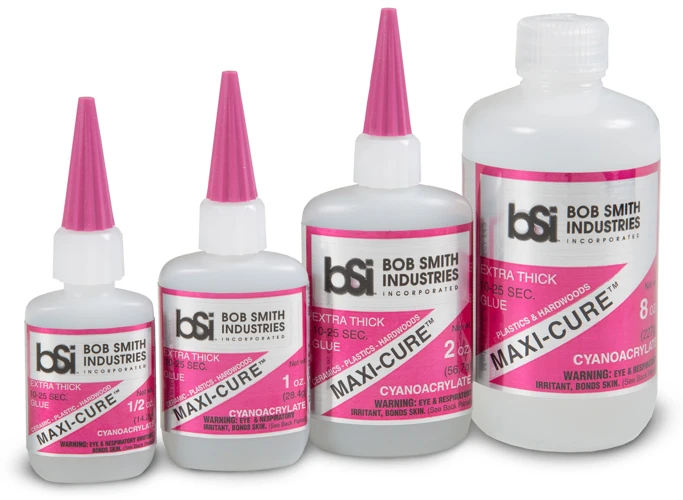
One of the best options for gluing Styrofoam to metal is using epoxy glue. Epoxy glue is a two-part adhesive that consists of resin and hardener. Once mixed together, the two components create a very strong and durable bond that can withstand a lot of stress. Another option is using cyanoacrylate glue, also known as super glue. This type of glue dries quickly and forms a strong bond, but it’s not recommended for larger or heavier pieces as it may not hold up well under long-term stress.
What to Look for in a Glue:
When choosing a glue for gluing Styrofoam to metal, there are a few things to keep in mind. First, look for a glue that is specifically designed for use on these materials. Second, make sure the glue is waterproof and heat-resistant, especially if the bond will be exposed to moisture or high temperatures. Finally, check the glue’s curing time and its ability to fill gaps, if there are any present.
It’s also important to note that not all glues are safe for use on Styrofoam. Some types of glue, such as hot glue, can actually melt the Styrofoam, causing it to deform and become structurally weak.
When choosing a glue for gluing Styrofoam to metal, it’s important to select a glue that is specifically designed for this type of application, taking into account its strength, water-resistance, heat-resistance, curing time, and the ability to fill gaps if necessary. If you’re unsure which glue to use, consult with a hardware store professional or an online resource like /how-to-glue-fiberglass/.
Types of Glue That Work Best on Styrofoam and Metal
When it comes to bonding styrofoam to metal, not all types of glue are created equal. It’s important to choose the right type of glue that provides a strong and durable bond, while also taking into account the unique properties of both materials. From acrylic adhesives to cyanoacrylates, there are a variety of glue options that work well on styrofoam and metal. In this section, we’ll explore some of the best glue options to use for this type of project and what to look for when selecting the right adhesive. If you’re interested in learning about other types of adhesive projects, be sure to check out our article on how to glue pool table felt, how strong super glue is on plastic or how to glue stainless steel sheets to the wall.
What to Look for in a Glue
When choosing a glue for Styrofoam and metal, there are several factors to consider to ensure a strong and long-lasting bond. Here are some things to look for when selecting a glue:
- Compatibility: Make sure the glue you choose is compatible with both Styrofoam and metal. Some adhesives may be strong on one material but may not work well on the other, or may even cause damage.
- Bond Strength: Look for a glue with high bond strength. This is crucial as you will want the bond to be strong enough to withstand any stress or strain that can cause the materials to come apart.
- Quick-Drying: A quick-drying glue is ideal for this project. However, take note of the drying time as it may vary depending on the type of glue and the environmental conditions.
- Waterproof: If the Styrofoam to metal bond will be exposed to moisture, be sure to choose a waterproof glue.
- Heat Resistance: If the bond will be exposed to heat, it’s essential to choose a glue that can withstand high temperatures.
- Flexible: Look for a glue that is flexible enough so that the bond can withstand any movements or vibrations without coming apart.
By considering these factors, you can select a glue that will work best for your Styrofoam to metal project. As a tip, you can use the anchor how long does acrylic glue take to dry to help you select the right quick-drying glue.
Preparing the Surfaces
Before gluing Styrofoam to metal, it’s essential to prepare the surfaces properly to ensure maximum adhesion. Here are the steps to follow:
Cleaning and Sanding the Metal
First, clean the metal surface with soap and water to remove any dirt, grease, or oil. Once the metal surface is clean, use fine-grit sandpaper to gently roughen the surface. This will help the glue adhere better to the metal. After sanding, wipe the surface clean with a damp cloth to remove any dust or debris.
Cleaning the Styrofoam
Next, clean the Styrofoam. It’s best to use a mild soap and water to clean the Styrofoam because some solvents can dissolve it. Avoid using any harsh cleaning chemicals. After cleaning the Styrofoam, let it dry completely before proceeding.
By preparing the surfaces in this way, you will be creating rough surfaces that are perfect for glue to adhere to. If you skip the step of cleaning and sanding the metal and cleaning the Styrofoam, your bond may not be as strong since the glue will be bonding to dirt and debris instead.
Proper preparation of both surfaces is crucial for a strong and long-lasting bond. It’s also essential to choose the right glue for the job. Read on to learn about the available types and how to choose the best glue for your specific project.
Cleaning and Sanding the Metal
Before applying glue to metal, it’s crucial to properly clean and sand the surface. Removing any dirt, dust, or debris from the metal will ensure that the glue bonds correctly and lasts as long as possible. Sanding the metal will create a rough texture that allows the glue to grip onto the surface more effectively. This step may require extra time and effort, but it’s worth it to ensure a strong bond between the Styrofoam and metal. Plus, it will help prevent any potential damage or detachment in the future.
Cleaning the Styrofoam
When it comes to gluing Styrofoam to metal, it’s important to make sure that both surfaces are clean for the best possible bond. To clean the Styrofoam, you will need a few basic tools and materials to ensure that it is free of dust, debris, and oils that could prevent the glue from working properly.
Tools and Materials
| Tool/Material | Description |
|---|---|
| Vacuum | A vacuum can be helpful in removing any loose debris from the Styrofoam. Use a soft brush attachment to gently sweep away any dust or particles that may be trapped in the material. |
| Soap and Water | A solution of mild soap and water can be used to clean the Styrofoam. Be sure to use a gentle formula and avoid harsh chemicals that can damage or dissolve the material. |
| Rag or Sponge | A soft, clean rag or sponge can be used to apply the soap and water solution to the Styrofoam and wipe away any dirt or grime that may be present. |
| Towel | A towel can be used to pat the Styrofoam dry after cleaning to remove any excess moisture. |
Cleaning Process
1. Begin by using the vacuum to remove any loose debris that may be present on the surface of the Styrofoam. Pay extra attention to any crevices or recessed areas where dirt and dust may accumulate.
2. Next, create a soap and water solution by mixing a few drops of mild soap with warm water. Dip the rag or sponge into the solution and wring out any excess liquid.
3. Gently wipe the Styrofoam with the damp rag or sponge, being careful not to apply too much pressure that could damage the material. Pay particular attention to any areas that are particularly dirty or stained.
4. Once you have cleaned the entire surface of the Styrofoam, rinse the rag or sponge with clean water and go over the material once more to remove any soap residue.
5. Use a towel to pat the Styrofoam dry, removing any excess moisture that may be present.
By following these steps, you can ensure that your Styrofoam is clean and ready to be bonded to the metal surface. A clean surface will ensure that the glue works properly and creates a strong, long-lasting bond.
Applying the Glue
When it comes to applying the glue, there are a few key factors to keep in mind to ensure that the bond between the Styrofoam and metal is strong and secure.
Using the Right Amount of Glue
First and foremost, it’s important to use the right amount of glue. Using too much glue can cause it to seep out and create a messy, uneven bond. On the other hand, using too little glue can result in a weak bond that may not hold up over time.
A good rule of thumb is to apply a thin, even layer of glue to the surface of both the Styrofoam and the metal. This will give you a strong and secure bond without being excessive.
Applying Glue to Both Surfaces
Another important factor to consider when applying glue is to make sure you apply it to both surfaces that you want to bond. This means both the Styrofoam and the metal should be coated with a thin, even layer of glue.
By applying glue to both surfaces, you are ensuring that the bond is strong and secure from all angles. It also helps to create a better seal between the two materials.
Assembling the Pieces
Once you’ve applied glue to both the Styrofoam and the metal, it’s time to carefully assemble the pieces. Take your time and ensure that the two surfaces are aligned exactly as you want them to be.
Gently press the Styrofoam and metal together, making sure that the glue spreads evenly between the two surfaces. This will help to create a strong and secure bond that will hold up over time.
It’s important to note that once the two surfaces have been pressed together, they should not be moved until the glue has fully cured. This can take anywhere from a few hours to a day or more, depending on the type of glue you are using.
Cleaning Up Excess Glue
If you happen to get any excess glue on the surface of either the Styrofoam or the metal, it’s important to clean it up before it dries. You can use a damp cloth or paper towel to gently wipe away any excess glue.
If you wait too long to clean up excess glue, it can become difficult or even impossible to remove. This can result in a messy and uneven bond that may not hold up over time.
Applying glue to Styrofoam and metal requires a bit of patience and attention to detail. By following these tips and taking your time, you can create a strong and secure bond that will last for years to come.
Using the Right Amount of Glue
One of the most crucial aspects of gluing styrofoam to metal is using the correct amount of glue. Too little glue could result in a weak bond, while too much glue can create a mess and ruin the appearance of your project. Finding the balance between the two is essential. But how much is enough? Let’s explore in detail below.
Applying Glue to Both Surfaces
When gluing Styrofoam to metal, applying glue to both surfaces is crucial for creating a strong bond. This means you need to apply glue to both the Styrofoam and the metal before joining the two pieces together. Here are some tips for applying glue to both surfaces effectively:
| Tip | Explanation |
|---|---|
| Use the right amount | Too little glue won’t create a strong bond, while using too much glue can cause it to overflow and create a mess. It’s important to use just the right amount for a strong and neat bond. Follow the manufacturer’s instructions for the recommended amount of glue to use. |
| Spread evenly | When applying the glue, make sure to spread it evenly over the entire surface to be bonded. This will ensure that the bond is evenly distributed and strong throughout the entire piece. |
| Use the right technique | When applying the glue, use a smooth, consistent motion to avoid creating any lumps or bumps that could affect the bond. Avoid using a back-and-forth motion, as this can create an uneven surface and weaken the bond. |
| Wait for the glue to dry | Before joining the Styrofoam and metal together, wait for the glue to dry partially. This will help the glue form a tacky surface that will bond better with the other surface. Refer to the manufacturer’s instructions for the recommended drying time. |
By following these tips and applying glue to both surfaces, you can create a strong and reliable bond between Styrofoam and metal that will last for a long time.
Assembling the Pieces
Now that you have applied glue to both surfaces, it’s time to assemble the pieces. Make sure you align the Styrofoam and metal precisely before you press them together.
To ensure proper alignment, you can use a ruler or measuring tape. Additionally, you can use clamps to hold the pieces together while the glue sets. Be careful not to use too much pressure with the clamps as it may cause the Styrofoam to deform.
If you’re working with larger pieces of Styrofoam or metal, it may be more challenging to align them correctly. In this case, you can use a support structure, such as a jig or a frame, to hold the pieces in place while the glue sets.
Table: Tips for Assembling the Pieces
| Tips | Explanation |
|---|---|
| Align precisely | Make sure the Styrofoam and metal pieces are aligned correctly before pressing them together. Use a ruler or measuring tape. |
| Use Clamps | To hold the pieces in place while the glue sets, use clamps, but be careful not to apply too much pressure. |
| Support Structure | For larger pieces, use a support structure such as a jig or frame to hold your pieces in place while the glue sets. |
Once the Styrofoam and metal are aligned correctly, gently press them together. If you’re working with a larger project, use a roller to apply pressure evenly across the surface. Avoid using your bare hands as it may cause unwanted dents or deformation.
Remember to wipe off any excess glue that may seep out from the edges of the glued area. You can use a paper towel or a clean cloth to remove the excess glue. Wait for some time as directed by the glue manufacturer before releasing the clamps or support structure.
In the next section, we’ll go over how long you should wait for the glue to cure and the factors that can affect the curing time.
Allowing the Glue to Cure
Once you’ve applied the glue to your Styrofoam and metal surfaces, the next step is to wait for the glue to cure. Curing time can vary depending on the type of glue you’ve used, the room temperature, and the humidity level. It’s important to follow the manufacturer’s recommended curing time for the specific glue you’ve chosen.
Waiting for the glue to cure is crucial for achieving a strong bond between the Styrofoam and metal. If you try to move the pieces too soon, the glue may not have fully set, and the bond may break. As a general rule, it’s best to wait at least 24 hours before handling the glued object.
If you’re working in a colder environment, the curing time may take longer than expected. In this case, you may need to wait up to 48 hours for the glue to fully cure. On the other hand, if you’re in a warmer environment, the curing time may be faster than anticipated.
It’s important to avoid touching or moving the glued object during the curing process, as this can disrupt the bond and cause the pieces to shift out of place. Additionally, keep the area well-ventilated to help with the curing process.
Once the glue has fully cured, you can proceed to the next step of your project. It’s a good idea to inspect the bond to ensure that it’s strong enough to withstand use. If the bond seems weak, you may need to reapply the glue and wait for it to cure again.
Allowing the glue to cure is an important step in creating a strong bond between Styrofoam and metal. Follow the manufacturer’s recommended curing time, and consider factors like temperature and humidity level. Avoid touching or moving the glued object during the curing process, and inspect the bond to ensure that it’s strong enough.
How Long Should You Wait?
One important consideration when gluing styrofoam to metal is the amount of time you’ll need to wait for the glue to cure. Waiting too little can result in a weak bond that may break easily, while waiting too long can be frustrating if you’re eager to move on with your project. However, the exact amount of time you’ll need to wait can depend on a variety of factors, from the type of glue you’re using to the environment in which you’re working. Let’s dive deeper into the factors that can affect curing time and how to ensure a strong bond.
Factors That Can Affect Curing Time
The curing time of the glue used to bond Styrofoam to metal can be affected by various factors. Understanding these factors can help you achieve a stronger and more reliable bond. Let’s take a closer look at them:
| Factors | Explanation |
|---|---|
| Humidity | High levels of humidity can slow down the curing process. The excess moisture in the air can react with the glue and cause it to take longer to dry and harden. |
| Temperature | The ideal temperature for the curing process is 70°F to 85°F (21°C to 30°C). If the temperature is too low or too high, it can cause the glue to cure at a slower rate. |
| Pressure | Applying pressure during the bonding process can improve the strength of the bond and reduce curing time. However, too much pressure can cause the glue to squeeze out of the joint and weaken the bond. |
| Thickness of Glue | The thickness of the glue layer can affect the curing time. Thicker layers take longer to cure than thinner ones. |
| Type of Glue | Different types of glue have different curing times. Some may require longer curing times than others, depending on the specific chemical composition of the glue. |
| Cleanliness of Surfaces | If the surfaces being bonded are not clean or free of debris, it can affect the bonding strength. The presence of dirt, dust, or grease can also affect the curing time of the glue. |
By taking these factors into account and following the guidelines for the specific glue you are using, you can achieve a strong and reliable bond between Styrofoam and metal.
Testing Your Bond
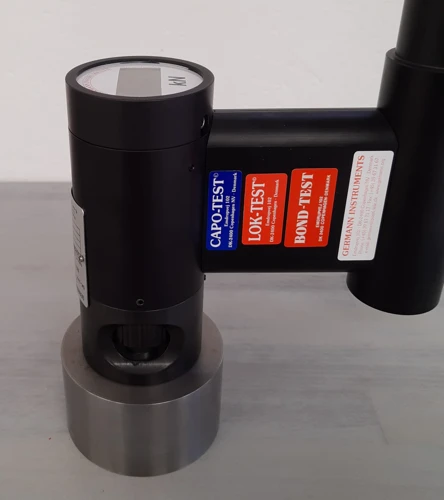
Now that you have glued the styrofoam to the metal, it’s important to make sure that the bond is strong enough to hold the materials together. The last thing you want is for the pieces to fall apart after all your hard work.
How to Check If Your Bond Is Strong Enough: The best way to test the bond is to give it a gentle tug. If the styrofoam feels securely attached to the metal, then you can move on to the next step. However, if the styrofoam starts to peel away from the metal, then you’ll need to reinforce the bond with more glue.
It’s important not to apply too much pressure when testing the bond, as this could cause additional damage to the materials. A gentle tug should be enough to determine if the bond is secure.
Factors That Can Affect Curing Time: The bond between styrofoam and metal may take some time to fully cure, depending on the type of glue you used and the environmental conditions. Be sure to follow the manufacturer’s instructions for the glue you selected and allow enough time for the bond to fully set before testing it.
Factors such as humidity, temperature, and air flow can also affect the curing time. If you’re working in a humid or cold environment, it may take longer for the bond to fully cure. Similarly, if there’s a lot of airflow around the bond, it may dry more quickly.
Final Thoughts: Testing the bond between styrofoam and metal is an important step in ensuring that your project is sturdy and reliable. Remember to use a gentle touch when testing the bond, and to allow enough time for the glue to fully cure before putting any stress on the materials. With the right techniques and patience, you can successfully glue styrofoam to metal and create a strong, long-lasting bond.
How to Check If Your Bond Is Strong Enough
After allowing the glue to cure for the recommended time, it’s important to test the strength of the bond before using the glued object. One way to test the bond is to gently wiggle or twist the two pieces of styrofoam and metal. If there is any movement or separation, the bond may not be strong enough.
Another test involves applying pressure to the joint. Use a small object such as a pencil or finger and press down firmly on the joint, applying pressure for a few seconds. If the bond holds and there is no movement or separation, it should be strong enough.
If you’re unsure about the strength of your bond, you can also use a weight to test it. Place a heavy object on top of the glued area and leave it for a few minutes. If the bond can withstand the weight, then it should be strong enough for use.
It’s important to note that even if the bond appears strong, it may not be suitable for heavy use or weight-bearing objects. Always follow the manufacturer’s instructions and guidelines for your specific glue and application. If in doubt, it’s best to reinforce the bond with additional glue or mechanical fasteners.
Tips and Tricks
When it comes to gluing Styrofoam to metal, there are certain tips and tricks that can make the process much easier and more successful. Here are a few things to keep in mind:
Working with Larger Pieces of Styrofoam or Metal: If you’re working with larger pieces of Styrofoam or metal, it can be helpful to have an extra set of hands to hold the pieces in place while the glue dries. Alternatively, you could use clamps or weights to hold them together. Just be sure to use caution when handling heavier pieces of metal to avoid injury.
What to Do if You Make a Mistake: If you accidentally apply too much glue or make a mistake during the gluing process, don’t panic. You may be able to remove the excess glue using a solvent like acetone or rubbing alcohol. Just be sure to follow the manufacturer’s instructions and use the solvent in a well-ventilated area.
Choosing the Right Temperature: Depending on the type of glue you’re using, the temperature of the room may impact how well the glue bonds. If the room is too cold, the glue may take longer to set. Conversely, if the room is too warm, the glue may dry too quickly, making it difficult to adjust the pieces. Try to work in a room that is around 70 degrees Fahrenheit for optimal results.
Using the Right Amount of Glue: As we mentioned earlier, using too much glue can be a common mistake. Not only can it be messy, but it can also weaken the bond between the Styrofoam and metal. To avoid this, try applying the glue in thin, even layers. You can always add more if necessary.
Testing your Bond: Once the glue has dried, it’s important to test the bond to ensure it’s strong enough to hold. Gently tug on the pieces to see if they come apart easily. If they do, you may need to add more glue or adjust the positioning of the pieces.
Patience is Key: Finally, it’s important to remember that patience is key when it comes to gluing Styrofoam to metal. Don’t rush the process, even if you’re tempted to check the bond before it’s fully cured. Wait the recommended amount of time and resist the urge to move or adjust the pieces before the glue has fully set.
Working with Larger Pieces of Styrofoam or Metal
When it comes to gluing larger pieces of styrofoam or metal together, the task can seem daunting. With the added weight and potential for misalignment, it’s important to approach the process with caution. However, by following some key tips and tricks, you can ensure a successful bond between these two materials. So, if you’re ready to tackle a larger project, keep reading for our expert advice on handling larger pieces of styrofoam and metal.
What to Do if You Make a Mistake
Mistakes can happen during any project, even with the best preparation. If you make a mistake when gluing Styrofoam to metal, don’t panic. There are a few steps you can take to fix the problem.
1. Assess the Damage: The first step is to assess the damage. If the mistake is minor, you might be able to fix it without starting over. If the pieces have already bonded, it is best to start again.
2. Separate the Pieces: If the pieces have not fully bonded, you can try to separate them. Use a putty knife to gently pry them apart. Be careful not to damage either surface.
3. Clean the Surfaces: Once the pieces are separated, clean both surfaces with rubbing alcohol or acetone. This will remove any residue and prepare the surfaces for regluing.
4. Apply New Adhesive: Apply a fresh coat of adhesive to both surfaces, following the instructions carefully. Use a clean brush or applicator.
5. Reassemble the Pieces: Carefully reposition the Styrofoam piece on the metal surface and press it down firmly. Wipe away excess glue, and let the bond cure completely.
Remember, it is always best to double-check your measurements and alignment before gluing to avoid mistakes. However, in the event of a mistake, don’t worry. With a little patience and care, you can fix the problem and still achieve a strong bond between Styrofoam and metal.
Conclusion
In conclusion, gluing styrofoam to metal can seem like a daunting task, but with the right approach and tools, it can be done successfully. It is important to choose a glue that is specifically formulated to work with both styrofoam and metal. Additionally, proper surface preparation is key to ensuring a strong bond.
Take the time to carefully clean and sand the metal surface, and ensure that the styrofoam is also free of any debris or oils. When applying the glue, be sure to use the correct amount and apply it to both surfaces.
Once the pieces are assembled, be patient and allow the glue to cure fully. This may take several hours or even a full day, depending on the type of glue used. It is also important to test the bond before assuming that the project is complete.
Remember to work carefully and accurately, especially if dealing with large pieces of styrofoam or metal. Mistakes can happen, but there are always ways to repair or fix the issue.
Overall, with careful planning and execution, gluing styrofoam to metal can result in a strong and durable bond. So, go ahead and tackle that DIY project knowing that you have the tools and knowledge to make it a success.
Frequently Asked Questions
1. Can I use regular glue to attach Styrofoam to metal?
No, regular glue won’t work as it won’t provide a strong and durable bond between these two materials.
2. Can I use hot glue to glue Styrofoam to metal?
No, hot glue is not recommended as it can melt Styrofoam, and the bond it provides may not be strong enough for long-term use.
3. Do I need to clean the surfaces before gluing?
Yes, you should clean both the metal and Styrofoam surfaces thoroughly before applying glue to ensure that there are no oils, debris, or dust that can hinder the bonding process.
4. How much glue should I use to attach the Styrofoam to the metal?
You should apply a thin layer of glue on both the metal and Styrofoam surfaces. Make sure to spread it evenly so that the bond is uniform.
5. How long does it take for the glue to cure?
Typically, it takes 24 hours for the glue to cure completely. However, the curing time may vary depending on the type of glue you’re using and the environmental conditions.
6. Can I paint the glued Styrofoam and metal surfaces?
Yes, after the glue has completely cured, you can paint the glued surfaces to match your desired color. However, you should avoid using oil-based or solvent-based paints, as they can corrode the Styrofoam.
7. Which glue is best for gluing Styrofoam to metal?
One of the best options is a solvent-based polystyrene adhesive, also called “styrofoam glue.” It’s specifically designed for bonding Styrofoam to metal and provides a strong and durable bond.
8. Can I use superglue to attach Styrofoam to metal?
No, superglue is not recommended for this purpose as it can’t bond well with Styrofoam, and the bond it creates may not be strong enough for long-term use.
9. Can I use epoxy glue to glue Styrofoam to metal?
While epoxy glue can bond Styrofoam and metal well, it’s not recommended because it can be brittle and may not withstand the natural flexing that can occur between the two materials.
10. Do I need to clamp the glued pieces together?
No, clamping is not necessary when gluing Styrofoam to metal. However, you can use tape or any other material to keep the pieces together until the glue completely cures.