Introduction
Creating your own glue at home can be a fun and rewarding DIY project. Whether you’re looking to save money, reduce your reliance on store-bought products, or simply enjoy the satisfaction of making something yourself, making your own glue is a great place to start. In this article, we’ll take a look at the different types of adhesives available, explore the process of making glue step by step, and provide some easy and effective DIY glue recipes that you can try at home. So put on your crafting apron, grab your mixing bowls, and let’s get started!
Why Make Your Own Glue?
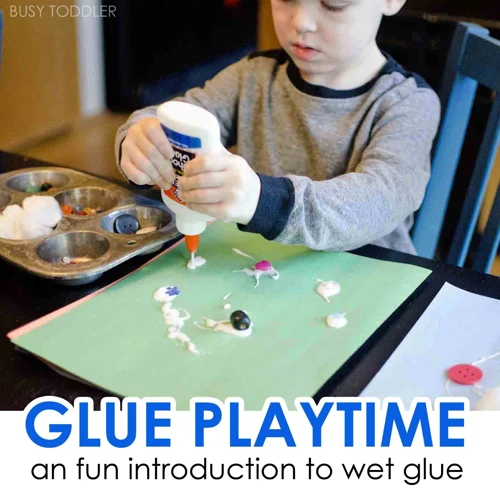
Making your own glue at home has several benefits that make it worth considering. For one, it is a fun and creative activity that you can do with your kids or friends. Additionally, it allows you to control the ingredients that go into your adhesive, which can be particularly beneficial if you or someone in your household has allergies or sensitivities to certain chemicals.
Another reason to make your own glue is that it can save you money. Commercial-grade adhesives can be expensive, and the cost can add up quickly if you find yourself using them frequently. By making your own glue at home, you can save money and ensure that you always have the adhesive you need on hand.
Homemade glue is often more eco-friendly than store-bought alternatives. Many commercial adhesives contain harsh chemicals that can be damaging to the environment, but by making your own glue, you can avoid contributing to this problem.
Finally, making your own glue can be a lot of fun and can be used in a variety of crafts and activities. From creating slime and flubber to decorating with crackle paint, there are countless ways to use homemade glue to bring your creative vision to life. To learn some fun DIY glue recipes, check out our DIY Glue Recipes section below.
| Reasons to Make Your Own Glue | Benefits |
|---|---|
| Control and avoid certain chemicals in glue | Beneficial for allergies and sensitivities |
| Cost-effective | Saves money |
| Eco-friendly | Reduces environmental impact |
| Fun and versatile | Great for crafts and creative projects |
Types of Adhesives
When it comes to adhesives, there are a plethora of options available for crafting, woodworking, household repairs, and more. Natural and synthetic adhesives each have their own unique properties, making them useful in different applications. It’s important to choose the right adhesive for the job to ensure a strong and long-lasting bond. In this article, we will explore the different types of adhesives available and their most common uses. As you follow along, keep in mind the type of glue that would be best for your specific project. You may also come across some interesting DIY projects using glue that you never thought possible!
Natural vs. Synthetic
When it comes to adhesives, there are two main categories: natural and synthetic. Natural adhesives are derived from organic sources such as plants, animals, and minerals. They have been used for thousands of years, dating back to ancient civilizations. In contrast, synthetic adhesives are man-made from a variety of chemical compounds.
One advantage of natural adhesives is that they are often more environmentally friendly because they are made from natural and renewable resources. They also tend to be biodegradable, which means they can break down naturally over time and aren’t harmful to the environment. Some natural adhesives such as flour and water glue, milk glue, and corn starch glue are safe for children to use.
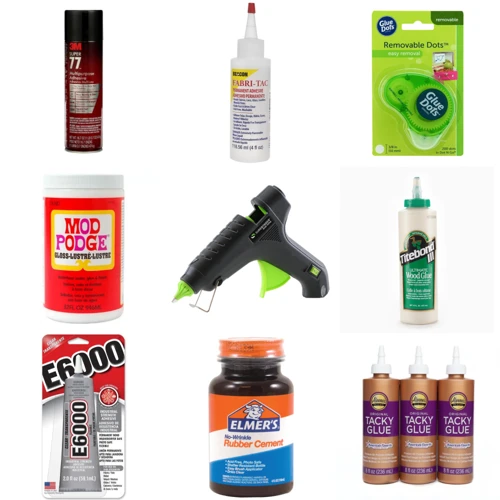
On the other hand, synthetic adhesives are generally more versatile and can bond a wider range of materials. They tend to be stronger than natural adhesives and can provide longer-lasting bonds. Some examples of synthetic adhesives are cyanoacrylate (super glue), epoxy, and silicone.
Both natural and synthetic adhesives have their own advantages and disadvantages. Natural adhesives tend to be more eco-friendly, whereas synthetic adhesives have more diverse uses and stronger bonding. It’s ultimately up to personal preference and the specific needs of the project to decide which type of adhesive to use.
With that being said, some people prefer to make their own adhesive from scratch. Check out the DIY glue recipes section for some inspiration on how to make your own natural adhesive at home. If you’re more interested in synthetic adhesives, check out these links:
/how-to-make-liquid-latex-with-elmer-s-glue/
/how-to-make-slime-out-of-glue-and-toothpaste/
Popular Types of Glue
When it comes to popular types of glue, there is a wide variety of options available for different purposes. Here are a few examples of common types of glue:
- Super Glue: This type of glue, also known as cyanoacrylate glue, is great for bonding materials such as plastic, metal, rubber, and ceramics. It dries quickly and forms a strong bond, making it a popular choice for DIY projects and repairs.
- Wood Glue: As the name suggests, wood glue is specifically designed for woodworking projects. It creates a strong bond between pieces of wood and can be used for furniture repairs, cabinetry, and more. You can even make your own wood glue at home using natural ingredients.
- White Glue: Also known as school glue or PVA glue, white glue is a popular choice for arts and crafts projects. It can be used on various materials, including paper, cardboard, and wood, and dries clear. You can even make fun glue balls with it for sensory play!
- Epoxy: Epoxy glue is a two-part adhesive that creates a strong, permanent bond. It is commonly used in construction, automotive repairs, and DIY projects. It can bond metal, wood, ceramics, glass, and more.
- Contact Cement: This type of glue is great for bonding large surfaces together, such as laminates and veneers. It creates a strong, waterproof bond and is resistant to heat and chemicals. It is commonly used in construction, automotive repairs, and woodworking.
No matter what type of glue you use, it’s important to follow proper storage and handling techniques. That way, you can ensure your glue lasts as long as possible and maintains its effectiveness. And if you’re feeling adventurous, why not check out some unique glue DIY projects, like creating a crackle paint effect with glue or making DIY flubber with glue? The possibilities are endless!
How to Make Glue
Making your own glue from scratch is a fun and economical way to create a sticky solution for all your home and school projects. Plus, you won’t have to rely on store-bought adhesives which can be costly. In this section, we’ll outline the steps you need to take to create your own DIY glue from basic ingredients that you may already have in your kitchen. But before we dive into the process, let’s briefly identify the different types of adhesives you can use and their pros and cons. If you’re interested in making homemade glue right away, you can learn how to make different types of glue recipes in the next section. And if you want to level-up your art projects, check out this guide on how to make sand sculptures with glue.
Step 1: Gather Your Ingredients
One of the fun aspects of making your own glue is the opportunity to gather common ingredients from around your home and kitchen. Here are the supplies you’ll need to make your homemade glue:
| Ingredient | Purpose |
|---|---|
| Water | Forms the base of the glue |
| Flour or Cornstarch | Thickens and binds the glue |
| Sugar | Used in some recipes as a natural preservative |
| Vinegar | Used in some recipes to promote long-lasting preservation |
| Milk | Forms the base of some natural glues |
| Borax or Contact Lens Solution | Used in some recipes to create a slime-like consistency |
Some glue recipes call for specialty ingredients like gelatin or resin, but the above ingredients are all you’ll need for most basic homemade glue recipes. For example, one simple recipe using only flour and water is known as “paste flour.” To make it, you’ll need to stir equal parts of flour and water together until the mixture forms a smooth and consistent paste. If you’d like to make glue with sugar and water instead, you can follow this recipe.
By gathering all of your ingredients ahead of time, you’ll be ready to begin making your homemade glue with ease.
Step 2: Prepare the Mixture
To prepare the glue mixture, you’ll need to gather the ingredients listed in Step 1. Once you have everything you need, follow these simple instructions:
| Ingredients | Measurements |
|---|---|
| Vinegar | 1 1/2 cups |
| Cornstarch | 1/2 cup |
| Baking soda | 1 teaspoon |
| Cold water | 1/4 cup |
| Food coloring (optional) | A few drops |
Step 1: In a medium-sized pot, mix together the vinegar and cornstarch until the cornstarch is fully dissolved.
Step 2: Add the baking soda to the pot and mix well. The mixture will start to fizz and bubble.
Step 3: Slowly pour the cold water into the mixture, stirring continuously. The mixture will start to thicken and become more glue-like.
Step 4: If you want to add color to your glue, now is the time to add a few drops of food coloring and stir until the color is evenly distributed.
Step 5: Remove the pot from the heat and let the mixture cool to room temperature. It should be thick and slightly glossy.
Your homemade glue mixture is now ready to use! You can move on to making slime or use it for any other art or school project. Remember to store any leftover glue in an airtight container in the fridge to prevent it from spoiling.
Step 3: Cook the Glue
Once you have mixed all the ingredients together, it’s time to cook the glue. This step requires a bit of patience as you need to keep stirring the mixture constantly. Here are the steps to follow:
First, place the pot over medium heat on your stove. Don’t turn it on high as that may cause the glue to boil over or burn.
Second, stir constantly with a wooden spoon to prevent the glue from sticking to the bottom of the pot. Make sure to scrape the sides of the pot to get any lumps out.
Third, watch for the glue to thicken up. This should take about 10-15 minutes, but it could take longer depending on the recipe you are using. Keep stirring until the glue has a thick and smooth consistency.
Fourth, test the glue by dipping a piece of paper or cardboard into it. If the material sticks together well and the glue doesn’t come off easily, your glue is ready.
Finally, remove the pot from the stove and let the glue cool down. You can now transfer the glue into a clean and airtight container for storage.
Important: Be careful not to overcook the glue, as it could turn into a hard and unusable substance. Also, make sure to use caution when handling hot pots and utensils. Allow everything to cool down before cleaning up.
To summarize, cooking the glue is a crucial step in the homemade glue-making process. You need to be patient, attentive, and follow the recipe instructions carefully to get the right consistency. Happy glue-making!
| Step 3: Cook the Glue |
|---|
| 1. Place the pot over medium heat on your stove. |
| 2. Stir constantly with a wooden spoon. |
| 3. Watch for the glue to thicken up. |
| 4. Test the glue by dipping a piece of paper or cardboard into it. |
| 5. Remove the pot from the stove and let the glue cool down. |
Step 4: Store and Use Your Glue
Once your homemade glue has been cooked and cooled, it’s important to know how to properly store and use it to ensure its longevity and effectiveness. Here are some tips to follow:
- Storage: Store your glue in an airtight container such as a mason jar or plastic container. Keep it in a cool, dry place away from direct sunlight. Homemade glue can last for several weeks if stored properly.
- Application: Apply the glue to both surfaces that you want to stick together. Use a brush or applicator to spread it evenly. The glue will need some time to dry, typically within a few hours. Be mindful of how much glue you use; too little will not create a strong bond, and too much can cause the paper to wrinkle.
- Substitutions: If your glue is too thick, you can thin it out with a small amount of warm water. Alternatively, you can make your glue stronger by adding more flour or cornstarch. Experiment with different proportions to achieve the desired consistency.
- Caution: Be careful while handling the glue, especially if you have sensitive skin or allergies. If you accidentally get glue on your skin, wash it off immediately with warm soapy water. Do not ingest or inhale any of the ingredients used in making the glue.
By following these simple steps, you’ll be able to create and use your homemade glue with ease and achieve long-lasting results.
DIY Glue Recipes
Now, it’s time to get creative and make your own glue! By making glue at home, you can save money and create a customized product that meets your specific needs. Here are some simple DIY glue recipes you can try using everyday household items.
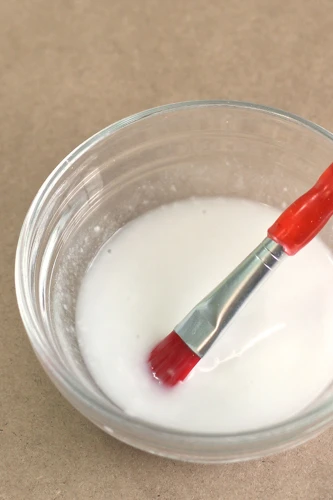
Corn Starch Glue is an easy-to-make adhesive solution that’s non-toxic and safe for children to use.
Flour and Water Glue is a classic homemade glue recipe that has been used for generations.
Milk Glue is a unique recipe that’s perfect for paper-based projects and can create a glossy finish. Let’s dive into each of these recipes and learn how to make them step-by-step.
Corn Starch Glue
Corn starch glue is an easy-to-make adhesive that is perfect for lightweight craft projects. Here’s what you’ll need to make it:
- Corn starch
- Cold water
- Boiling water
- A small saucepan
- A whisk or spoon
To make corn starch glue, begin by mixing 1/4 cup of corn starch and 1/4 cup of cold water in a small saucepan. Use a whisk or spoon to stir the mixture until it is smooth and free of lumps. Once the mixture is smooth, add 1 1/2 cups of boiling water to the saucepan and stir continuously until the mixture thickens. This should happen quickly, within 30 seconds to a minute, so make sure to keep whisking.
Tip: If you find that your mixture is taking longer than a minute to thicken, try raising the heat and continuing to whisk until it thickens.
Once the mixture is thick, remove it from the heat and let it cool. Your corn starch glue should have a thick, gel-like consistency. If you find that it is too thick, you can add a little more boiling water to thin it out.
Tip: You can add food coloring to your corn starch glue to give it a fun, colorful twist. Simply add a few drops of food coloring to the cold water before you begin mixing the glue.
To use your corn starch glue, apply it to one surface and press the other surface onto it. Hold them together until the glue sets, about 10-15 minutes.
Tip: Corn starch glue works best on lightweight materials such as paper, cardboard, and thin fabric. It may not be strong enough for heavier materials such as wood or metal.
Corn starch glue is a great option for quick and easy crafting projects. It’s non-toxic and easy to make with just a few simple ingredients. Plus, it can be stored in an airtight container for future use. Give it a try and see how it works for your next project!
Flour and Water Glue
One DIY glue recipe that you can try at home is the flour and water glue. It’s an easy and affordable way to create a glue that can be used for a variety of projects. Here’s how you can make it:
- Gather your ingredients. For this recipe, all you need is flour and water. It’s that simple!
- Prepare the mixture. In a mixing bowl, combine equal parts flour and water. For example, you could use 1/2 cup of flour and 1/2 cup of water.
- Cook the glue. Transfer the mixture to a saucepan and heat it over low to medium heat. Stir constantly for about 5 minutes or until the mixture thickens and forms a glue-like consistency. Be sure not to overcook the mixture or it will become too thick and difficult to use as glue.
- Store and use your glue. Once the glue has cooled, transfer it to an airtight container and store it in the fridge. This glue should be used within a week or so as it has a tendency to spoil quickly. To use the glue, simply apply it to one surface and press the surfaces together firmly.
This flour and water glue is great for paper, cardboard, and other lightweight materials. However, it may not be the best option for heavier materials or for projects that require a more durable bond. For those kinds of projects, you may want to consider using a stronger adhesive, such as epoxy or superglue.
The flour and water glue is a simple and versatile option for all sorts of crafting and DIY projects. Give it a try and see what kind of creative uses you can find for it!
Milk Glue
Milk glue is an easy-to-make adhesive that has been used for centuries, dating back to ancient Egyptian times. This glue is perfect for paper, cardboard, and even wood. Using milk glue is a great way to save money on store-bought glue while also reducing your carbon footprint. Here’s how to make it in just a few easy steps:
Ingredients:
- 1/4 cup milk
- 1 tablespoon white vinegar
Instructions:
- Begin by pouring 1/4 cup of milk into a small pot. Heat the milk on medium-low heat until it comes to a simmer. Do not let it boil.
- Add 1 tablespoon of white vinegar to the milk, stirring constantly. Let the mixture simmer for a few more minutes.
- Remove the pot from the heat and let the mixture cool. After it has cooled down, you should see clumps of curdled milk and a yellowish liquid.
- Pour the mixture through a cheesecloth or coffee filter to separate the curds from the whey. The curds are what you will use to make the glue.
- Squeeze out the excess liquid from the curds. Knead the curds together until they form a ball of sticky paste. This is your homemade milk glue!
Pro Tip: If you want a stronger glue, you can add a pinch of baking soda to the mixture. This will help to neutralize the vinegar and make the glue last longer.
Milk glue can be stored in an airtight container in the refrigerator for up to a week. To use, simply apply a thin layer of glue to one surface and press the two surfaces together firmly. The glue will dry within a few hours and will hold strong.
Using milk glue is a great way to add a personal touch to your crafts while also reducing waste and saving money. Give it a try next time you need an adhesive, and see just how easy it is to make your own glue at home!
Tips and Tricks
When it comes to making your own glue at home, there are a few tips and tricks that can take your DIY game up a notch. These helpful suggestions will not only ensure the quality of your homemade adhesive, but also make the process more efficient and enjoyable. From substitutions and modifications to proper storage and handling techniques, there are plenty of ways to tailor your glue-making experience to your individual needs. Here are some useful tips and tricks to consider as you embark on your DIY glue journey.
Substitutions and Modifications
When it comes to making your own glue at home, there are several substitutions and modifications that you can make to adjust the recipe to your specific needs. Whether you’re looking to make a stronger bond or simply don’t have all of the necessary ingredients on hand, there are a few modifications you can try.
Substitution
If you’re out of one of the main ingredients for your chosen glue recipe, there are some easy substitutions that you can make. For example, if you’re making corn starch glue and don’t have corn starch, you can use tapioca starch or potato starch instead. Similarly, if you don’t have vinegar for your milk glue recipe, you can use lemon juice as a replacement.
Modifications
For a stronger adhesive, you can experiment with adding ingredients to your recipe, such as adding a small amount of sugar to your flour and water glue to enhance its sticking power. Another option is to modify the cooking process. Some recipes suggest simmering the mixture for a longer period of time to create a thicker consistency, which can result in a stronger bond.
| Ingredient | Substitution |
|---|---|
| Corn Starch | Tapioca Starch or Potato Starch |
| Vinegar | Lemon Juice |
Handling and Storage Modifications
It’s important to properly store and handle your homemade glue to ensure it maintains its effectiveness. For example, storing your glue in an airtight container can help prevent it from drying out or developing mold. You can also add a few drops of essential oil or vinegar to help prevent mold growth. Additionally, if you want a thicker glue, you can store it in the refrigerator, which can result in a thicker consistency.
Making your own glue at home can be a fun and economical option. By experimenting with different substitutions and modifications, you can create a formula that works best for your specific needs. Always remember to properly store and handle your glue to ensure its effectiveness over time.
Proper Storage and Handling
After making your homemade glue, it’s important to store and handle it correctly to ensure its longevity and effectiveness. Here are some tips for proper storage and handling:
- Store in an airtight container: Air exposure can cause the glue to dry out or become contaminated. Make sure to store your glue in an airtight container, such as a jar with a screw-on lid or a plastic container with a tight-fitting lid.
- Keep in a cool, dry place: Heat and moisture can also affect the consistency and quality of the glue. Store it in a cool, dry place such as a cupboard or pantry, away from direct sunlight or any sources of heat.
- Label your container: If you’re making different types of glue, it’s important to label your container with the type of glue and the date you made it. This will help you keep track of how long the glue has been stored and when it’s time to make a fresh batch.
- Shake or stir before using: Over time, the ingredients in your homemade glue can separate. Before using it, give it a good shake or stir to ensure that it’s well-mixed and has a consistent texture.
- Use within a reasonable time frame: Homemade glue typically has a shorter shelf life than store-bought glue, so make sure to use it within a reasonable time frame. Generally, homemade glue can last for up to a month when stored properly, but it’s best to make smaller batches to ensure freshness.
- Dispose of properly: If you have leftover glue that has expired or gone bad, make sure to dispose of it properly. You can usually throw it away in the regular trash, but make sure to check with your local waste management guidelines to see if there are any special instructions for disposing of glue.
By following these storage and handling tips, you’ll be able to get the most out of your homemade glue and ensure that it remains effective for all of your crafting and DIY needs.
Conclusion
In conclusion, making your own glue can be a fun and cost-effective way to tackle a variety of projects. Whether you are simply looking for a more sustainable and eco-friendly option, or want to take advantage of the many benefits of natural adhesives, it’s easier than you might think to create your own DIY glue.
By understanding the different types of adhesives available and following the step-by-step guide provided in this article, you can create your own glue using ingredients that you likely already have in your home.
Remember to take proper precautions when handling and storing your homemade glue. Keep it in an airtight container and avoid letting it dry out. Additionally, don’t be afraid to experiment with different recipes and modifications to find the perfect glue for your project.
In all, making your own glue is a rewarding and empowering DIY experience that can save you money and provide you with a versatile and effective adhesive solution. Say goodbye to store-bought adhesives and hello to the world of DIY glue-making!
Frequently Asked Questions
How long does homemade glue last?
The shelf life of homemade glue varies depending on the ingredients and storage method, but it typically lasts for several weeks to a few months.
Can homemade glue be used for heavy-duty projects?
Homemade glue may not be as strong as commercial adhesives, but it can be used for a variety of light-duty projects.
Do I need to refrigerate homemade glue?
Not necessarily, but storing homemade glue in the refrigerator can help extend its shelf life.
Can I use homemade glue for paper crafts?
Yes, homemade glue is great for paper crafting and can be used to make paper mache, collage art, and more.
What are some alternative ingredients for homemade glue?
Alternative ingredients for homemade glue include vinegar, sugar, gelatin, and honey.
Can I add food coloring to homemade glue?
Yes, adding food coloring to homemade glue can help you keep track of where you’ve applied the glue and can add a fun pop of color to your project.
Is homemade glue safe for children to use?
Yes, homemade glue made from non-toxic ingredients is safe for children to use with adult supervision.
Can I use homemade glue on fabrics?
Yes, homemade glue can be used on fabrics, but it may not be as strong as commercial fabric glue.
What’s the difference between natural and synthetic adhesives?
Natural adhesives are made from organic materials like animal hides and plant starches, while synthetic adhesives are made from chemical compounds.
Why should I consider making my own glue?
Making your own glue can save you money, reduce waste, and allow you to customize the ingredients to your specific needs.