Introduction
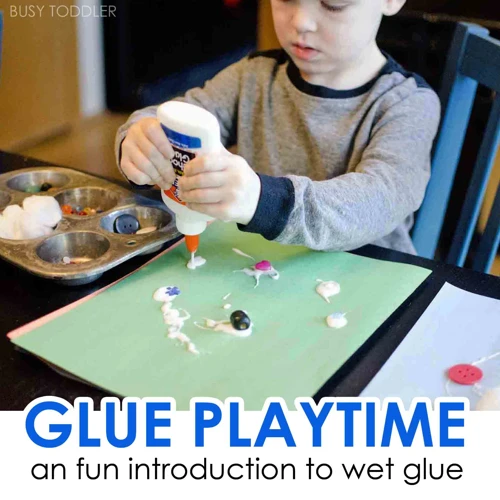
When it comes to DIY projects and crafts, adhesive glue is a must-have item. Whether it’s to fix something or to stick materials together, adhesive glue is an essential material. While there are various types of adhesive glue available in the market, making it at home can be a cost-effective and rewarding option. In this guide, we will walk you through the steps to make adhesive glue at home using simple and readily available materials. So, let’s dive in and learn how to make your very own adhesive glue in just a few easy steps!
What is Adhesive Glue
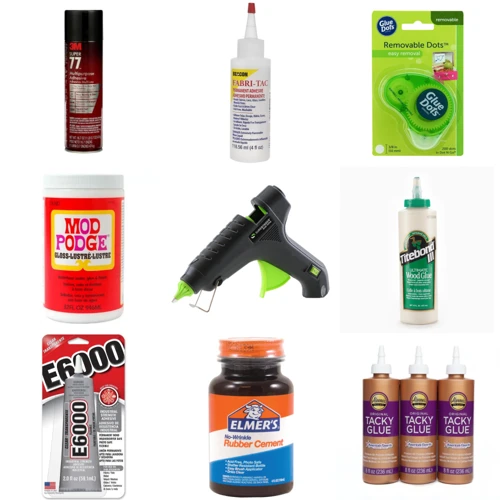
Adhesive glue, commonly referred to as just “glue”, is a substance used to stick or join two surfaces together. It has been in use for thousands of years and has played a significant role in various applications such as woodworking, paper crafts, construction, and many other industries. There are several types of adhesive glue, and they differ based on ingredients, chemical properties, and intended use.
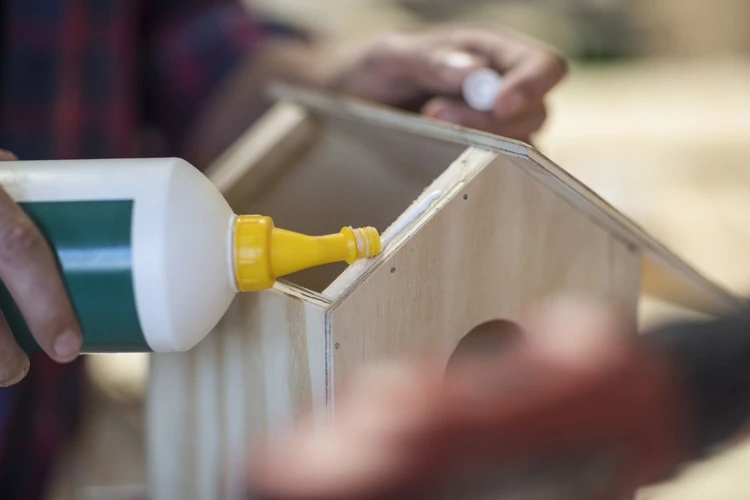
One of the most popular types of adhesive glue is wood glue. It is commonly used in woodworking as it makes a strong bond and dries clear. Another commonly used glue is PVA glue, which is a versatile glue and has a broad range of applications such as paper crafts, bookbinding, and so on. Another type of adhesive glue is the cyanoacrylate glue, which is commonly known as super glue and is used in the automotive and medical industry.
Some adhesives are made from synthetic materials like resins, while some are made from natural substances like animal hides or plants. Natural adhesives have been in use since ancient times and are still used today. For example, animal-hide glue is commonly used in woodworking, and flour paste glue is used in paper crafts.
Knowing the types of adhesives is essential before selecting the right one, based on the application requirement. Different types of adhesives have unique properties and are suitable for various materials as well. The table below shows different types of adhesives and their respective applications:
| Adhesive Type | Applications |
|---|---|
| Wood Glue | Woodworking, carpentry |
| PVA Glue | Bookbinding, paper crafts, cardboard, and leather |
| Super Glue | Automotive and medical industries, plastics and metals |
| Animal-hide Glue | Woodworking, crafts, and restoration projects |
| Flour Paste Glue | Paper crafts and elementary school projects |
If you want to learn more about how to spread wood glue, check out our article on it.
Why Make Adhesive Glue at Home
Making adhesive glue at home has several benefits. Firstly, it is a cost-effective way to get quality adhesive glue. You can make it easily with just a few common household items. Secondly, making adhesive glue at home gives you a better idea about the material you are using in the glue, ensuring that it is safe and chemical-free for use. Thirdly, you can customize the glue as per your requirement, by adding more or less of the ingredients. Fourthly, homemade adhesive glue is eco-friendly and non-toxic.
It is important to note that different types of glue are used for different purposes, and making adhesive glue at home is a great option for some purposes, but not for everything. For instance, if you are working on a woodworking project and need to spread wood glue, homemade adhesive glue may not be the best option. In this case, it is best to use specialized wood glue that spreads evenly and dries clear, and you can learn about spreading wood glue with our guide on how to spread wood glue. Similarly, if you want to glue a puzzle, Mod Podge glue is a better option than homemade glue, and you can learn about how to glue a puzzle with Mod Podge with our guide on gluing a puzzle with Mod Podge.
However, if you are looking to make a slime without glue or activator, making adhesive glue at home could be a good option, and you can check out our article on how to make soap slime without glue or activator for guidance. Other purposes for homemade adhesive glue can include making popsicle stick houses without glue, tying elastic bracelets without glue, and gluing air-dry clay. You can also learn how to make wood glue by following our guide on making wood glue. Additionally, you may want to use specialized glue like spirit glue or UHU glue pen for particular purposes, and you can learn about these in our articles on spirit glue and UHU glue pen respectively.
Types of Adhesive Glue
As we delve deeper into the world of adhesive glue, it’s important to acknowledge the different types available. Synthetic adhesive glue and natural adhesive glue are the two main categories of glue. Each type has its own unique properties and uses, and it’s important to understand which type is best suited for your particular task. While making your own adhesive glue at home may not produce the strongest type of glue available, it does have its advantages. Whether you’re constructing a popsicle stick house without using glue or looking to tie an elastic bracelet without glue, learning about the different types of adhesive glue will definitely come in handy.
Synthetic Adhesive Glue
Synthetic adhesive glues are made from chemicals that have been processed in a laboratory. These types of adhesives are very effective and widely used in different applications. Synthetic adhesive glue is essentially a polymer that is dissolved in a solvent. When the solvent evaporates, the polymer solidifies, bonding the surfaces together.
Some common types of synthetic adhesive glues include:
| Type of Synthetic Adhesive Glue | Common Uses |
|---|---|
| Epoxy | Used for industrial applications, bonding metal, glass, and plastic |
| Super Glue | Used for quick bonding of small items such as plastic, metal, and rubber |
| Polyurethane | Used for bonding wood, plastic, and metal |
| Acrylic | Used for bonding different plastics, metal, glass and ceramics |
| Hot Melt | Used for bonding fabric, paper and cardboard, and other materials |
It’s important to note that when using synthetic adhesive glue, you should always follow the manufacturer’s instructions for safe and effective use.
If you need a glue that dries clear on glass, you may want to try this type of glue. On the other hand, if you are looking for tips on how to glue air-dry clay, check out this guide.
Natural Adhesive Glue
When it comes to natural adhesive glue, there are a variety of options available for those who prefer to use non-toxic and eco-friendly options. The following table outlines some of the best natural adhesive glue options you can make at home:
| Material | Properties | Uses |
|---|---|---|
| Casein glue | Made from milk protein; dries hard and is water-resistant. | Used for woodworking, bookbinding, and paper products. |
| Plant-based glue | Made from natural sources like vegetable starch, gum arabic or resin from pine trees; dries clear and is non-toxic. | Used for paper-based crafts and woodworking. |
| Animal glue | Made from animal hides and bones; dries clear and is very strong. | Used for woodworking, bookbinding, and musical instruments. |
| Shellac glue | Made from a resin secreted by lac bugs; dries into a hard surface. | Used for woodworking and finishing. |
One of the benefits of natural adhesive glue is that it is often inexpensive and easy to make at home. For example, casein glue can be made by simply adding vinegar to milk and straining out the curds. Plant-based glue can be made by cooking vegetable starch with water and letting it cool. Animal glue requires boiling animal parts and bones to release the collagen, which can then be mixed with water and heated. Shellac glue can be made by dissolving shellac flakes in denatured alcohol.
Natural adhesive glue is a great option for those looking for eco-friendly and non-toxic alternatives to synthetic adhesive glues. Plus, making your own adhesive glue at home can be a fun and rewarding project!
Materials Required
Before diving into the process of making adhesive glue at home, let’s take a quick look at what materials you’ll need to get started. By gathering these simple and affordable items, you’ll be able to craft an effective and eco-friendly adhesive that can be used for a variety of purposes. Here are the key ingredients you’ll need: a bowl and spoon for mixing, white vinegar for its acidic properties, all-purpose flour to thicken the mixture, and corn syrup for added viscosity. Let’s explore each of these materials in more detail to understand how they contribute to the making of homemade adhesive glue.
Bowl and Spoon
Materials Required:
- A bowl
- A spoon
When making adhesive glue at home, it is important to have a designated bowl and spoon for this task. Avoid using any plastic utensils as they may melt when heated. Instead, use a glass or stainless steel bowl and a wooden or metal spoon for stirring.
Using a separate bowl and spoon for making glue ensures that you do not mix it up with your regular kitchen utensils, as adhesive glue is not safe for consumption. It is important to keep this glue away from children and pets.
Additionally, make sure your bowl is clean and dry before mixing your ingredients. Any impurities or leftover residue could interfere with the efficiency and quality of the adhesive glue.
Having a clean and designated bowl and spoon is a crucial step in making adhesive glue at home. It ensures that the glue is safe and effective, and prevents any potential contamination from other kitchen utensils.
White Vinegar
When it comes to making adhesive glue, one of the essential ingredients you’ll need is white vinegar. This common kitchen ingredient is known for its versatile uses, and adhesive glue is one of them. White vinegar is a type of vinegar made from the fermentation of grain alcohol. It has a high acidity level, making it a potent cleaning agent and an excellent ingredient for making glue.
To get the most out of the white vinegar you use in making adhesive glue, it’s essential to choose a high-quality type. You can find different types of white vinegar in the market, but not all of them are created equal. When buying white vinegar, look for organic, unfiltered, and unpasteurized variants to ensure its purity and effectiveness.
Here is a table that shows the benefits of using white vinegar in making adhesive glue:
| Benefits of Using White Vinegar in Making Adhesive Glue |
|---|
| Acts as a natural preservative |
| Enhances the binding properties of the glue |
| Reduces the stickiness of the glue, making it easier to handle |
| Increases the durability and longevity of the glue |
| Prevents the growth of bacteria and molds in the glue, making it safe to use |
The acid in white vinegar works as a natural preservative that helps prevent the growth of bacteria and molds in the glue. This property makes it safe to store the glue for a more extended period without worrying about it spoiling. Additionally, the acetic acid in white vinegar enhances the binding properties of the glue by reacting with the flour in the mixture.
Using white vinegar also reduces the stickiness of the glue, making it easier to handle while you’re making craft projects. With the help of white vinegar, you can achieve a balance between the adhesive properties and the glue’s viscosity, giving you a consistent and reliable glue for your DIY projects. Finally, using white vinegar in making adhesive glue makes it more durable and long-lasting, ensuring that your projects stay intact for a more extended period.
All-Purpose Flour
One of the main materials required to make homemade adhesive glue is all-purpose flour. This type of flour is readily available in most households and can be easily found in grocery stores. All-purpose flour is a versatile ingredient that is used in various recipes like cakes, bread, sauces, and more.
When it comes to making adhesive glue, all-purpose flour is an essential ingredient due to its binding properties. It helps to create a thick and sticky mixture that will harden over time, creating a strong bond when dry.
But why all-purpose flour specifically? Well, it has a high gluten content, which gives it a sticky texture when mixed with water or other liquids. This sticky texture allows it to adhere to surfaces and create a strong bond. In addition to this, all-purpose flour is also a cost-effective alternative to purchasing store-bought glue.
To make the adhesive glue, you need to use around two tablespoons of all-purpose flour. Mix it with equal parts of vinegar and corn syrup to create a thick, smooth paste. It’s essential to use the right proportion of flour to liquid to get the desired consistency.
It’s important to note that not all types of flour will work for this recipe. For example, cake flour has a lower gluten content than all-purpose flour and would not produce the same binding effect as all-purpose flour.
All-purpose flour is a crucial ingredient in making homemade adhesive glue due to its binding properties and sticky texture when mixed with water or other liquids. It’s a cost-effective alternative to store-bought glue, and the right proportion of flour to liquid is essential to get the desired consistency.
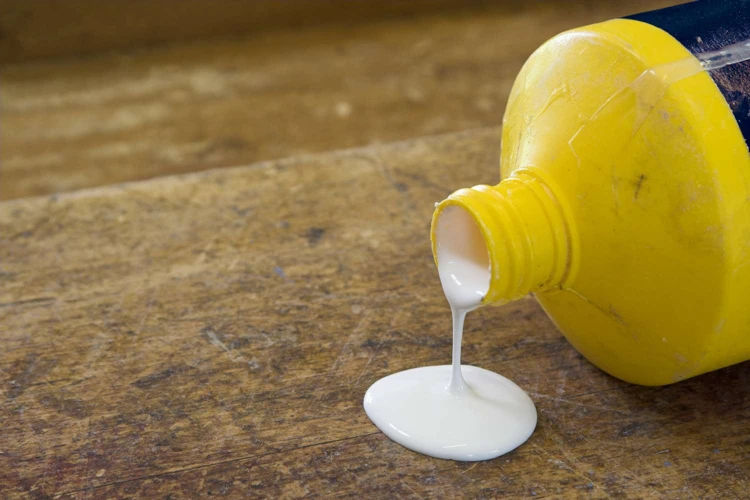
Corn Syrup
Corn syrup is a key ingredient when it comes to making adhesive glue at home. This thick and sticky sweetener acts as a binding agent in the mixture, allowing the glue to hold materials together effectively. It is important to use light corn syrup rather than dark corn syrup, as the former has more binding power.
When selecting corn syrup for your DIY adhesive glue recipe, it is advisable to go for 100% pure corn syrup. This is because some brands might contain additives that can affect the quality of the glue. Corn syrup is readily available in grocery stores and can be found in the baking aisle.
Here is a table showing the amount of corn syrup required for this DIY adhesive glue recipe:
| Materials | Amount Required |
|---|---|
| All-Purpose Flour | 1/3 Cup |
| White Vinegar | 1 tablespoon |
| Corn Syrup | 2 tablespoons |
Remember to follow the recipe precisely, as using too much or too little corn syrup can affect the consistency and adhesive properties of the glue. It is recommended to measure the corn syrup accurately using a measuring spoon, rather than estimating or pouring directly from the bottle. With the right amount of corn syrup and other materials, you can make a strong and effective adhesive glue right in the comfort of your own home.
Steps to Make Adhesive Glue
Are you tired of spending money on store-bought adhesive glue? Why not try making your own at home? It’s easier than you might think! By following a few simple steps, you can create a strong, effective adhesive glue that will come in handy for all your DIY projects. Get ready to roll up your sleeves and put your crafting skills to the test with this DIY guide. Here’s how to make your own adhesive glue at home with just a few basic materials.
Step 1: Mix Flour, Vinegar, and Corn Syrup
To start making your adhesive glue at home, you will need to gather the required materials. In a bowl, mix 1 cup of all-purpose flour, 1/3 cup of white vinegar, and 2 tablespoons of corn syrup.
All-purpose flour is a common household ingredient that serves as the base for this glue recipe. It works as a binder, holding the mixture together. White vinegar is added to create a chemical reaction that causes the flour to swell and thicken. This strengthens the adhesive properties of the glue. Corn syrup is added to the mixture to give it a sticky consistency and to make it more durable.
It is important to mix the ingredients thoroughly to ensure that there are no lumps in the mixture. Using a spoon, stir the mixture until it reaches a smooth and consistent texture. Once you have a smooth mixture, you can move on to the next step in creating your adhesive glue.
Step 2: Heat the Mixture
After mixing all the ingredients in the bowl, it is time to heat the mixture to make an adhesive glue at home. Follow these steps carefully to get the perfect consistency and texture.
- Transfer mixture to a saucepan: Transfer the mixture to a saucepan for heating.
- Cook on medium heat: Cook the mixture on medium heat while continuously whisking.
- Whisk until thick: Continue whisking until the mixture thickens and forms a paste-like consistency. This should take around 5-7 minutes.
- Remove from heat: Remove the saucepan from heat and let the paste cool down for approximately 10-15 minutes.
Heating the mixture is an essential step that helps in binding all the ingredients together and forming the desired consistency. It is crucial to maintain medium heat and continuous whisking to avoid any lumps or uneven texture. Once the mixture is heated and thickened, it should be removed from the heat to cool down.
Remember that the adhesive glue gets thicker as it cools down, so ensure you get the right consistency before removing it from the heat. Be cautious while handling the hot mixture and use a heat-resistant tool while stirring.
Step 3: Store the Adhesive Glue
After making your adhesive glue, it’s important to store it properly to ensure it doesn’t dry out or spoil. Storing your glue is a simple process that only requires a few basic materials.
Materials Required:
| – Clean plastic container with lid |
| – Label or masking tape |
| – Marker or pen |
Steps to Store the Adhesive Glue:
- Clean a plastic container with a lid. Make sure the container is dry before storing your adhesive glue.
- Label your container with the contents and the date you made it. This way, you can keep track of how long your adhesive glue has been stored and avoid using any that has expired.
- Place your glue in the container and seal it tightly with the lid. Store the container in a cool, dry place. Avoid storing it in areas that are too hot or too cold. Direct sunlight can also affect the consistency of your adhesive glue, so keep it in a dark place if possible.
- Make sure to check your adhesive glue regularly to ensure it hasn’t dried out or gone bad. If it starts to develop an unusual odor or appearance, it’s best to dispose of it and make a fresh batch.
By following these simple steps, you can ensure that your homemade adhesive glue is ready to use when you need it. Remember to always store it properly to ensure its longevity and effectiveness.
Using Your Adhesive Glue
So you’ve made your own adhesive glue at home. Congratulations! Now it’s time to put it to good use. But before you start sticking things together, there are a few important things to keep in mind. Here are some tips and precautions for using your homemade glue effectively and safely. Let’s dive in!
Precautions
It is crucial to exercise caution when using adhesive glue, regardless of whether it was made at home or purchased from the store. Failure to adhere to safety guidelines could cause harm to individuals handling the glue and damage to the items being glued. Here are some precautions to take when using your adhesive glue:
| Precaution | Description |
|---|---|
| Wear Gloves | Whenever using adhesive glue, it is recommended to wear gloves to prevent skin irritation or allergic reactions. |
| Apply in a Well Ventilated Area | Adhesive glue contains chemicals that could be harmful when inhaled. Ensure that the working area is well ventilated to allow air circulation to minimize the risks of inhalation. |
| Keep Away From Children | Adhesive glue is hazardous when ingested, swallowed, or put into the mouth by children. Ensure to store your adhesive glue in a safe location, out of reach of children. |
| Do Not Use on Food Items | Homemade adhesive glue should not be used on items that may come into contact with food. This is because it may contain harmful chemicals that may be ingested when in contact with food items. |
| Avoid Eye Contact | When working with adhesive glue, it is essential to avoid any contact with your eyes. In case of contact, rinse with running water for 10-15 minutes. |
| Clean Up Spills Immediately | In case of accidental spills, it is imperative to clean up the area immediately. Use a damp cloth to wipe the area, followed by soap and water. |
Following these precautions will ensure that you work safely with your homemade adhesive glue, keeping you and your loved ones safe while you complete your projects.
Storage Tips
Once you have made your adhesive glue, it’s important to store it correctly to ensure it stays usable for future projects. Here are some storage tips to keep in mind:
- Store in an airtight container: To keep air and moisture from affecting the glue’s consistency, store it in an airtight container such as a glass jar or plastic container with a tight-fitting lid.
- Keep in a cool, dry place: Adhesive glue that is exposed to high temperatures or humidity can become ineffective. Store it in a cool, dry place like a pantry or cupboard.
- Avoid freezing: While some types of glue can be frozen to extend their shelf life, the adhesive glue you made at home may not freeze well. Avoid storing it in the freezer or exposing it to extreme cold.
- Label the container: Once you have stored your adhesive glue in a container, label it with the date and contents. This will help you keep track of its freshness and ensure you don’t accidentally use it past its expiration date.
- Shake or stir before use: Depending on how long your glue has been stored, the ingredients may separate. Before using it, give the container a good shake or stir to ensure the ingredients are well-mixed.
By following these storage tips, you can ensure that your homemade adhesive glue stays fresh and effective for all your future crafting and DIY projects.
Conclusion
In conclusion, making adhesive glue at home is not only easy, but it can also be a fun DIY project. By using simple materials that are readily available in most households, you can create a strong and efficient adhesive glue that can be used for a variety of purposes. Whether you want to bond paper, fabric, wood, or even plastic, this homemade adhesive glue is a cost-effective and reliable option.
Remember to use the adhesive glue in a well-ventilated area, and to wear protective gloves when handling hot glue. It is also important to store the adhesive glue in an airtight container to prevent it from drying out or becoming contaminated.
So why spend money on expensive commercially available adhesives when you can make your own at home? With this easy-to-follow DIY guide, you can make adhesive glue in just a few simple steps, and have a useful and versatile tool at your disposal for all your bonding needs. Give it a try today and see the difference it can make in your DIY projects!
Frequently Asked Questions
What are some common uses for adhesive glue?
Adhesive glue can be used for various purposes, such as repairing broken items, creating crafts, and even in construction projects.
How long will homemade adhesive glue last?
If stored properly in an airtight container, homemade adhesive glue can last for several weeks to a few months.
Can this adhesive glue be used on all surfaces?
No, certain surfaces may not bond well with the homemade adhesive glue. Testing it on a small, inconspicuous area before use is recommended.
Is it safe to use homemade adhesive glue?
Yes, it is generally safe to use homemade adhesive glue as it is made from non-toxic ingredients. However, it’s important to keep it out of reach of small children.
Can I use white flour instead of all-purpose flour?
No, using white flour may not yield the same results as all-purpose flour in making this adhesive glue. All-purpose flour is recommended.
Can I add food coloring to the adhesive glue?
Yes, you can add food coloring to the glue mixture to achieve a desired color.
Can I use this adhesive glue for paper projects?
Yes, this adhesive glue can be used for paper projects such as making cards, scrapbooking, and more.
How can I remove excess adhesive glue from a surface?
You can remove excess adhesive glue by gently scraping it off with a knife or sandpaper. Alternatively, you can use warm soapy water to soften the glue and then wipe it away.
Can I freeze this adhesive glue for later use?
No, it is not recommended to freeze this adhesive glue as it may change its texture and consistency. Storing it in an airtight container at room temperature is best.
Can I double the recipe to make a larger batch of adhesive glue?
Yes, you may double or triple the recipe to make a larger batch of adhesive glue. Just make sure to mix the ingredients in proportion to the recipe.