Introduction
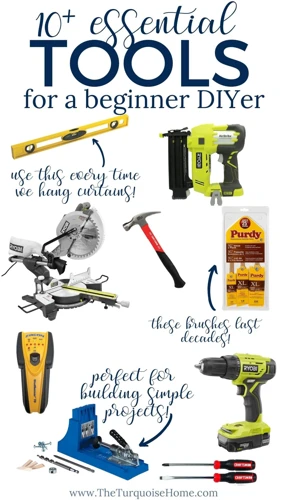
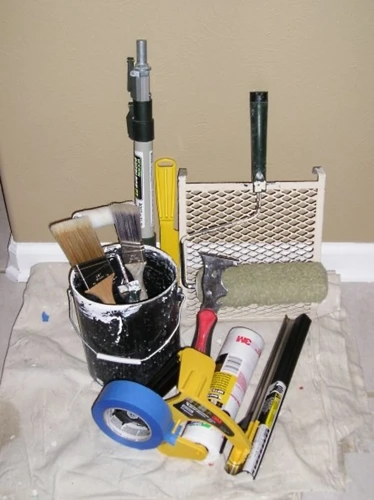
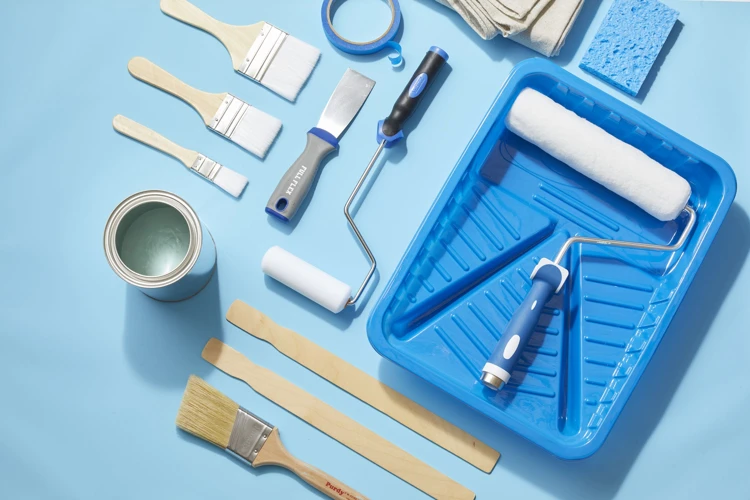
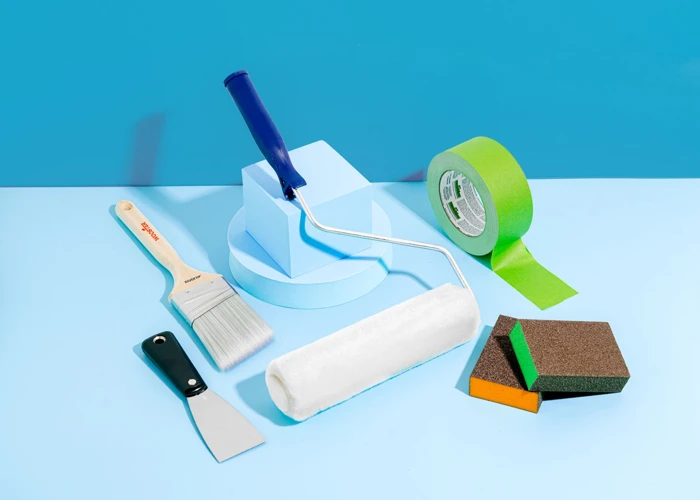
Starting an interior painting project can be an exciting task that can add a fresh look and feel to your living space. However, having the right tools for the job is essential to achieve the desired results. As a DIYer, it might be tough to know where to begin and which painting tools you need to get started. In this article, we will guide you through the ten essential interior painting tools that every DIYer should have. From drop cloths to extension poles, we will cover everything you need to start your interior painting project like a pro.
The Importance of Having the Right Tools
It is crucial to have the right tools when it comes to interior painting. Without proper tools, achieving a professional-looking result can be almost impossible. Using old or low-quality tools may cause the paint to smear, drip, or leave an uneven coat, resulting in a messy, unfinished look. That’s why it’s important to invest in the right tools before starting any painting project.
Using the right tools can also speed up the painting process, making it more efficient and less time-consuming. With the right painting tools, you can reduce the time spent on touch-ups or fixing mistakes, resulting in cost and time savings. Investing in quality tools can also mean that they will last for years, providing multiple uses for future painting projects.
Using proper painting tools can also reduce the amount of paint waste and mess, making cleaning up easier as well. With the use of tools like drop cloths and painter’s tape, you can protect surfaces from paint spillage and dripping, leaving you with less clean-up afterward.
Having the right tools for your painting project is essential to achieving professional-looking results, saving time and money, and avoiding any potential painting mishaps. To ensure the best result, it’s important to use high-quality tools and follow proper painting techniques. If you’re unsure where to start, check out these helpful interior painting resources: How to Choose the Right Interior Paint Finish, 5 Tips for Prepping Interior Walls Before Painting, Proper Painting Techniques, Paint a Room Like a Pro: A Guide, Avoiding Interior Painting Mistakes, DIY vs Professional Interior Painting, Creating the Perfect Home Color Scheme, Accent Walls in Interior Design, and Eco-Friendly Paint Options.
1. Drop Cloths
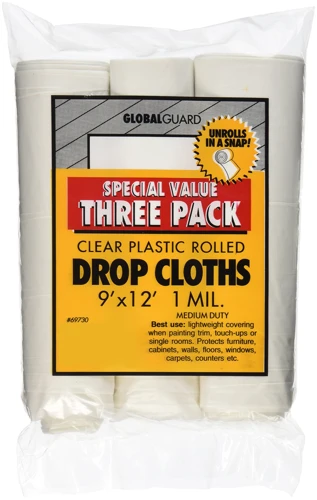
Painting your home’s interior is a great way to refresh your space and give it a new look. However, painting can be a messy task, and a single mistake can ruin your entire project. What you need is a set of essential interior painting tools that make the process a lot simpler and more manageable. One such tool is a drop cloth. A drop cloth is a heavy-duty cloth that can help protect your flooring, furniture, and other items from spilled paint and other mishaps. In this section, we will discuss why you need a drop cloth, what types are available, and how to use them effectively.
Why You Need Them
Drop cloths are an essential tool for any DIY interior painting project. They serve an important purpose, which is why you need them. Here are a few reasons why you should invest in a drop cloth:
| Reason | Description |
| Protect Floors and Furniture | Paint drips and splatters can easily ruin your floors, carpets or furniture. A drop cloth provides an extra layer of protection and helps to keep your surfaces clean and free of any paint damage. |
| Reduce Cleanup Time | With a drop cloth in place, you can prevent paint from seeping into small crevices or onto surfaces that aren’t meant to be painted. This means less cleanup and less time spent correcting mistakes. |
| Save Money | By using a drop cloth, you can avoid having to replace or repair damaged floors, furniture or carpets. This can save you a significant amount of money in the long run. |
| Professional Finishing | A drop cloth helps to create a professional-looking finish by preventing unwanted drips or smudges on your painted surfaces. |
Investing in a drop cloth is a smart decision that will not only save you money and time but also ensure a professional-looking finish for your interior painting project.
Types of Drop Cloths
When it comes to drop cloths, there are different materials you can choose from depending on your needs. Here are some types of drop cloths you may consider:
| Cloth Drop Cloths | Canvas Drop Cloths | Plastic Drop Cloths |
|---|---|---|
| Cloth drop cloths are made from natural fibers, typically cotton or linen, making them durable and absorbent. They are ideal for catching drips and spills, and can be washed and reused. | Canvas drop cloths are made from heavy-duty cotton canvas, making them very durable and long-lasting. They are great for protecting floors and furniture during painting projects, and can be reused many times. | Plastic drop cloths are made from polyethylene, which makes them lightweight and easy to handle. They are great for protecting floors and furniture from paint splatters and spills, but may tear easily and are not reusable. |
Cloth drop cloths are ideal if you want a reusable, eco-friendly option that is also durable and absorbent. Canvas drop cloths are perfect for heavy-duty protection and multiple uses. Plastic drop cloths are a cost-effective option for one-time use, but are not as durable as cloth or canvas drop cloths. It is important to consider your specific needs and budget when choosing the type of drop cloth to use.
How to Use Them
When it comes to using drop cloths, there are a few important steps to follow to make sure they are effective in protecting your floors and furniture from paint drips and spills. Follow these steps for proper use:
| Step | Instructions |
|---|---|
| Step 1: | Lay the drop cloth flat on the floor, making sure it completely covers the area you want to protect. |
| Step 2: | If you’re using a canvas drop cloth, make sure the canvas side is facing up. The canvas side is more absorbent and will help prevent paint from seeping through to the floor. |
| Step 3: | If you’re using a plastic drop cloth, make sure it’s taped down along the edges to prevent it from moving around. |
| Step 4: | If you’re painting a ceiling, use a drop cloth with a piece of string or rope tied to the sides to create a makeshift “tent” that will catch any paint drips. |
| Step 5: | If you’re painting a room with furniture still in it, cover the furniture with a drop cloth as well. |
| Step 6: | If you accidentally get paint on the drop cloth, do not fold it up into itself. This will cause the paint to spread and potentially stain your floors. Instead, move the drop cloth to a new section before continuing to paint. |
By following these steps, you’ll be able to effectively use drop cloths to protect your floors and furniture during your painting project.
2. Painter’s Tape
When it comes to interior painting, achieving crisp and clean lines can be a challenge. But with the right tool, you can make it a breeze. Enter painter’s tape. This versatile tool is a must-have for any DIYer looking to achieve professional-looking paint jobs. Whether you’re using it to create a color block statement wall or simply to protect baseboards and trim, painter’s tape is an essential tool that can make a big difference in the finished look of your project. In this section, we’ll explore why you need painter’s tape, the different types available, and how to use it effectively.
Why You Need It
Painter’s tape is an important tool that every DIYer should have for interior painting projects. It serves as a barrier between the areas you want to paint and those you want to keep clean and free from paint. This means that you can achieve clean, straight lines and edges without worrying about paint bleeding or seeping under the tape.
Using painter’s tape also saves time and effort because you don’t have to be as careful or precise when cutting in at the edges. You can simply apply the tape, paint over it, and then remove it once the paint is dry. This allows for a much quicker and easier painting process.
Another benefit of using painter’s tape is that it can be used on a variety of surfaces, including walls, trim, and even furniture. It also comes in different widths, making it adjustable for the size of the area you want to protect.
Painter’s tape is an essential tool for achieving a professional-looking paint job with clean, crisp lines and edges. It saves time, effort, and frustration, making it a must-have for any DIYer’s painting toolkit.
| Why You Need Painter’s Tape: |
|---|
| Serves as a barrier between painted and unpainted areas |
| Makes achieving clean, straight lines and edges easier |
| Saves time and effort during the painting process |
| Can be used on a variety of surfaces |
| Comes in different widths to fit different areas |
Types of Painter’s Tape
When it comes to painter’s tape, there are various options to choose from depending on your needs. Here are some of the types of painter’s tape that you can find in the market:
- Basic Painter’s Tape: This is the most commonly used tape for interior painting projects. It is easy to tear and apply, and can be used on a variety of surfaces such as walls, trim, and ceilings.
- Delicate Surface Painter’s Tape: If you’re painting on delicate surfaces like wallpaper or freshly painted walls, this tape is the best option. It has a gentler adhesive that won’t damage the surface or leave any residue.
- Multi-Surface Painter’s Tape: This tape is ideal for projects that require different surfaces to be painted at the same time. It has a medium-strength adhesive that can stick to a variety of surfaces, including carpet, metal, and glass.
- UV-Resistant Painter’s Tape: If you’re painting in an area that gets a lot of sunlight, consider using UV-resistant painter’s tape. This tape has a special adhesive that can withstand exposure to sunlight for a longer period, without leaving any residue or damage to the surface.
- Blue Painter’s Tape: This tape is often referred to as painter’s tape, and it’s ideal for painting straight lines or edges. It’s easy to remove, and won’t damage or leave any residue on the surface.
- Green Painter’s Tape: This tape is similar to blue painter’s tape, but it has a stronger adhesive that can stick to rough or uneven surfaces. It’s perfect for painting textured walls or surfaces.
With these various types of painter’s tape available, you can choose the one that works best for your specific painting project. Just remember to apply the tape carefully and remove it as soon as possible after painting to prevent any damage or residue.
How to Use It
Here is a table explaining how to use the various essential interior painting tools:
| Tool | Instructions |
|---|---|
| Drop Cloths | 1. Ensure the area you are painting is clean and clear of any debris or furniture. 2. Place the drop cloth on the floor or over any furniture items you want to protect. 3. Use masking tape to secure the drop cloth in place to prevent it from moving while you paint. |
| Painter’s Tape | 1. Clean the surface you will be taping off with a damp cloth or sponge. 2. Apply the painter’s tape to the edge of the area you want to protect. Press down firmly to make sure it adheres to the surface. 3. Paint as desired. 4. Remove the painter’s tape while the paint is still wet to avoid peeling off any paint along with the tape. |
| Paint Brushes | 1. Choose the appropriate paint brush for your project. 2. Dip the brush into the paint and remove any excess by gently tapping it against the side of the paint can. 3. Starting in the top corner of the wall, apply the paint with long strokes, using a consistent amount of pressure. 4. Work in small sections and smooth out any brush strokes as you go. |
| Paint Rollers and Roller Covers | 1. Choose the appropriate paint roller and cover for your project. 2. Pour the paint into the paint tray. 3. Dip the roller into the paint and roll it back and forth in the tray to distribute the paint evenly. 4. Starting in a corner of the wall, roll the paint onto the surface in a “W” shape, filling in the spaces between. 5. Smooth out any roller marks as you go. |
| Paint Trays | 1. Pour the desired amount of paint into the tray. 2. Use the ridges in the tray as a guide to distribute the paint evenly across the roller. 3. Avoid overfilling the tray to prevent spills or drips. 4. Clean the tray after each use to ensure it is ready for the next project. |
| Stir Sticks | 1. Before using the paint, stir it thoroughly with a stir stick to ensure an even consistency. 2. Dip the stick into the can and scrape off any excess paint. 3. Stir the paint in a circular motion, making sure to scrape the sides and bottom of the can. 4. Stir the paint occasionally during use to keep it well mixed. |
| Painters’ Multi-Tool | 1. Use the scraper end to remove any loose or peeling paint from the surface. 2. Use the flat end to smooth out any bumps or imperfections in the wall. 3. Use the angled edge to apply or remove painter’s tape. 4. Clean the tool after each use to prevent paint build-up. |
| Putty Knife | 1. Use the knife to fill any holes or cracks in the wall with spackle or putty. 2. Spread the material evenly over the surface and smooth out any excess. 3. After the material has dried, sand it down with sandpaper to create a smooth surface for painting. 4. Clean the knife after each use to prevent material build-up. |
| Sandpaper | 1. Choose the appropriate grit of sandpaper for your project. 2. Sand down any rough or uneven areas of the wall to create a smooth surface for painting. 3. Sand in a circular motion or back and forth, depending on your preference. 4. Wipe away any dust or debris with a cloth before painting. |
| Extension Pole | 1. Attach the extension pole to the paint roller. 2. Adjust the length of the pole to the desired height. 3. Use the pole to reach high areas, such as ceilings or tall walls, without having to use a ladder. 4. Remove the pole after use and clean it to prevent any damage or build-up of paint. |
By following these instructions, you can ensure that you are using your interior painting tools correctly and achieving the best possible results for your paint project.
3. Paint Brushes
One of the most essential tools for any interior painting project is a good paint brush. From cutting in around trim and corners to adding detail work, a quality paint brush is necessary to achieve a professional-looking finish. However, with so many types, sizes, and materials available, it can be overwhelming to choose the right paint brush for your specific project needs. In this section, we’ll explore why paint brushes are important, the different types of paint brushes available, how to choose the right one, and how to properly clean and care for them to ensure they last for future projects.
Why You Need Them
Drop cloths are essential tools for any DIYer who wants to protect their floors, furniture, and other belongings from accidental paint splatters or spills. The importance of drop cloths cannot be overstated, as they can save you from costly damages and cleanup in the long run. Here are a few reasons why you need drop cloths for your next interior painting project:
- Protects Floors: Without drop cloths, you put your floors at risk of getting stained with paint, which can be difficult to remove once it dries.
- Protects Furniture: If you are painting a room with furniture that cannot be removed, drop cloths can prevent paint drips from accidentally ruining your upholstery or wood surfaces.
- Easy Cleanup: Instead of spending hours trying to scrub off paint from floors or furniture, drop cloths can be easily removed and disposed of after completing the painting project.
- Prevents Accidents: A drop cloth can also prevent accidents, such as slips and falls from a wet or slippery surface.
- Cost-Effective: Buying drop cloths is an inexpensive yet effective way to protect your belongings and keep your space clean during a painting project.
Whether you are an experienced DIYer or a beginner, drop cloths should be on your list of essential interior painting tools as they provide crucial protection for floors, furniture, and other items in your home.
Types of Paint Brushes
When it comes to choosing the right paint brush for your interior painting project, there are a few different types to consider. Here are some of the most common types of paint brushes and their uses:
- Flat Brushes – These brushes have straight, flat bristles and are ideal for painting large, flat areas like walls or ceilings.
- Angle Brushes – These brushes have bristles that are cut on an angle, making them great for painting corners, edges, and trim.
- Round Brushes – These brushes have a round tip and can be used for a variety of painting techniques, such as blending and detail work.
- Foam Brushes – These brushes are made with foam instead of bristles and can be less expensive than traditional paint brushes. They are often used for applying finishes like polyurethane or varnish.
- Detail Brushes – These brushes have very fine bristles and are perfect for painting small areas or intricate details.
Choosing the right paint brush for your project will depend on the type of paint you are using, as well as the surface you are painting. It’s important to choose a brush that will allow you to apply the paint evenly and smoothly, without leaving brush marks or streaks.
When selecting a brush, consider the size of the brush in relation to the size of the project. A larger brush will cover more surface area, but may be harder to control when painting smaller details. A smaller brush will provide more precision, but will take longer to cover larger areas.
Investing in high-quality paint brushes is essential for achieving a professional-looking finish. With the right brush, you’ll be able to paint your interior spaces with ease and precision.
How to Choose the Right Paint Brush
Choosing the right paint brush can make all the difference in the quality of your paint job. Here are some tips to help you choose the right paint brush for your project:
- Consider the type of paint: Different types of paint require different types of brushes. For example, for oil-based paint, use a natural bristle paint brush. For water-based paint, use a synthetic brush.
- Look at the size of the brush: The size of the brush you choose should be appropriate for the size of the area you are painting. For small areas, use a smaller brush. For larger areas, use a larger brush.
- Check the bristles: Make sure the bristles are straight and not frayed. Frayed bristles can leave marks on the surface you are painting.
- Consider the shape: Paint brushes come in different shapes, such as flat, angled, and round. Choose a shape that will work best for the area you are painting. For example, flat brushes are great for painting large, flat surfaces, while angled brushes work well for cutting in at corners.
- Think about the handle: The handle of the brush should feel comfortable in your hand. Make sure it is not too short or too long for you to hold comfortably.
- Choose a quality brush: A high-quality paint brush may cost more, but it will last longer and give you a better finish. Look for a brush with densely packed bristles and a sturdy handle.
By following these tips, you can choose the right paint brush for your project and achieve a professional-looking finish. Remember to properly clean and care for your paint brushes after each use to ensure they last as long as possible.
How to Clean and Care for Your Paint Brushes
Cleaning and Caring for Your Paint Brushes
Properly cleaning and caring for your paint brushes is essential to prolong their lifespan and ensure they are ready for your next project. Here are some tips on how to clean and care for your paint brushes:
| Step | Instructions |
|---|---|
| Step 1 | Immediately after use, remove excess paint from the brush by wiping it on the edge of the paint can or a clean cloth. |
| Step 2 | Rinse the brush with warm water to remove any remaining paint. |
| Step 3 | If the paint is oil-based, clean the brush with mineral spirits or paint thinner in a well-ventilated area. If the paint is water-based, use soap and water to clean the brush. |
| Step 4 | Gently massage the bristles with your fingers or use a brush comb to remove any remaining paint or buildup. |
| Step 5 | Rinse the brush in clean water and repeat steps 2-4 until the water runs clear and all paint has been removed. |
| Step 6 | Shape the brush back into its original form and let it dry flat or hanging upside down, making sure the bristles are not touching any surfaces. |
| Step 7 | Once the brush is completely dry, store it in its protective cover or wrap it in paper to keep the bristles in good shape until your next use. |
By following these steps, you can ensure that your paint brushes are clean and well-maintained, ready to be used for your next interior painting project.
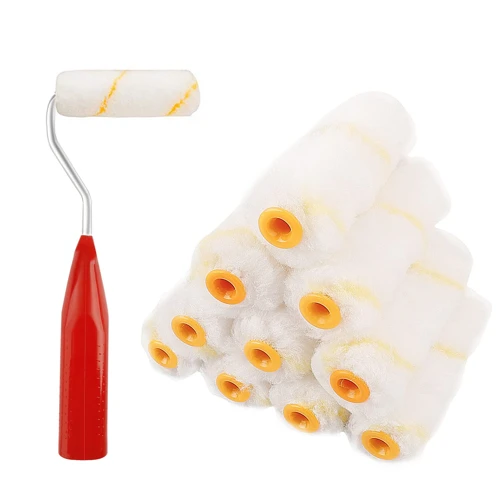
4. Paint Rollers and Roller Covers
As you prepare for your next interior painting project, don’t forget about the crucial role that paint rollers and roller covers play in achieving a smooth and even finish. Whether you’re painting walls, ceilings, or furniture, using the right type of roller and cover can make all the difference in the quality of your finished product. In this section, we’ll explore why these tools are essential, the various types available, and how to choose and care for them properly.
Why You Need Them
Drop cloths are an essential tool for any DIY interior painting project. They serve a crucial purpose in protecting your floors, furniture, and other belongings from getting splattered with paint. Without drop cloths, you risk ruining your floors or furniture with paint stains that are difficult or impossible to remove.
Drop cloths are useful for:
- Preventing paint splatters and drips from damaging your floors or furniture.
- Minimizing cleanup time and effort by collecting any spilled paint on the cloth.
- Preventing slippage while painting by creating a non-slip surface on the floor.
- Protecting your health by preventing paint and chemical spills from being absorbed into surfaces and releasing harmful fumes.
In short, drop cloths are essential for any DIY interior painting project to save time and effort on cleanup, protect your belongings, and ensure a clean, professional-looking finish. It is strongly recommended that you invest in high-quality drop cloths to achieve the best results.
Types of Paint Rollers and Covers
When it comes to paint rollers and covers,there are a few different types to choose from depending on your painting needs. Here are some options to consider:
| Nap Length | Best Used On |
|---|---|
| 3/16 inch | Smooth surfaces |
| 1/4 inch | Semi-smooth surfaces, such as plaster walls and ceilings |
| 3/8 inch | Medium surfaces, like textured walls and ceilings |
| 1/2 inch | Rough surfaces, such as brick walls or concrete |
The nap length of a paint roller refers to the thickness of the material covering the roller. The longer the nap, the more paint the roller can hold and apply. Choose the appropriate nap length for the surface you are going to paint. A 3/8 inch nap roller is a good overall choice for most surfaces.
In addition to nap length, there are different cover materials. Synthetic covers such as polyester are durable and work well with all types of paints, while natural fiber covers like lambswool are ideal for oil-based paints. There are also foam rollers, which are great for painting cabinets and furniture, as they leave a smooth finish.
When selecting a roller cover, choose one that is appropriate for the type of paint you are using. For example, if you are using a water-based paint, choose a roller cover made specifically for water-based paints.
Lastly, consider the roller size. A larger roller covers more area quickly, but is more difficult to use in tight spaces. A smaller roller is easier to maneuver and is great for smaller projects. Remember to choose the right roller cover for the job to ensure a smooth and even application.
How to Choose the Right Paint Roller and Cover
When it comes to choosing the right paint roller and cover for your interior painting project, there are a few things to consider. Here are some factors that can help you make the right choice:
| Factor | Consideration |
| Type of Paint | Consider the type of paint you will be using. For example, if you are using a thicker paint, you may need a thicker nap on your roller cover to ensure proper coverage. |
| Surface Texture | Consider the texture of the surface you will be painting. A rougher surface may require a thicker nap on your roller cover, while a smoother surface may require a thinner nap. |
| Size of Roller | Consider the size of the roller you will be using. A larger roller may be necessary for larger surfaces, while a smaller roller may be better for smaller areas. |
| Material of Roller Cover | Consider the material of the roller cover. Synthetic materials, such as nylon or polyester, are typically more durable and can be easier to clean. However, natural materials, such as lamb’s wool, may provide a smoother finish. |
| Nap Length | Consider the nap length of the roller cover. A shorter nap is better for smooth surfaces, while a longer nap is better for textured surfaces. |
By taking these factors into consideration, you can choose the right paint roller and cover for your specific project and ensure a professional-looking finish. And don’t forget to properly prep your roller and cover before use by washing them with warm, soapy water and giving them a good shake to remove any excess water.
How to Use a Paint Roller
Using a paint roller is a quick and effective way to cover large areas with paint. Here are some steps to follow when using a paint roller:
- Prepare the roller: First, select the appropriate roller cover for the job (see section 4 for types of roller covers). Then, attach the cover to the roller frame and spin it on the paint tray to get rid of any loose fibers.
- Load the roller with paint: Dip the roller into the paint tray and roll it back and forth to ensure that it is completely coated but not dripping with paint.
- Start painting: Begin by rolling the paint onto the wall in a “W” or “N” pattern, starting in a top corner of the wall and working your way down. Use light pressure and keep the roller at a slight angle to avoid drips.
- Overlap strokes: Overlap each stroke of the roller slightly to ensure complete coverage and to avoid leaving streaks or missed spots.
- Reload the roller: As you paint, be sure to periodically reload the roller with paint to ensure that it continues to cover evenly.
- Cut in the edges: Once you have covered most of the wall with the roller, use a paintbrush to “cut in” around the edges and corners of the wall that the roller can’t reach (see section 3 for types of paint brushes).
- Keep a wet edge: To avoid lap marks, make sure to paint with a “wet edge,” meaning you should not let one section of the wall dry before starting the next.
- Clean up: When you have finished painting, clean the roller cover with soap and water (see section 4 for how to clean roller covers) and store it in a dry place until the next use.
Following these steps can help ensure that your painting project goes smoothly and without any mishaps.
How to Clean and Care for Your Paint Rollers
Properly cleaning and caring for your paint rollers is essential to getting the most out of them and making them last for multiple uses.
Here are the steps you can take to ensure your paint rollers are well taken care of:
- Clean thoroughly after each use: After you have finished painting, immediately remove any excess paint from the roller using a scraper or putty knife. Then, using warm soapy water, thoroughly wash the roller until the water runs clear.
- Dry completely: Once you have finished washing the roller, use a clean cloth or paper towel to remove any excess water. Allow the roller to air dry completely before storing it.
- Store properly: Once your roller is completely dry, store it in a dry and cool place to prevent any potential mold or bacteria growth. One option is to place the roller in an airtight plastic bag or wrap it in plastic wrap.
- Additional cleaning tips: For more stubborn paint, you can use a roller cleaner tool or paint thinner to help remove the paint. However, be cautious when using paint thinner as it can potentially damage the roller if used improperly. Always read the manufacturer’s instructions before using any harsh chemicals.
By following these simple steps for cleaning and caring for your paint rollers, you can ensure that they will last longer and be ready to be used for your next painting project.
5. Paint Trays
As you gather your essential interior painting tools, you wouldn’t want to overlook the significance of having a paint tray. This accessory helps hold your paint in one place, making it more convenient to work with your brushes and rollers. Without it, you may end up with a messy painting project and waste precious paint. In this section, we will discuss the importance of paint trays, types available, how to use them, and tips on how to clean and maintain them properly.
Why You Need Them
Drop cloths are essential tools for any DIY interior painter. They serve several important purposes while painting your walls or ceilings. Here are a few key reasons why you need them:
- Protection from spills and splatters: Painting can be a messy process, and even the most experienced painter can make a mistake. A drop cloth provides a protective layer to prevent any accidental spills or splatters from damaging your floors, carpets or furniture.
- Minimizing clean-up time: By using a drop cloth, you will not have to worry about cleaning up any paint drips or spills on your floors. This will save you a considerable amount of time and effort.
- Preventing slips and falls: Wet paint can create a very slippery surface, and someone can easily slip and fall if they accidentally step on it. Using a drop cloth can help prevent any such accidents.
- Enhancing your painting precision: A drop cloth helps create a clear boundary between your work area and other parts of your home. This can help you focus better on your painting and ensure that you don’t accidentally paint the wrong surface.
In short, drop cloths are a must-have accessory for any DIY interior painter. They provide an additional layer of protection for your home and prevent any unwanted and costly mistakes.
Types of Paint Trays
When it comes to choosing paint trays, there are a few different types to consider. Here are some of the most common types of paint trays you might come across:
| Standard Plastic Trays | These are the most common type of paint tray and are often made out of durable plastic. They come in a range of sizes and typically have a ribbed surface that makes it easy to load your roller with paint. |
| Disposable Cardboard Trays | These trays are a good option if you’re looking for something cheap and easy to use. They are made from lightweight, biodegradable cardboard and can be easily disposed of after use. |
| Metal Trays | Metal paint trays are often more durable than their plastic counterparts and are a good choice if you plan to do a lot of painting. They can be a bit heavier to handle, but are less likely to tip over during use. |
| Roller Grids | A roller grid is a different type of painting accessory that can be used in place of a traditional paint tray. It’s a small, flat, rectangular tool that has a series of ridges on its surface which allows you to roll off excess paint from your roller. Roller grids are often made from durable materials like metal or plastic and can be used multiple times before cleaning. |
When choosing a paint tray, consider the size and style of your painting project, as well as your overall budget. A disposable cardboard tray might be fine for a small project, but a metal tray or roller grid might be a better investment if you plan to do a lot of painting. Whichever type of tray you choose, make sure it’s easy to clean and maintain for future use.
How to Use Them
When using drop cloths, it’s important to know the proper techniques to avoid damage to your floors or furniture. Follow these steps to use drop cloths effectively:
- Choose the right type of drop cloth for the job: Depending on the size of your project and the surfaces you need to protect, choose from canvas, plastic, or paper drop cloths.
- Secure the drop cloth: Lay the drop cloth flat on the surface you’re protecting, making sure it covers the entire area. If it’s windy, use tape or weights to hold it in place.
- Overlap multiple drop cloths: If the area you’re painting is larger than one drop cloth, overlap the edges to make sure there are no gaps.
- Clean up spills immediately: If you accidentally spill paint on the drop cloth, clean it up right away before it dries and becomes harder to remove.
- Remove the drop cloth carefully: When you’re finished with your project, remove the drop cloth carefully to avoid spreading any paint or debris onto your floors or furniture. Fold it neatly and dispose of it properly.
By following these simple steps, you can protect your floors and furniture from paint splatters and spills while you work on your interior painting project.
How to Clean and Care for Your Paint Trays
When it comes to cleaning and caring for your paint trays, there are several steps you can take to ensure they last for multiple projects. Here are some tips for keeping your paint trays in tip-top shape:
| Clean Up Immediately | After each use, it’s important to clean your paint tray thoroughly to prevent paint buildup. Use a scraper or putty knife to remove excess paint. |
|---|---|
| Use Warm Water and Soap | Fill a sink or bucket with warm water and soap. Let the paint tray soak for a few minutes to loosen any remaining paint. Then, scrub the tray with a brush or sponge until it’s clean. |
| Don’t Use Harsh Chemicals | Avoid using harsh chemicals or solvents to clean your paint tray, as these can damage the plastic material. Stick to warm water and soap instead. |
| Let it Dry Completely | Once you’ve cleaned your paint tray, let it air dry completely before storing it away. This will prevent mold or mildew from developing. |
| Store Properly | When not in use, store your paint tray in a cool, dry place to prevent warping or cracking. You can also wrap it in plastic wrap or a plastic bag to keep it clean and dust-free. |
By taking these steps, you’ll ensure your paint trays are always clean, functional and ready for your next DIY painting project.
6. Stir Sticks
If you’re a DIYer looking to tackle an interior painting project, it’s important to have all the necessary tools at your disposal. One tool that may be easily overlooked but is essential for any painting job is the stir stick. These simple, yet necessary tools play a crucial role in ensuring your paint is mixed properly and ready to use. Without them, your paint may not spread evenly or adhere properly to your walls. In this section, we’ll explore why stir sticks are important and how to use them effectively to achieve a professional-looking finish.
Why You Need Them
Using drop cloths during an interior painting project is essential for several reasons. Not only do they protect your flooring and furniture from paint spills and splatters, but they also make clean-up much easier. Without a drop cloth, you risk damaging or staining your floors, carpets, or furniture, which can end up costing you more in repairs or replacements.
Using a drop cloth allows you to focus on the painting task at hand, without worrying about potentially messy accidents. It also helps to create a more professional and organized workspace, which can improve the overall quality of your work.
In addition to protection and organization, drop cloths can also contribute to your safety during the painting process. By covering slippery surfaces, they can prevent slips and falls, which can be especially dangerous when working with paint and other tools.
Investing in high-quality drop cloths is a wise decision for any DIY interior painting project, as they provide crucial protection, organization, and safety benefits. Check out the different types and how to use them in the table below.
| Type of Drop Cloth | Material | Features |
|---|---|---|
| Canvas Drop Cloth | Heavy-duty fabric | Durable, reusable, absorbent, and less likely to slip |
| Plastic Drop Cloth | Lightweight plastic sheeting | Easy to use, disposable, water-resistant, and good for shorter term projects |
| Paper Drop Cloth | Thick kraft paper | Inexpensive, recyclable, and good for one-time use |
Types of Stir Sticks
When it comes to stir sticks, there are a few options to choose from, each with their own benefits. It may be tempting to just use whatever is lying around, but having the right type of stir stick can make a big difference in the quality of your paint job. Here are a few types of stir sticks to consider:
| Type of Stir Stick | Description |
|---|---|
| Wooden Stir Sticks | These are the most common type of stir stick and are often provided for free at the paint store. They’re made of wood and are disposable, which makes them a convenient option. However, they can splinter and break, which can be frustrating when you’re trying to stir your paint. |
| Plastic Stir Sticks | Plastic stir sticks are a more durable option than wooden ones, and they’re less likely to splinter or break. They’re also washable and reusable, so you can use them for multiple projects. However, they’re not as eco-friendly as wooden ones, and they can be harder to find at hardware stores. |
| Metal Stir Sticks | Metal stir sticks are the most durable option and can last for years, making them a good investment if you plan on doing a lot of painting. They’re also easy to clean, which makes them a convenient option. However, they can be more expensive than wooden or plastic ones, and they’re not as disposable. |
It’s important to choose a stir stick that is appropriate for the type of paint you’re using. Some paints require more vigorous stirring or have thicker consistencies than others, so be sure to choose a stir stick that can handle the job. Additionally, be sure to clean and properly store your stir sticks after each use to prolong their lifespan.
How to Use Them
Using drop cloths is an essential step to protect surfaces while painting. Here are the steps for using drop cloths:
- Prepare the surface: Before putting down the drop cloths, make sure the surface you want to protect is clean and free of debris.
- Choose the right type of drop cloth: There are different types of drop cloths and it’s important to choose the right one for your project. Plastic drop cloths are best for protecting floors and furniture from paint spills, while canvas drop cloths are better for protecting larger areas from splatters and drips.
- Unroll the drop cloth: Carefully unroll the drop cloth over the surface you want to protect. Make sure it covers the entire area and extend the drop cloth several inches up the wall to protect the baseboards from drips.
- Secure the drop cloth: Secure the drop cloth by taping the edges down to the floor or using weights. Make sure the drop cloth is pulled taut and there are no wrinkles or bumps that could cause trouble while painting.
- Paint: Once your drop cloth is secured, you’re ready to paint! Be mindful of any areas that may not be covered by the drop cloth and take extra precautions to avoid any accidents.
- Clean up: Once the painting is complete, carefully remove the drop cloth and dispose of it. If you’re using a canvas drop cloth, be sure to shake off any excess paint and allow it to dry before storing it for future use.
Following these steps will ensure that your surfaces are well protected during painting and that you prevent any accidental spills or splatters.
7. Painters’ Multi-Tool
When it comes to interior painting, having the right tools can make all the difference in achieving a professional-looking finish. One tool that every DIYer should have in their arsenal is a versatile painters’ multi-tool. This handy gadget can help you save time and effort on your painting projects by performing a variety of tasks, from scraping and applying putty to opening paint cans and cleaning brushes. Let’s take a closer look at why this tool is essential for your next painting project.
Why You Need It
Painter’s tape is an essential tool when it comes to painting the interior of your house. It helps to create crisp, clean lines between different colored walls, and it can protect surfaces that you don’t want to paint. Here are some reasons why you need painter’s tape:
| Reason | Explanation |
| Protect surfaces | Using painter’s tape can help to protect surfaces such as baseboards, trim, and window frames from accidental paint splatters. |
| Create clean lines | Painter’s tape can help you to create clean lines between different colored walls or to create accent walls without worrying about paint bleeding through. |
| Save time | Using painter’s tape can save you time because it allows you to paint quickly and confidently without worrying about making mistakes. |
| Reduce touch-ups | By using painter’s tape, you can reduce the amount of touch-ups that you need to do after painting, which can save you both time and money. |
| Professional-looking results | Painter’s tape can help you to achieve professional-looking results even if you’re a beginner at painting. |
With all of these benefits, it’s easy to see why painter’s tape is an essential tool for any DIYer who wants to achieve a perfect paint job in their home.
Types of Painters’ Multi-Tools
When it comes to choosing the right painters’ multi-tool for your interior painting project, there are several options available. Here are some of the most common types of painters’ multi-tools:
- Scraper/putty knife combination: This type of multi-tool generally features a scraper on one end and a putty knife on the other, making it a versatile option for scraping and smoothing surfaces.
- 5-in-1 tool: As the name suggests, this multi-tool typically features five different functions, including a scraper, putty knife, roller cleaner, nail puller, and paint can opener.
- Angle scraper: This type of multi-tool is designed for scraping in hard-to-reach areas, such as corners and edges. It has a thin, angled blade that makes it easier to scrape without damaging surrounding surfaces.
- Corner roller: This multi-tool has a small roller on one end and a scraper on the other, making it ideal for painting and smoothing corners.
- Texture sprayer: For projects that require adding texture to walls or ceilings, a texture sprayer multi-tool is a great option. It typically features an adjustable nozzle that allows you to control the texture pattern.
- Edger: An edger multi-tool is designed for painting edges and trim. It has a guide wheel that helps you paint a straight line without getting paint on adjacent surfaces.
No matter which type of painters’ multi-tool you choose, it’s important to choose high-quality tools that will last for multiple projects. Investing in good multi-tools could help you save money in the long run, as you won’t have to replace them as frequently.
How to Use It
When using paint brushes, there are a few things to keep in mind in order to make your painting project a success. Here are some steps to follow when using your paint brushes:
- Load the brush: Dip the brush into the paint and then tap it gently on the edge of the container to remove any excess. This will help prevent drips and ensure an even coat of paint.
- Start painting: Apply the paint to the surface in a smooth, even motion. Use long strokes to cover larger areas, and shorter strokes for smaller areas or when cutting in around edges.
- Brush technique: Hold the brush at an angle, with the bristles slightly tilted towards the direction you are painting. When applying paint, use a light touch and avoid pressing too hard on the brush.
- Overlap strokes: As you apply more paint, make sure to overlap your strokes slightly to ensure even coverage. This will help avoid any gaps or missed spots.
- Keep the brush wet: It’s important to keep your brush wet while painting, as this will help the paint flow more smoothly. If the paint starts to dry out, dip the brush back into the paint to reload it.
- Clean the brush: After you have finished painting, clean your brush thoroughly with soap and water or the recommended cleaner for the type of paint you used. Always shape the bristles before hanging the brush up to dry, to ensure they dry in the correct position.
By following these steps, you can ensure that your paint brushes are used in the most effective way possible, and that your interior painting projects are a success.
8. Putty Knife
One of the most versatile tools in an interior painter’s arsenal is the putty knife. This tool can be used for a variety of tasks beyond just applying putty, and it’s essential to have one on hand for any DIY painting project. Whether you need to scrape off old paint, fill in gaps, or apply a smooth finish, a putty knife can help you achieve a professional-looking result. In this section, we’ll take a closer look at why a putty knife is necessary for any DIYer and how to choose the right one for your project.
Why You Need It
Painter’s tape is an essential tool for any DIY interior painting project. It is a type of masking tape that is specifically designed to prevent paint from bleeding into areas where it is not wanted. Here are some reasons why you need it:
| Reason | Explanation |
| Sharp Lines | Painter’s tape can help you achieve sharp, clean lines between different colors or areas of your walls. It is especially useful when painting near ceilings, trim, or corners. |
| Protects Surfaces | By applying painter’s tape to surfaces you don’t want to paint, such as windows, door frames, or baseboards, you can protect them from accidental drips or brush strokes. This can save you time and money on repairs or touch-ups. |
| Easy Application | Painter’s tape is easy to apply and remove, and it doesn’t leave behind residues or damage surfaces. This makes it a great tool for both beginners and experienced painters alike. |
| Various Surfaces | Painter’s tape can be used on a variety of surfaces, including walls, ceilings, wood, metal, and glass. This versatility makes it a convenient tool to have in your painting kit. |
Painter’s tape is a simple but powerful tool that can help you achieve professional-looking results in your interior painting projects. It is easy to use, protects surfaces from damage, and allows you to create sharp, clean lines. Be sure to choose the right type of painter’s tape for your project and use it correctly for best results.
Types of Putty Knives
Putty knives are versatile tools that are useful for a variety of interior painting projects. They can be used for smoothing and scraping surfaces, as well as for applying and removing putty, caulk, and other materials. There are several types of putty knives available, each with their own unique features.
Types of Putty Knives
| Type of Putty Knife | Description |
|---|---|
| Flexible Putty Knife | As the name suggests, this type of putty knife has a flexible blade. This makes it ideal for smoothing and spreading materials such as putty and caulking. The blade bends easily to match the shape of the surface being worked on, which ensures a smooth, even finish. |
| Stiff Putty Knife | Stiff putty knives, as the name suggests, have a rigid blade. This makes them ideal for scraping and removing materials, as they provide plenty of leverage. They are less useful for applying and smoothing materials, however, as they can leave a rough, uneven finish. |
| Offset Putty Knife | An offset putty knife has a blade that is angled upwards from the handle. This makes it useful for scraping and removing materials in hard-to-reach areas, such as corners and edges. It can also be used for smoothing and spreading materials. |
| Chisel Putty Knife | A chisel putty knife has a sharp, angled edge that is ideal for scraping and removing materials. It can be especially useful for removing old paint or wallpaper, as the sharp edge can make quick work of stubborn adhesives. It is less useful for applying and smoothing materials, however. |
When choosing a putty knife, it’s important to consider the task at hand. A flexible putty knife may be ideal for applying and smoothing a fresh coat of putty, while a stiff putty knife may be better for removing old, stubborn materials. An offset putty knife may be useful for working in tight spaces, while a chisel putty knife may be the best choice for removing old paint or wallpaper. By selecting the right tool for the job, you can ensure a professional-looking finish and make your interior painting project go more smoothly.
How to Use It
When it comes to using your painting tools, it’s important to know the proper techniques to ensure a smooth and flawless finish. Here’s a guide on how to use some of the essential interior painting tools:
| Tool | How to Use It |
|---|---|
| Drop Cloths | Place them over anything you want to protect, such as furniture or flooring, before you begin painting. Secure them in place with painter’s tape, if necessary. |
| Painter’s Tape | Apply it around the edges of any areas you don’t want to paint, such as baseboards or trim. Make sure to press it firmly to avoid any paint seeping underneath. |
| Paint Brushes | Dip the brush into the paint, then tap it against the side of the can to remove any excess. Use long, even strokes to apply the paint, being careful not to overload the brush. |
| Paint Rollers and Roller Covers | Dip the roller into the paint tray until it’s evenly coated, then roll it back and forth to remove any excess. Use long, even strokes to apply the paint, being careful not to press too hard. |
| Paint Trays | Pour paint into the tray, then use the ridged portion at the top of the tray to evenly distribute the paint on your brush or roller. |
| Stir Sticks | Use them to stir the paint, making sure to reach the bottom of the can to thoroughly mix the paint. |
| Painters’ Multi-Tool | Use the sharp edge to scrape any old, peeling paint or wallpaper, and use the brush end to clean up any dust or debris left behind. |
| Putty Knife | Use it to fill in any holes or cracks in the wall with spackling paste or joint compound, then smooth it out evenly with the flat edge. |
| Sandpaper | Use it to sand down any rough or uneven surfaces on the wall before painting. Always sand in the direction of the grain to avoid damaging the surface. |
| Extension Pole | Attach it to your paint roller or brush to reach high or hard-to-reach areas, such as ceilings or tall walls. |
By using these tools properly, you can achieve a professional-looking finish on all of your interior painting projects.
9. Sandpaper
When it comes to achieving a smooth and even surface on your interior walls or furniture, sandpaper is a DIYer’s best friend. This abrasive material is essential for removing old paint or finishes, smoothing rough surfaces, and preparing surfaces for painting or staining. However, with so many varieties and grits available, it can be perplexing to choose the right sandpaper for your project. In this section, we will discuss the importance of having sandpaper in your toolkit, the different types of sandpaper you may need, and how to properly use it to achieve the desired results.
Why You Need It
Painter’s tape is an essential tool that every DIYer should have in their arsenal when it comes to interior painting. It is a versatile tape that has a low adhesive quality, which means it is easy to apply and remove without damaging the surface underneath. Here are some reasons why you need painter’s tape:
| Reason | Explanation |
| Protects surfaces | Painter’s tape is perfect for protecting surfaces such as baseboards, trim, ceilings, and floors from paint splatters and drips. It ensures that the paint stays only where it is supposed to go. |
| Creates straight lines | One of the primary uses of painter’s tape is to create sharp, clean lines between different paint colors or between paint and other surfaces. It is especially useful for creating geometric patterns, stripes, and borders. |
| Helps with touch-ups | Painter’s tape is also helpful for touch-ups. It makes it easy to paint only the area that needs fixing without having to repaint a whole wall or room. |
Overall, painter’s tape is a must-have for any DIYer who wants to achieve a perfect paint job. Its versatility and ease of use make it an effective tool for protecting surfaces, creating straight lines, and helping with touch-ups.
Types of Sandpaper
Sandpaper is a type of abrasive material that is used to smoothen surfaces and remove dirt or other substances from them. It is an essential tool for any DIY painter who wants to achieve a professional finish on their interior painting project. It comes in different types or grits, each designed for a specific task. In this section, we will discuss the types of sandpaper commonly used in interior painting projects.
| Grit | Common Uses | Description |
|---|---|---|
| Coarse Grit (40-60) | Removing heavy rust or paint, shaping wood | Has larger grit particles and removes material quickly |
| Medium Grit (80-120) | Smoothing rough surfaces, removing old paint or varnish | Has smaller particles and removes material more slowly than coarse grit |
| Fine Grit (150-180) | Preparing surfaces for painting, removing scratches, sanding between coats | Has even smaller particles and creates a smooth and even finish |
| Extra Fine Grit (220-240) | Final sanding of surfaces before painting, smoothing finishes, preparing surfaces for buffing | Has very fine particles and is used for creating a polished finish |
When choosing sandpaper, it is important to consider the task you will be performing and the type of material you will be working on. Using sandpaper with the wrong grit can damage the surface being sanded or make it more difficult to achieve the desired finish. Always start with a coarse grit and work your way up to a finer grit for the best results.
In addition to the grit, you should also consider the type of backing on the sandpaper. Sandpaper can come with either a cloth or paper backing. Cloth-backed sandpaper is more durable and will last longer, making it a better choice for high-intensity sanding projects. However, it is also more expensive than paper-backed sandpaper. Paper-backed sandpaper is more affordable and is better suited for lighter sanding tasks.
How to Use It
When it comes to using your interior painting tools, it’s important to know how to use them properly to achieve the best results. Here is a step-by-step guide on how to use each of the essential interior painting tools:
| Tool | How to Use It |
|---|---|
| Drop Cloths | Before you start painting, lay out the drop cloth over your floors and furniture to protect them from paint splatters and spills. Tape the edges of the drop cloth down to prevent it from moving during painting. |
| Painter’s Tape | Apply painter’s tape along the edges of moldings, baseboards, and door and window frames, where they meet the wall. This will create a clean, crisp line and prevent paint from bleeding onto the adjacent surfaces. |
| Paint Brushes | Choose the right paint brush for the job and use it to cut in along the edges of the walls and the ceiling, as well as to paint trim and small details. Dip the brush into the paint, tap off the excess, and use a smooth, even stroke to apply the paint. |
| Paint Rollers and Roller Covers | Insert the roller cover onto the roller, and then dip it into the paint tray. Roll it back and forth to distribute the paint evenly, and then roll it onto the wall in a “W” or “V” pattern, filling in the area with horizontal strokes. |
| Paint Trays | Pour the paint into the paint tray and use the roller to spread it out evenly. Be careful not to overload the roller with paint, as this can cause drips and splatters. |
| Stir Sticks | Use the stir stick to mix the paint thoroughly before using it. This will ensure that the color is consistent throughout the project. |
| Painters’ Multi-Tool | Use the painters’ multi-tool to scrape off any old paint or debris from the surface you are painting. You can also use it to remove painter’s tape, as well as to open paint cans. |
| Putty Knife | Use the putty knife to apply spackle or joint compound to any holes or gaps in the wall. Smooth out the surface with the putty knife and let it dry before sanding and painting. |
| Sandpaper | Use sandpaper to smooth out any rough surfaces or bumps on the wall. Start with a coarse grit sandpaper and work your way up to a fine grit for a smooth finish. |
| Extension Pole | Attach the extension pole to your paint roller to reach high or difficult areas, such as ceilings or high walls. This will allow you to paint without having to use a ladder. |
By following these tips on how to use your essential interior painting tools, you can achieve a professional-looking finish on your DIY painting projects.
10. Extension Pole
One thing that can make interior painting easier and more efficient is having the right tools. While you may have thought of the basics like paint rollers and brushes, there’s one tool that often gets overlooked: the extension pole. This handy tool can save you time and energy, especially when it comes to painting hard-to-reach areas like high ceilings or tall walls. Let’s take a closer look at why you need an extension pole and the different types available.
Why You Need It
Painter’s tape is a crucial tool for any DIY interior painting project, and there are several reasons why you need it.
1. Clean Lines: One of the primary reasons to use painter’s tape is to achieve clean and crisp lines while painting. Painter’s tape makes it easy to keep paint where it belongs and prevents it from bleeding onto adjacent surfaces, such as baseboards, trim, or ceilings.
2. Protection: Painter’s tape is also an excellent tool for protecting items that you don’t want to get paint on, such as light switches, outlets, and windowpanes. By taping around these areas, you can ensure that you don’t accidentally get paint on them and create more work for yourself.
3. Ease of Use: Painter’s tape is very easy to use and requires no special skills or experience. Once you’ve applied it to the desired area, you can paint right up to the edge of the tape, allowing for neat and precise lines.
4. Time-Saving: Using painter’s tape can also save you time in the long run by eliminating the need for touch-ups or rework. By taking the extra step to use tape, you can ensure that you get it right the first time, and avoid any potential mistakes that could cost you time and materials.
Painter’s tape is an essential tool for achieving professional-looking paint jobs, and should be a staple in any DIYer’s toolbox.
Types of Extension Poles
When it comes to choosing an extension pole, there are a few options to consider depending on your needs. Here are some of the types of extension poles available:
- Telescoping poles: These poles have adjustable lengths that can reach up to 18 feet. They are perfect for painting high walls and ceilings.
- Threaded poles: These poles have threaded ends that can attach to various painting tools such as rollers, brushes, and pads. They come in different lengths and are great for hard-to-reach places.
- Twist-lock poles: These poles have a unique locking mechanism that allows for easy adjusting and secure locking. They come in different lengths and are perfect for both professional and DIY use.
- Bayonet poles: These poles feature a bayonet-style locking mechanism that allows for quick and easy tool attachment. They come in different lengths and are great for large painting projects.
- Mini poles: These poles are shorter than traditional poles and are perfect for smaller painting projects. They are also great for touch-up work and can reach tight corners and spaces.
No matter which type of extension pole you choose, make sure to select one that is sturdy and durable enough to handle your painting tasks.
How to Use It
When using the painter’s multi-tool, follow these steps to ensure the best results:
- Scraping: Use the flat edge of the tool to scrape off any loose or peeling paint from the surface you are painting. Be careful not to damage the surface underneath.
- Sanding: Use the sandpaper holder on the multi-tool to smooth out any rough spots on the surface. Begin with a coarser grit sandpaper and work your way up to a finer grit for a smooth finish.
- Cleaning: The multi-tool may also come with a built-in paint can opener and a cap lifter. Use these features to open paint cans and clean up any spills or drips immediately to prevent them from drying and becoming harder to remove later on.
- Caulking: Some multi-tools may also come with a caulk remover or applicator. This can be used to remove old caulking around windows or to apply new caulking to seal any gaps or cracks in your walls or ceilings before painting.
- Measurements: Lastly, the multi-tool may also have a measuring feature built in, which can be helpful when determining the amount of paint needed for your project or when measuring the length of a surface to be painted.
By using the different features of the painter’s multi-tool, you can save time and effort when preparing your surface for painting, while also achieving a professional-looking finish.
Conclusion
As we near the end of our journey in exploring the essential interior painting tools every DIYer should have, it’s important to reflect on the importance of having the right tools. With the right tools in hand, anyone can transform their home with a fresh coat of paint. But without them, the task can quickly become frustrating and time-consuming. So before you embark on your next painting project, take some time to consider which of these tools will be most helpful to you. Remember, investing in quality tools is an investment in the success of your project.
Finish Your Interior Painting Projects Like a Pro
You may not be a professional painter, but with the right tools, you can still achieve professional-looking results. Here’s a table summarizing the essential tools every DIYer should have to finish interior painting projects like a pro:
| Tool | Purpose | Usage Tips |
|---|---|---|
| Drop Cloths | Protect floors and furniture from paint splatters and drips. | Use heavy-duty or canvas cloths for prolonged use. Secure edges with painter’s tape to prevent slipping. |
| Painter’s Tape | Mask off edges and surfaces to create clean lines and edges. | Apply in short sections and press firmly to prevent bleeding, but remove gently to avoid damage. |
| Paint Brushes | Apply paint to trim, corners, and other tight spaces. | Choose the right brush shape and size for the surface and paint type. Keep bristles clean and moist to avoid drying out. |
| Paint Rollers and Roller Covers | Apply paint quickly and efficiently to large surfaces. | Choose the right nap length and material for the surface and paint type. Roll at a consistent speed and overlap each stroke slightly. |
| Paint Trays | Hold paint for easy access with brushes and rollers. | Use disposable liners for easy cleanup. Clean tray thoroughly to avoid contamination of paint. |
| Stir Sticks | Mix paint thoroughly before use. | Use clean sticks to prevent contamination of paint. Stir slowly to avoid creating air bubbles. |
| Painters’ Multi-Tool | Perform multiple tasks such as opening cans, cleaning rollers, and scraping surfaces. | Choose a tool with the right edges and shapes for the tasks at hand. Keep it clean and dry to avoid rusting. |
| Putty Knife | Fill gaps and holes in walls and trim. | Choose a knife with a flexible blade for easy spreading of putty or spackle. Keep it clean and dry to avoid rusting. |
| Sandpaper | Smooth out rough surfaces before painting or between coats. | Choose the right grit size for the surface and purpose. Sand lightly and evenly to avoid creating scratches or grooves. |
| Extension Pole | Reach high walls and ceilings without using a ladder. | Choose a pole with a comfortable grip and adjustable length. Attach brushes or rollers securely to prevent wobbling or slipping. |
With these tools and tips, you can tackle any interior painting project like a pro. Remember to always follow safety precautions and read product labels for best results. Happy painting!
Frequently Asked Questions
Why is it important to use drop cloths when painting?
Drop cloths protect your flooring and furniture from paint spills and splatters that can permanently damage them.
What are the different types of drop cloths available?
Drop cloths come in canvas, plastic, and paper varieties. Canvas is more durable and reusable, while plastic and paper options are more affordable.
Why is painter’s tape necessary when painting?
Painter’s tape creates a neat and clean edge where two paint colors meet. It also prevents paint from bleeding onto the surface you don’t want painted.
What are some different types of painter’s tape?
There are different types of painter’s tape for specific surfaces such as delicate surfaces, textured surfaces, or rough surfaces. Also, some types come with different levels of adhesive strength.
What types of paint brushes should I have for interior painting?
Angled brushes are great for cutting in around molding and trim. Flat brushes are great for covering large areas. A small detail brush is helpful for touch-ups.
How do I choose the right paint roller?
Rollers come in different sizes and nap lengths. Consider the texture of your walls and the type of paint you’re using when choosing the right roller for your project.
What is a painters’ multi-tool?
A painters’ multi-tool is a handheld tool with multiple functions, including a bottle opener, can opener, flat-head screwdriver, and paint can opener.
Why do I need a putty knife?
Putty knives are useful for scraping off old paint, smoothing out caulk, and removing wallpaper. They also make it easier to open a paint can.
What types of sandpaper should I use?
Sandpaper comes in different grits, including fine, medium, and coarse. Choose the appropriate grit based on the surface you’re working on and the degree of sanding required.
Why should I use an extension pole?
An extension pole allows you to reach high areas without needing a ladder. It also reduces the strain on your body from reaching and bending during painting.