Woodworking can be a fulfilling hobby or profession, and one of the most important aspects is ensuring that the wood you’re working with stays securely in place. This is where wood glue comes into play. As the name suggests, wood glue is specifically designed to bind pieces of wood together. But what exactly is it made of, and how does it work? In this article, we’ll explore the ins and outs of wood glue, its benefits, how to choose the right one, and the detailed steps on how to use it for your next project. So, grab your safety goggles and let’s dive into this sticky world!
What is Wood Glue?
Woodworking is a craft that requires attention to the smallest details, and choosing the right materials is essential to ensure the longevity and aesthetics of your project. When it comes to joining pieces of wood together, one of the most fundamental materials you’ll need is wood glue. Wood glue is a specially-formulated adhesive that creates a strong and permanent bond between wood surfaces. It’s essential to know about the different types and applications of wood glue to achieve the best results. In the next sections, we’ll talk about the definition of wood glue, its types, and how it works to give you a deeper understanding of this essential woodworking material. But first, let’s take a quick look at what Titebond wood glue is made of for those who are curious.
Definition of Wood Glue
Wood glue is a type of adhesive designed specifically for joining wood pieces together. It is a versatile tool used by carpenters, woodworkers, and DIY enthusiasts to bond pieces of wood in various projects, from simple woodwork repairs to complex wooden structures. The use of wood glue is an excellent alternative to using nails, screws or other mechanical fixings, as it creates a strong permanent bond that maintains the integrity of the wooden pieces.
There are several types of wood glue, including PVA (polyvinyl acetate) glue, polyurethane glue, and epoxy glue. Each of these types has unique properties that make it suitable for specific woodworking tasks. PVA is a water-based glue, easy to clean up, and widely used in woodworking. Polyurethane glue is a waterproof adhesive that forms a bond that is stronger than the wood itself. Epoxy glue is a two-part adhesive that produces a strong bond and is commonly used for heavy-duty woodworking projects.
Regarding its composition, wood glue is typically made up of two essential components – a resin and a hardener. The resin, which is often a synthetic polymer, provides the adhesive properties. The hardener, on the other hand, is a catalyst that triggers the crosslinking of the resin molecules, resulting in the glue’s hardened state. The combination of these two components creates a powerful and durable adhesive that can adhere tightly to wood surfaces.
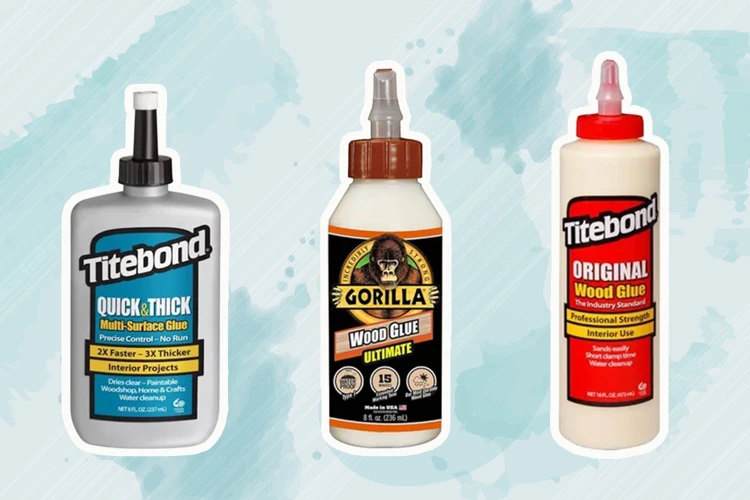
It’s important to note that the quality of wood glue can vary considerably depending on the manufacturer and the type of glue used. Some wood glues may have additional additives that improve its toughness, water resistance, and bonding strength. For example, Titebond III Ultimate Wood Glue is a particularly popular brand of PVA wood glue that contains advanced water-resistant properties due to the presence of polyurethane additives. This type of glue is an excellent option for outdoor projects such as furniture, decks, and fences due to its superior water-resistant properties.
Wood glue is a versatile and essential adhesive used in various woodworking applications, providing a strong and permanent bonding solution between pieces of wood. By choosing the right type of wood glue, you can ensure that your woodworking projects are sturdy, durable, and long-lasting.
Types of Wood Glue
When it comes to woodworking, choosing the right type of wood glue can make all the difference in the final product. There are several different types of wood glue available, each with their own unique properties and advantages. Here are some of the most common types of wood glue:
- PVA Glue: PVA (polyvinyl acetate) glue is the most commonly used type of wood glue. It is easy to use, dries clear, and is effective at bonding porous surfaces. PVA glue sets quickly, so it is ideal for projects that require fast results.
- Hide Glue: Hide glue is a natural adhesive made from animal collagen. It has been used for centuries and is known for its strength, durability, and ease of use. Hide glue is also reversible, which means it can be easily removed if necessary. However, it does require heating and mixing, so it may not be the best choice for beginners.
- Polyurethane Glue: Polyurethane glue is a waterproof adhesive that is ideal for outdoor projects or applications that require water-resistant bonds. It forms a strong, permanent bond and can be used on a variety of surfaces, including wood, metal, and plastic.
- Epoxy: Epoxy glue is a two-part adhesive that is known for its strength and durability. It is ideal for bonding surfaces that are difficult to glue with other types of adhesives, such as metal or plastic. Epoxy glue sets slowly, so it allows for more time to make adjustments before the bond sets.
- Cyanoacrylate Glue: Cyanoacrylate glue, also known as super glue, is a fast-drying adhesive that is ideal for small projects or repairs. It forms a strong bond quickly, but it is not ideal for larger projects or projects that require a longer open time.
Each type of wood glue has its own unique advantages and disadvantages. Choosing the right glue for your project depends on several factors, including the type of wood you are using, the desired strength and durability of the bond, and the conditions the project will be exposed to. It’s important to do your research and choose the right glue for your specific needs. If you want to learn more about one of the most popular types of wood glue, check out our article on Titebond wood glue here.
How Does Wood Glue Work?
Wood glue is a type of adhesive that is designed to bond wood pieces together. But, have you ever wondered how it works? Here, we’ll take a look at the science behind wood glue.
The Chemistry of Wood Glue
Most wood glues are polyvinyl acetate or PVA-based. When you apply wood glue to a surface, the water in the glue begins to evaporate, causing the glue to dry and harden. As the glue dries, it reacts with the moisture in the wood fibers, causing it to form a strong bond that can withstand a significant amount of stress.
The Role of Pressure
In addition to the chemical reaction between the wood glue and wood fibers, the application of pressure also plays a crucial role in the bonding process. The tighter the bond between the surfaces, the stronger the bond will be. This is why it’s essential to clamp or press the wood pieces together while the glue is drying. It allows the glue to spread out evenly and creates a tighter bond.
Curing Time
Once the wood glue dries, it forms a bond that is incredibly strong but may take some time to reach full strength. This is known as the curing time, and it can vary depending on the type of glue used. Generally, it’s recommended to wait at least 24 hours before using the bonded wood pieces to allow the glue to cure fully.
Factors Affecting Wood Glue’s Effectiveness
Several factors can affect the effectiveness of wood glue. For instance, temperature and humidity levels can impact the drying and curing time of the glue. Additionally, the type of wood being glued can also influence the effectiveness of the bond.
Wood glue works by reacting with the moisture content in the wood fibers and can reach its full strength through the application of pressure and allowing it to cure fully. Understanding the science behind wood glue can help you choose the right type of glue and apply it correctly for the best result.
Benefits of Using Wood Glue
As a woodworker or DIY enthusiast, you might have heard about wood glue. This adhesive is a crucial component in fixing wood parts in various projects. However, you may be wondering why wood glue is so popular and what advantages it offers over other types of adhesives. Let’s explore the benefits of using wood glue in your woodworking projects and how it enhances the durability and performance of your creations.
Strength and Durability
When it comes to woodworking, durability is a top priority. This is where wood glue shines. The strength and durability of wood glue keeps your wood projects durable and long-lasting. Here are some reasons why:
- Strong Bond: Wood glue creates a strong bond that is often stronger than the wood itself. When two pieces of wood are glued together, the glue fills in the gaps between the wood fibers and creates a tight, solid bond. This bond can withstand heavy loads and impact.
- Prevents Joint Failure: Wood glue creates a permanent, waterproof bond that prevents joint failure. This is especially important in outdoor projects that are exposed to the elements.
- Resists Temperature Changes: Wood glue has the ability to resist temperature changes, which is essential for projects that experience extreme temperature changes. The bond created by the glue remains strong even in hot or cold temperatures.
- Minimal Shrinkage: Some types of wood glue have minimal shrinkage when drying. This is important because it means that the joint created will not develop gaps over time due to the glue shrinking.
- Resists Moisture: Besides temperature extremes, moisture is a common cause of joint failure. Wood glue is water-resistant and can withstand exposure to moisture without compromising the bond created by the glue.
- Longevity: One of the main benefits of using wood glue is its longevity. When applied correctly, wood glue can provide a long-lasting bond that can last for years, even decades.
The strength and durability of wood glue makes it an essential tool for any woodworking project. Its ability to create a strong, permanent, and waterproof bond ensures that your projects will be sturdy and long-lasting.
Time and Cost Efficiency
One of the major benefits of using wood glue is its time and cost efficiency. Wood glue dries in a relatively short time and can bond wood pieces together in a strong and permanent way. This means less time spent waiting for the adhesive to dry, and more time spent working on the project. Additionally, wood glue is typically less expensive than other types of adhesives, making it a cost-effective choice for many projects.
The following table highlights some of the key factors that contribute to wood glue’s time and cost efficiency:
| Factor | How It Affects Time and Cost Efficiency |
|---|---|
| Type of Wood Glue | Some types of wood glue, such as PVA glue, dry in as little as 30 minutes. This means less time spent waiting for the adhesive to dry, and more time spent working on the project. Additionally, some types of wood glue, such as polyurethane glue, require less glue to be used, making them more cost-effective. |
| Application Method | Using a glue spreader or brush to apply wood glue to surfaces can help ensure that the adhesive is evenly distributed and that excess glue is removed. This can save time by reducing the need for sanding or trimming excess glue after the project is finished. Additionally, using the right amount of glue can help save money on supplies. |
| Drying Time | The faster a wood glue dries, the less time it will take to complete a project. Some types of wood glue, such as cyanoacrylate glue, dry almost instantly, making them a good choice for quick repairs. However, faster-drying wood glues may be more expensive, so it’s important to consider both time and cost when choosing an adhesive. |
| Project Size and Complexity | Larger and more complex projects will naturally take longer to complete than smaller and simpler ones. However, using a fast-drying and cost-effective wood glue can help reduce the time and cost required to complete even large projects. |
By considering these factors, you can make an informed choice about the type of wood glue and application method that will be most time and cost efficient for your project.
Water-Resistance
One of the great benefits of wood glue is its ability to resist water. This makes it an ideal adhesive for projects that will be exposed to moisture, such as outdoor furniture, boats, or even kitchen countertops. When choosing a wood glue, it’s important to look for products that offer strong water resistance. Here are some factors to keep in mind:
- Waterproof vs. water-resistant: Waterproof wood glues are specially formulated to resist water to a high degree, while water-resistant versions can still withstand some exposure to moisture. Consider the level of water resistance you need for your project before selecting a wood glue.
- Type of project: While all water-resistant wood glues are able to repel water to some degree, certain types may be better suited for specific projects. For example, if you’re building a boat that will be exposed to saltwater, you may need to opt for a marine-grade wood glue to ensure proper water resistance.
- Duration of exposure: If you anticipate that your project will not be exposed to water for prolonged periods of time, a standard water-resistant wood glue may suffice. However, if you expect the project to be constantly in contact with moisture, such as a kitchen countertop, you may need to opt for a more heavy-duty waterproof glue for added protection.
- Curing time: Some water-resistant wood glues take longer to cure than others, so be sure to check the product label for specific curing times. Additionally, keep in mind that a longer curing time may result in a stronger bond, which can be important for projects that will be exposed to water.
By taking these factors into consideration, you can select a wood glue that offers the water resistance you need for your project. Additionally, using wood glue in combination with other water-resistant finishes, such as marine varnish or epoxy, can further protect your project from water damage.
How to Choose the Right Wood Glue?
Choosing the right wood glue can be a daunting task, especially for those who are not familiar with the different types available. With so many options to choose from, it can be overwhelming to determine which glue is best for your project. In this section, we will discuss various factors to consider when selecting the appropriate wood glue for your needs. By the end of this article, you will have a better understanding of what to look for in wood glue to help you make an informed decision.
Project Type
When choosing the right wood glue, it’s important to consider the project type as different types of glue are better suited for different projects. Here’s a breakdown of which type of glue works best for various project types:
| Project Type | Best Type of Wood Glue |
|---|---|
| Indoor Furniture and Woodworking | PVA Glue |
| Outdoor Furniture and Woodworking | Polyurethane Glue or Epoxy |
| Decorative Woodworking | Cyanoacrylate Glue |
| Heavy-Duty Woodworking | Epoxy |
| Veneer or Delicate Woodworking | PVA Glue or Hide Glue |
| Large-Scale Construction | Epoxy |
PVA glue, also known as white glue, is ideal for indoor furniture and woodworking projects. This type of glue is easy to use, dries clear, and is easy to clean up with water.
Polyurethane glue or epoxy is a better choice for outdoor furniture and woodworking projects. These types of glue are water-resistant and able to withstand exposure to the elements.
For decorative woodworking projects, use cyanoacrylate glue, which is also known as super glue. This type of glue is best suited for small projects with delicate parts.
For heavy-duty woodworking projects such as construction, epoxy is the strongest and most durable option. It can bond wood to metal and other materials.
If you’re working with veneer or other delicate woodworking materials, PVA or hide glue is the best option. These glues are gentle on delicate materials and won’t damage them.
When considering large-scale construction projects, such as building a house or bridge, epoxy is the most reliable and strongest option for bonding wood.
By choosing the right type of wood glue for your project, you can ensure a strong, durable, and long-lasting bond.
Drying Time
One of the most important factors to consider when choosing wood glue is the drying time. This is the amount of time it takes for the glue to dry and set, allowing you to move on to the next step of your project.
Different types of wood glue have varying drying times, so it’s important to choose one that fits your needs. To help you make the right choice, here is a breakdown of the drying times for some common types of wood glue:
| Wood Glue Type | Drying Time |
|---|---|
| PVA Glue (White Glue) | About 1 hour for initial set; 24 hours for full cure |
| Polyurethane Glue | 20-30 minutes for initial set; 24 hours for full cure |
| Cyanoacrylate Glue (Super Glue) | 10-20 seconds for initial set; 24 hours for full cure |
| Epoxy Glue | 5-30 minutes for initial set; 24 hours for full cure |
PVA glue, also known as white glue, is a popular choice for woodworking projects. It has a relatively long drying time of about 1 hour for initial set, which gives you plenty of time to adjust your pieces before the glue starts to set. However, it takes 24 hours for the glue to fully cure, so you will need to be patient if you want the strongest bond.
Polyurethane glue is another popular choice, as it has a relatively fast drying time of 20-30 minutes for initial set. This can be useful if you need to move on to the next step of your project quickly. However, like PVA glue, it takes 24 hours for the glue to fully cure.
Cyanoacrylate glue, also known as super glue, is a fast-drying glue that sets in just 10-20 seconds. This can be useful for small, quick repairs, but it may not be the best choice for larger woodworking projects. It still takes 24 hours for the glue to fully cure.
Epoxy glue is a two-part adhesive that sets quickly, usually within 5-30 minutes. However, it can take up to 24 hours for the glue to fully cure. Epoxy glue is known for its strength and durability, and it is often used for projects that need a particularly strong bond.
When choosing a wood glue, it’s important to consider not just the drying time, but also the type of project you’re working on and the other factors covered in this article. With the right glue, you can ensure a strong, long-lasting bond for your woodworking projects.
Water and Weather Resistance
When choosing the right wood glue, it’s essential to consider the specific project’s requirements. One crucial factor to consider is the water and weather resistance of the glue. Some projects may require a glue that can withstand exposure to water and weather conditions without losing strength or deteriorating.
Water Resistance: The ability of wood glue to resist water depends on the type of adhesive used. Some adhesives are water-resistant, while others are not. For instance, PVA (polyvinyl acetate) glue is not waterproof and can soften and lose its strength when exposed to water for an extended period. On the other hand, polyurethane glue is waterproof and can withstand exposure to water without losing its bonding strength.
Weather Resistance: Weather-resistant wood glue is crucial for outdoor woodworking projects that are exposed to different weather conditions. It’s important to choose a glue that can withstand fluctuations in temperature, humidity, and exposure to UV rays. One type of weather-resistant glue is epoxy, which has a high resistance to both heat and moisture.
When choosing a water and weather-resistant glue, it’s important to check the label for the glue’s specific properties and its ability to resist water and weather conditions. Here is a table outlining the level of water and weather resistance for some common types of wood glue:
| Glue Type | Water Resistance | Weather Resistance |
|---|---|---|
| PVA (Polyvinyl Acetate) Glue | Not waterproof | Not weather-resistant |
| Polyurethane Glue | Waterproof | Weather-resistant |
| Epoxy Glue | Waterproof | Highly weather-resistant |
| Cyanoacrylate Glue | Not waterproof | Not weather-resistant |
Consider the level of water and weather resistance required for your specific project and choose a wood glue that meets those requirements for the best results.
Color and Transparency
Choosing the right wood glue for your project also means considering the color and transparency of the glue. There are many types of wood glue available in different colors, including clear, natural, and brown.
Clear Glue: If you want a transparent finish, clear glue is a great option as it dries clear and won’t produce a noticeable glue line. It’s perfect for projects where aesthetics are important, such as woodworking or carpentry. It also works well for light-colored woods.
Natural Glue: Natural glue, also known as yellow glue, is ideal for darker woods. It dries to a natural wood color, blending in with the wood and hiding the glue line. The color is also versatile, as it can work well with light or dark woods.
Brown Glue: Brown glue is another popular option. It’s ideal for projects where a wood-toned glue line is desirable, such as rustic or antique furniture. The glue dries to a dark brown color, making it perfect for darker woods.
When choosing a glue, it’s important to consider the transparency of the glue as well. Some glues, such as epoxy, dry clear, while others, like polyurethane, dry amber. This can have an impact on the overall appearance of your project.
To help you decide which wood glue is right for you based on the color and transparency, refer to the following table:
| Type of Glue | Color | Transparency |
|---|---|---|
| Clear Glue | Clear | Transparent |
| Natural Glue (Yellow) | Natural wood color | Semi-transparent |
| Brown Glue | Dark brown | Semi-transparent |
| Polyurethane Glue | Amber | Transparent to semi-transparent |
| Epoxy Glue | Clear | Transparent to semi-transparent |
Consider the type of wood you’re using and decide which color of glue would best complement it. Keep in mind that some glues, such as polyurethane, dry darker than their original color, so it’s important to test a small area first before applying the glue to the entire project. By taking the time to consider the color and transparency of the glue, you can greatly enhance the overall appearance and quality of your woodworking project.
How to Use Wood Glue?
Once you have chosen the right wood glue for your project, it’s time to learn how to use it properly. The process may seem simple, but there are a few key steps that should not be overlooked in order to ensure a strong and durable bond. In this section, we will discuss the step-by-step instructions for using wood glue, including preparation, application, clamping, drying, and cleanup. Let’s dive in and learn how to use wood glue like a pro.
Step-by-Step Instructions
When it comes to using wood glue, following a step-by-step process can lead to a successful outcome. Below are the steps that are recommended for using wood glue:
Step 1: Prepare your work area by making sure it’s clean and dry. You don’t want any debris or moisture interfering with the bonding process.
Step 2: Ensure that the pieces you are gluing fit together properly. Any gaps or loose spots can adversely affect the bonding strength.
Step 3: Apply a thin layer of wood glue on one of the surfaces. Make sure the layer is even and there are no visible bumps or clumps.
Step 4: Carefully press the two surfaces together. Make sure they are properly aligned, and then apply pressure for a few moments.
Step 5: Clamp the two surfaces together tightly to hold them in place while the glue dries. Check the label on your particular wood glue to determine how long it needs to dry.
Step 6: Once the glue has dried, unclamp the surfaces and inspect your work. If any excess glue has oozed out, carefully trim it away with a knife or chisel.
Step 7: Sand the surface gently, removing any rough spots or unevenness.
It’s important to note that if the surfaces you’re bonding have a certain level of porosity, applying a second layer of glue on both surfaces can lead to better bonding. Additionally, wiping any excess glue immediately after application helps prevent any messiness that could be hard to remove once dried. By following these steps, you can ensure that your woodworking project comes out neat, sturdy, and professional-looking.
Preparation
Before applying wood glue, proper preparation of the surface is essential for ensuring optimal bonding. Here are some key steps to take in preparation:
- Clean the surfaces: Start by cleaning the surfaces to be glued thoroughly with a clean cloth or brush. Make sure there is no dust, debris, or grease on the surface. Even a small amount of dirt can prevent the glue from adhering properly, so take the time to ensure that the surface is completely clean.
- Sand the surfaces: Next, use a fine-grit sandpaper to lightly roughen the surface. This helps to create a better bonding surface for the glue and ensures that the glue will penetrate the wood fibers more readily. Sanding also helps to create a more even surface for bonding, making it easier to achieve a strong bond.
- Apply wood conditioner: Before applying the glue, it’s a good idea to apply a wood conditioner to the surface. Wood conditioner helps to seal the wood fibers, preventing the glue from penetrating too deeply into the wood. This can help to create a stronger bond and reduce the risk of the glue seeping through the wood and leaving unsightly stains.
- Protect surfaces: When working with wood glue, it’s important to protect any surfaces that you don’t want to get glue on. Use masking tape or plastic wrap to cover any adjacent surfaces that could be affected by the glue. This will help to ensure that the glue doesn’t spread beyond the work area and create a mess.
By taking these simple steps to prepare the surface, you’ll be able to ensure that the wood glue can bond to the surface effectively and create a strong and lasting bond.
Application
Before applying wood glue, make sure the surfaces to be joined are clean and dry. Any dust, dirt, or oil may affect the binding strength of the glue. Here are the steps for applying wood glue:
Step 1: Apply wood glue to one of the surfaces to be joined. Use enough glue to coat the surface evenly, but not too much that it will drip.
Step 2: Spread the glue with a brush or spreader to cover the surface entirely.
Step 3: Join the two surfaces together by pressing them firmly. Make sure the surfaces are aligned and square.
Step 4: Apply clamps to hold the surfaces together. The pressure applied by the clamps ensures a strong and tight bond.
Step 5: Wipe off any excess glue with a damp cloth before it dries.
Note: Some wood glues may have different application methods depending on the type and brand. Always follow the manufacturer’s instructions for the best results.
Remember that the amount of glue used, the pressure applied by clamps, and the drying time affect the strength and durability of the bond. Taking your time in applying the wood glue and ensuring proper clamping and drying techniques can mean the difference between a strong, lasting bond and a weaker joint that can separate over time.
Clamping and Drying
Once you have applied the wood glue to the surfaces that need to be joined, the next step is to clamp them tightly together. Clamping is a crucial part of the wood gluing process, as it ensures that the glue dries evenly and forms a strong bond between the two pieces of wood.
Here are some steps to follow when clamping and drying your wood glue:
- Make sure the surfaces are aligned: Before clamping the wood together, align the pieces properly to ensure a tight fit and an even application of glue. Use a ruler or other measuring device to ensure the surfaces are aligned correctly.
- Apply even pressure: When clamping the two pieces of wood together, it’s important to apply even pressure along the entire joint. You can use a clamp or multiple clamps, depending on the size of the project and the length of the joint.
- Avoid excessive pressure: While it’s crucial to apply even pressure, using too much pressure can actually be counterproductive. Excessive pressure can cause the glue to squeeze out of the joint, resulting in a weak bond between the pieces of wood.
- Allow for enough drying time: Different types of wood glue have different drying times, so it’s important to follow the instructions on the label. Generally speaking, most wood glues require at least 30 minutes to dry, while some may take up to 24 hours to fully cure.
- Don’t disturb the joint: Once you’ve clamped the wood together and applied the glue, it’s important to leave the joint undisturbed while the glue dries. Moving or adjusting the wood during the drying process can weaken the bond between the two pieces of wood.
- Clean up excess glue: Once the glue has dried, remove any excess glue using a chisel or scraper. It’s crucial to remove any excess glue before sanding or finishing the wood, as the glue can interfere with these processes and affect the final result.
By following these steps, you can ensure that your wood glue application is successful and that you achieve a strong and durable bond between your pieces of wood.
Cleanup
After the wood glue has dried completely, it’s time to clean up the excess glue. Proper cleanup will ensure that your project looks neat and tidy. Here are the steps to take for effective cleanup:
| Step | Procedure |
|---|---|
| 1. | Scrape off the dried glue using a sharp chisel or scraper. Be careful not to scratch or damage the surrounding wood. |
| 2. | Sand the surface lightly with sandpaper to remove any leftover glue residue or marks. Use a fine-grit sandpaper to avoid leaving scratches on the surface. |
| 3. | Clean the surface with a damp cloth or sponge. Make sure not to saturate the wood with water, as this can cause warping or damage to the wood. |
| 4. | Inspect the surface for any remaining glue residue before applying any finishes or coatings. |
By following these steps, you can ensure that your project looks clean and professional. Proper cleanup also ensures that any finishes or coatings you apply will adhere properly to the surface without any obstruction from excess glue.
Conclusion
In conclusion, wood glue is an essential component in carpentry and woodworking projects. With its adhesive properties, it offers a reliable and durable bonding solution that makes every project possible. Furthermore, its versatility, affordability, and ease of application make it an ideal choice for both DIYers and professionals alike.
When choosing the right wood glue, it is essential to consider your project’s specific needs, including the drying time, water-resistance, and color. By selecting the appropriate glue, you can ensure your project’s success and longevity.
When using wood glue, proper preparation, application, clamping, and drying is crucial to achieve a strong and lasting bond. And, of course, cleaning up after applying wood glue should not be overlooked.
In summary, wood glue plays a significant role in woodworking, providing a long-lasting and sturdy adhesion solution. By using it correctly, carpenters and DIY enthusiasts can create masterpieces that stand the test of time. Choose the right glue for your project, follow the application procedure carefully, and clean up after use to ensure your project’s success.
Frequently Asked Questions
What is the strongest wood glue?
The strongest wood glue is polyurethane glue, which can provide a strong and durable bond.
Is wood glue waterproof?
Most wood glue is water-resistant, but not entirely waterproof. If the project requires full waterproofing, a polyurethane glue or marine-grade epoxy may be better options.
Can I use wood glue for outdoor projects?
Yes, but it depends on the type of wood glue being used. Polyurethane glue and marine-grade epoxy are recommended for outdoor projects where exposure to water or humidity is possible.
What is the drying time for wood glue?
The drying time for wood glue varies depending on the type and brand, but it can take anywhere from 1-24 hours to dry completely.
What is the shelf life of wood glue?
The shelf life of wood glue varies depending on the type and brand, but most have a shelf life of at least one year.
Can wood glue be sanded?
Yes, wood glue can be sanded once it has dried. It is important to wait for it to dry completely before sanding.
Can wood glue be used on other materials besides wood?
Yes, wood glue can also be used on materials such as paper, cardboard, and fabric. It is important to check the manufacturer’s recommendations for use on specific materials.
How do I remove excess wood glue?
Excess wood glue can be removed with a damp cloth or sponge before it dries. If it has already dried, it can be sanded or scraped off carefully.
Can I stain over wood glue?
Yes, but it depends on the type of wood glue being used. Some types of wood glue can interfere with staining, so it is important to test on a small area first.
What can I do if the wood glue doesn’t hold?
If the wood glue doesn’t hold, it may be due to improper surface preparation or clamping. It is important to follow the manufacturer’s instructions carefully and make sure the surfaces are clean and dry before applying the glue. Additionally, using clamps to hold the pieces together while the glue dries can help ensure a strong bond.