If you’re a DIY enthusiast or a professional craftsman, you know how important it is to have the right adhesive for each project. One type of adhesive that has been gaining popularity among woodworkers, model builders, and jewelry makers in recent years is CA glue. Also known as super glue, this fast-drying adhesive can bond multiple materials quickly and efficiently. However, if you’re new to working with CA glue, you may be wondering how to use it effectively. In this article, we’ll provide you with tips and tricks on how to apply CA glue like a pro for a seamless finish and a strong bond.
What Is CA Glue?
CA glue, also known as cyanoacrylate adhesive, is a versatile and popular adhesive used in a variety of industries, from woodworking to automotive repair. This fast-acting glue is well-known for its strong bonding capabilities and quick drying time. However, if you’re unfamiliar with this adhesive, you may be wondering what exactly it is and how it works. Understanding the properties and characteristics of CA glue is crucial for successful application. In this article, we’ll dive into the details of what CA glue is and how it works to help you achieve professional-level results with your projects. And if you need tips on fixing a broken key with super glue or want to know how long it takes for super glue to dry, we have articles on that too.
How Does It Work?
CA glue, also known as cyanoacrylate adhesive, is a type of fast-drying super glue that forms a strong and durable bond on various materials such as wood, plastic, and metal. The gluing process involves a chemical reaction between the glue and surface moisture, resulting in a tight and secure attachment.
The basic principle behind the working of CA glue is quite simple. It works by turning from liquid to solid upon exposure to moisture. This moisture can come from the air, or from the surface that is being bonded. Once the CA glue comes into contact with moisture, it starts to harden rapidly, forming a strong bond in just a matter of seconds.
The table below describes the key factors that influence the working of CA glue:
| Factor | Description |
|---|---|
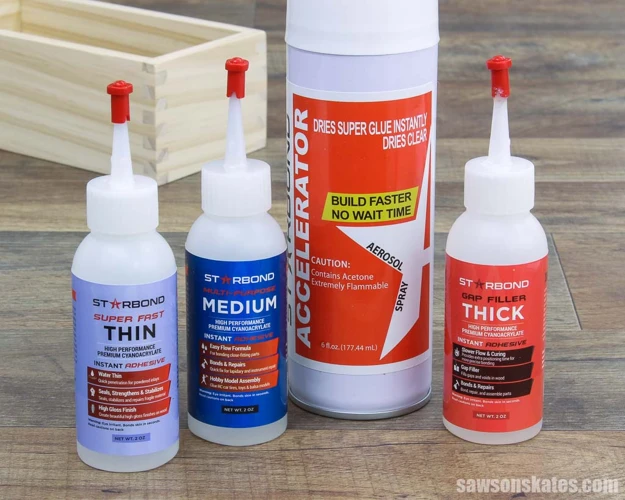
| Viscosity | Refers to the thickness or consistency of the glue. Low viscosity CA glues are thinner and flow more easily, while high viscosity CA glues are thicker and don’t flow as easily. |
| Surface Moisture | The presence of moisture on the surface being bonded is essential for the CA glue to work effectively. Non-porous materials may require additional moisture to get the glue to set properly. |
| Temperature | The working time and setting time of CA glue is highly dependent on temperature. Higher temperatures accelerate the hardening process, while lower temperatures slow it down. |
| Clamping Pressure | Applying adequate pressure to the glued surfaces helps to ensure strong bonding. Clamping pressure also helps to squeeze out air bubbles and excess glue. |
CA glue can be a quick and easy solution for a variety of bonding and repair tasks. Despite its simplicity, it’s important to keep in mind the key factors that impact its effectiveness in order to achieve the best results. In the following sections, we’ll look at some tips and tricks for using this valuable adhesive for a range of applications.
Anchor text: Learn how to fix a broken key with super glue.
Applications of CA Glue
CA glue, also known as super glue, cyanoacrylate glue, or simply cyanoacrylate, is an extremely versatile adhesive that can be used in a variety of applications. From woodworking to jewelry making, it has become a go-to adhesive for many DIY enthusiasts and professionals alike. Let’s explore some popular uses for CA glue and how it can benefit your projects. If you’ve ever accidentally broken a key, check out our guide on how to fix a broken key with super glue.
Woodworking
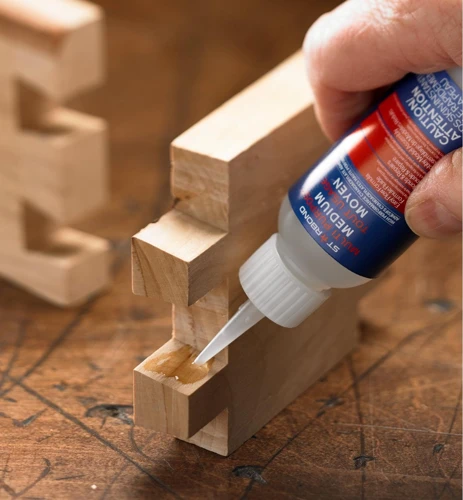
Woodworking with CA glue is a popular application, allowing for fast and durable bonding of materials. The strong bond created by CA glue makes it an excellent choice for woodworking projects requiring precise alignments and strong adhesion.
Table: Applications for Ca Glue in Woodworking
| Application | Technique | Benefits |
|---|---|---|
| Joining wood | Applying glue to one surface and clamping the pieces together | Strong and durable bond, fast drying time |
| Filling gaps and cracks | Applying glue to the gap or crack and sanding down the excess once dry | Quick and easy to apply, can be sanded and finished |
| Reinforcing weak joints | Applying glue to the joint and allowing it to seep into the crack, then clamping it together until it dries | Increases strength of joint, improves stability of the structure |
Whether working on a woodworking project that requires precise joints or fixing a broken wooden object, using CA glue can simplify the process and ensure a strong and durable bond. However, it is important to properly prepare the surfaces for bonding before applying the glue. This can be done by cleaning the surfaces with alcohol and sanding them down to create a rough texture for better adhesion.
(Internal link example:) Before using CA glue in your woodworking projects, make sure you know how to properly apply super glue and how to handle it. Additionally, be aware of the drying time and the proper storage to ensure its effectiveness in future projects.
Model Building
Model building is a popular hobby enjoyed by many people all over the world. CA glue, also known as super glue, has proven to be an indispensable tool for many model builders. Its fast-drying and strong bond make it the perfect adhesive for a wide range of model building applications.
When building models, precision is key. Choosing the right adhesive is vital to ensure that all the parts fit together perfectly. This is where CA glue comes in. It can bond a variety of materials together, including wood, plastic, metal, and rubber.
When to Use CA Glue for Model Building:
CA glue is particularly useful for applications that require a quick bond or need to be held in place while waiting for other adhesives to dry. For example, when building model airplanes, CA glue can be used to hold the fuselage together while the wings are glued in place with a slower-drying adhesive.
Preparing Surfaces:
Before applying CA glue, make sure that the surfaces to be bonded are clean and dry. If necessary, use sandpaper to remove any rough spots or bumps on the surfaces. Be sure to remove any dust or debris before applying the glue.
Applying CA Glue:
When applying CA glue, use caution and precision. The dropper method is the most common method for applying CA glue to model building projects. Use only a small amount of glue and apply it sparingly to one surface. Then, press the two surfaces together and hold until the glue sets.
Sanding and Filing:
After the glue has dried, sanding and filing are often necessary to ensure a smooth finish. Use fine-grit sandpaper or a file to gently remove any excess glue.
Cautions:
When using CA glue, always wear gloves, eye protection, and work in a well-ventilated area. CA glue has a very strong odor and can cause irritation if it comes into contact with skin or eyes. Always read and follow the manufacturer’s instructions carefully.
CA glue is a valuable tool for those who enjoy model building. It offers a quick and strong bond that can help make the model building process easier and more precise. However, it’s important to use caution and wear protective equipment when working with CA glue. To learn more about super glue and its drying time, check out our article on super glue drying time.
Jewelry Making
Jewelry making is another common application for CA glue. It is a popular adhesive in the jewelry industry due to its fast-drying nature and clear finish.
Benefits:
- Creates a strong bond
- Dries clear
- Works well with various types of metals and gemstones
When using CA glue in jewelry making, it is crucial to have a clean and dry surface before applying the adhesive. Any grease or dirt on the surface can cause a weak bond. Similarly, the metal surface must be free of any oxidation or rust.
Jewelry often requires intricate bonding, and CA glue offers an easy and reliable solution to attach small pieces. This adhesive is ideal for setting stones, attaching beads to wires, and bonding different types of metal.
Tip: When using CA glue in jewelry making, it is essential to apply a minimal amount of adhesive to avoid any excess dripping onto the surface.
It is also essential to ensure that the adhesive used is rated for use with jewelry. This rating ensures that there are no harmful chemicals to the metal and does not damage the gemstones.
Post-Application Techniques:
- After the adhesive has dried, the excess can be carefully removed with a sharp blade or sandpaper.
- For finishing, the jewelry piece can be polished with a jewelry cloth to remove any residue or fingerprints.
- Additionally, it is crucial to check the bond frequently, as constant wear and tear can cause the glue to weaken.
When using CA glue in jewelry making, it is essential to take the necessary precautions and follow safety guidelines to avoid any unwanted harm.
Automotive Repair
When it comes to automotive repair, CA glue can be a lifesaver. There are a variety of ways this versatile adhesive can be used to fix and reinforce various parts of your vehicle. Here are some common uses of CA glue in automotive repair:
- Bonding plastics: CA glue can be used to bond together plastic parts of a car, such as interior panels, side view mirrors, and exterior bumper covers. It is also useful for bonding plastic lenses to light fixtures.
- Sealing leaks: If you have a small hole or crack in a gas or diesel tank, CA glue can be used as a temporary fix until you can get a new tank. Simply apply the glue on the area of the tank that is leaking and let it dry. Depending on the size of the leak, multiple layers may be needed.
- Repairing upholstery: If your vehicle’s upholstery has a small tear, CA glue can be used to hold the tear together. Apply the glue to a toothpick or small brush and carefully insert it into the tear. Press the edges of the tear together and hold in place until dry.
- Fixing interior trim: If the trim around the door or dashboard is coming loose, CA glue can be used to fix it back in place. Apply the glue to the back of the trim and press firmly into place for a few minutes.
- Reattaching rearview mirrors: If your rearview mirror has become detached from the windshield, CA glue can be used to reattach it. Clean both surfaces thoroughly and apply the glue to the back of the mirror and the windshield. Hold it in place for a few minutes until it is dry.
It’s important to note that while CA glue is a great tool for automotive repair, it should not be used for repairs that involve high stress or weight-bearing. Always follow safety precautions and use appropriate ventilation when working with any type of adhesive.
Preparing for CA Glue Application
Before applying CA glue, it is essential to prepare the surfaces to ensure a strong and long-lasting bond. Proper preparation allows the glue to penetrate the surface and create a reliable hold. There are several important factors to consider when getting ready for CA glue application, including ensuring clean surfaces, sanding the surfaces, and utilizing clamping techniques. In this section, we will explore these preparatory steps with detailed instructions and useful tips to achieve the best results. Let’s get started!
Clean Surfaces
Ensuring that surfaces are clean before applying CA glue is crucial to achieve a strong bond. Any dirt, grease, or other foreign substances can weaken the adhesive bond, causing it to fail over time. Here are some tips for preparing surfaces to be bonded:
| Step | Description |
|---|---|
| Step 1 | Wipe the surface with a clean, dry cloth to remove any loose dirt or debris. |
| Step 2 | Use a cleaning solution that is appropriate for the surface type. For example, use isopropyl alcohol for metal surfaces or warm, soapy water for plastic surfaces. |
| Step 3 | Rinse the surface with clean water and pat dry with a clean cloth. |
| Step 4 | Inspect the surface for any remaining residue or contaminants. If necessary, repeat the cleaning process until the surface is completely clean and free of debris. |
| Step 5 | Let the surface dry completely before applying the CA glue. Any moisture on the surface can interfere with the adhesive bond. |
It is important to note that some materials, such as plastics, may require additional preparation before bonding with CA glue. In these cases, it is advisable to consult the manufacturer’s instructions or seek expert advice.
Proper surface preparation is essential for achieving a strong bond with CA glue. By following these steps and ensuring that surfaces are clean and free of debris, you can maximize the adhesive’s effectiveness and ensure that your project is successful.
Sanding Surfaces
To prepare surfaces for CA glue application, sanding is an essential step. Sanding helps to create a smooth and even surface which helps to bond the glue. Here are some tips for sanding surfaces:
| Tip | Description |
|---|---|
| Select the right grit sandpaper | The grit of sandpaper you use depends on the type of surface and the level of sanding required. For example, if you are sanding a rough surface, use a lower grit sandpaper such as 80-grit. For finishing, use a higher grit sandpaper such as 220-grit for a finer surface. |
| Use a sanding block | Using a sanding block helps to evenly distribute pressure on the surface being sanded. It also helps prevent fingers from sanding through the surface or creating uneven spots. |
| Wear a mask and safety glasses | Sanding can create dust and debris that can be harmful if inhaled. Make sure to wear a mask and safety glasses to protect yourself from dust and debris. |
| Sand in a well-ventilated area | A well-ventilated area helps to reduce the amount of dust and debris in the air. It’s important to sand in an area with good air circulation to avoid inhaling harmful particles. |
| Clean the surface after sanding | After sanding, use a clean cloth or tack cloth to remove any dust or debris. This will help ensure a clean surface for the CA glue to bond to. |
Following these tips will help ensure that the surface is properly sanded and prepared for CA glue application. Remember to always take safety precautions to protect yourself when working with sandpaper and other tools.
Clamping Techniques
Before applying CA glue, it is important to ensure that the surfaces to be joined are properly aligned. This will require the use of clamps to hold the surfaces in place while the glue dries. Choosing the right clamp for a job is important, especially for larger or irregularly shaped objects.
Here are some common clamping techniques to consider:
| Clamping Technique | Description |
|---|---|
| C-Clamp | A C-clamp is a versatile clamp that can be used in a variety of woodworking and metalworking tasks. It is ideal for holding flat pieces together and can be adjusted to fit various thicknesses of material. To use a C-clamp, position it over the surface, tighten the screw to hold the clamp in place, and adjust the pressure as needed. |
| Spring Clamp | Spring clamps are easy to use and are ideal for smaller objects or for holding material in place temporarily. They provide consistent pressure and are great for holding together thin layers of material. To use a spring clamp, position the clamp over the surface and squeeze the handles to close the clamp. |
| Bar Clamp | Bar clamps are ideal for larger projects, and can hold material securely in place, even on uneven surfaces. They have a long bar that spans across the material and can be adjusted to fit the size of the project. To use a bar clamp, adjust the size of the clamp to fit the project, position the clamp over the surface, and apply pressure to hold it in place. |
| Handscrew Clamp | Handscrew clamps are great for irregularly shaped projects and can hold material in a variety of angles. They have two wooden jaws that can be adjusted to fit the thickness and shape of the material. To use a handscrew clamp, position the clamp over the material, adjust the jaws to fit, and then tighten the screws to hold it in place. |
It is important to remember that the clamping pressure should be evenly distributed across the surface to prevent the glue from dripping out or causing gaps. Always check the manufacturer’s instructions for recommended clamp pressure and drying time.
By using the appropriate clamping technique, you can ensure that your project stays in place and the glue sets properly for a strong and durable bond.
Applying CA Glue
One of the most crucial aspects of working with CA glue is the proper application technique. Even though the glue sets quickly, there are some tips and tricks you can follow to ensure a successful application. In this section, we will explore three different methods of applying CA glue: dropper, brush, and spray. Each method has its advantages and disadvantages, so read on to find out which one will work best for your project.
Dropper Method
One popular method for applying CA glue is the dropper method. This method involves using a small dropper to apply the glue to the desired area. Here are the steps for using this method:
- Cut the tip of the dropper: Use scissors or a knife to carefully cut off the tip of the dropper. Make sure the hole is small enough so that the glue comes out in small drops.
- Prepare the surfaces: As with any application method, it’s important to prepare the surfaces you will be gluing. Ensure they are clean and dry, and free of any debris or dust.
- Apply the glue: Squeeze the dropper to release a small drop of glue onto one of the surfaces. Be careful not to use too much, as CA glue dries quickly and excess glue can create a mess.
- Press surfaces together: Once the glue is on one surface, quickly align the two surfaces and press them together. Hold them firmly for several seconds to ensure a strong bond is formed.
- Wait for glue to dry: CA glue dries quickly, but it’s important to give it enough time to fully cure. Depending on the project and amount of glue used, 5-15 minutes may be necessary for complete curing.
- Clean up excess glue: Use a cloth or paper towel to wipe away any excess glue that may have seeped out during the application process.
The dropper method is useful for precise applications and small projects. However, it may not be the best choice for larger areas or when multiple surfaces need to be glued at once. In those cases, the brush method or spray method may be more efficient.
Remember, always follow safety guidelines when using CA glue. Wear gloves and work in a well-ventilated area. Keep the glue out of reach of children and pets. With proper use and application, CA glue can be a useful tool for a variety of projects.
Brush Method
A brush can be an excellent tool for applying CA glue in certain situations. This method is ideal for areas that require more precision and control, such as when gluing tiny or intricate parts of a project. The brush method requires a steady hand and a brush with fine bristles, which should be kept clean and free of hardened glue residue.
When using a brush with CA glue, it is essential to work quickly and keep an eye on the amount of glue being applied. Too much glue can result in a mess or even cause the glue to run, while too little, on the other hand, may lead to an incomplete bond.
To apply CA glue with a brush, we recommend the following steps:
- Clean the surface and make sure it is dry
- Open the CA glue container and dip the brush into the glue
- Tap the brush gently on the rim of the container to remove any excess glue
- Apply a thin, even layer of glue to the desired area using a brush, starting at the center and working outwards
- Press the two surfaces together firmly for several seconds, holding them in place until the glue begins to set
- Clean the brush immediately with acetone or rubbing alcohol to prevent the glue from hardening and ruining the bristles
It’s worth noting that a brush might not be the best choice for larger surface areas as it may be difficult to apply the glue evenly. Once the glue comes in contact with the bristles, it can start curing and hardening instantly, which means that the brush may not be reusable and may have to be discarded.
Tips:
| Tip #1 | Choose a brush with bristles that are compatible with CA glue. Natural hair brushes are often not recommended since they can’t withstand the chemical reaction with the glue, while synthetic bristles work well. |
| Tip #2 | Be sure to work in a well-ventilated area to prevent breathing in fumes. |
| Tip #3 | If you are using a brush with CA glue, be sure to work swiftly and immediately clean the brush afterwards with acetone or rubbing alcohol to avoid bristle damage. |
By following these tips, you can use the brush method to apply CA glue to your projects successfully.
Spray Method
The spray method for applying CA glue involves using a specialized spray bottle to evenly disperse the glue onto the desired surface. This method is often used for larger projects or surfaces that require a quick application process. Here are the steps to follow when using the spray method:
- Prepare the surface: As with the other application methods, it’s important to make sure the surface is clean and dry before applying the glue.
- Set up the spray bottle: Fill the spray bottle with the CA glue and attach the spray nozzle. Make sure the nozzle is functioning properly and spraying evenly before beginning the application process.
- Apply the glue: Hold the spray bottle a few inches away from the surface and spray a light coating of glue onto the area. Keep a steady hand and move the bottle in a back-and-forth motion to ensure even coverage.
- Allow the glue to dry: Depending on the type of CA glue being used, it may take a few minutes or longer for the glue to dry completely. Follow the manufacturer’s instructions for drying time and avoid touching the surface until the glue has fully hardened.
- Repeat as necessary: For larger surfaces or projects, multiple coats of glue may be required. It’s important to wait for each layer of glue to dry completely before adding another layer.
While the spray method can be a quick and efficient way to apply CA glue, it’s important to use caution when working with the spray bottle. Avoid spraying the glue directly onto your skin or in a confined area, as the fumes can be harmful. Always wear gloves and a protective mask when working with CA glue and make sure to follow the manufacturer’s instructions carefully.
Post-Application Techniques
Once you have successfully applied CA glue to your project, you want to make sure that the finished product looks as professional as possible. One way to do this is to use post-application techniques to ensure that any excess glue is removed, surfaces are sanded and polished, and the glue has fully cured. These simple yet effective techniques can take your project from good to great. So, let’s dive into some tips and tricks for post-application techniques using CA glue.
Sanding and Filing
Once the CA glue has completely cured (which usually takes less than an hour), you can start sanding and filing the surface to give it a smooth finish. Sanding and filing are important parts of post-application techniques that will help you get the best results possible.
Sanding: To sand the surface, start with a coarse sandpaper with a grit of around 80 – 120. This will help you remove the excess glue and flatten the surface. Next, move to a finer sandpaper with a grit of 220 – 320 to further smoothen the surface. Finally, use a super fine sandpaper with a grit of 400 – 600 to give the surface a polished look. Make sure to sand in the same direction as the grain of the wood to avoid scratches and uneven spots.
Filing: If you need to file the surface, use a fine file or a rasp. Use gentle pressure and work in the same direction as the grain of the wood. Keep in mind that filing removes material quickly, so be careful not to overdo it and create uneven spots.
Once you’ve completed sanding and filing, you can move on to polishing and buffing to give the surface an even smoother and shinier finish. Remember, sanding and filing are crucial post-application techniques that will help you achieve the desired results for your project.
| Sandpaper Grit | Surface |
|---|---|
| 80-120 | Remove excess glue and flatten surface |
| 220-320 | Futher smoothen surface |
| 400-600 | Give surface a polished look |
Polishing and Buffing
After the CA glue has dried, you may find that the surface is not as smooth and shiny as you would like. This is where polishing and buffing come in. Polishing and buffing your CA glue project will give it a professional-looking finish.
To polish and buff your project, you will need some sandpaper and a buffing wheel. Start by sanding the surface with a fine-grit sandpaper. This will smooth out any rough spots and prepare the surface for buffing.
Once you have sanded the surface, switch to a buffing wheel. Apply a small amount of polishing compound to the wheel and turn on the buffer. Hold your project against the wheel, being careful not to apply too much pressure. Move the project slowly back and forth across the wheel, letting the wheel do the polishing work for you.
Note: When polishing and buffing, always wear protective goggles and a face mask to prevent inhalation of any dust particles.
You may need to apply several coats of polishing compound, depending on the desired level of shine. After each coat, wipe down the surface with a clean, dry cloth to remove any excess compound. Keep polishing until you achieve the desired level of shine.
Tip: To achieve an even higher shine, you can use a microfiber cloth to buff the surface after polishing.
Once you have finished polishing and buffing, your CA glue project will look smooth, shiny, and professional. It’s important to keep in mind that this process can take some time, but the end result is definitely worth it.
Removing Excess Glue
When using CA glue in your projects, it’s common to end up with excess glue that needs to be removed. It’s important to remove excess glue while it’s still wet, as it can be difficult to remove once it dries and hardens. Here are some tips for removing excess CA glue:
- Scraping: One option for removing excess CA glue is to use a scraper. This can be especially effective if the glue is on a flat surface. Use a plastic scraper or an old credit card, and gently scrape away the excess glue. Be careful not to apply too much pressure, which could damage the surface.
- Sanding: Sanding is a good option for removing excess CA glue from wood surfaces. Start with a low-grit sandpaper, such as 80-grit, and gradually work your way up to a higher grit, such as 220-grit. Be careful not to sand too aggressively, as you could damage the wood.
- Acetone: Acetone can be used to remove excess CA glue from non-porous surfaces such as glass or metal. Apply a small amount of acetone to a cloth and gently rub the glue until it starts to dissolve. Be sure to wear gloves and work in a well-ventilated area when using acetone.
- Heat: Applying heat can also help soften excess CA glue, making it easier to remove. Use a heat gun or hair dryer to apply heat to the glued area. Be sure to use caution when applying heat, as too much heat can damage the surface.
Remember, it’s important to remove excess CA glue properly to avoid damaging your project. Take your time and choose the method that best suits the surface you’re working with.
Cautions for Using CA Glue
As versatile and useful as CA glue can be, it’s important to handle it with care and caution. Proper safety measures must be taken to avoid any unpleasant incidents. In this section of our guide on how to use CA glue, we’ll explore some of the most critical areas of cautionary concern when working with this powerful adhesive. From health and safety precautions to storage and shelf life considerations, we’ll equip you with the knowledge you need to use CA glue safely and effectively.
Health and Safety
When working with any type of glue, including CA glue, it is important to prioritize health and safety. There are several precautions that should be taken into consideration in order to avoid any potentially dangerous situations.
Below is a table detailing some important health and safety measures when working with CA glue:
| Precaution | Description |
|---|---|
| Wear gloves | CA glue can be irritating to the skin, so it is important to wear gloves when handling the glue. |
| Work in a well-ventilated area | The fumes from CA glue can be harmful if breathed in, so it is important to work in a well-ventilated area. |
| Avoid direct contact with eyes and mouth | CA glue can be harmful if it comes into contact with the eyes or mouth, so be sure to wear goggles and avoid touching your face while working with the glue. |
| Store in a cool, dry place | CA glue should be stored in a cool, dry place in order to maintain its effectiveness. |
| Keep out of reach of children and pets | CA glue should be kept out of reach of children and pets, as it can be dangerous if ingested. |
By following these health and safety precautions, you can ensure that your experience working with CA glue is a safe and enjoyable one. Remember to always prioritize your health and well-being when working with any type of glue.
Storage and Shelf Life
Proper storage of CA glue is essential to maximize its shelf life and ensure its effectiveness for future use. Here are some important tips to keep in mind:
- Store in a cool, dry place: CA glue should be kept in a cool and dry place, away from direct sunlight and heat sources. Exposure to heat and moisture can cause the glue to harden and lose its effectiveness.
- Use a tight-sealing container: CA glue should be stored in a tightly sealed container to prevent air from entering and causing the glue to deteriorate. Most CA glue comes with a self-sealing cap, but if the glue is transferred to another container, make sure it is tightly sealed.
- Keep away from children and pets: CA glue should be kept out of reach of children and pets as it is toxic if ingested. It is important to store the glue in a secure location to prevent accidental exposure.
- Check the expiration date: CA glue has a limited shelf life and will eventually lose its effectiveness over time. Check the expiration date on the container and dispose of any glue that has expired.
By following these simple storage tips, you can ensure that your CA glue remains effective and ready to use for future projects. Remember to always handle CA glue with care and follow safety precautions to minimize any potential risks.
Conclusion
In conclusion, CA glue can be a valuable tool in various applications, including woodworking, model building, jewelry making, and automotive repair. The key to success when using CA glue is to prepare properly and follow the recommended application techniques.
It is important to ensure that surfaces are clean and sanded before applying the glue, and that appropriate clamping techniques are used. When it comes to actual application, there are multiple methods to choose from, including the dropper, brush, and spray methods.
After application, post-application techniques such as sanding and filing, polishing and buffing, and removing excess glue can help achieve a professional-looking finish. However, it is important to take caution when using CA glue, such as wearing appropriate protective gear and storing it properly to avoid potential health and safety hazards.
In summary, by following these tips and tricks, users can master the use of CA glue and achieve outstanding results in their projects. Whether it’s for hobby or professional use, CA glue can be a reliable adhesive solution when used correctly.
Frequently Asked Questions
1. How fast does CA glue dry?
CA glue can dry as fast as 5-10 seconds, depending on the thickness of the glue and the moisture content of the surfaces being bonded.
2. Can CA glue be used on all materials?
No, CA glue is not suitable for all materials. It works best on non-porous materials like metal, glass, and plastic. It can also be used on wood, but may require a primer or activator for best results.
3. How do you remove CA glue from surfaces?
CA glue can be removed with acetone or nail polish remover. Soak a cloth in the solvent and place it over the glue until it softens, then gently scrape it off with a plastic scraper or spatula.
4. Can CA glue be used for filling gaps in wood?
Yes, but it’s important to use a thin viscosity glue and apply it in layers, allowing each layer to dry fully before applying the next. Sanding may also be necessary to smooth out the area once the glue has dried.
5. Does temperature affect the performance of CA glue?
Yes, temperature can affect the bonding strength of CA glue. It works best at room temperature, between 60-75°F (15-24°C), and may not bond well in extreme heat or cold.
6. Can CA glue be used for outdoor applications?
Most CA glues are not recommended for outdoor use, as they may break down or lose strength over time due to exposure to moisture and UV rays. However, some specialty CA glues are designed for outdoor use and may be suitable for certain applications.
7. Does CA glue work on oily or greasy surfaces?
No, CA glue does not bond well to oily or greasy surfaces. These surfaces should be cleaned thoroughly before applying the glue to ensure a strong bond.
8. How long does CA glue last once opened?
CA glue has a shelf life of approximately 1 year once opened, if stored properly in a cool, dry place with the cap securely sealed. Using expired glue can result in weaker bonds or failure to bond at all.
9. Can CA glue be used for filling cracks in concrete?
No, CA glue is not suitable for filling cracks in concrete as it may not provide the necessary structural support and bonding strength. Specialty products designed for concrete repair should be used instead.
10. Is CA glue safe to use?
CA glue can be safe to use if proper precautions are taken. It should be used in a well-ventilated area, and gloves and eye protection should be worn. Avoid skin contact and ingestion, and seek medical attention if necessary.