As DIY home improvement projects become increasingly popular, many people are now opting to install their own tiling rather than hiring a professional. Tile adhesive, also known as tile glue or ceramic adhesive, is an essential component in any tiling project, as it is what holds the tiles securely in place on the surface. However, with so many types of tile adhesives available in the market- from mastic adhesive to epoxy tile adhesive- choosing the right one can be overwhelming. Applying the adhesive correctly is equally important for a successful tiling project. In this article, we will explore the world of tile adhesive, its types, names, applications, and factors to consider when choosing, as well as provide a step-by-step guide on how to apply and maintain it, so that you can achieve a professional-looking tiling job with ease.
What is Tile Adhesive?
As perplexing as it may sound, tile adhesive is a material that holds great importance when it comes to tiling surfaces. Without the right type of adhesive, tiling can be a frustrating and time-consuming process. Whether you’re tiling a kitchen backsplash, bathroom floor, or outdoor patio, choosing the proper tile adhesive can be the difference between a successful project and a disastrous one. In this section, we will explore what tile adhesive is, why it’s important, and the different types available. If you’re questioning what glue to use for other home improvement projects, check out our article on what kind of glue to use on laminate cabinets.
Definition of Tile Adhesive
Tile adhesive, also known as tile glue or ceramic adhesive, is a type of cement-based adhesive that is used to fix tiles and other materials to surfaces. This versatile adhesive can be used for a variety of applications, from fixing small mosaic tiles to larger ceramic or natural stone tiles.
Tile adhesive is designed to bond to a range of surfaces, including concrete, wood, and even metal. It works by creating a strong, durable bond between the tile and the surface, which ensures that the tile stays firmly in place.
There are several types of tile adhesive, each with its own unique properties and characteristics. These include thinset mortar, mastic adhesive, epoxy tile adhesive, and polymer-modified cement tile adhesive, among others. Each type of adhesive is designed for specific applications, and some may be better suited for certain types of tiles or surfaces.
When choosing a tile adhesive, it is important to consider factors such as the surface to which the tiles will be applied, the type of tiles being applied, the environmental conditions, and the size and shape of the tiles being applied. Budget is another important consideration, as some types of tile adhesive can be more expensive than others.
In general, tile adhesive is easy to apply and can be mixed to the right consistency with water. Once mixed, the adhesive is applied to the surface using a notched trowel, and the tiles are then pressed into place. The adhesive is left to dry for a specified amount of time, depending on the type of adhesive and the environmental conditions.
Regular cleaning and maintenance is important to ensure that the tiles and adhesive remain in good condition. In the event of cracks or breaks in the tiles, or damage to the adhesive, repairs may need to be made using additional adhesive or other materials.
Tile adhesive is a reliable and effective way to fix tiles and other materials to surfaces. Whether you are installing a new tile floor or completing a DIY tiling project, choosing the right tile adhesive is key to ensuring a successful installation.
Purpose of Tile Adhesive
Tile adhesive serves several purposes, making it an essential component of tile installation. Here are some of the main purposes and benefits of using tile adhesive:
- Securely bond tiles: The primary purpose of tile adhesive is to securely bond tiles to another surface. Unlike using traditional cement, tile adhesive provides a stronger bond and better long-term stability. This type of glue is particularly useful in environments with high foot traffic or heavy loads.
- Smooth out uneven surfaces: Tile adhesive can be applied to uneven surfaces to provide a smooth base for tiling. This is especially useful if you are renovating an older home or building and have uneven surfaces to work with.
- Water-resistance: Some tile adhesives have waterproof properties that make them ideal for use in areas exposed to water, such as bathrooms, kitchens, and swimming pools. These types of adhesives will not deteriorate or lose their bond in damp environments.
- Easy to apply: Tile adhesive is relatively easy to apply and requires minimal tools. This makes it a popular choice for DIY and home improvement projects.
- Long-lasting: Once the adhesive has cured and the tiles have been installed, the bond between the tiles and the surface is long-lasting and durable. This means that you won’t have to replace your tiles or redo the installation for many years to come.
Having a good understanding of the purpose of tile adhesive will help you choose the right product for your tiling project’s specific needs. If you are in doubt about which tile adhesive to use for your project, consult a professional or reference the manufacturer’s recommendations.
Link to information about what glue to use for carpet pad on concrete
Types of Tile Adhesive
Tile adhesive comes in various types and formulations, and the choice of adhesive depends on various factors such as the surface to which the tiles will be applied, the type of tiles being applied, and the environmental conditions. Here are the different types of tile adhesive used in the industry:
- Cement-Based Adhesive: This is the most commonly used adhesive and is ideal for applying tiles on floors and walls. It sets slowly and has a longer curing time, allowing easier adjustments to the tile position. It is easy to use and can be used with most types of tiles, including porcelain and ceramic.
- Pre-Mixed Adhesive: This type of adhesive comes ready to use and does not require mixing. It is ideal for small jobs and is easy to apply. However, it has a shorter working time, and adjustments to the tile position are difficult once the adhesive has set.
- Epoxy Adhesive: This adhesive is a two-part system, consisting of a resin and hardener, that creates a strong bond between the tiles and the surface. It is ideal for high traffic areas and can be used in wet environments. However, it is expensive, difficult to work with, and has a shorter working time as it sets quickly.
- Mastic Adhesive: This adhesive is ideal for small tiles and mosaics on walls but is not suitable for floors as it does not have enough bonding strength. It is economical and easy to use but has a shorter life span and can degrade over time, causing the tiles to fall off.
- Latex-Modified Adhesive: This adhesive is similar to cement-based adhesive but has added latex to improve flexibility and bonding strength. It is ideal for uneven surfaces and can be used with most types of tiles. However, it is more expensive than cement-based adhesive and has a shorter working time.
- Polymer-Modified Cement Adhesive: This adhesive is similar to cement-based adhesive but has added polymers for improved bonding strength. It sets quickly and has a long working time, allowing adjustments to the tile position. It is ideal for large tiles, heavy tiles, and outdoor use. However, it is more expensive than cement-based adhesive and can be difficult to mix.
Each of these adhesives has its own set of benefits and drawbacks, which should be considered when choosing the right adhesive for the project at hand. It is essential to speak with a professional and follow the manufacturer’s instructions when choosing and using tile adhesive.
If you are interested in learning how to apply adhesive for other materials, check out our article on how to use top bond glue for wallpaper.
Common Uses of Tile Adhesive
Tile adhesive is an essential component in building and renovation projects. It is a versatile and effective bonding agent used for a wide range of applications. Here are some common uses of tile adhesive:
| Common Uses | Explanation |
|---|---|
| Wall and Floor Tile Installation | Tile adhesive is commonly used for fixing tiles to walls and floors in bathrooms, kitchens, and other areas where water-resistant surfaces are required. |
| Mosaic Tile Installation | Mosaic tiles are small and delicate, making them challenging to install. Tile adhesive is the preferred choice for mosaic tile installation because it provides a stronger bond compared to traditional mortar. |
| Ceiling Tile Installation | Tile adhesive is perfect for overhead installations because it can be applied easily without the risk of tiles slipping or falling off the ceiling. |
| Decorative Finishing | Tile adhesive is also used for decorative finishing, such as installing medallions, borders, and other accents that will enhance the aesthetic value of the installation. |
| Bonding of Different Substrates | Tile adhesive is a versatile bonding agent that can bond different substrates, including wood, metal, concrete, and even glass. |
Whether you are undertaking a new installation project or renovating an old one, tile adhesive has numerous applications. It provides a long-lasting, durable, and moisture-resistant bond that is ideal for a wide range of substrates. If you need guidance on how to apply tile adhesive to specific projects, you can find more information by following these helpful guides for various applications.
Names for Tile Adhesive
When it comes to installing tiles, tile adhesive is a crucial component that ensures the tiles stick in place. This multipurpose bonding material is referred to by various names, depending on the type of tile and the surface it is being applied to. Some of the common names for tile adhesive include Tile Glue, Ceramic Adhesive, Ceramic Tile Adhesive, Stone Adhesive, Thinset Mortar, Mastic Adhesive, Epoxy Tile Adhesive, and Polymer-Modified Cement Tile Adhesive. Each of these names can indicate a specific type of tile adhesive designed for particular applications. Let’s explore each of these tile adhesives in more detail. If you want to learn more about gluing other materials, check out our article on how to glue linoleum.
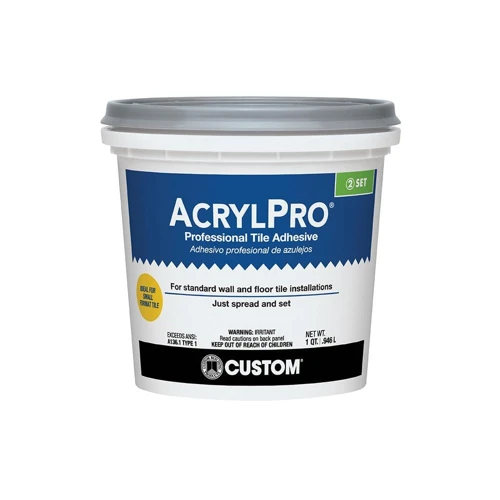
Tile Glue
Tile glue is a type of adhesive that is specially designed for bonding tiles to surfaces. This type of glue is also commonly known as ceramic tile adhesive or ceramic glue. Tile glue is a versatile adhesive that can help secure a wide variety of tile types and materials onto many different surfaces. Strong and durable, tile glue can be used both indoors and outdoors, making it a preferred choice for many DIY enthusiasts and contractors alike.
Here are some popular types of tile glue:
- Ceramic Tile Glue – This type of tile glue is used for bonding ceramic tiles to surfaces. Ceramic tile glue consists of a mixture of cement, sand, and other materials, creating a thick paste that can hold tiles firmly in place. It is ideal for use on walls, floors, and countertops.
- Stone Adhesive – This type of tile glue is specially formulated for bonding stones, such as granite, marble, and slate. Stone adhesive is designed to provide a strong bond, even under extreme weather conditions like rain, heat, or cold.
- Thinset Mortar – This type of tile glue is a mixture of cement, sand, and water-retaining agents. Thinset mortar is an excellent choice for bonding tiles to walls and floors as it can hold heavy tiles securely in place. It is perfect for use in high traffic areas due to its excellent durability and strength.
When choosing the type of tile glue to use, it’s important to consider the surface and the tiles you want to bond. Some tile adhesives are designed specifically for certain types of materials, such as porcelain or glass tiles, so it’s important to choose the right adhesive for your specific project.
Pros and Cons of Using Tile Glue
Tile glue is a popular choice because of its versatility and strength. It can be used for a variety of surfaces and tile types. Tile glue is resistant to water and heat, making it perfect for use in damp or hot areas like bathrooms or kitchens.
However, tile glue has its drawbacks. It can be difficult to handle and work with, especially for beginners. Tile glue also requires longer curing times, so it may take a while before you can move onto the next step of your tiling project.
Related anchor: If you are interested in learning more about how to glue mosaic tiles to wood, or any other surface, check out our step-by-step guide: How to Glue Mosaic Tiles to Wood.
Ceramic Adhesive
Ceramic Adhesive is a type of tile adhesive specifically designed for ceramic tiles. Ceramic Adhesives can come in both powder or pre-mixed forms, making them easy to use for DIYers and professionals alike.
One advantage of ceramic adhesive is its high bonding strength, which ensures that ceramic tiles remain securely in place over time. Another benefit of ceramic adhesive is its resistance to water and humidity, making it ideal for use in damp areas such as bathrooms and kitchens.
When selecting a ceramic adhesive, it is important to consider factors such as the type of ceramic tile being used and the surface to which it will be applied. A latex-modified ceramic adhesive may be a good choice for installing ceramic tiles on a wooden substrate, as it can help to reduce the risk of cracking due to wood movement.
It is also important to note that ceramic adhesive typically has a longer drying time than other types of tile adhesives, meaning that it may not be the best choice for time-sensitive installations.
If you are unfamiliar with how to apply ceramic adhesive, it is recommended to follow the manufacturer’s instructions carefully to ensure a successful installation. Additionally, proper surface preparation is crucial for achieving a strong bond and preventing future issues with the tiles.
In terms of maintenance and repair, regular cleaning can help keep ceramic tiles and the adhesive holding them in place in good condition. If cracks or breaks do occur in the tiles, it may be necessary to replace them and reapply the ceramic adhesive.
Internal link: If you need guidance on how to apply adhesive for laminate flooring, you can check our article on how to glue laminate flooring.
Ceramic Tile Adhesive
Ceramic tile adhesive is a popular choice among homeowners and DIY enthusiasts for its strength and durability. It is a type of glue that is specifically designed for use with ceramic tiles. Ceramic tile adhesive is a cement-based adhesive that is designed to adhere to both the tile and the surface to which it is being applied.
Properties of Ceramic Tile Adhesive:
– Strong bonding properties
– Water-resistant
– Suitable for indoor and outdoor use
– Can be used on a variety of surfaces
– Easy to work with
Advantages of Using Ceramic Tile Adhesive:
– Long-lasting hold
– Resistant to moisture and water damage
– Can be used on almost any surface
– Can be used for indoor and outdoor tile projects
Steps for Using Ceramic Tile Adhesive:
- Prepare the surface by removing any debris, dirt, or dust. The surface must be clean and dry before the adhesive is applied.
- Apply the adhesive to the surface using a notched trowel. The size of the trowel will depend on the size of the tile being used.
- Press the tile firmly into the adhesive. Wiggle and press the tile into the adhesive to ensure a strong bond.
- Repeat steps 2 and 3 until all tiles are in place.
- Allow the adhesive to dry completely before grouting.
It is important to note that different types of tile require different types of adhesive. For example, large format tiles may require a different type of adhesive than smaller, ceramic tiles. Be sure to choose the right type of adhesive for your particular tile installation project.
Ceramic tile adhesive is an effective and durable adhesive that is suitable for a wide range of tile projects. By understanding the properties of ceramic tile adhesive and following the proper steps for installation, homeowners and DIY enthusiasts can achieve professional-looking results. If you want to learn more about glues for specific projects, be sure to check out our articles on how to glue boat carpet, how to glue artificial grass, and how to glue vinyl baseboard.
Stone Adhesive
When it comes to installing stone tiles, a specialized adhesive is typically required. Stone adhesive is specifically designed to provide a strong and durable bond between natural stone tiles and the surface on which they are being applied.
Types of Stone Adhesive
There are several types of stone adhesive available on the market, each with their own unique properties. The following table outlines some of the most commonly used types of stone adhesive:
| Stone Adhesive Type | Features |
|---|---|
| Epoxy Stone Adhesive | Two-part adhesive that provides a strong and waterproof bond |
| Polyurethane Stone Adhesive | Flexible adhesive that is ideal for use with natural stone that may have some movement or flexing |
| Acrylic Stone Adhesive | Fast-drying adhesive that is easy to work with and ideal for use in small projects |
Factors to Consider When Choosing Stone Adhesive
When selecting a stone adhesive, it is important to consider the type of stone being used, as well as the size and shape of the tiles. Environmental factors, such as temperature and humidity should also be taken into consideration.
How to Apply Stone Adhesive
The application of stone adhesive is similar to that of other tile adhesives. The surface should be properly prepared and any cracks or imperfections should be repaired prior to tile installation. The adhesive should be mixed according to the manufacturer’s instructions and applied to the surface using a notched trowel. The stone tiles should then be placed onto the adhesive and lightly tapped into place with a rubber mallet.
Curing Time and Maintenance
Stone adhesive typically requires a longer curing time than other types of tile adhesive. It is important to follow the manufacturer’s instructions when determining curing time. Once the adhesive has fully cured, the tiles can be grouted. Regular cleaning and maintenance of stone tiles is necessary to ensure their longevity. Any cracks or breaks in the tiles should be addressed promptly to prevent damage to the adhesive and underlying surface.
Stone adhesive is an essential component when installing natural stone tiles. By selecting the right type of adhesive and properly applying it, you can ensure a long-lasting, beautiful finish to your project.
Thinset Mortar
Thinset mortar is a type of tile adhesive that is commonly used for setting and bonding tiles. It is a mixture of cement, sand, and a chemical additive that helps improve its bonding capabilities. Thinset mortar gets its name from its thin consistency, which makes it easier to spread and apply evenly.
Some of the key features of thinset mortar include its ability to form a strong bond between tiles and the surface they are being applied to, its ability to withstand moisture and temperature changes, and its resistance to shrinkage and cracking over time.
When choosing thinset mortar, it is important to consider the type of project you are working on and the specific requirements of your tiles and installation surface. Some factors to consider include the size and weight of your tiles, the level of moisture and temperature exposure they will experience, and the type of substrate you will be bonding them to.
There are several different types of thinset mortar available, each with its own unique properties and applications. Here are some of the most common types:
– Unmodified Thinset Mortar: This is a basic type of thinset mortar that does not contain any additives. It is typically used for laying natural stone tiles, where the presence of any additives could cause discoloration or other damage.
– Polymer-Modified Thinset Mortar: This type of thinset mortar includes a polymer additive, which helps improve its bonding properties and increase its resistance to moisture and temperature changes. It is suitable for use with most types of tiles, including porcelain and ceramic.
– Latex-Modified Thinset Mortar: This is a type of polymer-modified thinset mortar that includes a latex additive. The latex helps improve the mortar’s elasticity and flexibility, making it ideal for use with large, heavy tiles or tiles that are likely to expand or contract due to temperature changes.
– Non-Sag Thinset Mortar: This is a specialized type of thinset mortar that is designed to resist sagging or slipping when applied to vertical surfaces. It is often used for large-format tiles or stone veneers.
No matter which type of thinset mortar you choose, the application process will generally involve mixing the mortar with water to achieve the right consistency, spreading it evenly over the surface with a notched trowel, and then placing the tiles in the mortar and pressing them firmly into place. After the tiles are installed, it is important to allow the mortar to cure for the recommended amount of time before grouting or walking on the tiles.
Mastic Adhesive
Mastic adhesive is a popular type of tile adhesive that is often used by non-professionals. It is a ready-to-use glue that is applied directly from the container and does not require any mixing. This makes it convenient and easy to use, although it may not be as strong as other types of tile adhesives.
Properties
Mastic adhesive is a premixed, organic tile adhesive that is primarily made from sticky, organic polymers and water. It is generally used for low-traffic areas such as backsplashes, because it is not as strong as other adhesive options. The adhesive is not recommended for use in areas that are exposed to moisture and high humidity levels.
Advantages
– Easy to use – Mastic adhesive is ready-to-use which means it does not require any mixing or preparation. It can be directly applied to the surface with a notched trowel.
– Convenient – Mastic adhesive comes in a pre-mixed form which saves time and energy as there is no need for measuring or mixing.
– Affordable – Mastic adhesive is a relatively cheap option compared to other tile adhesives. It is an economic option for those who want to tile their homes on a budget.
– Good for DIYers – As mastic adhesive is easy to use, it is suitable for DIY projects.
Disadvantages
– Not suitable for high-moisture areas – Mastic adhesive is not recommended for use in areas that are exposed to moisture as it can weaken the adhesive and cause the tiles to come loose.
– Not as strong as other tile adhesives – Mastic adhesive is not as strong as other tile adhesives, so it is recommended to use alternative options for high-traffic areas.
– Limited shelf life – As mastic adhesive contains organic polymers, it has a limited shelf life. Once the container is opened, the adhesive must be used within a few weeks.
Conclusion
Mastic adhesive is a convenient and easy-to-use tile adhesive option, but it may not be suitable for all tile installations. It is perfect for low-traffic areas such as backsplashes, but not recommended for high-moisture and high-traffic areas. If you are considering using mastic adhesive, it is essential to follow the manufacturer’s instructions and take the necessary precautions to ensure your tiling job is successful.
Epoxy Tile Adhesive
Another type of tile adhesive that you may come across is epoxy tile adhesive. It is one of the most durable and strong adhesives that is specifically formulated for tiles. Epoxy tile adhesive is a two-part system that consists of a resin and a hardener. When combined, these two components create a chemical bond that is incredibly strong and long-lasting.
Advantages of Epoxy Tile Adhesive
One of the major advantages of using epoxy tile adhesive is its strength. It is an excellent option for tiles that will be subjected to heavy loads or a lot of foot traffic. Epoxy tile adhesive is also highly resistant to water, making it a great choice for use in areas like bathrooms, laundry rooms, and kitchens. Additionally, it is highly resistant to chemicals like acids and solvents, which makes it ideal for use in industrial settings.
Disadvantages of Epoxy Tile Adhesive
While there are many benefits to using epoxy tile adhesive, it is not without its downsides. It can be difficult to work with, especially if you have never used it before. The two-part system requires careful measuring and mixing, and you need to work quickly before it begins to set. Additionally, epoxy tile adhesive is more expensive than other types of adhesive, so it may not be the best choice if you are on a tight budget.
When to Use Epoxy Tile Adhesive
Epoxy tile adhesive is the best choice when you need an adhesive that is strong, durable, and resistant to water and chemicals. It is particularly well-suited for use in commercial and industrial settings, as well as in areas of the home that are subject to heavy foot traffic or exposure to moisture. If you are installing tiles in a bathroom or kitchen, or if you are working with tiles that are particularly heavy or large, epoxy tile adhesive may be the best choice for your project.
Here is a quick summary of the advantages and disadvantages of epoxy tile adhesive:
| Advantages | Disadvantages |
|---|---|
| Highly resistant to water | More expensive than other adhesives |
| Highly resistant to chemicals | Difficult to work with |
| Strong and durable |
It is important to keep these factors in mind when choosing tile adhesive for your project. If you are unsure which type of adhesive is best for your needs, consult with a professional or speak to your local home improvement store for guidance.
Polymer-Modified Cement Tile Adhesive
Polymer-modified cement tile adhesive is a popular option for those looking for a strong and durable tile adhesive. This type of adhesive is made by mixing cement with a polymer, which creates a more flexible and water-resistant bond.
Here are some benefits of using polymer-modified cement tile adhesive:
- Great bonding strength: Polymer-modified cement tile adhesive provides a strong bond between the surface and tile, ensuring that the tiles don’t come loose over time.
- Flexible: The polymer component in this type of adhesive helps to make it more flexible than traditional cement adhesives. This means that it can withstand slight movements in the surface without cracking or breaking the tiles.
- Water-resistant: The polymer in the adhesive helps to make it more water-resistant, which is especially important in areas like a bathroom or kitchen where there may be moisture present.
When using polymer-modified cement tile adhesive, there are some important things to keep in mind:
- Surface preparation: It is important to properly prepare the surface by cleaning it free of any dust, dirt, or debris before applying the adhesive.
- Mixing: Follow the manufacturer’s instructions for mixing the adhesive correctly. Improper mixing can result in a weaker bond or other issues.
- Application: Use the appropriate trowel to apply the adhesive evenly to the surface, ensuring full coverage. Only apply as much as you can tile in a reasonable amount of time, as the adhesive can begin to harden after a period of time.
- Curing time: The curing time for polymer-modified cement tile adhesive can vary based on the manufacturer’s instructions. Make sure to allow enough time for the adhesive to fully dry and harden before allowing foot traffic on the surface.
Polymer-modified cement tile adhesive is a great option for those looking for a strong, flexible, and water-resistant tile adhesive. Just be sure to follow the manufacturer’s instructions and take proper precautions during the application and drying process for the best results.
Factors to Consider When Choosing Tile Adhesive
Choosing the right tile adhesive is crucial to ensure a successful tiling project. To make the right decision, there are several factors that must be considered. Different surfaces and types of tiles may require different types of adhesives. The environmental conditions, size and shape of the tiles, and even your budget are all factors that will affect your choice of adhesive. In this section, we will explore each of these key considerations in depth, so you can make an informed decision on which type of tile adhesive to use for your project.
Surface to Which Tiles Will Be Applied
Choosing the right tile adhesive is essential to ensure that tiles are fixed securely and will last for years to come. One important factor to consider when selecting the right tile adhesive is the surface to which the tiles will be applied.
Different surfaces require different types of tile adhesives for proper installation. Here is a breakdown of which adhesive is recommended for each type of surface:
| Surface Type | Recommended Tile Adhesive |
|---|---|
| Concrete | Cement-based tile adhesive |
| Gypsum Plaster | Flexible tile adhesive |
| Plywood or Particleboard | Modified epoxy tile adhesive or uncoupling membrane |
| Existing Ceramic Tiles | Latex-modified tile adhesive |
| Painted Surface | Two-part epoxy tile adhesive |
When selecting an adhesive, it is important to follow the manufacturer’s guidelines for the specific surface. Using the wrong adhesive can cause the tiles to not adhere properly, leading to a waste of time and money. It could also cause safety risks if the tiles become loose and create tripping hazards.
It is also important to make sure that the surface is clean, dry, and free of any debris before applying the adhesive. Any dirt, oil, or other substances can prevent the adhesive from bonding correctly with the surface.
By carefully considering the surface type and choosing the correct tile adhesive, you can ensure that your tile installation will be strong and durable, and will last for years to come.
Type of Tiles Being Applied
When selecting tile adhesive, it’s important to consider the type of tiles being applied. Different tiles have specific requirements for adhesives in order to ensure proper adhesion and longevity of the installation.
Here are the types of tiles to consider:
- Ceramic Tiles: These are the most common type of tile used in homes. They are made of clay and have a low water absorption rate. For ceramic tiles, a traditional cement-based adhesive such as thinset mortar is recommended.
- Porcelain Tiles: These are similar to ceramic tiles but are denser and less porous. Due to their heavier weight, a stronger adhesive such as a polymer-modified cement-based adhesive or epoxy tile adhesive may be necessary.
- Natural Stone Tiles: These include materials such as marble, granite, and slate. They are more delicate and porous than ceramic or porcelain tiles and require a specialized adhesive that won’t stain or damage the surface. A stone adhesive is specifically designed for natural stone tiles.
- Glass Tiles: These are more challenging to install due to their smooth and non-porous surface. Mastic adhesive is recommended for glass tiles as it provides a stronger bond.
- Mosaic Tiles: These are small tiles that are often used to create intricate designs. A mosaic tile adhesive is recommended as it is specifically designed to hold together these smaller pieces.
- Large Format Tiles: These are any tile with sides longer than 15 inches. Due to their size and weight, a stronger adhesive such as a polymer-modified cement-based adhesive or epoxy tile adhesive is recommended.
It’s important to note that some tile types may have specific adhesive requirements based on their manufacturer’s recommendations. Always check the manufacturer’s instructions before selecting an adhesive for your project. Taking the time to select the proper adhesive will ensure a long-lasting and successful tile installation.
Environmental Conditions
When choosing a tile adhesive, it is important to take into consideration the environmental conditions in which the tiles will be installed. This includes factors such as temperature, humidity, and potential exposure to water.
| Environmental Condition | Consideration |
|---|---|
| Temperature | The temperature of the installation area can affect the curing time of the adhesive. In colder temperatures, the adhesive may take longer to set, while in higher temperatures it may set more quickly. It is important to choose an adhesive that is suitable for the temperature range of the installation area. |
| Humidity | Humidity levels can also affect the curing time of tile adhesive. In areas with high humidity, the adhesive may take longer to dry and cure properly. If the adhesive is exposed to water before it has fully cured, it may weaken or fail. Choosing an adhesive that is specifically formulated for high-humidity environments can help ensure a successful installation. |
| Potential Water Exposure | If the tiles will be installed in an area that is exposed to water, such as a bathroom or kitchen, it is important to choose an adhesive that is water-resistant or waterproof. This will help prevent water damage and ensure that the adhesive bond remains strong. |
| Outdoor vs. Indoor | If the tiles will be installed outdoors, it is important to choose an adhesive that is specifically formulated for outdoor use. Outdoor adhesives are typically more durable and resistant to weather and temperature changes. Indoor adhesives may not hold up as well if exposed to the elements. |
Considering these environmental factors when choosing a tile adhesive can help ensure that the installation is successful and long-lasting. It is always important to read the manufacturer’s instructions and recommendations before selecting an adhesive to ensure that it is suitable for the specific installation conditions.
Size and Shape of Tiles Being Applied
When choosing tile adhesive, one of the important factors to consider is the size and shape of the tiles being applied. Here are some things to keep in mind:
- Large Format Tiles: If you are using large format tiles (typically any tile with one side 15 inches or longer), you will need a highly modified adhesive to support the weight of the tile. These may include medium-bed or large-tile adhesives.
- Mosaic Tiles: For mosaic tiles, you may want to consider a specific type of adhesive that is designed to fill in the gaps between the tiles for better adhesion. This is especially important for outdoor mosaics that will be exposed to freezing and thawing temperatures.
- Irregular-Shaped Tiles: Tiles that are not square or rectangular in shape may require a specialty adhesive that can fill in gaps and provide more support. Additionally, curved tiles may require a different type of adhesive to adhere to curved surfaces.
- Thickness of Tiles: The thickness of your tiles can also impact the adhesive you choose. Thicker tiles may require a thicker adhesive, while thinner tiles may require a thinner adhesive to ensure even coverage.
By taking the size and shape of your tiles into consideration, you can ensure that you select the right adhesive for your specific project. Make sure to consult with the manufacturer’s recommendations before making your final decision, and always test the adhesive on a small area before applying it to your entire project.
Budget
When choosing the right tile adhesive, it is important to consider your budget. Different types of tile adhesive come in different price ranges, so it’s essential to factor in the cost of the adhesive when planning your project. Here are some factors to consider when choosing a tile adhesive based on your budget:
- Price per unit: The price per unit will vary depending on the type of tile adhesive you choose. For example, epoxy tile adhesive is generally more expensive than cement-based tile adhesive. However, keep in mind that higher-priced adhesives may also come with added benefits or features that can make them a worthwhile investment in the long run.
- Amount needed: Consider how much adhesive you will need to complete your project. If you’re tiling a large area, you may need to buy adhesive in bulk, which can save you money in the long run.
- Waste: Don’t forget to factor in the potential for waste when calculating the amount of adhesive you need. Depending on the type of tiles you’re using and the complexity of your project, you may end up wasting some adhesive along the way.
- Additional costs: Remember that there may be additional costs associated with using tile adhesive, such as tools for mixing and applying the adhesive. You may also need to invest in grout to seal the tiles once they’re in place.
By carefully considering your budget, you can choose the right tile adhesive that meets your needs without breaking the bank. Keep in mind that while the cost of the adhesive is an important consideration, it shouldn’t be the only factor that you take into account. Make sure to also consider other factors, such as the type of tiles you’re using and the conditions in which they will be installed, to ensure that you choose an adhesive that will deliver the results you need.
How to Apply Tile Adhesive
When it comes to laying tiles, applying the tile adhesive is a crucial step that can make or break the entire process. Proper application ensures that your tiles stick firmly, creating a solid, long-lasting surface. However, if the tile adhesive is applied incorrectly, tiles may become loose or even break, causing costly damage and requiring additional work. In this section of the article, we will discuss the steps to follow for properly applying tile adhesive, from surface preparation to the curing process.
Preparation of the Surface
The preparation of the surface is a crucial step in ensuring a successful tile installation. Before applying tile adhesive, the surface needs to be cleaned and prepped properly to ensure the adhesive will properly bond to the surface. Here are the steps that need to be taken in preparing the surface:
- Clean the Surface: The first step is to clean the surface where the tile will be installed. There should be no loose dirt, debris, or residue left on the surface. Any adhesives or old tiles should be removed if they are present.
- Smooth Out the Surface: If the surface is uneven, it should be smoothed out before applying the tile adhesive. Any bumps or ridges on the surface will make it difficult to apply the adhesive evenly and may lead to an uneven installation.
- Make Sure the Surface is Dry: The surface should be completely dry before applying tile adhesive. Any moisture present on the surface can weaken the adhesive bond and lead to tile failure.
- Use the Right Primer: Some surfaces require a primer before applying the tile adhesive. The primer helps the adhesive bond better to the surface. It is essential to use the correct primer for the surface you are working with.
Properly preparing the surface is essential to ensure that the tile adhesive bonds correctly and creates a strong foundation for the tiles. By following these steps, you can ensure that your tile installation is successful and will last for years to come.
Mixing the Adhesive
Mixing the adhesive is a crucial step in ensuring a strong bond between the tiles and the surface. Here are the steps to follow:
- Choose the right mixing container: The container should be large enough to hold the amount of adhesive needed and should have a smooth surface that allows for easy mixing.
- Add water: Follow the manufacturer’s instructions for the correct water-to-adhesive ratio. The water should be added gradually to the container, and the adhesive should be stirred continuously.
- Mix thoroughly: It is important to mix the adhesive thoroughly to ensure that it is evenly distributed. Use a paddle mixer to achieve a consistent texture throughout the mixture.
- Allow the mixture to rest: After mixing, allow the adhesive to sit for a few minutes to reduce air bubbles. This will also give the adhesive time to reach the correct consistency.
- Remix: Stir the adhesive again before application. This will ensure that any lumps or inconsistencies are thoroughly mixed before you apply the adhesive to the surface.
It is important to note that the mixture should be used within the recommended time frame before the adhesive begins to set. Also, use only the recommended amount of water, as adding too much water can weaken the bond and cause the adhesive to break down over time. By following these steps, you can ensure a strong and long-lasting bond between the tiles and the surface.
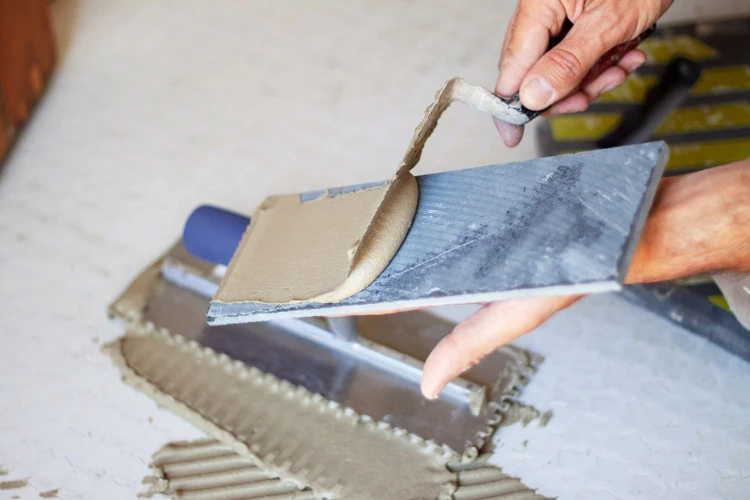
Application of the Adhesive
Once you have mixed your tile adhesive, it’s time to apply it to the surface. Here are the steps you need to follow for a successful application of the adhesive:
| Step 1: | Starting at the center of the surface, use a notched trowel to apply the adhesive with smooth, even strokes. |
| Step 2: | Work in small sections, applying just enough adhesive for the amount of tiles you can lay in 15 minutes. |
| Step 3: | Hold the trowel at a 45-degree angle, spreading the adhesive in a ridged pattern. This will help create suction between the tiles and the surface. |
| Step 4: | Use the flat side of the trowel to smooth out the ridges in the adhesive and create an even bed for the tiles. |
| Step 5: | Place the tiles into the adhesive, pressing down firmly and twisting them gently to set them into the ridges. |
| Step 6: | Use tile spacers to ensure even spacing between the tiles. |
| Step 7: | Repeat this process, working in small sections, until all the tiles are in place. |
It’s important to note that the application process may differ slightly depending on the type of tile adhesive being used. Always refer to the manufacturer’s instructions for specific guidance in this regard. Additionally, it’s important to make sure that the adhesive is completely dry before moving on to the next step of the tiling process. This typically takes 24 to 48 hours, so be patient and resist the temptation to rush the process.
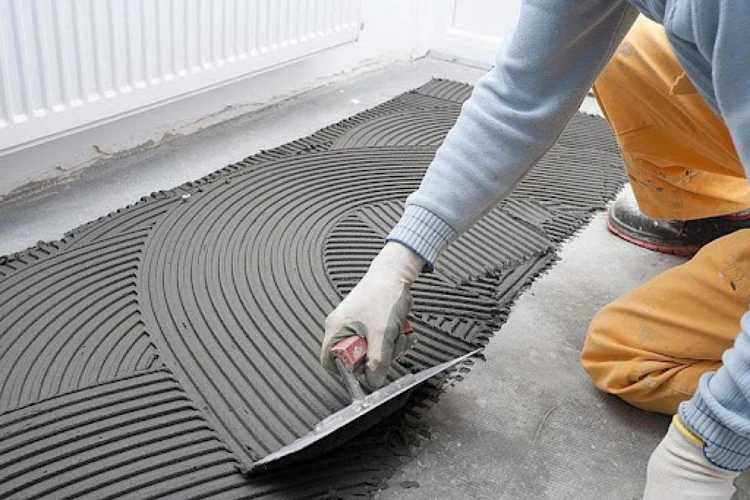
Placement of the Tiles
After applying the adhesive, it’s time to place the tiles. It’s important to have a clear plan for how the tiles will be placed before beginning the installation process. This can prevent mistakes and ensure that the finished product looks as intended.
Step 1: Starting Point
Begin at the center of the room or the focal point of the area to be tiled. This will create a balanced layout and help ensure that any cut tiles or tiles that need to be adjusted are near the edges of the room.
Step 2: Alignment
Use spacers to ensure proper alignment and spacing between the tiles. This will create even grout lines and help the finished product look neat and professional.
Step 3: Installation
Starting at the center and using a notched trowel, apply the adhesive to the surface in a small area. Then, spread the adhesive in one direction with the notched side of the trowel, and then spread it again in the opposite direction to create ridges in the adhesive.
Step 4: Placing the Tiles
Place the tiles firmly into the adhesive with a slight twisting motion, ensuring that they are level and aligned properly with the surrounding tiles. As each tile is placed, use a rubber mallet or a wooden block to tap it gently into place.
Step 5: Cutting Tiles
Use a tile cutter or wet saw to cut any tiles that need to be adjusted to fit along the edges of the room or around fixtures. Be sure to wear eye and ear protection when operating these tools.
Step 6: Grouting
After the adhesive has dried completely, it’s time to apply the grout. Remove the spacers and mix the grout according to the manufacturer’s instructions. Apply the grout with a rubber float, making sure to fill in all of the gaps between the tiles. Then, wipe away the excess grout with a damp sponge and let it dry completely.
Proper placement of the tiles is essential for a successful tile installation. Follow the steps carefully, and don’t hesitate to ask for professional help if needed.
Curing Time
Once tiles have been laid with the adhesive, it is important to allow enough time for the tile adhesive to cure properly. The curing time can vary depending on the type of adhesive used and the environmental conditions, such as temperature and humidity. Curing time usually ranges from 24 hours to several days.
The table below provides a general guide for the curing time of some common tile adhesives:
| Adhesive Type | Curing Time |
|---|---|
| Thinset Mortar | 24-48 hours |
| Mastic Adhesive | 24-72 hours |
| Epoxy Tile Adhesive | 48-72 hours |
| Polymer-Modified Cement Tile Adhesive | 24-48 hours |
It is important to follow the manufacturer’s instructions for the specific adhesive being used. The curing time can also be affected by the size and thickness of the tiles, as well as the substrate being used.
During the curing time, it is important to avoid putting pressure on the tiles or exposing them to water. Regular foot traffic, heavy furniture, or other weights should not be placed on the tiles until the adhesive is fully cured. Water exposure can also affect the curing time, as moisture can interfere with the bonding process.
Taking the time to properly allow the tile adhesive to cure will ensure a strong and long-lasting bond between the tiles and the substrate. Rushing the process or not allowing for enough curing time can result in tiles that come loose or shift over time, potentially causing damage or safety hazards in the space.
Maintenance and Repair
As much as we want our tiles to stay flawless and in top condition, wear and tear is inevitable. Through regular use, accidental damages may occur that require maintenance and repair. In this section, we’ll discuss some tips and tricks on how to properly maintain and repair your tiles. From regular cleaning to fixing breaks and cracks, we’ve got you covered. Let’s dive in and learn how to keep your tiles looking their best.
Regular Cleaning
After installing tiles with adhesive, it’s crucial to maintain them to ensure their longevity and appearance. Regular cleaning is an essential part of maintaining tiled surfaces, but it’s essential to use the right cleaning products to avoid any damage.
Here are some tips for regular cleaning:
| Step | Description |
|---|---|
| Step 1 | Sweep or vacuum the surface regularly to remove any dirt or debris that can scratch the tiles over time. |
| Step 2 | Using a damp mop or cloth, wipe the surface with warm water and a gentle cleaner specifically designed for tiles and grout. Avoid using harsh chemicals or abrasive cleaners that can damage the tiles or adhesive. |
| Step 3 | Dry the surface with a clean towel or mop to avoid any water stains or streaks. |
Regular cleaning helps maintain the beauty of the tiled surface, prevent staining, and extend the life of the adhesive. In addition to regular cleaning, it’s essential to handle any spills or stains immediately. If not addressed quickly, they can penetrate the adhesive and make it difficult to remove them later.
It’s important to note that some types of adhesives may require specific cleaning methods. Check the manufacturer’s instructions for cleaning recommendations specific to your adhesive.
Regular cleaning is a crucial part of maintaining tiled surfaces installed with adhesive. By following the tips above and using the right cleaning products, you can keep your tiled surfaces looking their best for years to come.
Handling Cracks or Breaks in Tiles
Cracks or breaks in tiles can be a major headache for homeowners. Fortunately, with the right tools and a bit of know-how, it’s possible to fix the problem without replacing the entire tile. Here’s what you need to do:
- Assess the damage: Before attempting to fix a tile, it’s important to assess the extent of the damage. If the crack or break is minor, it can usually be repaired. However, if the damage is severe, the tile may need to be replaced.
- Remove the damaged tile: If the tile needs to be replaced, the first step is to remove it from the surface. This can be done using a chisel and hammer or a grout saw. Be careful not to damage the surrounding tiles in the process.
- Clean the area: Once the damaged tile has been removed, clean the area thoroughly to remove any debris or adhesive. Use a scraper or putty knife to remove any excess adhesive from the surface.
- Prepare the new tile: If you’re replacing the damaged tile, you’ll need to prepare the new tile before installation. This involves measuring the area to ensure a proper fit, as well as cutting the tile to size if necessary.
- Apply new adhesive: Once the area is clean and the new tile is prepared, apply a fresh layer of adhesive to the surface using a notched trowel. Be sure to apply the adhesive evenly, and avoid applying too much or too little.
- Install the new tile: Carefully place the new tile into position, ensuring that it is level and properly aligned with the surrounding tiles. Press the tile firmly into the adhesive, and use spacers if necessary to maintain an even gap between tiles.
- Cure the adhesive: Allow the adhesive to dry completely before walking on or using the surface. This will usually take 24-48 hours, depending on the type of adhesive used.
Handling cracks or breaks in tiles can be a daunting task, but with careful preparation and the right tools, it’s possible to make repairs that look as good as new. Just remember to take your time and be patient – rushing the process can lead to mistakes and even larger problems down the line.
Repairing Damaged Tile Adhesive
When tile adhesive gets damaged, it needs to be repaired to maintain the integrity of the tiled surface. Here are the steps to take to repair damaged tile adhesive:
- Remove the damaged adhesive: First, remove any loose or damaged adhesive. This can be done by chipping away at the damaged areas with a chisel or scraper. Be careful not to damage the tiles in the process.
- Clean the area: Once the damaged adhesive is removed, clean the area with a damp cloth to ensure that there is no debris or dust left behind. Allow the area to dry completely before proceeding to the next step.
- Mix new adhesive: Prepare a new batch of tile adhesive according to the manufacturer’s instructions. Make sure to mix the adhesive to the right consistency, as this will affect how well it adheres to the tiles.
- Apply the new adhesive: Apply the new adhesive to the damaged area using a notched trowel. Make sure to spread the adhesive evenly and avoid leaving any gaps or lumps. Press the tiles into the adhesive, making sure to align them properly with the surrounding tiles. Use tile spacers to maintain the correct spacing between the tiles.
- Allow the adhesive to dry: Once the tiles are in place, allow the adhesive to dry completely. This can take anywhere from 24 to 48 hours, depending on the type of adhesive used and the environmental conditions.
- Grout the tiles: After the adhesive has dried, remove the tile spacers and apply grout to the gaps between the tiles. Make sure to choose a grout color that matches the surrounding grout, or that complements the overall design of the tiled surface.
- Seal the grout: Finally, seal the grout to prevent moisture from penetrating and causing damage to the tiles or adhesive. This can be done using a grout sealer, which can be found at most hardware or tile stores.
It is important to follow these steps carefully and to use the right tools and materials to ensure that the repaired tile adhesive is strong and durable. Always refer to the manufacturer’s instructions when working with tile adhesive, and if in doubt, consult a professional for assistance.
Conclusion
In conclusion, tile adhesive is a crucial component in any tile installation project. It provides a strong and durable bond between the tiles and the surface they are applied to, ensuring that the tiles remain in place for years to come.
Choosing the right type of tile adhesive is essential for a successful tile installation project. Factors such as the surface to which the tiles will be applied, the type of tiles being applied, environmental conditions, size and shape of tiles, and budget must all be taken into consideration.
Proper preparation of the surface, careful mixing and application of the adhesive, and correct placement of the tiles are also important steps in ensuring a successful installation. Curing time must also be taken into account, as rushing the process can lead to a weaker bond.
Regular maintenance and cleaning of the tiles is necessary to keep them in good condition and prevent damage. In the event of cracks or breaks in tiles, prompt handling and repair is essential to maintain the integrity of the structure.
Overall, tile adhesive is an important aspect to consider when undertaking any tile installation project. With careful consideration and proper installation techniques, tile adhesive can provide a strong and lasting bond between the tiles and the surface, creating a beautiful and functional tiled space.
Frequently Asked Questions
Can tile adhesive be used on all surfaces?
No, tile adhesive should only be used on clean, flat, and structurally sound surfaces such as concrete, cementitious backer boards, and drywall.
What is the difference between thinset and mastic?
Thinset is a cement-based adhesive that is water-resistant and recommended for floors and heavy tiles. Mastic, on the other hand, is a non-cement-based adhesive that is used for walls and less heavy tiles.
How long does it take for tile adhesive to dry?
The drying time depends on the type of adhesive, but it usually ranges from 24-48 hours for the tile to be fully set and adhered.
Can tile adhesive be used for outdoor projects?
Yes, but it depends on the type of adhesive and environmental conditions. It’s best to consult with a professional to ensure the proper adhesive is chosen for the project.
Can tile adhesive be used for shower walls?
Yes, but it’s recommended to use a waterproof tile adhesive specifically designed for shower walls.
What is the best way to remove excess tile adhesive?
The best way to remove excess adhesive is to wait until it is dry and then scrape it away with a putty knife or similar tool.
What is the advantage of using epoxy tile adhesive?
Epoxy tile adhesive provides a stronger bond and is more resistant to water, heat, and chemicals compared to other types of tile adhesive.
Can tile adhesive be used on top of old tiles?
No, it’s not recommended to apply new tiles on top of old tiles without first removing the old tiles and preparing the surface properly.
Can tile adhesive be used for backsplashes?
Yes, but it’s important to use an adhesive that is suitable for backsplashes and can hold up against moisture and heat.
Can tile adhesive be used with heated floors?
Yes, but it’s important to use an adhesive that is approved for use with heated floors and can withstand changes in temperature.