As a homeowner, you may find yourself perplexed when it comes to choosing the right type of paint for your walls or furniture. With so many options available, it can be challenging to determine which type of paint is suitable for your project. That’s where this comprehensive guide comes in handy. In this article, we will take an in-depth look at latex paint, one of the most popular and versatile paint options on the market. We’ll examine its composition, the different types available, its advantages and disadvantages, and how to apply and maintain it. Whether you’re a novice or an experienced painter, this guide will equip you with all the information you need to work with latex paint like a pro.
What is Latex Paint?
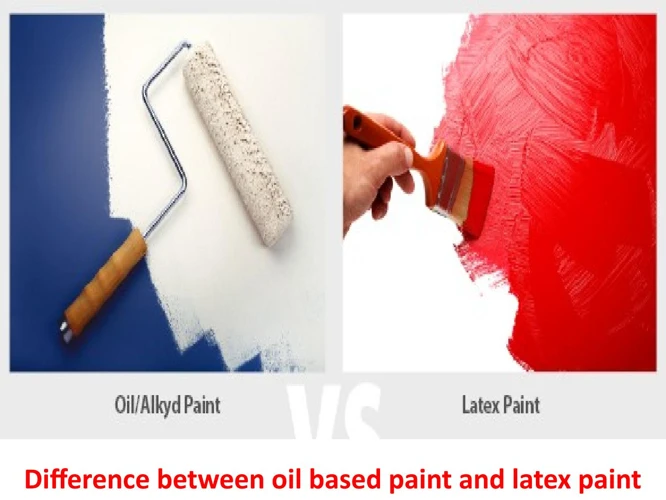
When it comes to painting, there are numerous types of paints to choose from, each with its unique set of characteristics. One of the most popular types of paint is latex paint. Although the term “latex paint” might be confusing to some, as it doesn’t actually contain latex, it is still a favorite paint among both DIY enthusiasts and professionals. This type of paint is versatile, easy to use, and provides a stunning finish. In this section, we’ll explore what exactly latex paint consists of, the different types available, as well as the advantages and disadvantages of using it. Curious about some of the applications of latex paint? Check out our article on how to apply latex paint on walls.
Composition of Latex Paint
Latex paint, also known as acrylic paint, is a popular type of paint used in many households for various painting projects. Knowing the composition of latex paint can help you understand why it is an excellent choice for many applications.
Here is a breakdown of the components of latex paint:
| Component | Purpose | |
|---|---|---|
| 1 | Binder | Binds the paint together and helps it stick to the surface being painted |
| 2 | Pigment | Gives the paint its color |
| 3 | Filler | Provides additional volume and helps to level the surface being painted |
| 4 | Extender | Maintains the consistency of the paint and extends its coverage |
| 5 | Solvent | Dilutes the paint to a workable consistency and evaporates as the paint dries |
| 6 | Additives | Enhances various properties of the paint such as drying time, mold-resistance, and the ability to be cleaned |
The binder in latex paint is typically a synthetic resin, such as acrylic, which creates a strong bond to the surface it is applied to. Pigments are added to the paint to provide the desired color, while fillers are used to enhance the texture and coverage of the paint. Extenders help to maintain the consistency of the paint and provide additional coverage, while solvents are used to dilute the paint to a workable consistency and evaporate as the paint dries. Additives are used to improve the paint’s properties, such as drying time, resistance to mold, and cleanability.
Understanding the composition of latex paint is important because it can affect the performance of the paint depending on the surface being painted and the application method used. Additionally, knowing the composition of latex paint can help you choose the right paint for your project and store it properly to ensure its longevity.
For more information on the advantages of latex paint, check out our article “Advantages of Latex Paint”.
Different Types of Latex Paints
Latex paint is a popular option due to its ease of use and versatility. There are different types of latex paint to choose from, varying in their chemical composition and properties. Here are a few different types of latex paints and their unique characteristics:
- Interior Latex Paint: This type of latex paint is specially designed for indoor use. It dries quickly, is easy to clean, and generally has low levels of volatile organic compounds (VOCs).
- Exterior Latex Paint: As the name suggests, this type of latex paint is made for exterior surfaces such as siding, fences, and decks. It is durable and can withstand harsh weather conditions.
- Acrylic Latex Paint: Acrylic latex paint is water-based and dries quickly. It is also resistant to fading, cracking, and chalking. This type of paint is great for high traffic areas, as it is durable and easy to clean.
- Eco-Friendly Latex Paint: Eco-friendly or “green” latex paint is a more environmentally friendly option. It typically contains low levels of VOCs and is made with natural ingredients.
- Low-VOC Latex Paint: Low-VOC latex paint is another eco-friendly option. It contains lower levels of VOCs than traditional latex paint, which makes it a safer choice for indoor use.
It is important to consider the specific needs of your project when choosing a type of latex paint. For example, if you are painting a high-traffic area, acrylic latex paint may be the best choice due to its durability. On the other hand, if you are repainting a room in your home and want a low-VOC option, eco-friendly or low-VOC latex paint may be the way to go.
If you are unsure which type of latex paint to use, consult with a paint professional at a paint store. They can provide valuable advice and help you choose the best product for your specific needs. You can find a wide variety of latex paints for sale at your local home improvement store or online at stores such as Home Depot. It is important to note that while latex paint is a great choice for many projects, it is not always the best option. Latex and oil-based paints each have their unique advantages and disadvantages, so it’s important to research and choose the best type of paint for your project.
Latex paint offers a variety of options to suit different needs, making it a popular choice among homeowners and professionals alike. However, it’s important to be aware of common mistakes to avoid when using latex paint, such as not properly preparing the surface, so that you can achieve the best possible results. Additionally, make sure to clean your brushes and rollers properly after using latex paint, which you can learn how to do in our guide on cleaning latex paint brushes and rollers.
Advantages of Latex Paint
latex paint has several advantages over other types of paints, which makes it a popular choice for both professionals and DIY enthusiasts alike. The following table outlines some of the key advantages of latex paint:
| Advantages | Description |
|---|---|
| Dries quickly | Latex paint typically dries within a few hours, which makes it ideal for those who want to get their painting projects done quickly. This is in contrast to oil-based paints, which can take up to 48 hours to dry. |
| Low odor | Latex paint has a much lower odor than oil-based paints, which makes it a more comfortable option for indoor painting projects. Additionally, low odor means less harmful fumes for people and pets, making it the healthier choice. |
| Easy cleanup | Latex paint is water-soluble, which means you can easily clean brushes and rollers with soap and water. You do not need any specialty solvents, such as mineral spirits, when it comes to cleaning up after using latex paint. This makes it eco-friendly and cost-effective solution. |
| Resistant to fading, cracking and peeling | Latex paint is particularly well-equipped to deal with climate and weather changes. This makes it a perfect option for outdoor projects where the paint will endure different weather conditions, such as extreme heat or cold. It also gives a longer life to the paint coat. |
| Variety of Sheens | There are multiple sheen finishes available in latex paint, such as flat, satin, semi-gloss, and gloss, among others. This variety allows you to choose the finish that best suits your needs when it comes to both protection and appearance of painted surfaces. You can click here to learn more about different sheens of latex paint. |
Latex paint is a durable, versatile, and easy-to-use option for home improvement projects. Whether you are painting interior walls, trim, or exterior surfaces, latex paint can provide a high-quality finish while also preserving the health of your family and the environment.
Disadvantages of Latex Paint
While latex paint has many advantages, it also has some drawbacks that should be taken into consideration before choosing it for your painting project. Some disadvantages of latex paint are:
| Disadvantages | Description |
|---|---|
| Less durable than oil-based paint | Latex paint may not hold up as well as oil-based paint in high traffic areas or on surfaces that are frequently exposed to moisture. |
| Thinner consistency | While a thinner consistency may make latex paint easier to apply, it may also mean that more coats are needed to achieve the desired finish. |
| May raise the grain of certain woods | Latex paint can raise the grain of certain types of wood, which may require additional sanding and preparation before painting. |
| Not suitable for all surfaces | Latex paint may not adhere well to certain surfaces, such as bare metal, and may require additional priming or preparation. |
| May dry too quickly | Latex paint dries quickly, which can be a disadvantage if you’re not able to work quickly. This can lead to visible brush strokes or roller marks. |
Despite these disadvantages, latex paint is still a popular choice for many homeowners and professionals due to its ease of use, quick drying time, and low odor. By understanding the potential drawbacks, you can make an informed decision about whether latex paint is the right choice for your next painting project.
How to Apply Latex Paint?
When it comes to painting, applying latex paint is one of the most popular and widely used techniques. But for those who are new to the process, it can seem daunting. The good news is that with the right tools, materials, and techniques, anyone can achieve a clean, even finish that will leave their walls looking like new. In this section, we’ll walk you through the steps of applying latex paint, from choosing the right tools to preparing the surface, applying the paint, and finishing up with a second coat.
Choosing the Right Tools and Materials
When it comes to painting with latex paint, choosing the right tools and materials can make all the difference in achieving a professional-looking finish. Here are some important considerations:
Brushes and Rollers:
Using the right brush or roller can help you achieve the smooth and even finish you desire. For latex paint, it’s recommended to use brushes and rollers made specifically for this type of paint. Look for brushes with synthetic bristles as natural bristles can absorb water and cause the paint to become waterlogged. Foam rollers are also a good choice for smooth surfaces like walls.
Tape and Drop Cloths:
Properly masking off areas you don’t want to paint is crucial. Use painter’s tape on edges and corners to create clean lines. Cover floors and furniture with drop cloths or plastic sheeting to protect them from drips and splatters.
Paint:
When selecting a latex paint, consider factors like the sheen level (e.g. matte, eggshell, satin, semi-gloss, or high-gloss) and the quality of the pigment. It’s also important to choose paint that is appropriate for the surface you’ll be painting on.
Additional Materials:
Other tools and materials you may need include a paint tray, stir sticks, sandpaper or a sanding sponge for smoothing rough surfaces, and a paint sprayer if you are tackling a large project.
By selecting the right tools and materials, you’ll set yourself up for success when it comes to applying latex paint.
Preparing the Surface
Preparing the surface before applying latex paint is crucial to ensure a smooth and even finish. Proper preparation of the surface will also help the paint to adhere well and last longer. Here are the steps involved in preparing the surface for latex paint:
| Step | Description |
|---|---|
| Clean the surface | The surface to be painted should be free of dust, dirt, grease, and other contaminants. Use a damp cloth or sponge to clean the surface thoroughly. For heavily soiled surfaces, use a mild detergent and water solution to clean. Rinse well and allow the surface to dry completely before proceeding. |
| Remove loose or flaky paint | If the surface has loose or flaky paint, it is important to remove it before painting. Use a scraper, sandpaper, or wire brush to remove the loose paint. Sand the surface lightly to create a smooth surface for painting. Remove any sanding dust with a damp cloth. |
| Repair any damage | If the surface has any cracks, holes, or other damage, it is important to repair them before painting. Use a filler or putty to fill in any gaps or holes. Sand the area smooth after the filler has dried. For bigger repairs, use a patching compound to fill the damaged area. Sand and prime the area before painting. |
| Tape off any areas | Use painter’s tape to protect any areas that should not be painted, such as trim, windows, or doors. Make sure the tape is properly adhered and remove it immediately after painting to avoid peeling or damaging the painted surface. |
| Prime the surface (if needed) | If the surface is new, previously unpainted or has been heavily repaired, it is advisable to prime the surface before painting. This will help the paint adhere well and cover the surface evenly. Apply primer with a brush, roller or sprayer and allow it to dry completely before painting. |
By following these steps, you can ensure that the surface is properly prepared for latex paint, which will result in a beautiful and long-lasting finish.
Applying the Paint
When it comes to applying latex paint, there are a few key steps to follow to ensure a smooth and even finish. Here is a step-by-step guide:
- Start with the edges and corners: Use a brush to paint around the edges and corners of the surface, known as “cutting in.” This will make it easier to fill in the larger areas with a roller later on.
- Use the right roller: Choose a roller with the appropriate length and nap (thickness of the fibers) for the surface being painted. A longer nap is best for textured surfaces, while a shorter nap is better for smooth surfaces. Rollers with rounded ends will also help prevent roller marks.
- Roll in a “W” pattern: Start by rolling the paint onto the surface in a “W” pattern, using moderate pressure. Then, fill in the pattern by rolling in straight lines, blending each section together as you go.
- Avoid lap lines: To avoid lap lines (areas where wet paint overlaps with dry paint), roll back over painted areas while they are still wet to even out the paint and blend the edges.
- Work in small sections: To ensure that the paint stays wet and easy to work with, work in small sections at a time (about 3-4 feet square).
- Smooth out drips and sags: Check for drips and sags frequently and smooth them out with a brush or roller while the paint is still wet.
- Let the first coat dry completely: Allow the first coat to dry completely before applying a second coat (check the manufacturer’s instructions for drying time).
By following these steps, you can achieve a professional-looking finish with latex paint. Just remember to choose the right tools and materials, prepare the surface properly, and take your time during the application process.
Applying a Second Coat
After completing the first coat of latex paint, it is important to allow it to dry before applying a second coat. The drying time can vary depending on factors such as humidity and temperature, so it is best to check the manufacturer’s instructions for recommended drying times.
Once the first coat is completely dry, a second coat can be applied. Applying a second coat is important to ensure full coverage and a consistent finish. It also helps to increase the durability of the paint.
Before applying the second coat, it is crucial to properly prepare the surface. This includes making sure there is no debris, dust or dirt on the surface. Sanding may also be necessary if there are any rough spots or areas where the first coat did not adhere properly.
When applying the second coat, it is important to use a quality brush or roller to ensure even coverage. Pouring the paint into a paint tray can also make it easier to apply the paint evenly. Starting at the top of the surface, use long strokes to apply the paint in a thin layer.
It is important not to overload the brush or roller with too much paint, as this can lead to drips and uneven application of the paint. Instead, it is better to apply a thin coat of paint and allow it to dry completely before applying another coat.
After applying the second coat, it is important to allow it to dry completely before touching or using the painted surface. Again, check the manufacturer’s instructions for recommended drying times.
The following table summarizes the steps for applying a second coat of latex paint:
| Step | Description |
|---|---|
| 1 | Allow the first coat to dry completely before applying the second coat. |
| 2 | Clean and prepare the surface before applying the second coat. |
| 3 | Use a quality brush or roller to apply the second coat. |
| 4 | Apply a thin layer of paint, avoiding overloading the brush or roller. |
| 5 | Allow the second coat to dry completely before touching or using the painted surface. |
By following these steps, you can ensure that your second coat of latex paint is applied evenly and provides a durable and lasting finish.
Cleaning and Maintaining Latex Painted Surfaces
After successfully applying latex paint, it is important to remember that proper cleaning and maintenance of the painted surfaces will help preserve their appearance and integrity over time. Whether you’re working with walls, floors, or furniture, keeping your latex painted surfaces clean and well-maintained will ensure they continue to look their best for years to come. In this section, we’ll explore some basic cleaning techniques, as well as tackle more stubborn stains and discuss how to retouch and repair areas of latex paint that may become damaged over time. So, let’s dive in and learn how to extend the lifespan of your latex painted surfaces.
Basic Cleaning Techniques
Keeping your latex painted surfaces clean is essential not just for aesthetic purposes but also for extending their lifespan. Here are some basic cleaning techniques to help you keep your latex painted surfaces looking fresh and vibrant:
| Cleaning Method | Materials Needed |
|---|---|
| Dry Dusting | – Soft-bristle brush or feather duster |
| Wet Cleaning | – Mild dish detergent – Warm water – Soft cloth or sponge |
| All-Purpose Cleaner | – All-purpose cleaner – Soft cloth or sponge |
Dry dusting is the simplest and most gentle way to clean your painted surfaces. You can use a soft-bristle brush or a feather duster to gently remove surface dust and debris. Be careful when dusting not to apply too much pressure or you could scratch the surface.
If dry dusting isn’t enough, you can move on to wet cleaning. Mix a small amount of mild dish detergent with warm water and use a soft cloth or sponge to wipe down the surface. Be sure to rinse the cloth or sponge frequently and wring out excess water to avoid leaving water spots or streaks.
If you need a stronger cleaning solution, an all-purpose cleaner can be used instead. Follow the manufacturer’s instructions, and be sure to avoid any abrasive cleaners or tools that could damage the surface.
In addition to these basic cleaning techniques, it’s important to be mindful of the types of cleaning products and tools you use on your painted surfaces. Harsh chemicals and rough tools can damage the paint and cause it to peel or chip over time. Always test a small, inconspicuous area of the painted surface first to make sure the cleaning product or tool is safe to use.
Removing Stubborn Stains
When it comes to removing stubborn stains from a latex painted surface, there are a few methods you can try. It’s important to remember to always test a small, inconspicuous area before attempting to remove the stain to avoid any damage to the paint. Here are some methods to try:
- Dish Soap: Mix a few drops of dish soap with warm water and use a soft cloth to gently scrub the stain. Rinse with clean water and dry with a clean towel.
- Vinegar: Mix equal parts vinegar and water and use a soft cloth to gently scrub the stain. Rinse with clean water and dry with a clean towel.
- Baking Soda: Mix baking soda with just enough water to form a paste. Apply the paste to the stain and let sit for several minutes before scrubbing gently with a soft cloth. Rinse with clean water and dry with a clean towel.
- Rubbing Alcohol: Dampen a cotton ball or soft cloth with rubbing alcohol and gently rub the stain. Rinse with clean water and dry with a clean towel.
- Hydrogen Peroxide: Mix equal parts hydrogen peroxide and water and use a soft cloth to gently scrub the stain. Rinse with clean water and dry with a clean towel.
It’s important to be gentle when trying to remove stains from a latex painted surface. Using harsh chemicals or abrasive scrubbers can damage the paint and make the stain worse. If the stain persists, it may be best to consult a professional.
Retouching and Repairing Latex Paint
Inevitably, there will be instances where a latex painted surface will need retouching or repairing. Here are some steps to follow for those instances:
Step 1: Assess the Damage
Before starting any repair work, assess the amount of damage to the surface. Look for areas where the paint is chipping, peeling, or scratched. In some cases, a simple touch-up may be enough, while in other cases, repainting the entire area may be necessary.
Step 2: Gather Your Materials
For touch-ups, you will need the original paint color, a small brush, and a smooth, fine-grit sandpaper. For larger repairs, you may need more paint and tools like a putty knife, a patching compound, and a paint roller.
Step 3: Prepare the Surface
Clean the damaged area and remove any loose paint with a putty knife or sandpaper. If the surface is uneven, apply a patching compound to fill in the gaps and allow it to dry completely. Sand the surface until it is smooth using a fine-grit sandpaper.
Step 4: Touch-up or Repaint
If only a small area needs attention, use a small brush to apply a small amount of paint to the damaged spot. Allow it to dry completely and then check to see if the color matches the surrounding area. Repeat the process until the damaged area is completely covered and the color matches perfectly.
Step 5: Finishing Touches
If the repaired area stands out from the rest of the wall, blend it in by feathering the edges of the repaired area with a dry brush. If necessary, apply a second coat of paint to the entire surface to ensure an even finish.
With these steps, retouching and repairing a latex painted surface can be done with ease, making your walls or other surfaces look as good as new.
Tips and Tricks for Working with Latex Paint
Once you have all the essentials covered, working with latex paint can be quite an enjoyable experience. However, if you’re looking to take your game up a notch and achieve professional-quality results, there are a few tips and tricks you should keep in mind. From ensuring even coats to painting edges with precision, these expert techniques can make a huge difference in the final outcome of your project. So, without further ado, let’s delve into some key strategies for mastering the art of working with latex paint.
Painting Large Surfaces
When painting large surfaces, it is important to use the right tools and techniques to ensure a smooth and even finish. Here are some tips to help you achieve professional-looking results:
- Use a paint roller: A paint roller is a great tool for painting large walls and ceilings quickly and efficiently. Choose a roller with a medium nap for smooth surfaces or a longer nap for textured surfaces.
- Start from the top: Begin painting at the top of the surface and work your way down. This will help to prevent drips and ensure even coverage.
- Work in small sections: Divide the surface into manageable sections and paint one section at a time. This will help you to maintain a wet edge and ensure that the paint blends seamlessly.
- Overlap your strokes: To avoid visible lines, overlap your roller strokes slightly as you work your way across the surface.
- Apply light pressure: Apply light pressure to the roller, letting the weight of the tool do the work. This will help to prevent roller marks and ensure an even coat of paint.
- Avoid excessive rolling: Over-rolling can lead to a rough texture and uneven coverage. In general, it’s best to use as few strokes as possible and avoid going over the same area too many times.
- Keep a wet edge: Try to maintain a wet edge as you paint, which means overlapping your strokes while the paint is still wet. This will help to prevent lap marks and ensure a smooth finish.
By following these tips, you can achieve a professional-looking finish when painting large surfaces. Remember to take your time, use the right tools and materials, and work carefully to ensure the best possible results.
Getting Smooth and Even Coats
Getting a smooth and even coat of latex paint can be a challenging task for many people. To ensure that the paint job is of high quality and looks professional, it is important to follow some tips and tricks.
Use the Right Technique
One of the most important aspects in getting an even coat of latex paint is the technique used. It is recommended to use a roller instead of a brush to apply the paint, as a brush can leave brush marks and result in an uneven coat. Additionally, it is important to use long and even strokes, avoiding too much pressure on the roller.
Thin Layers
To get a smoother and even coat, it is essential to apply thin layers of latex paint. Thick layers of paint can result in an uneven appearance, as the paint dries at different rates across the layer. By applying thin layers, each layer can dry evenly, leading to a smoother finish.
Let it Dry
It is essential to give the paint enough time to dry between each coat. This allows the paint to fully set and dry, preventing the risk of the paint lifting or peeling off. Waiting at least 24 hours between each coat is recommended, and using a dehumidifier or fan to speed up the drying process can help achieve a smooth and even finish.
Post-Painting Check
After the final coat of latex paint has dried, it is important to do a post-painting check. Inspecting the wall from different angles can reveal any imperfections, such as spots that are lighter or darker in color or any areas that are not smooth. These areas can be touched up with a small brush, using thin coats to ensure a smooth finish.
Clean Up Tools
To prevent any dried latex paint or debris from affecting the next paint job, it is essential to clean up the tools used in the painting process. The roller, brush, and tray should be washed and dried completely before storing, ensuring that they are clean and ready for the next use.
By following these tips and tricks, it is possible to achieve a smooth and even coat of latex paint that looks professional and high quality.
Painting Trim and Edges like a Pro
When it comes to painting trim and edges, it can be a bit tricky to get a clean and professional-looking finish. Here are some tips to help you paint like a pro:
- Clean and prep the area: Before you begin painting, make sure the trim and edges are clean and free of dust and debris. Sand any rough spots and fill any small holes or gaps with putty. Use painter’s tape to mask off any areas you don’t want to paint.
- Choose the right brush: For trim and edges, it’s best to use a brush with angled bristles. This shape makes it easier to paint corners and edges with precision. Look for a brush with high-quality bristles that won’t shed or leave brush marks.
- Start with the edges: Begin by painting the edges of the trim first, using a steady hand and light pressure. Dip the brush about a third of the way into the paint, and tap it lightly on the side of the can to remove excess. Then, use short, smooth strokes to paint along the edge of the trim, working from top to bottom. Tip: It’s best to use a small brush for this step.
- Paint the face: Once the edges are dry, you can begin painting the face of the trim. Again, use light pressure and steady strokes to avoid drips and smudges. Work in small sections, brushing from top to bottom and then back up again to smooth out any brush marks.
- Watch for drips: It’s easy to get drips and runs when painting trim, especially on vertical surfaces. To avoid these, don’t overload the brush with paint, and use light pressure. If you do get a drip, wipe it off immediately with a clean brush or cloth.
- Use a second coat: To get a smooth and even finish, you may need to apply a second coat of paint once the first is completely dry. Follow the same process as before, starting with the edges and then painting the face of the trim.
By following these simple tips, you can achieve a professional-looking finish when painting trim and edges. Remember to take your time, use high-quality materials, and practice patience and precision.
Conclusion
In conclusion, it is evident that latex paint is a versatile and popular choice for painting surfaces in residential, commercial and industrial settings. Its composition, including water and synthetic polymers, make it an eco-friendly and safe option compared to oil-based paint.
The different types of latex paint provide homeowners and professionals with options based on the surface to be painted and the desired finish. The benefits of latex paint, such as its quick drying time and easy clean up, outweigh the disadvantages such as its susceptibility to water and its inability to adhere well to unprimed metal surfaces.
When applying latex paint, the right tools and materials are crucial, and proper surface preparation is necessary to ensure a smooth and even finish. It is also important to know how to clean and maintain latex painted surfaces to prolong their lifespan and appearance.
By following the tips and tricks for working with latex paint, individuals can achieve professional-looking results and avoid common mistakes such as visible brush strokes and uneven coats.
Overall, latex paint is an accessible and user-friendly solution for transforming surfaces and adding a fresh look to any space. Whether it’s a DIY home improvement project or a professional job, latex paint is a dependable and cost-effective option for achieving beautiful and long-lasting results.
Frequently Asked Questions
Can latex paint be used on all surfaces?
No, latex paint is not suitable for all surfaces. It is best suited for surfaces that are dry, clean, and free of dust, grease, and debris. Surfaces like metal, glass, and certain plastics may not be suitable for latex paint.
How long does latex paint take to dry?
The drying time for latex paint depends on various factors, including the type of surface, the temperature, and the humidity. In general, latex paint dries to the touch within an hour or two, but it may take up to 24 hours to fully cure, depending on the conditions.
Can you apply latex paint over oil-based paint?
It is possible to apply latex paint over oil-based paint, but it requires adequate preparation of the surface, including cleaning, sanding, and applying a primer. Failure to prepare the surface properly may result in peeling or flaking of the paint.
Is latex paint flammable?
No, latex paint is not flammable. It is made from water-based emulsion, which makes it non-flammable and easy to clean up using soap and water.
What is the shelf life of latex paint?
The shelf life of latex paint depends on various factors, including the type of paint, the brand, and the storage conditions. Generally, unopened latex paint can last for up to 10 years if stored in a cool, dry place.
Can you mix different colors of latex paint?
Yes, it is possible to mix different colors of latex paint to create a custom color. However, it is important to mix the paint thoroughly to ensure uniformity and consistency of color.
What is the best way to clean latex paint from brushes and rollers?
The best way to clean latex paint from brushes and rollers is to rinse them with warm, soapy water immediately after use. For stubborn paint, you may need to use a specialized cleaner or solvent.
What is the difference between paint and primer?
Paint is a colored substance used to decorate and protect surfaces, while primer is a preparatory coating used to improve adhesion, coverage, and durability of the paint.
How many coats of latex paint are needed?
The number of coats of latex paint needed depends on several factors, including the type of surface, the color of the paint, and the desired finish. In general, two coats of paint are sufficient, but for darker colors or uneven surfaces, additional coats may be needed.
Can you tint latex paint?
Yes, it is possible to tint latex paint using pigments or dyes to create a custom color. Tinting also helps to improve the coverage and vibrancy of the paint.