Introduction
As you embark on the journey of renovating your kitchen cabinets, you may find yourself overwhelmed by the vast array of options available. With so many paints and finishes to choose from, it can be challenging to determine which one will give your kitchen the look and feel that you desire. One option that is rising in popularity is milk paint. In this section, we will discuss what milk paint is, why it is a great choice for kitchen cabinets, and some popular milk paint color ideas to consider.
What is Milk Paint?
Milk paint is a type of paint that has been used for thousands of years, dating back to ancient Egypt, Greece, and Rome. It is made from simple, natural ingredients, such as milk protein (casein), limestone, and clay. Milk paint is considered an environmentally friendly paint option because it is non-toxic, biodegradable, and can be made from sustainable resources.
Unlike modern paints, milk paint comes in a powdered form that needs to be mixed with water before use. This unique feature allows for greater control and customization, as the amount of water added will affect the consistency and opacity of the paint. Milk paint can be used on a variety of surfaces, including wood, plaster, and even metal.
One of the most unique qualities of milk paint is its ability to create a distressed or vintage look. This is achieved by applying multiple layers of paint and then sanding away some of the top layers to reveal the color underneath. Milk paint also lends itself well to custom color mixing, allowing for endless possibilities.
Milk paint has experienced a resurgence in popularity in recent years as people search for more natural, eco-friendly alternatives to traditional paints. It is important to note that milk paint does have some drawbacks, such as lower durability and the need for a bonding agent on certain surfaces. However, with proper preparation and application, milk paint can create a beautiful, long-lasting finish on your kitchen cabinets.
Why Use Milk Paint on Kitchen Cabinets?
Milk paint is a popular choice for kitchen cabinets due to its unique properties. Although it has been around for centuries, it is now experiencing a resurgence in popularity as homeowners seek a more natural and eco-friendly alternative to traditional paints. Here are a few reasons why you might want to consider milk paint for your kitchen cabinets:
- Compared to other paints, milk paint is more environmentally friendly. Unlike oil-based or acrylic latex paints, milk paint is made from natural ingredients like milk protein, limestone, and clay. This means it is biodegradable, non-toxic, and safe for use around children and pets.
- Milk paint creates a smooth, velvety finish. Due to its unique composition, milk paint dries to a velvety, matte finish that is perfect for achieving a vintage or rustic look.
- Milk paint is versatile in terms of colors. While milk paint is often associated with muted, vintage-inspired colors, it can also be found in bright and bold shades that are perfect for adding a pop of color to your kitchen.
- Milk paint is easy to distress. If you’re looking for a shabby-chic look, milk paint can be easily distressed using fine-grit sandpaper or a wet rag to create a beautiful, lived-in look.
- You can mix your own milk paint using a variety of methods. Whether you prefer to use a pre-made mix or prefer to experiment with different recipes, there are many ways to create your own batch of milk paint using ingredients that can be found at your local hardware store.
All in all, milk paint is a great option for anyone looking for a beautiful, natural, and eco-friendly way to give their kitchen cabinets a fresh new look. If you’re curious about the difference between milk paint and chalk paint, or want to learn more about the pros and cons of milk paint, check out our other articles on the topic!
Popular Milk Paint Color Ideas
As you start considering milk paint for your kitchen cabinets, one of the most exciting parts is choosing a color. With numerous shades to choose from, it can be overwhelming to pick the right one. From timeless black to vivid burnt orange, the possibilities are endless. But don’t worry; we’ve got you covered with some of the most popular milk paint color ideas that can transform your kitchen. Before diving in, let’s briefly revisit what milk paint is and why it’s an excellent option for your cabinets. For more information on milk paint, you can check out the differences between milk and chalk paint or learn about the fascinating history of milk paint.
1. Classic Black
One of the most classic options for milk paint color on kitchen cabinets is black. It may seem like a bold choice, but black cabinets can actually create a sophisticated and modern look in your kitchen. With milk paint, black can have a matte finish that adds a timeless appeal.
To achieve this look, be sure to properly clean and prep your cabinets before applying the milk paint. Once you have done so, mix your paint mixture according to the instructions using a black pigment. When the mixture is ready, apply it to your cabinetry in thin layers, letting each coat dry before applying the next one.
Tip: For a smoother finish, lightly sand between layers of milk paint. Once your final coat has fully dried, add a protective finish such as wax or hemp oil to ensure your black cabinets will last for years to come.
If you’re looking for a way to add a chic and edgy element to your kitchen, black cabinets with milk paint could be the perfect solution. To learn more about milk paint and its benefits, check out our article on milk paint pros and cons. If you’re interested in using milk paint on other furniture pieces, be sure to read our tips on mixing milk paint for furniture and creating a long-lasting finish with milk paint in our article on how to create long-lasting milk paint finishes.
2. Ocean Blue
A popular color choice for kitchen cabinets painted with milk paint is Ocean Blue. This color option is perfect for a coastal or nautical themed kitchen. It adds a pop of color with a relaxing and calming effect, reminiscent of the ocean.
To achieve the perfect Ocean Blue color, measure out your milk paint powder and mix it with water according to the manufacturer’s instructions. For a lighter shade, use less powder, and for a darker shade, add more powder.
Once the milk paint is mixed, begin applying it to your kitchen cabinets using a brush or sprayer. Consider adding a second coat for a more opaque finish.
When using Ocean Blue milk paint, it is important to consider the other colors in your kitchen decor. Pair this cool color with warm elements like wooden countertops or brass hardware to create a harmonious balance.
Remember, milk paint will naturally distress over time, giving your Ocean Blue kitchen cabinets a vintage and unique feel. Adding a clear topcoat can help protect your cabinets and prevent unnecessary distressing.
If you want your kitchen cabinets to have a more vintage look, check out our article on milk paint tips for a vintage look. If you are comparing milk paint to chalk paint for your kitchen cabinets, read our article on milk paint vs. chalk paint to make an informed decision.
3. Sage Green
Sage Green is a soft and calming color that can add a touch of sophistication to your kitchen cabinets. This color is perfect for those who want a subtle pop of color without going too bold. It pairs well with a variety of materials, including wood and marble.
Pros:
- Calming and sophisticated
- Complements a variety of materials
- Not too bold, perfect for a subtle pop of color
Cons:
- May not stand out enough for those looking for a bolder statement
- May not look great with certain colors or patterns in your kitchen
- May need multiple coats for full coverage
| Sage Green with White Countertops | Sage Green with Wood Countertops |
|---|---|
 |
 |
Tips:
- Consider pairing Sage Green with white or wood countertops for a timeless look.
- Use a high-quality primer before applying the paint to ensure the color stays true and lasts longer.
- Paint a small area first as a sample to test how the color looks in your kitchen’s lighting.
Sage Green is a great choice for those who want a soft and calming look for their kitchen cabinets. With proper preparation and application, you can achieve a beautiful and long-lasting finish.
4. Bright Yellow
One of the most popular milk paint colors for kitchen cabinets is bright yellow. This vibrant hue instantly adds a touch of cheer and warmth to any kitchen. Here are some details about this color option:
| Color Name: | Bright Yellow |
| Color Family: | Yellow |
| Undertones: | Warm and sunny, with slight orange undertones |
| Best for Cabinet Styles: | Modern and contemporary styles, such as flat panel or slab doors, that allow the color to shine and create a statement |
| Pair With: | Neutral colors such as white or gray for a balanced look, or with black and metallic accents for a bold and modern touch |
Before choosing bright yellow as your milk paint color for kitchen cabinets, it’s important to consider the overall design and aesthetic of your kitchen. This color is best suited for modern and contemporary styles, and pairs well with neutral colors to create a cohesive and balanced look.
In terms of undertones, bright yellow has warm and sunny tones with slight orange undertones. This makes it a perfect choice for kitchens with natural light, as it will enhance the warmth of the sunlight and create a cozy environment.
To enhance the statement-making effect of bright yellow cabinets, consider pairing them with black or metallic accents, such as knobs and handles. This will create a bold and modern touch and really make the cabinets stand out. Additionally, adding natural wood elements, such as flooring or countertops, can balance the bright yellow and create a warm and inviting space.
Bright yellow is a great choice for those looking to add a touch of cheer and warmth to their kitchen. Just be sure to pair it with complementary colors and take into consideration the overall design of your space.
5. Burnt Orange
Another trendy milk paint color idea for your kitchen cabinets is a bold Burnt Orange. This color can be dramatic and eye-catching, adding a warm and inviting atmosphere to your kitchen. Here’s a breakdown of what you need to know about using Burnt Orange milk paint on your kitchen cabinets.
Color Description
As the name suggests, Burnt Orange is a deep shade of orange with hints of red and brown, creating a rustic and earthy tone. This color works well with natural wood accents and can complement earthy or neutral-toned kitchen decor.
Pairing Options
If you choose to go with Burnt Orange, you can complement it with warm and natural-toned accessories, such as earthy green plants, copper pots, or wooden utensils. For a bold yet harmonious look, pair it with white or cream-colored countertops and backsplash.
Application Tips
Before applying Burnt Orange milk paint, make sure to clean and prep your cabinets properly. It’s important to use a good quality paintbrush to achieve a smooth and even finish. Apply thin and even coats, allowing enough drying time between each layer. If the color appears too bold, you can tone it down by mixing in a little bit of Vintage White milk paint.
Maintenance
To keep your Burnt Orange kitchen cabinets looking fresh and vibrant, avoid using harsh chemical cleaners, as they can damage the milk paint finish. Instead, simply wipe them down with a damp cloth, and if necessary, use a mild soap solution.
Pros and Cons
One of the main advantages of using Burnt Orange milk paint is its distinctive and statement-making look. However, some people may find it too bold for their taste, and it may not be suitable for smaller or darker kitchens.
Burnt Orange milk paint is a unique and earthy color option for your kitchen cabinets that can add warmth and character to your space. When paired with the right accessories and finishes, it can create a stylish and inviting atmosphere in your home.
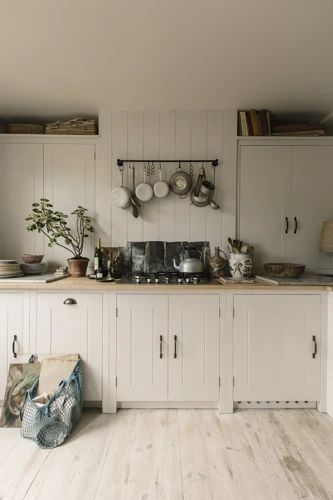
6. Vintage White
Vintage white is a classic color choice for many kitchen cabinets. It is a soft, warm white with a hint of yellow undertones. This color is perfect for achieving a vintage or shabby chic look in your kitchen. Here are some benefits of using vintage white milk paint on your kitchen cabinets:
- Timeless Appeal: Vintage white is a classic color that never goes out of style. It has an understated elegance that can make your kitchen look sophisticated and refined.
- Easy to Pair: This color can be paired with a variety of different accents and accessories, making it a versatile choice for any kitchen. Vintage white pairs well with both warm and cool color palettes, making it an easy choice for those unsure about what color to pick.
- Enhances Natural Light: Vintage white is a light color that can help enhance natural light in your kitchen. It can make your space appear brighter and more open, even if you have a small kitchen with limited natural light.
To achieve the vintage white look on your kitchen cabinets, follow these steps:
- Gather your materials, including milk paint, paintbrush, sandpaper, and a protective topcoat
- Clean and prep your cabinets by removing any dirt, grease, or grime. Sand the cabinets lightly to help the milk paint adhere properly
- Mix your milk paint according to the manufacturer’s instructions. For vintage white, you may want to add a small amount of yellow pigment to create a warm undertone
- Apply your milk paint to your cabinets evenly and with long brushstrokes. Allow each layer to dry before applying the next one until you achieve the desired coverage
- Once the final coat has dried completely, you can add a protective finish to help protect your cabinets from wear and tear
With a little bit of effort, your kitchen cabinets can be transformed into beautiful vintage white showpieces. Not only will they look great, but they will help enhance the overall look and feel of your kitchen.
7. Bold Red
Red is a daring and bold choice for your kitchen cabinets, but it can add a pop of color that will truly make a statement. To help you achieve this look with milk paint, here are some tips and key features to keep in mind when selecting the right shade of red.
Shade: When it comes to red, you want to ensure that you pick the right shade to achieve the desired effect. For a bold, statement-making look, a bright and saturated red like “Fire Engine Red” or “Cherry Red” would be perfect. If you’re looking for something a little more subdued, a darker, deeper red like “Crimson” or “Bordeaux” could be a good option.
Style: Red cabinets can fit in with a variety of kitchen styles, from modern to farmhouse. For a contemporary look, pair your bold red cabinets with sleek stainless steel appliances and minimalist hardware. For a more traditional look, consider pairing your red cabinets with warm wood accents and vintage-inspired accessories.
Contrast: If you’re looking to add even more visual interest to your red cabinets, consider pairing them with a contrasting color on your walls or countertops. White or black can create a striking contrast, while a neutral grey or beige can help tone down the boldness of the red.
To ensure your milk paint application goes smoothly, be sure to gather all the necessary materials and follow the step-by-step instructions carefully. With just a little bit of planning and elbow grease, you can transform your kitchen cabinets into a bold, beautiful statement piece that will leave everyone in awe.
Here’s a table summarizing the key points for applying bold red milk paint to your kitchen cabinets:
| Key Feature | Description |
|---|---|
| Shade | Bright, saturated red for a statement-making look or a darker, deeper red for a more subdued style. |
| Style | Red cabinets can fit in with a variety of kitchen styles, from modern to farmhouse. |
| Contrast | Consider pairing with a contrasting color on walls or countertops for added visual interest. |
8. Soft Pink
Soft pink is a whimsical, delicate color that can add a touch of romance to any kitchen. Here are some tips for incorporating soft pink milk paint into your kitchen cabinet design:
- Pair with White: Soft pink pairs beautifully with crisp white accents, creating a fresh, feminine look.
- Add Metallic Hardware: To give your soft pink cabinets a modern edge, add metallic hardware in silver or gold.
- Choose Complementary Colors: Soft pink is a pastel color, so it pairs well with other soft, pastel colors like baby blue, mint green, or lavender.
- Consider the Lighting: Soft pink can look different depending on the lighting in your kitchen, so be sure to test out a sample of the milk paint in the space before committing to the color.
- Add Texture: To create visual interest with soft pink cabinets, add texture through a patterned backsplash or textured countertops.
When applying soft pink milk paint to your kitchen cabinets, be sure to prepare the surface properly and apply multiple coats for a full coverage finish. Adding a protective topcoat will ensure the paint lasts and stays looking beautiful for years to come.
9. Navy Blue
If you’re looking for a color that’s bold yet soothing at the same time, Navy Blue can be a great choice for your kitchen cabinets. This color can make your kitchen look sophisticated and timeless, without being too overwhelming or dramatic.
To help you decide if Navy Blue is the right color for your kitchen cabinets, here are some things to consider:
| Pros | Cons |
| Navy blue is a classic color that never goes out of style. | Can make a small kitchen look even smaller if not paired with the right lighting and decor. |
| It can create a calming and soothing atmosphere in your kitchen. | May show fingerprints or smudges more easily than lighter colors, so you’ll need to wipe them down frequently. |
| It pairs well with many different materials, such as wood, marble or brass. | Can make a kitchen feel too dark if not balanced with lighter colors for contrast. |
If you’ve decided that Navy Blue is the color for your kitchen cabinets, here’s how to use milk paint to achieve this look:
1. Gather Your Materials: You’ll need milk paint in the color Navy Blue, a paintbrush, sandpaper, and a wax or hemp oil for finishing.
2. Clean and Prep Your Cabinets: Before you begin painting, it’s important to thoroughly clean your cabinets and remove any dirt, grease and grime. Use sandpaper to roughen up the surface of the cabinets slightly, which will help the paint adhere better.
3. Mix Your Milk Paint: Follow the instructions on your milk paint package to mix the paint to the proper consistency for your cabinets. Add more or less water depending on the thickness or thinness of the paint.
4. Apply Your Milk Paint: Use your paint brush to apply the milk paint in thin, even strokes. It may take multiple coats to achieve the desired look, so be patient and allow enough time between coats for the paint to dry.
5. Add a Protective Finish: Once the paint has dried completely, protect it with a wax or hemp oil. This will help to seal the paint and prevent any chipping or flaking.
With a little patience and the right tools, you can easily transform your kitchen cabinets with the beautiful and timeless color of Navy Blue.
10. Creamy Beige
Creamy beige milk paint is a versatile and soft color that can add warmth and sophistication to any kitchen. It has a subtle creamy tone that pairs well with most kitchen design styles, from modern to traditional. Here are some tips for using creamy beige milk paint on your kitchen cabinets:
- Consider your kitchen lighting: Creamy beige may look slightly different depending on the lighting in your kitchen. If you have warm or natural lighting, creamy beige can appear more yellowish. If you have cool lighting, it may appear more grayish. Take this into consideration when choosing this paint color.
- Pair with contrasting hardware: Creamy beige pairs well with both warm and cool tones, so you have your choice of hardware. If you want to create contrast, consider pairing your creamy beige cabinets with darker hardware, like oil-rubbed bronze. If you want a more cohesive look, consider choosing hardware in a similar tone.
- Experiment with different textures: Creamy beige cabinets can pair well with a range of different textures. For example, you can pair them with natural wood, marble or granite countertops, or even metallic accents. The neutral tone of creamy beige provides a great base to experiment with other textures and design elements.
- Pair with colorful accents: Creamy beige can also be a great backdrop for colorful accents like bright green plants, colorful dishes, or vibrant window treatments. If you want to add a pop of color to your creamy beige kitchen, consider using accessories or accents with bold, saturated hues.
- Use a matte finish: For a more modern and sophisticated look, consider using a matte finish on your creamy beige cabinets. Matte finishes have a soft, velvety texture that looks great with this creamy beige tone.
Creamy beige is a great choice for adding warmth and sophistication to your kitchen. With some experimentation and creative thinking, you can create a stunning and unique kitchen design using creamy beige milk paint.
How to Use Milk Paint on Kitchen Cabinets
Now that you have chosen the perfect milk paint color for your kitchen cabinets, it is time to learn how to apply it. Using milk paint may seem daunting at first, but with the right materials and technique, achieving a beautiful and durable finish is possible. Follow these step-by-step instructions below to learn how to use milk paint on your kitchen cabinets and transform your space.
Gather Your Materials
Before starting the process of painting your kitchen cabinets with milk paint, it is important to gather all the necessary materials to ensure a smooth and successful painting process. Here are the key materials you will need:
| Milk Paint | The first and most important material you will need is, of course, the milk paint itself. Milk paint is available in various colors and can be purchased in powder form. |
|---|---|
| Paint Brushes | You will need a set of high-quality paint brushes to help you apply the milk paint to the cabinets. The number and size of brushes you will need will depend on the size of the cabinets and the type of finish you want to achieve. |
| Paint Thinner | Some milk paint manufacturers require a paint thinner to be added to the milk paint when mixing. Check the instructions on your milk paint package to see if you need to purchase paint thinner. |
| Protective Gear | Protective gear is essential when working with any type of paint. You will need gloves, eye protection, and a breathing mask to make sure you do not inhale any harmful dust particles. |
| Screwdriver | You will need a screwdriver to remove the cabinet doors and hardware before painting. Make sure to keep all the small screws organized and in a safe place to avoid losing them. |
| Sandpaper | You will need sandpaper to sand down any rough spots on the cabinet surface before painting. Choose a grittiness that is appropriate for the level of sanding you need to do. |
| Tack Cloth | A tack cloth is used to remove any residual sawdust or debris from sanding before painting. Make sure to use a tack cloth that is specifically designed for use with milk paint. |
By gathering all the necessary materials before starting your project, you can ensure that the process of painting your kitchen cabinets with milk paint will be a success. With the right tools in hand, you will be able to achieve the perfect finish for your cabinets and create a beautiful and unique look for your kitchen.
Clean and Prep Your Cabinets
Before applying milk paint to your kitchen cabinets, it’s important to properly clean and prep the surfaces to ensure that the milk paint adheres correctly and provides a smooth finish. Here are the steps to follow:
| Step 1: Remove Hardware | Remove all hardware from your cabinets, such as knobs, handles, and hinges. This will make it easier to paint the cabinet surfaces without accidentally getting paint on the hardware. |
| Step 2: Clean Surfaces | Thoroughly clean all surfaces of your cabinets using a gentle cleaner, such as dish soap and water. Be sure to remove any grease, grime, dirt or dust that may have accumulated. |
| Step 3: Sand Surfaces | Use a fine-grit sandpaper to sand all surfaces of your cabinets. This will help to create a rough surface, which will allow the milk paint to adhere more easily. Be sure to sand in the direction of the grain. |
| Step 4: Fill Any Holes or Gaps | If you notice any holes or gaps in the cabinets, use an appropriate filler to fill them in. Allow the filler to dry completely before moving on to the next step. |
| Step 5: Wipe clean | After all these steps, use a clean, damp cloth to wipe down all surfaces of your cabinets to remove any sanding dust or debris. Make sure that everything is completely dry before moving on to the next step. |
It’s important to note that if your cabinets were previously painted with a glossy finish, you may need to use a deglosser to remove the finish before sanding. Also, if your old paint or stain has any lead, it’s important to follow lead-safe practices and procedures when sanding or removing it. Taking the time to properly clean and prep your kitchen cabinets will ensure that your milk paint adheres correctly, resulting in a professional-looking finish.
Mix Your Milk Paint
To mix your milk paint, follow these simple steps:
- Measure out your milk paint powder: Depending on the amount of paint you need, measure out the milk paint powder using a kitchen scale or measuring spoons. It’s important to follow the instructions on the packaging for the correct ratio of powder to water.
- Add water: Slowly add water to your measured milk paint powder while stirring constantly. You can use warm or cool water, depending on your preference. Keep mixing until the mixture is smooth and free of lumps.
- Optional: Add bonding agent: If you want to make sure the paint adheres well to your kitchen cabinets, you can add a bonding agent to your milk paint mixture. Follow the instructions on the bonding agent packaging for how much to add to your mixture.
- Let the mixture rest: Once your milk paint is mixed, let it sit for about 5-10 minutes to allow the powder to fully dissolve and the mixture to thicken. It should end up with a yogurt-like consistency.
By following these steps, you can ensure that your milk paint is mixed properly and will provide a great finish on your kitchen cabinets.
Apply Your Milk Paint
When it’s time to apply your milk paint to your kitchen cabinets, follow these steps to achieve a beautiful and professional finish:
- Step 1: Start with the cabinet doors. Use a brush or roller to apply a light, even coat of milk paint to the cabinet doors, making sure to cover the entire surface. It’s important to work quickly and carefully to avoid drips or splatters.
- Step 2: Next, move on to the cabinet frames. Using the same method as with the doors, apply a light, even coat of milk paint to the frames. Be sure to get into all the corners and crevices, taking your time to avoid mistakes.
- Step 3: After you have applied the first coat of milk paint, let it dry completely. This can take up to 24 hours, depending on the conditions in your kitchen.
- Step 4: Once the first coat is dry, sand the cabinets lightly with a fine-grit sandpaper to smooth out any rough spots or debris. Wipe the cabinets clean with a damp cloth, and then apply a second coat of milk paint.
- Step 5: Continue applying coats of milk paint until you have achieved the desired level of coverage and color. Be sure to let each coat dry completely before applying the next.
- Step 6: After you have applied the final coat of milk paint and it has dried completely, use a wax or sealant to add a protective layer to your cabinets. This will help them resist scratches, stains, and other damage.
Remember, when applying milk paint, it’s important to take your time and work carefully to achieve a smooth and even finish that will last for years to come.
Add a Protective Finish
Once you’ve finished painting your kitchen cabinets with milk paint, it’s important to add a protective finish to ensure the longevity and durability of the paint job. Adding a protective finish will also make the cabinets easier to clean and maintain over time.
There are different options for protective finishes, including wax, oil, or polyurethane. Each option has its own advantages and disadvantages, and it’s important to choose the right one for your specific needs.
Wax: A wax finish is a traditional option for milk-painted cabinets. It provides a natural, low-luster look that enhances the character and beauty of the wood. However, wax may not be the best option for high-traffic areas, as it can wear down quickly and needs to be reapplied often.
Oil: An oil finish, such as tung or linseed oil, provides a durable, water-resistant, and easy-to-maintain surface for milk-painted cabinets. Oil finishes penetrate the wood and create a natural-looking matte finish. However, they can take a long time to dry and are combustible, requiring proper ventilation and handling.
Polyurethane: A polyurethane finish is a synthetic, durable, and water-resistant option for milk-painted cabinets. It comes in different sheens, from matte to high gloss, and can provide a hard, protective layer that prevents scratches, stains, and discoloration. However, polyurethane can be difficult to apply evenly and may require sanding between coats.
No matter which protective finish you choose, it’s important to apply it correctly, following the manufacturer’s instructions, and allow it to dry completely before using the cabinets. Additionally, don’t forget to regularly clean and maintain your milk-painted cabinets, using gentle cleaning products and techniques that won’t damage the paint or the protective finish.
Conclusion
In conclusion, milk paint is a versatile and eco-friendly option for updating your kitchen cabinets. Its unique, matte finish can bring a vintage or modern feel to your kitchen, depending on the color chosen. Classic black, ocean blue, sage green, and burnt orange are just a few examples of the many milk paint color options available.
Using milk paint on kitchen cabinets requires some prep work, but the end result is a beautiful, durable finish that will stand the test of time. Make sure to gather all necessary materials, thoroughly clean and prep your cabinets, and follow the mixing and application instructions carefully. A protective finish is also recommended to ensure your newly painted cabinets stay looking great for years to come.
Overall, milk paint is a great choice for those looking to update their kitchen cabinets without breaking the bank or harming the environment. With a little bit of effort, you can give your kitchen a fresh new look with milk paint.
Frequently Asked Questions
What is the difference between milk paint and regular paint?
Milk paint is made from natural ingredients like milk protein, lime, and pigment, while regular paint is often made with synthetic chemicals.
Can milk paint be used on all types of cabinets?
Milk paint can be used on most types of cabinets, including wood, MDF, and even metal cabinets if they are properly prepped beforehand.
How long does it take for milk paint to dry?
Milk paint usually dries within 30 minutes to an hour, but it’s best to wait a full 24 hours before applying a protective finish.
Do I need to sand my cabinets before applying milk paint?
It’s recommended to sand the cabinets lightly beforehand to help the milk paint adhere better, but it’s not always necessary.
Can I use milk paint on cabinets that have already been painted?
Yes, you can use milk paint on previously painted cabinets as long as the old paint is in good condition and doesn’t have any chipping or peeling.
Is milk paint eco-friendly?
Yes, milk paint is eco-friendly because it’s made from natural ingredients and doesn’t contain harmful chemicals that can be harmful to the environment.
How do I clean my milk painted cabinets?
You can clean your milk painted cabinets with a damp cloth or sponge and mild soap. Avoid using harsh chemicals, which can damage the paint.
Can I use milk paint on cabinets that are stained or varnished?
Yes, you can use milk paint on cabinets that are stained or varnished, but it’s recommended to sand the cabinets lightly beforehand for best results.
Can I mix different colors of milk paint together?
Yes, you can mix different colors of milk paint together to create your own unique shade. It’s recommended to mix small batches and test the color on a small area before applying it to the entire cabinet.
Do I need to apply a protective finish over my milk painted cabinets?
Yes, it’s recommended to apply a protective finish over your milk painted cabinets to help protect the paint from scratches and stains.