Have you ever stared at your walls and thought about how a fresh coat of paint could transform the look of your room? If the answer is yes, then you’re in luck! Applying latex paint on walls is an easy and affordable way to update your space. However, if you’re new to painting or looking to improve your technique, the process can feel overwhelming. That’s why we’ve put together a comprehensive guide to walk you through the step-by-step process of preparing your walls, choosing the right type of paint and equipment, and executing proper painting techniques. By the end of this guide, you’ll feel confident in your ability to give your walls a professional-looking finish that will make your room look like new!
Preparing Your Walls for Painting
Before you start painting the walls, it’s crucial to prepare them properly. The preparation process includes a series of crucial steps that are essential for achieving lasting and quality results. These steps ensure that the surface is clean, smooth, and even, allowing the paint to adhere correctly. In this section, we will guide you through the process of preparing your walls for painting. We’ll cover everything from cleaning and repairing to taping and protecting your work area, providing you with a solid foundation for the painting process. To learn more about latex paint, its advantages, types, and sheen, we recommend checking out our what is latex paint, advantages of latex paint, and latex paint sheen guides. Additionally, if you need advice on how to store, clean, and maintain your painting equipment, please refer to our guides on storing latex paint and cleaning latex paint brushes and rollers. Before we dive into the preparation process, let’s first take a look at some common mistakes to avoid when painting with latex paint by visiting our guide on common mistakes to avoid with latex paint.
Cleaning Your Walls
To achieve a flawless paint finish, it is essential to start with a clean surface. Cleaning your walls thoroughly is the first step towards ensuring a long-lasting paint job. Before cleaning, ensure that the room is well ventilated by opening windows or turning on a fan. Here are the steps you should follow while cleaning your walls:
| Materials Required: | Instructions: |
|---|---|
| Soft-bristled brush or vacuum cleaner with brush attachment | Start by removing any loose dust and cobwebs on the walls using a soft dust brush or a vacuum cleaner with a brush attachment. Use gentle strokes to avoid leaving scratches on the walls. |
| Two Buckets | Fill two buckets; one with clean, warm water and another with a cleaning solution. You can either use a store-bought cleaner or make a cleaning solution at home by mixing one cup of white vinegar with two cups of warm water. |
| Soft cloth/sponge | Dip a soft cloth or sponge into the cleaning solution and wring it out until damp. Start cleaning from the top of the wall and work your way down. |
| Second bucket of clean water | Dip another soft cloth or sponge in the bucket with clean water and use it to rinse the walls thoroughly. Rinse the cloth or sponge frequently in the clean water and replace it with a new one if it gets too dirty. |
| Towels/ absorbent cloths | Wipe down excess water with towels or absorbent cloths. Ensure that the walls are completely dry before priming or painting. |
It is important to note that different wall surfaces may require different cleaning methods. For instance, you may need to use a degreaser to remove grease and oil stains from kitchen walls. Flat-painted walls require extra care as scrubbing can cause the paint to peel or fade. If you are not sure about the best way to clean your walls, seek professional advice.
Once your walls are thoroughly cleaned and dried, you are ready to start the preparation process before painting. One of these preparation steps includes priming your walls before painting with a new layer of latex paint.
Repairing Wall Damage
Before applying latex paint on your walls, it is important to check for any damage that needs to be repaired. This step will ensure that the walls are smooth and ready to receive a fresh coat of paint. Here are some common types of wall damage that you may need to address:
| Damaged Area | Repair Method |
|---|---|
| Small nail holes | Fill with spackling paste, allow to dry, then sand smooth. |
| Large holes or cracks | Cut out any loose bits of plaster or drywall, then patch with a self-adhesive mesh patch and joint compound, sanding smooth once it’s dry. |
| Gaps or cracks between molding and wall | Apply caulk into the gap or crack, then smooth with a caulk tool or your finger. |
| Water damage or stains | Remove any loose or peeling paint or wallpaper, then prime the area with a stain-blocking primer before painting. |
It’s important to let any repaired areas dry completely before applying paint. This will ensure that the paint adheres properly and prevents any further damage to the wall. Taking the time to properly repair any wall damage will ultimately lead to a smoother and more professional-looking paint job.
Taping and Protecting Your Work Area
Before starting to apply latex paint on your walls, it is important to take necessary precautions to protect your work area from any potential damages. Protecting your space helps you avoid getting paint on floors, furniture or items around your work area. Here are some steps for taping and protecting your work area:
Gather the Right Materials
Before starting, make sure to have all your materials ready. You’ll need painter’s tape, plastic drop cloths, and/or paper tape or masking paper to protect surfaces from paint splatters.
Cover the Floor
To prevent paint spills or splatters, cover your floor with a drop cloth or plastic sheeting. Secure them in place using painter’s tape or masking tape. Make sure to cover the entire flooring area, including any corners.
Protect Baseboards, Trim, Windows and Doors
Use painter’s tape to protect areas like baseboards, window and door trim, sockets, light switches, outlets, and any other areas that you do not wish to paint. Take the time to properly align the tape and press it down to create a secure seal. Use a putty knife or a fingernail to make sure the tape is flush against the surface.
Cover Large Items and Furniture
Use drop cloths to cover large items like furniture, appliances, and cabinets. Use masking tape to keep the coverings in place. If you’re painting a small area, you can also use masking paper or newspaper to cover the surrounding area.
Keep a Damp Cloth Handy
Accidents happen, no matter how careful you are. Keep a clean, damp cloth nearby to quickly clean up any spills, drips or splatters. This will help you avoid any damage to your work area.
By taking the time to properly prepare and protect your work area, you can avoid mess and damages caused by paint spills or drips. It can seem like an added chore, but in the long run it’ll save you time and money spent on repairs or clean up.
Choosing the Right Paint and Equipment
As you prepare to paint your walls with latex paint, it’s crucial to have the right type of paint and equipment for the job. With so many options available, choosing the appropriate paint can be a perplexing task. Similarly, selecting the right painting tools and equipment can be equally challenging. In this section, we’ll provide you with information on the different types of latex paint available and the painting tools and equipment that are essential for a successful painting project. Additionally, we’ll discuss the importance of priming your walls to achieve the best results. So, let’s dive in and figure out what we need to get started!
Types of Latex Paint
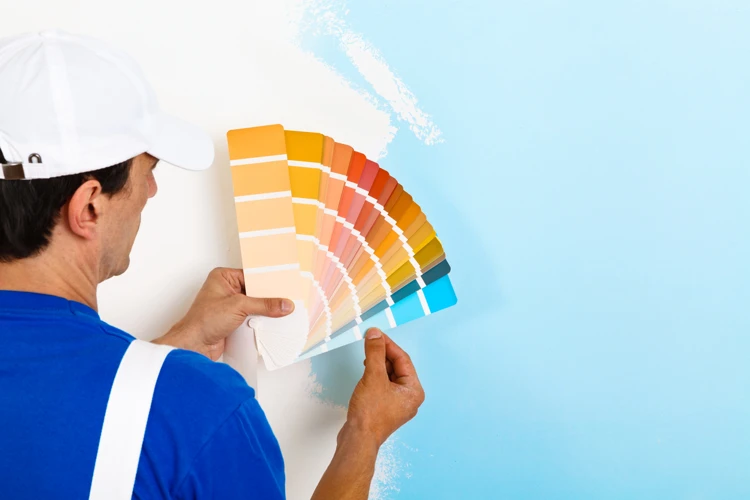
When it comes to choosing the right type of latex paint for your walls, there are several options to consider. Latex paint is a popular choice among homeowners and professional painters because of its durability, ease of use, and relative affordability. Here are some different types of latex paint and their characteristics:
| Flat or matte paint | Has a smooth, non-reflective finish and is great for concealing small imperfections on walls. However, it is not as easy to clean and may not be the best choice for high-traffic areas. |
| Eggshell paint | Has a slight sheen and is more durable than flat paint. It is a good choice for living rooms, dining rooms, and bedrooms. |
| Satin paint | Has a subtle sheen and is easy to clean, making it a good choice for high-traffic areas like hallways, entryways, and bathrooms. |
| Semi-gloss paint | Has a shiny finish and is the most durable of all the latex paint finishes. It is a good choice for kitchens, bathrooms, and other areas that may get splattered or stained. |
| High-gloss paint | Has an extremely shiny finish and is great for highlighting architectural features or adding drama to a space. However, it is not a good choice for walls with imperfections, as it will accentuate them. |
Consider the use and location of the room, as well as your personal style, when choosing the type of latex paint for your walls. Keep in mind that using different finishes, such as eggshell for walls and semi-gloss for trim, can create a more interesting and dynamic look.
Painting Tools and Equipment
Before starting to paint your walls, it’s important to have all the necessary tools and equipment on hand. Here are some of the painting tools and equipment that you should gather:
- Roller frames and covers: Roller frames hold the roller covers and allow you to paint large surface areas quickly. Choose the right size roller frame for the job, and select roller covers with the appropriate nap (the thickness of the material on the cover).
- Paint brushes: You’ll need paint brushes for cutting in around corners and edges. Look for brushes with bristles that are compatible with your type of paint.
- Painter’s tape: Use painter’s tape to protect areas that you don’t want to get paint on, such as trim, windows, and doors. Make sure the tape is tightly adhered to the surface to prevent paint from bleeding under it.
- Paint tray: Pour your paint into a paint tray for easy access while you’re painting. Make sure the tray is wide enough for your roller and deep enough to hold an adequate amount of paint.
- Extension poles: Extension poles attach to your roller frame, making it easier to reach high walls and ceilings without climbing on a ladder.
- Dust sheets: Cover floors, furniture, and other items in the room with dust sheets to protect them from paint drips and splatters.
- Paint scrappers: Paint scrapers can be used to remove loose or chipped paint from walls if needed, make sure to use them with care as not to damage the wall underneath.
Having the right equipment on hand can make a big difference in the quality of your paint job, so make sure to select tools that are appropriate for the task at hand.
Priming Your Walls
Before applying paint to your walls, it’s important to prime them first. Priming is the process of applying a coat of special paint to the walls before the actual paint is applied. Priming serves multiple purposes, including filling in porous surfaces, providing better adhesion, and enhancing the durability of the paint. Follow these steps to prime your walls correctly:
- Choose the right primer: There are different types of primer available, and you’ll need to choose the right one depending on the condition of your walls, the type of paint you’ll be using, and the room you’ll be painting. For example, a high-hide primer can cover up stains and discoloration, while a bonding primer can help the paint adhere better to the walls.
- Clean the Walls: Just like when you’re cleaning the walls before painting, you’ll need to clean them before priming. Use a soft cloth or sponge and a solution of warm water and mild detergent to remove any dirt, dust, or grease that might be present on the walls. Rinse the walls with clean water and let them dry completely before priming.
- Prepare the Area: As with painting, you’ll need to prepare the work area before priming. Use painter’s tape to mask off any areas you don’t want to paint, such as trim, window frames, and door frames. Cover the floor with a drop cloth to protect it from any drips or spills.
- Apply the Primer: Open the container of primer and stir it thoroughly with a stirring stick. Dip a paintbrush or roller into the primer and apply an even coat to the walls. Work in sections, starting from the top and working your way down. Use long, smooth strokes and avoid drips or buildup. Wait for the primer to dry completely before applying the paint.
By taking the time to prime your walls, you’ll ensure that your paint will adhere better, last longer, and look more professional. Don’t skip this important step!
Painting Techniques

When it comes to painting your walls, using the right technique can make all the difference in achieving a professional finish. It’s important to understand the proper cutting in and rolling on techniques for latex paint. Additionally, making multiple coats and ensuring proper coverage is crucial for achieving a seamless finish. Let’s dive into the details and explore the various techniques for applying latex paint on walls.
Cutting In
When it comes to painting your walls, you want to make sure you achieve a professional-looking finish, and this requires some precision work. Cutting in is a technique that involves painting along the edges of your walls and around any fixtures or corners using a paintbrush. This technique helps you create clean lines and ensures that you don’t accidentally paint over areas that you don’t want to.
To properly cut in, you need to follow these steps:
- Start with a good quality paintbrush: Choose a brush with angled bristles that will allow you to easily cut in around corners and edges, but make sure it is the right size for your needs.
- Dip your brush in paint: Dip the brush only about a third of the way into the paint and then tap off any excess on the rim of the can.
- Paint along the edges: Begin by painting along the edges of your walls, using light pressure and a steady hand to create a straight line.
- Work in sections: You can work in manageable sections of 2-3 feet and focus on detailing one section at a time.
- Overlap: To ensure even coverage, overlap the areas as you paint. This will help you avoid leaving gaps or spots.
- Use a smaller brush: To paint in tighter corners, use a smaller brush.
Cutting in is an important step to achieve a professional-looking finish, but it can be time-consuming. Take your time to do it correctly, and you’ll be rewarded with crisp lines that make your walls look beautifully finished.
Rolling on the Paint
When it’s time to apply the paint to the walls, the rolling technique is often the most efficient and effective method. Here are the steps to follow:
- Load the roller: Pour some paint into the paint tray, then dip the roller and roll it back and forth until the roller is well coated but not dripping with paint.
- Start rolling: Begin at the top of the wall, working in sections about 3 feet wide. Roll up and down, applying even pressure and using long, smooth strokes. It’s helpful to use an extension pole to reach high areas and to make the job less strenuous.
- Blend: After each section is painted, go back and roll over it again with a slightly lighter pressure. This will help to blend any roller marks or lines that might have formed, giving your walls a smooth and even finish.
- Work in natural light: As you work, keep an eye out for any areas that may need touch-up or extra paint. It’s best to work in natural light to help you see any imperfections that need addressing.
- Allow for drying time: Latex paint typically dries to the touch within a few hours, but it’s best to wait at least 24 hours before adding a second coat or placing furniture back against the wall to ensure that the paint has fully cured.
By following these steps, you’ll be well on your way to achieving a beautifully painted room with a professional, even finish.
Painting Multiple Coats
Once you’ve finished with the cutting in and rolling on the first coat of paint, it’s important to let it dry completely before applying any additional coats. Typically, it takes about two to four hours for latex paint to dry, but you should refer to the paint can for more specific instructions.
When applying multiple coats, it’s important to use a light touch to avoid applying too much paint at once, which can result in drips or uneven coverage. For the second coat, you can follow the same techniques as the first coat, cutting in the edges first and then rolling on the paint in a W shape.
Don’t be tempted to skimp on coats in order to save time or money. Multiple coats ensure that the paint color is even and rich, and it also adds durability to the finish. In fact, most professionals recommend at least two coats of paint for walls, and even more for high-traffic areas.
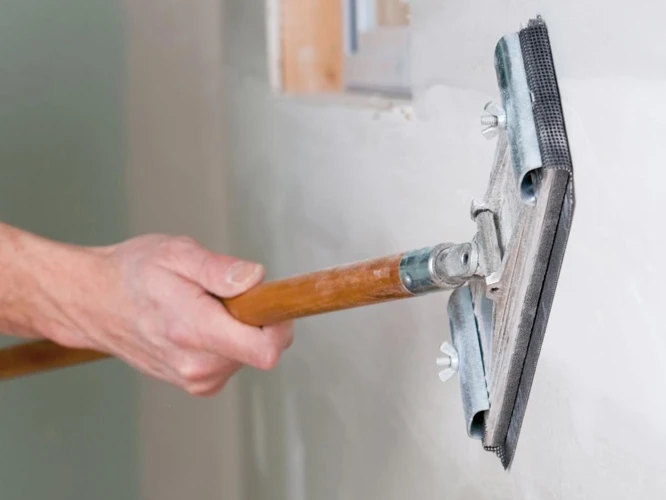
If you notice any imperfections or areas that need touch-ups after the second coat has dried, you can lightly sand those areas with a fine-grit sandpaper and then apply additional coats of paint as needed. Sanding between coats can also help smooth out any brush or roller marks.
Remember, allow enough time for each coat to dry completely before applying the next one. Rushing the painting process can often result in a less-than-perfect finish. Once you’ve applied all the coats of paint you need, be sure to let the walls dry completely before touching or hanging anything on them.
To summarize, painting multiple coats is an important part of achieving a high-quality paint job without imperfections. Make sure to use a light touch, apply enough coats for even coverage, and let each coat dry completely before applying the next one.
Bathroom and Kitchen Paint Tips
When it comes to painting bathrooms and kitchens, there are some tips and tricks that can help ensure the paint job lasts in the moisture-heavy environment. Here are some paint tips for bathrooms and kitchens:
| TIP | DESCRIPTION |
|---|---|
| Use a special bathroom or kitchen paint. | These types of paints are designed to withstand the moisture and humidity that are commonly found in these areas. Look for paints labeled as “mold and mildew resistant” to ensure the paint lasts. |
| Avoid flat or matte finishes. | These finishes can absorb moisture and are difficult to clean. Instead, opt for satin, semi-gloss, or gloss finishes, which are easier to clean and more resistant to moisture. |
| Proper ventilation is important. | Make sure the room is well-ventilated when painting and afterwards, to help the paint dry and prevent excess moisture buildup. Use exhaust fans or open windows to increase air flow. |
| Be mindful of color choices. | Certain colors may show moisture stains more easily, so it’s best to choose a lighter color or one with a bit of texture to hide any water stains. |
| Apply multiple coats. | Applying two or three coats of paint can provide an extra layer of protection against moisture and mold. |
| Allow ample drying time. | Make sure the paint is completely dry before using the bathroom or kitchen. This can take several days depending on the humidity and ventilation in the room. |
By following these bathroom and kitchen paint tips, you can ensure a lasting and beautiful paint job in these moisture-prone areas.
Finishing Up
As you reach the final stages of your painting project, it can be tempting to rush to the end. However, taking the time to properly finish up is essential to ensure a professional and polished look. In this section, we will cover important steps for finishing up, including cleaning up after painting, carefully removing painter’s tape, and adding any finishing touches necessary to make your walls shine. Let’s dive in!
Clean Up After Painting
Cleaning up after painting is an essential step to keep your tools and workspace in good condition. Here are the steps to follow:
1. Collect Your Tools
Gather all the tools that you used in the painting process. This includes brushes, rollers, trays, and painter’s tape.
2. Dispose of the Paint Properly
Make sure to dispose of any unused or excess paint properly. Check the guidelines for hazardous waste disposal in your area or ask for guidance from a local hardware store.
3. Clean the Rollers and Brushes
Get rid of excess paint by wiping your brushes and rollers with a rag or paper towel. Then, wash them in warm soapy water.
4. Clean the Paint Tray
Remove any excess paint from the tray and wash it with warm soapy water.
5. Remove Drop Cloths and Painter’s Tape
Carefully remove the drop cloths and painter’s tape from the walls and floors. Make sure to pull the tape off gently to avoid damaging the newly painted surface.
6. Vacuum the Work Area
Use a vacuum cleaner to pick up any small pieces of debris or dust on the floor or workspace.
7. Dispose of Materials Responsibly
Dispose of any used paper towels, rags, or other materials properly.
By following these simple steps, you will ensure that your painting tools are clean and your workspace is tidy, making future paint projects much easier.
Removing Painter’s Tape
Removing painter’s tape is a crucial step in achieving clean, sharp lines for your paint job. Here are some tips to help you remove painter’s tape without damaging your freshly painted walls:
- Wait for the paint to dry: It is important to wait until the paint is completely dry before removing the painter’s tape. This can take anywhere from a few hours to a day, depending on the type of paint and the humidity in your area.
- Use a sharp object: Once the paint is dry, use a sharp object such as a razor blade or a putty knife to score along the edge of the tape. This will help to prevent the paint from peeling off with the tape.
- Peel at a 45-degree angle: Starting at one end of the taped area, peel the tape back at a 45-degree angle. This will help to prevent the tape from tearing or leaving pieces behind on the wall.
- Remove slowly and carefully: As you peel the tape, do it slowly and carefully to avoid any sudden movements that could rip the tape or damage the paint.
- Check for any touch-ups: After removing the tape, inspect the edges of the painted area for any touch-ups that may be needed. Use a small brush to correct any imperfections.
By following these simple tips, you should be able to remove the painter’s tape without any issues, leaving you with a beautifully painted room.
Finishing Touches
After you’ve finished painting your walls with latex paint, there are a few finishing touches you can add to make your work stand out. Here are a few options to consider:
| Crown Molding: | Adding crown molding to the tops of your walls is a great way to give your room a more finished look. Crown molding comes in a variety of styles and can be painted to match your walls or left unpainted for a contrasting effect. |
| Accent Walls: | If you’re feeling bold, consider adding an accent wall to your space. This can be a wall painted a different color than the rest of the room or a wall with a bold patterned wallpaper. This is a great way to add visual interest to a space without overwhelming it. |
| Trim: | Painting the trim around your windows, doors and baseboards can add a polished finishing touch to your walls. If your trim is already white, consider painting it with a high gloss finish to give it an extra pop. |
| Artwork: | Once your walls are painted, it’s the perfect time to add some artwork. Consider hanging a gallery wall, creating a statement piece, or simply adding a few pieces that you love. Artwork can add personality and warmth to any room. |
| Lighting: | Finally, consider adding new lighting fixtures to your space. A new light fixture can completely transform a room and is an easy way to add a finishing touch after painting your walls. Choose a fixture that complements the style of your space and provides the light you need. |
Adding any of these finishing touches will provide the perfect complement to your freshly painted walls. Consider which options work best for your space and style and enjoy your newly transformed room.
Conclusion
Overall, applying latex paint on walls can be a simple and cost-effective way to freshen up your space. However, it’s important to ensure your walls are properly prepared before painting, and that you choose the right equipment and technique for the job.
By taking the time to clean and repair any damage to your walls, you can ensure that your new paint will adhere properly and look its best for years to come. Remember to protect your work area with tape and drop cloths, and choose the right type of paint and equipment for your specific project.
It’s also important to prime your walls before painting to ensure an even, long-lasting finish. Be sure to follow the specific instructions on your primer and paint to ensure best results.
Once you’re ready to begin painting, make sure to use the proper technique, including cutting in and rolling on the paint in even, consistent strokes. For bathrooms and kitchens, be sure to choose a paint that is resistant to moisture and mold.
Finally, when you’re finished painting, take the time to clean up your work area and remove any painter’s tape. Add any finishing touches, such as touching up any missed areas or adding a final coat of paint, if necessary.
Overall, with the right preparation, equipment, and technique, applying latex paint on walls can be a fun and rewarding DIY project. So, don’t be afraid to get creative and add some fresh color to your space!
Frequently Asked Questions
Can I paint over old latex paint?
Yes, you can paint over old latex paint as long as it is in good condition and properly prepared.
Do I need to use a primer before painting?
It is recommended to use a primer before painting, especially if you are painting over a dark color or a porous surface.
What type of paintbrush should I use for cutting in?
A angled sash brush is ideal for cutting in since it allows for precision and control.
How many coats of paint should I apply?
It is recommended to apply at least 2 coats of paint for a smooth and even finish.
What is the drying time for latex paint?
The drying time for latex paint varies depending on humidity, temperature, and the thickness of paint applied, but generally it takes 1-2 hours to dry to the touch and 24 hours to fully cure.
Can I use latex paint in high moisture areas like bathrooms and kitchens?
Yes, you can use latex paint in high moisture areas like bathrooms and kitchens as long as it is a high-quality and moisture-resistant paint.
Should I remove electrical outlet covers before painting?
Yes, it is recommended to remove electrical outlet covers before painting to prevent paint from getting on them and to allow for a more polished finish.
Can I paint the ceiling with the same paint as the walls?
Yes, you can paint the ceiling with the same paint as the walls as long as it is appropriate for ceilings and properly applied.
What should I do if I accidentally get paint on the floor or furniture?
Act quickly and wipe the paint with a damp cloth. If the paint is already dry, use a paint remover or scraper and be careful not to damage the surface underneath.
How should I dispose of leftover paint?
Check with your local government for the proper disposal method of paint. It is illegal to dispose of paint in regular trash and can harm the environment.