Have you ever wondered how radio control (RC) models are put together? Maybe you’ve heard of CA glue and wondered what it is and how it’s used in RC modeling. Well, you’re in luck! In this article, we’ll be discussing everything you need to know about CA glue and how it’s an essential tool for RC modelers of all skill levels. From its origins to its benefits in RC modeling, we’ll explore the ins and outs of CA glue and provide step-by-step instructions on how to use it in your next RC modeling project. So grab your tools and let’s dive in!
What is CA glue?
For those who are new to RC modeling, the term “CA glue” may seem unfamiliar. However, CA glue is a crucial tool for building and repairing RC models. CA glue is a type of adhesive that is often referred to as “super glue” due to its incredible strength and rapid bonding time. But what exactly is CA glue? To learn more about the origins, composition, and functionality of CA glue, check out our informative guide. You’ll be surprised by all the ways this versatile adhesive can be used in your RC modeling projects. To learn more about other types of glues, check out What is Krazy Glue? article.
The origins of CA glue
CA glue, also known as “super glue”, has been used for decades in a variety of applications, including in RC modeling. The origins of CA glue can be traced back to the 1940s when Harry Coover, a chemist at Eastman Kodak, was conducting experiments to create a clear plastic for use in precision gun sights during World War II. However, he accidentally discovered a new adhesive that was incredibly strong, clear, and resistant to water and heat.
Initially, the new adhesive didn’t have any practical applications and was forgotten until the 1950s when Coover and his team revisited it and found that it was still just as effective after several years. The adhesive was eventually marketed for industrial purposes under the name “Super Glue” by the company Eastman Kodak in 1958.
The name “CA glue” or “cyanoacrylate glue” came later when the adhesive was further developed and refined to be used in medical and veterinary settings. Its ability to seal wounds and other injuries quickly and effectively made it a valuable tool in emergency situations.
Today, CA glue is widely available and is used for a variety of applications, including in RC modeling. Its quick-drying and strong adhesive properties make it an ideal choice for many modeling scenarios. To learn more about the benefits of using CA glue in RC modeling, continue reading the next section.
How CA glue works
CA glue, also known as cyanoacrylate adhesive, works by creating a chemical reaction when it comes into contact with water. The reaction causes the glue to harden and create a strong bond between two surfaces. This type of adhesive is known for its quick-drying and strong bonding properties, making it a popular choice for RC modelers.
The chemical structure of CA glue is what allows it to work so effectively. It is composed of molecules that have a carbon triple bond to a nitrogen molecule. When the glue is exposed to water, the water molecules react with the triple bond, causing it to break and create a strong bond between the glue and the surface it’s being applied to.
Here’s a breakdown of how CA glue works:
| Step 1: | CA glue is applied to the surface |
| Step 2: | The glue comes into contact with water molecules in the air or on the surface |
| Step 3: | The water molecules break the carbon triple bond in the glue |
| Step 4: | The broken bond creates a chemical reaction that hardens the glue and creates a strong bond between the two surfaces |
It’s important to note that the strength of the bond created by CA glue can vary depending on the surfaces being bonded and the conditions in which it’s applied. Additionally, the reaction caused by the glue can be accelerated by the presence of certain metals, such as copper and iron. It’s recommended to follow the manufacturer’s instructions and take proper safety precautions when working with CA glue.
Want to know more about the origins of CA glue and what “CA” stands for? Check out our article on What Does CA Glue Stand For?
Why CA glue is useful in RC modeling
Why is CA glue the adhesive of choice for RC modeling enthusiasts? Model enthusiasts choose CA glue because of its strong bonding power and quick curing time. The unique properties of CA glue make it an ideal choice for a wide range of RC modeling scenarios. In the following sections, we’ll examine the benefits of using CA glue in RC modeling, the types of RC models it works with, and we’ll even provide step-by-step instructions for applying CA glue to your models. Let’s dive in!
Benefits of using CA glue
Using CA glue in RC modeling has several benefits, including:
- Fast drying time: CA glue dries almost instantly, making it perfect for quick repairs or bonding during competitions.
- Strong bond: CA glue creates a strong, permanent bond, which is essential in RC modeling where parts need to withstand high speeds and stress.
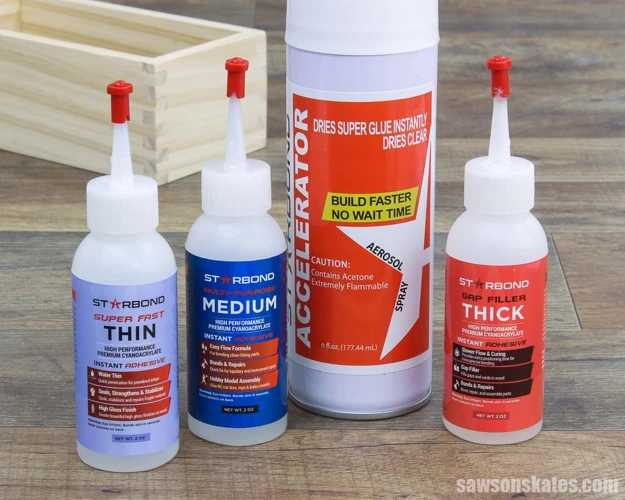
- Easy to apply: CA glue comes in a variety of forms, including thin and thick viscosity, making it easy to apply in any situation.
- Versatile: CA glue works with a variety of materials used in RC modeling, including plastic, wood, and metal.
- Water-resistant: CA glue is water-resistant once it has dried, making it ideal for RC models that operate near water sources.
- Can be sanded and painted: Once dry, CA glue can be sanded and painted to give your RC models a professional look.
These benefits make CA glue a go-to adhesive for RC modelers looking for a strong bond and quick, easy application. However, before using CA glue, it is important to take the necessary safety precautions and follow the proper usage instructions. Not doing so can result in injury or damage to your RC models.
Types of RC models CA glue works with
Using CA glue in RC modeling can be incredibly effective when trying to create a strong bond between two materials. While not all materials are able to be bonded with CA glue, there are several types of RC models that can be successfully secured using this powerful adhesive. Here are some examples of the types of RC models that work well with CA glue:
- Aircraft: Many different aircraft models including helicopters, airplanes, and drones can be constructed and reinforced with CA glue. The glue’s ability to dry quickly and securely makes it an excellent option for attaching parts such as wingtips or landing gear.
- Cars: RC cars often require a strong adhesive to keep their bodies and other components securely in place during high-speed races or stunts. CA glue can help keep wheels, frames, and other car parts in place.
- Boats: RC boats require specific materials that can withstand the harsh conditions of water. CA glue can help bond together materials such as plastic, wood, and fiberglass, which are commonly used in creating RC boat models.
- Multirotors: Multirotors or drones rely heavily on the stability of their various components, such as motors, batteries, and wiring. These items can be firmly attached together using CA glue to ensure a secure and stable flight.
- Rock Crawlers: Rock crawler RC models require extremely secure attachments and often use materials such as metal or carbon fiber. CA glue can help bond these materials together, reinforcing the stability and durability of the model.
It’s important to note that not all materials will bond well with CA glue, and it’s best to check the manufacturer’s recommendations before using this adhesive. Additionally, it’s important to handle CA glue with care and follow safety guidelines to prevent any accidents during the bonding process.
How to Use CA Glue in RC Modeling
Once you have gathered all the necessary materials, it’s time to learn how to use CA glue in RC modeling. This is an essential skill that every RC modeler should have in their arsenal. Although it may seem intimidating at first, with the right preparation and technique, anyone can use CA glue effectively. In this section, we’ll provide step-by-step instructions for applying CA glue and offer tips for using it in specific RC modeling scenarios. But before diving into the instructions, let’s quickly review the benefits of using CA glue and some safety tips to keep in mind.
Preparation and safety tips
Before using CA glue in RC modeling, it is important to take the necessary safety precautions and prepare your workspace. CA glue can be harmful if not handled correctly, so always wear protective gloves and eye protection to avoid contact with your skin or eyes. Here are some useful preparation and safety tips to follow:
- Clean the surfaces you plan to bond thoroughly to ensure maximum adhesion. For more information on how to prepare surfaces for bonding with Crazy Glue, check out our guide on how to make Crazy Glue.
- Use a well-ventilated area when working with CA glue to avoid inhaling fumes.
- Always keep a vinegar solution nearby to neutralize CA glue in case of accidental contact with skin or eyes.
- Store CA glue in a cool, dry, and dark place to ensure it maintains its efficacy. To learn more about how to store CA glue properly, check out our article on how to open a Krazy Glue pen.
- Keep CA glue out of reach of children and pets to prevent accidental ingestion.
- Be careful not to overuse CA glue, as it can lead to unnecessary weight and potentially weaken the structure of your RC model.
- Use a small amount of CA glue at a time to avoid spreading it too thin or causing excess drip, which can be a difficult mess to clean up.
- After using CA glue, always wipe the nozzle with a cloth or tissue and close the cap tightly to prevent it from drying out. To learn more about how to make Krazy Glue at home, check our our guide on how to make Krazy Glue.
By following these preparation and safety tips, you can ensure a successful and safe CA glue application for your RC modeling projects.
Step-by-step instructions for applying CA glue
When working with CA glue, it is essential to follow the proper steps for application to ensure a secure bond. Here are the step-by-step instructions for applying CA glue:
- Prepare the surfaces: Ensure that the surfaces you want to bond together are clean, dry, and free from oil or dust. Use rubbing alcohol or acetone if necessary to clean the surfaces.
- Apply the glue: Hold the CA glue bottle upside down and apply a drop of glue onto one of the surfaces. Remember, a little goes a long way with CA glue, and you don’t need to apply too much.
- Press the surfaces together: Once you have applied the glue, press the surfaces together for about 10 to 15 seconds. This will help distribute the glue evenly and help it set quickly.
- Let it dry: It is recommended to let the glue dry for at least 24 hours to ensure that it has fully cured and formed a strong bond.
It is important to note that CA glue can bond skin quickly, so it is essential to wear gloves when working with the glue. If you do get glue on your skin, do not try to pull it off. Instead, use acetone or nail polish remover to dissolve the glue and then wash it off with soap and water.
Super Glue was originally invented by Dr. Harry Coover, and its technical name is cyanoacrylate. CA glue is a type of super glue that is commonly used in RC modeling due to its fast-drying and strong bonding properties. Depending on the brand, CA glue can hold anywhere from 100 to 500 pounds per square inch (PSI). It is a versatile adhesive that can be used to bond a variety of materials, including plastic, wood, and metal.
In some cases, it may be necessary to use accelerator spray to speed up the drying process or to fill gaps between two surfaces. Be sure to follow the manufacturer’s instructions when using accelerator spray.
Using CA glue can be an effective and efficient way to bond materials in RC modeling. By following the proper steps for application and exercising caution, you can achieve a secure and long-lasting bond. However, if you prefer to use alternative adhesives, such as epoxy or cyanoacrylate, be sure to research their application and properties thoroughly.
Tips for using CA glue in specific RC modeling scenarios
Tips for using CA glue in specific RC modeling scenarios:
- Bonding small parts: In RC modeling, sometimes you need to bond small parts, like a circuit board or a servo motor. When bonding small parts, use a small amount of CA glue. It will help you to avoid glue overflow, which can damage the parts or components. Overusing glue can also make your model heavier, which can severely affect its performance. You can use super glue for bonding small parts as it has a low viscosity and can easily penetrate even the tiniest cracks and gaps.
- Repairing propellers: Broken or damaged propellers can be a headache for RC modelers. In such cases, CA glue can be a savior. Apply a small amount of glue to the broken area and press it gently. Hold it for a few minutes until the glue dries completely. As the glue dries quickly, you can get back to flying faster. While Krazy glue is also useful for propeller repair, you may want to know how much weight it can hold before applying it.
- Bonding landing gear: Landing gear is one of the most delicate and crucial parts of an RC model. CA glue is ideal for bonding landing gear, as it offers a strong and instant bond. However, before bonding, make sure that the surface is clean and free from any dirt, oil, or grease. You can use alcohol to clean the surface before applying the glue. Loctite super glue is also a reliable choice for bonding landing gear. It produces a durable bond that can withstand high stress and friction, so you don’t have to worry about damaging or losing the wheels.
- Gluing delicate parts: Sometimes, RC models feature delicate parts like canopies, cockpit glasses, or wingtips, which require extra care when gluing. For attaching delicate parts, use a gel-based CA glue, which has a higher viscosity and stays in place. It will help you to avoid glue overflow and unwanted bond. You can also use a slower-drying glue, which will give you enough time to adjust the position of the delicate part before it dries. Krazy glue is perfect for gluing delicate parts due to its high precision application formula. You can learn more about what Krazy glue is used for here.
Remember that CA glue is not suitable for all RC modeling scenarios, and sometimes, you may need to use other types of adhesives or materials. If you are unsure about using CA glue, consult with experienced modelers or a hobby shop expert for advice.
Best Practices for Using CA Glue in RC Modeling
As with any tool or adhesive, there are best practices to follow for using CA glue in RC modeling. Taking these precautions can help prevent accidents and ensure that your RC models are built to last. Here are some tips and tricks to keep in mind when working with CA glue:
Troubleshooting common issues
Even the most experienced RC modelers run into issues with CA glue from time to time. One common problem is that the glue doesn’t set as quickly as you’d like it to. This can be a result of a few different factors, such as humidity or too little glue being applied. In these cases, you can use an accelerator to speed up the bonding process. On the other hand, if the glue sets too quickly, you can try using a debonder to remove it and start over.
How to store CA glue to increase shelf life and efficacy
Like many adhesives, CA glue has a limited shelf life. However, there are steps you can take to increase its longevity. First, make sure that you store it in a cool, dry place. Heat and moisture can cause the glue to break down more quickly. You can also store it in an airtight container to prevent evaporation. Finally, be sure to check the expiration date on your bottle of CA glue and replace it as needed to ensure it’s as effective as possible.
Alternatives to CA glue
While CA glue is a popular choice for RC modeling, there are other types of adhesive that can be used as well. For example, Loctite super glue is another adhesive that can provide a strong, fast bond. To learn more about how strong Loctite super glue is in comparison to CA glue, check out our article “How Strong Is Loctite Super Glue?” to help you decide which adhesive is best for your RC modeling needs.
Troubleshooting common issues
While CA glue is a versatile adhesive that works well for many RC modeling applications, it can sometimes present some challenges. Here are some common issues that users may encounter when working with CA glue and some troubleshooting techniques that can help solve them:
| Issue | Causes | Solutions |
|---|---|---|
| Bond failure | Contamination, improper surface preparation, insufficient glue application, improper storage conditions | Ensure surfaces are clean and dry before applying glue, use enough glue for the joint, store glue in a cool, dry place |
| Uneven glue line | Applying too much or too little glue, uneven clamping pressure, bent or warped surfaces | Use an applicator tip for precise glue application, apply pressure evenly across the joint, ensure surfaces are flat |
| Glue drying too slowly | Humid environment, old or improperly stored glue, too little glue applied | Use a dehumidifier or air conditioning, make sure glue is fresh and stored in a cool, dry place, apply a sufficient amount of glue |
| Skin irritation | Contact with skin, inhalation of fumes | Wear protective gloves and goggles, work in a well-ventilated area |
It’s important to note that while CA glue can be a strong and effective adhesive, it may not be suitable for all applications. In some cases, other types of adhesives, such as epoxy or cyanoacrylate glue, may be a better choice. Ultimately, the success of any adhesive application will depend on proper preparation and technique, as well as choosing the right adhesive for the job.
How to store CA glue to increase shelf life and efficacy
Proper storage of CA glue is crucial in maintaining its efficacy and shelf life. Following simple guidelines can help ensure that your CA glue remains usable and effective throughout its lifespan.
Here are some tips for storing your CA glue:
| Tip 1: | Keep it in a cool, dry place: CA glue tends to break down when exposed to heat and humidity. Storing it in a cool and dry place, ideally at a temperature range of 50-77 degrees Fahrenheit, will help maintain its efficacy. |
| Tip 2: | Store upright: This prevents the glue from leaking and drying out. Place the cap back on tightly after use to avoid air exposure. |
| Tip 3: | Use the original container: Avoid transferring the glue into a different container as it may lead to contamination or alteration of chemical composition. Keep the original container labeled clearly. |
| Tip 4: | Keep it away from direct sunlight: Exposure to ultraviolet radiation can cause the glue to deteriorate and become less effective. Store it in a cabinet or a drawer. |
| Tip 5: | Check the expiration date: CA glue has a shelf life ranging from six months to two years depending on the brand and type. Using expired glue won’t yield the desired results and could possibly lead to damage or injury. Dispose of expired CA glue as per the manufacturer’s instructions. |
By following these simple tips, you can prolong the shelf life of your CA glue and ensure that it remains effective. Proper storage ensures that you get the best out of your investment and also ensures the longevity of your RC model.
Alternatives to CA glue
While CA glue is a popular adhesive for RC modeling, there are also alternative options available. It’s important to consider the specific needs of your modeling project before selecting an alternative.
Here are some alternatives to CA glue:
| Adhesive Type | Benefits | Drawbacks |
|---|---|---|
| Epoxy | Strong bond, good for metal and plastic surfaces | Long curing time, two-part mixing process can be tricky |
| Polyurethane | Flexible bond, good for wood and foam surfaces | Long curing time, can be messy to apply |
| Polyvinyl acetate (PVA) glue | Easy to use, dries clear, good for wood surfaces | Weak bond, not suitable for high-stress areas |
| Hot glue | Fast-drying, can be used on a variety of surfaces | Weaker bond compared to other adhesives, not suitable for all materials |
It’s important to note that each adhesive has its own benefits and drawbacks. For example, while epoxy is a strong option for metal and plastic surfaces, its two-part mixing process can be tricky for beginners. PVA glue is easy to use and dries clear, making it a good option for wood surfaces, but it may not be strong enough for high-stress areas.
Ultimately, the choice of adhesive for your RC modeling project will depend on the materials you are using, the level of strength required, and your personal preference and experience with each option.
Conclusion
After reading through this beginner’s guide to using CA glue in radio control models, you should have a thorough understanding of how CA glue works, why it is useful in RC modeling, how to use it properly and the best practices to follow to ensure its longevity and efficacy.
CA glue is a versatile and efficient adhesive that is well-suited for use in a variety of RC modeling scenarios, and its ability to bond quickly and securely make it a popular choice among RC enthusiasts.
When using CA glue, it is important to follow the proper safety precautions and preparation steps to avoid accidents and ensure optimal results. By taking the time to carefully plan out your RC modeling project and prepare the surfaces to be bonded, you can achieve a strong and durable bond with minimal effort.
If you do encounter any issues or challenges when using CA glue, there are several troubleshooting strategies you can employ to address the problem and salvage your project. And if you find that CA glue is not the right adhesive for your specific needs, there are several alternatives that may better suit your purposes.
Overall, with proper usage and care, CA glue can be a highly effective and convenient tool to have in your RC modeling toolkit. By incorporating it into your workflow and following the best practices outlined in this guide, you can achieve expert-level results and take your RC modeling skills to the next level.
Frequently Asked Questions
1. Can CA glue be used on all materials?
No, CA glue is not suitable for all materials. It works best with non-porous materials like metal, plastic, and rubber.
2. Is CA glue waterproof?
Yes, some types of CA glue are waterproof. However, it is important to read the label and choose the appropriate type for your project.
3. How fast does CA glue dry?
CA glue dries very quickly, usually within a few seconds to a minute depending on the thickness and type of glue applied.
4. Can CA glue be used for larger projects?
Yes, CA glue can be used for larger projects, but it may not be the most practical or cost-effective option.
5. Is CA glue safe to use?
When used properly, CA glue is safe to use. However, it is important to follow safety precautions including wearing gloves, keeping the glue away from eyes and skin, and ensuring proper ventilation.
6. Can CA glue be sanded or painted over?
Yes, CA glue can be sanded and painted over once it has dried. However, it may require additional sanding and preparation for a smooth finish.
7. Can CA glue be removed if applied incorrectly?
Yes, CA glue can be removed with acetone or nail polish remover if applied incorrectly. However, this may damage the surface it was applied to.
8. How long does CA glue last before it expires?
CA glue typically lasts for several months to a year if stored properly in a cool and dry place. However, this can vary depending on the type and brand of glue.
9. Can CA glue be used for foam materials?
Yes, CA glue can be used for foam materials, but it should be used sparingly and with caution as it can melt or dissolve some types of foam.
10. How does CA glue compare to other types of adhesives?
CA glue is strong, fast-drying, and versatile, making it a popular choice for RC modeling. However, it may not be the best option for all types of projects and materials. Other types of adhesives, such as epoxy and silicone, may be better suited for certain applications.