Are you tired of constantly buying expensive glue for your crafting and household projects? Have you ever considered making your own crazy glue? It may sound like a daunting task, but with the right ingredients and equipment, it’s easier than you might think. Plus, you can have the satisfaction of knowing exactly what’s going into your glue and tailor it to your specific needs. In this article, we’ll guide you through the step-by-step process of making your own crazy glue at home, including tips and tricks for success. So let’s get started and unleash our inner chemist!
What You Will Need
Before getting started, make sure you have all the necessary ingredients and equipment at hand. Making Crazy Glue is a simple process that requires easily accessible items. You don’t need to waste money on store-bought glue when you can create your own at home. In this section, we will detail the exact materials and tools you need to produce an effective and long-lasting adhesive. If you’re curious about the technical name for super glue or how to open a Krazy Glue pen, visit our articles on those subjects. But for now, let’s focus on the items required for making Crazy Glue from scratch.
Ingredients
For making your own crazy glue at home, you will need the following ingredients:
| Ingredients | Amount |
|---|---|
| Gelatin | 1 tablespoon |
| Vinegar | 1 1/2 teaspoons |
| Corn Syrup | 1/2 teaspoon |
| Baking Soda | 1/4 teaspoon |
| Water | 1 tablespoon |
| Resin | 1 tablespoon |
Gelatin is the main ingredient that makes up the base of the glue, and it binds all the other ingredients together. Vinegar is used to help dissolve the gelatin, and is also useful in preventing the glue from becoming too thick. Corn syrup is used to add stickiness to the glue, while baking soda helps to harden it. Water is also used in the process of dissolving the gelatin. Resin provides extra strength to the glue once it has been created.
If you’re curious about the technical name for super glue, you can learn more here. And if you’re struggling to open a Krazy Glue pen, check out our tips here.
Equipment
To make crazy glue, you will need several pieces of equipment. These items can be easily found at your local grocery or hardware store. In this section, we will go over each piece of equipment that you will need to make your homemade glue.
| Pot and Stove | A pot is required to heat up the water. Any small or medium-sized pot will do. You will also need a stove as the pot needs to be heated over the flame. |
| Measuring Cups and Spoons | You will need a set of measuring cups and spoons to measure out the ingredients. |
| Mixing Bowl and Spoon | A mixing bowl and spoon are needed to mix the ingredients together. Choose a bowl that is larger in size, as the mixture needs room to be stirred without spilling over. |
| Container | You will need a container to store the glue. This can be a small jar or container with a lid that can be securely closed. |
It’s important to note that all of the equipment should be clean and dry before using. Using dirty or wet equipment can affect your glue’s effectiveness. Now that you know what equipment you will need, let’s move onto the process of making your own crazy glue at home.
If you want to learn more about commercial crazy glue, check out our article about what is crazy glue.
The Process
After assembling all the components needed to make your very own DIY crazy glue, it’s time to move onto the process of making it. This is where things may get a little tricky, but don’t worry – we’ve got you covered. By following the steps outlined below, with a bit of patience and attention to detail, you’ll be able to make a strong and reliable adhesive that you can use for all sorts of projects. So, let’s get started! But before we dive in, in case you are curious, you can check out how strong Krazy Glue is or learn more how super glue works.
Step 1: Boiling Water
One of the first steps in making crazy glue is boiling water. This is an essential step in creating the base for the glue. You will need a pot of boiling water to melt the gelatin. It is important to have the water at the right temperature to ensure that the gelatin dissolves properly.
To make sure the water is boiling:
| Step | Description |
| 1 | Fill a pot with water and place it on the stove. |
| 2 | Turn the heat on high and bring the water to a rolling boil. |
| 3 | Wait for the water to reach a temperature of 212°F or 100°C. |
Once the water is boiling, you can move on to the next step in the process. It is important to have all the necessary ingredients and equipment ready to go before you start boiling the water. This will help to make the process smoother and prevent any mishaps.
If you’re interested in learning more about the various types of glue available and their uses, check out what is Krazy Glue used for. For those who want to know how to use Krazy Glue Maximum Bond properly, we have an article on how to use Krazy Glue Maximum Bond.
Step 2: Dissolving the Gelatin
To make this DIY Crazy Glue recipe, the gelatin needs to be dissolved properly. Gelatin is a protein that dissolves in hot water and is extracted from animal products. It is important to use the right kind of gelatin in this recipe, as different types may produce different results. Here, we suggest using granulated gelatin, which can be found at most grocery stores.
To dissolve the gelatin, you will need about 1 tablespoon of granulated gelatin and 3 tablespoons of cold water. It is crucial not to skip this step as it affects the strength and consistency of the glue. Follow the steps below to dissolve the gelatin:
| Step | Instructions |
|---|---|
| 1 | Add the gelatin into a small bowl. |
| 2 | Pour the cold water over the gelatin and stir until it is evenly combined. |
| 3 | Let the mixture sit for about 5 minutes until the gelatin absorbs the water and becomes a gel-like substance. |
| 4 | Place the bowl into a pan of simmering water and stir the mixture until it dissolves into a liquid. The melting process should take about 5 minutes. |
Be careful not to overheat the gelatin mixture, as this may affect the glue’s consistency. Once the gelatin is completely melted, the next step is to add the vinegar.
Step 3: Adding the Vinegar
In the third step of this DIY recipe, we’ll add one of the key ingredients to our glue – vinegar. Vinegar is an acid that will act as a hardener for our glue once it has cooled. It will also help prevent the glue from spoiling.
Here’s how to add the vinegar:
- Grab your vinegar and carefully measure out exactly one tablespoon.
- Stir the vinegar into the water and gelatin mixture until it is well combined.
- Make sure that the vinegar is completely mixed in, and then continue to stir the mixture frequently as it cooks.
It’s important to note that the proportion of vinegar used in making this glue is crucial for its effectiveness. Adding too much or too little vinegar can make the glue too soft or too brittle respectively. This can compromise the bond between the surfaces being glued together, and the glue may not hold up over time.
Now that we’ve added the vinegar, the mixture will need to continue to cook and thicken. Keep stirring occasionally until the mixture reaches the desired consistency. The next step involves creating the resin, so let’s move on to that now.
Step 4: Creating the Resin
To create the resin for your crazy glue, you will need to gather together your materials. Start with a small glass or non-reactive metal measuring cup or bowl. Make sure that the container is heat-proof and can handle boiling water. Next, you will need to measure out your glue granules to make sure that you have the right proportions.
| Materials | Amount |
|---|---|
| Glue Granules | 1 tablespoon |
| Cold Water | 3 tablespoons |
| Baking Soda | 1/8 teaspoon |
Add the glue granules to your container and then add the cold water. Stir the two together until they are well combined. Make sure that all the granules are wet and that there are no dry spots left in the mixture.
Once the glue granules and water are well combined, you can add in the baking soda. This ingredient is what will help to activate the glue and turn it into a solid resin. Stir the baking soda into the mixture until it is fully dissolved.
At this point, your mixture will be very runny and liquid-like. That’s okay! The next step will be to boil this liquid mixture and turn it into a solid. Move on to the next step to learn how to do this.
Learn how to make more DIY projects.
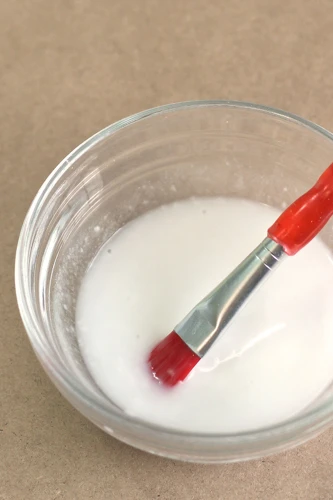
Step 5: Combining the Ingredients
With all the previous steps completed, it’s now time to combine all the ingredients to create your own crazy glue. Here is a step-by-step guide to mixing the ingredients:
- First, remove the saucepan from the heat and carefully pour the resin mixture into a small mixing bowl.
- Next, add the dissolved gelatin to the resin mixture and stir it in thoroughly.
- After that, pour the mixture into a squeeze bottle or any other container that you want to store your glue in.
- Then, let the glue cool and settle for a few hours. Make sure that you shake or stir the mixture occasionally during this time to make sure that the ingredients are evenly distributed.
It’s important to note that the glue may still be a little runny or transparent after combining the ingredients. Don’t worry! This is normal for homemade glue that uses gelatin. The glue will dry clear and harden over time.
You can now use your homemade crazy glue like you would use any other commercial super glue! Apply a small amount to one surface, press the two surfaces together, and hold them in place until the glue dries.
Remember to store your DIY glue in a cool, dry place, and avoid exposing it to extreme temperatures or direct sunlight. This should help prolong its shelf life for future use.
If you’re interested in other ways that glue has been used, check out our article on the cat who sniffed glue or who made super glue.
Step 6: Storing the Glue
Once you have finished making your DIY crazy glue, it is important to store it properly to ensure that it remains usable for as long as possible. Here are some tips for storing your homemade glue:
- Choose an airtight container: The best way to store your glue is in an airtight container that will prevent it from being exposed to air. Excess air exposure can cause the glue to dry out and become unusable. A small plastic or glass container with a tight-fitting lid is a great option.
- Keep it in a cool, dry place: Store your glue in a cool, dark place like a cupboard or drawer. Exposure to heat, humidity, or direct sunlight can damage the glue and decrease its effectiveness.
- Label the container: Clearly labeling your glue container with the date it was made and what it is will help you keep track of it and prevent any confusion with other substances you may have stored in the same area.
- Check it regularly: Make sure to check on your glue periodically to ensure that it is still usable. If it starts to thicken, dry out, or become discolored, it may be time to make a fresh batch.
By following these tips, you can ensure that your homemade crazy glue remains effective and ready to use for all of your DIY projects.
Tips and Tricks
As you venture into the world of DIY Crazy Glue, it’s important to keep a few tips and tricks up your sleeve. These helpful hints can make a big difference in the outcome of your final product. From managing proportions to controlling heat, paying attention to these details can ensure that your glue is strong, durable, and effective. So, let’s take a closer look at some of the most important tips and tricks for making Crazy Glue at home.
Proportions
When it comes to making Crazy Glue at home, following the right proportions is essential for its effectiveness. Here’s a breakdown of the proportions you should aim for:
| Ingredient | Amount |
|---|---|
| Gelatin | 1/2 teaspoon |
| Vinegar | 1 tablespoon |
| Baking Soda | 1/2 teaspoon |
These proportions ensure that the glue is strong and long-lasting. Too little or too much of any ingredient can result in a weak bond. It’s also important to note that the glue will become thicker as it cools, so it’s best to keep an eye on the consistency as you add each ingredient.
In addition to following these proportions, it’s important to use high-quality ingredients for the best results. This will ensure that the glue is strong enough to meet your needs, whether you’re using it for household repairs or crafting projects. And, as with any DIY project, it’s a good idea to test the glue on a small area before using it on a larger project. This will help you ensure that the glue is working as expected and that it’s the right choice for your needs.
Heat Management
Managing the heat during the “How to Make Crazy Glue: DIY Recipe” process is crucial to achieving the perfect consistency for your glue. You should pay attention to the temperature of the glue mixture throughout all the steps.
To help ensure successful heat management, we’ve provided some tips and tricks for each step in the process.
| Step Number | Tip/Trick |
|---|---|
| Step 1: Boiling Water | Use a thermometer to check the temperature of the water and make sure it reaches boiling point (100°C). |
| Step 2: Dissolving the Gelatin | Remove the pan from the heat source once the gelatin starts to dissolve. Do not let the mixture boil. |
| Step 3: Adding the Vinegar | Make sure the vinegar is at room temperature before adding it to the gelatin mixture. Do not heat the vinegar as it will affect the reaction. |
| Step 4: Creating the Resin | Stir the resin constantly until it reaches a temperature of 60°C. You can use a thermometer to monitor the temperature. |
| Step 5: Combining the Ingredients | Mix the two parts together once both the gelatin mixture and the resin have reached similar temperatures (between 50-60°C). Make sure to stir the glue mixture thoroughly before it starts to set. |
| Step 6: Storing the Glue | Store your glue in a cool and dry place to prevent the mixture from drying out or becoming too runny. Do not place the glue mixture in direct sunlight or near a source of heat. |
Pro-tip: If you’re having trouble with heat management, try using a double boiler. This will help to regulate the temperature of the mixture and prevent it from overheating or boiling. Just make sure the water in the bottom pot is not boiling too vigorously or touching the bottom of the top pot, as this can again heat the mixture too quickly.
Conclusion
Wrapping Up: Making your own Crazy Glue can save you a lot of money, and it’s an enjoyable activity that you can do at home. We hope this guide has been helpful in showing you how to make DIY Crazy Glue.
Remember: Be cautious of handling hot water and heat management while preparing the glue. Always follow the safety protocol when dealing with chemicals and make sure to store the glue in a cool and dry place.
Pro-Tip: If you don’t have time to make your own DIY Crazy Glue, there are many reliable commercial options that you can easily find in the market. However, if you’re a fan of DIY projects, this recipe is an excellent way to unleash your creative side.
Have Fun and Get Creative: Making your own Crazy Glue is not only an enjoyable craft but can also be an excellent skill to have. You can use it to bond different types of surfaces effectively, and it’s ideal for minor repairs. Regardless of your experience level, it’s always satisfying to create something with your own hands, which is why we encourage you to give this DIY recipe a try.
Frequently Asked Questions
Can I substitute gelatin with agar agar?
Yes, you can use agar agar as a vegan substitute for gelatin. However, the proportions and boiling times may vary. It’s best to test the recipe with small batches before making a larger amount.
Is Crazy Glue safe for kids to use?
Crazy Glue should only be used under adult supervision and in a well-ventilated area. It’s important to keep the glue away from children and pets.
Can I dye the glue a different color?
Yes, you can add food coloring or a drop of acrylic paint to the mixture to give the glue a different color. However, keep in mind that too much pigment can affect the glue’s bonding strength.
Can I store the glue in the fridge?
No, it’s best to store the glue at room temperature in an airtight container. Refrigeration can cause the glue to become too thick or in some cases, solidify.
Can I use white vinegar instead of apple cider vinegar?
Yes, white vinegar can be used instead of apple cider vinegar. However, apple cider vinegar is preferred as it has a milder scent.
Is Crazy Glue waterproof?
Yes, Crazy Glue is waterproof and can be used for outdoor applications. However, exposure to prolonged moisture can weaken the bond.
Can I add a fragrance to the glue?
While it’s possible to add a fragrance to the glue, it’s not recommended as it can affect the bonding strength. It’s best to use unscented glue for optimal results.
How do I remove Crazy Glue from my skin?
To remove Crazy Glue from your skin, soak the affected area in warm soapy water or rubbing alcohol for several minutes. Gently peel the glue off and avoid pulling too hard to prevent skin irritation.
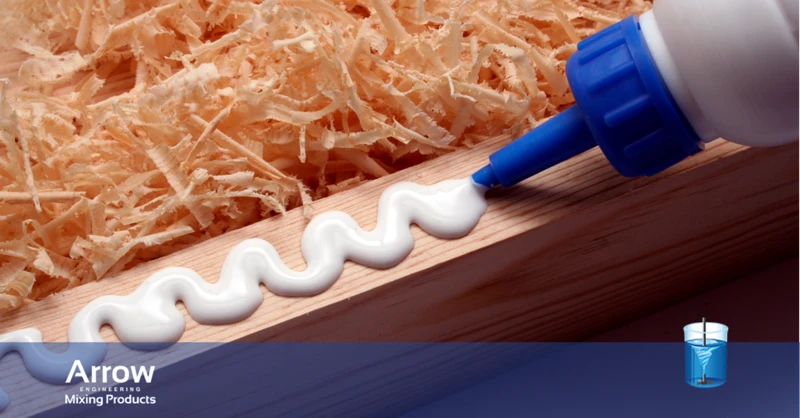
Can Crazy Glue be used for woodwork?
Yes, Crazy Glue can be used for woodwork. However, it’s best to sand the surfaces before applying the glue for better adhesion.
Can I use Crazy Glue on fabric?
No, it’s not recommended to use Crazy Glue on fabric as it can damage or dissolve the material. Instead, use fabric glue or sewing methods for attaching fabrics.