Have you ever found yourself struggling to open a new Krazy Glue Pen? Don’t worry, you’re not alone! The compact and convenient design of the Krazy Glue Pen can make it difficult to figure out how to open it for the first time. But fear not, because in this article we will provide you with a step-by-step guide on how to easily open your Krazy Glue Pen. Additionally, we’ll explore the benefits of using a Krazy Glue Pen, tips and tricks for using it, and how to store it properly. So, let’s dive in and get that glue flowing!
Why Use Krazy Glue Pen?
If you’re someone who loves DIY projects or likes to fix household items on your own, then having a Krazy Glue Pen in your toolkit can be a real lifesaver. This compact and easy-to-use glue pen can help you quickly fix anything from broken toys to jewelry. Not only is it easy to handle, but it also creates a strong and long-lasting bond in seconds. But before you dive in and start using it, it’s important to know how to open and handle it properly to avoid any mess or accidents. In this article, we will guide you step-by-step on how to open a Krazy Glue Pen and give you some tips on using it effectively. But first, let’s quickly go over what Krazy Glue Pen is and why it’s such a popular adhesive option.
Benefits of Krazy Glue Pen
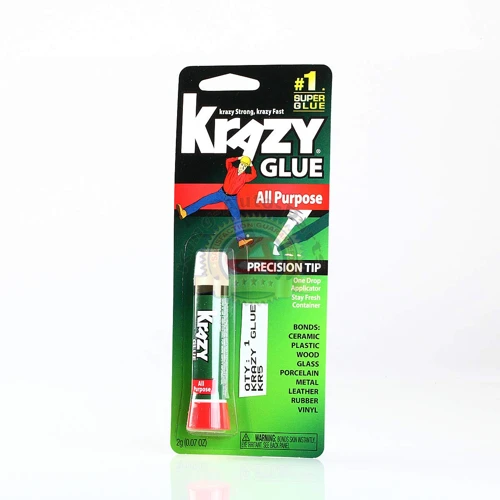
Krazy Glue Pen is a popular type of super glue that comes in a small pen-like container. This glue has numerous benefits that make it a favorite among crafters, DIY enthusiasts, and anyone who needs a strong adhesive for quick fixes.
Here are some of the main benefits of Krazy Glue Pen:
| Benefit | Description |
|---|---|
| Quick-setting | Krazy Glue Pen forms a strong bond in just a few seconds, making it ideal for quick fixes and repairs. |
| Strong adhesive | It is formulated to create a solid and long-lasting bond on a variety of surfaces, including metal, plastic, ceramic, wood, and more. |
| Easy-to-use | The pen-style container makes it easy to apply the glue precisely where you need it without creating a mess. |
| Portable | The small size of the pen container makes it easy to carry around in a pocket or purse, allowing you to have a reliable adhesive handy whenever and wherever you need it. |
| Versatile | Krazy Glue Pen can be used on a vast range of materials and can be used for a variety of applications, from sealing cracks to fastening small objects together. |
| Safe | The glue is non-toxic, making it safe for use in a variety of settings and with most materials. |
Whether you are using Krazy Glue Pen for a one-time repair or for an ongoing project, it is essential to know how to open it. Thankfully, the process is relatively simple and involves just a few steps.
Step-by-step Guide to Open Krazy Glue Pen
Are you struggling to open your Krazy Glue Pen? Don’t worry; we are here to help you with a step-by-step guide to make the process much easier. Whether it’s your first time using Krazy Glue or you’re a seasoned user, opening the pen can sometimes be a bit tricky. With our easy-to-follow instructions, you’ll be ready to use your Krazy Glue Pen in no time. But before we get started, let’s understand why Krazy Glue Pen is the preferred choice for bonding and repairing various objects.
Step 1: Unscrew the Cap
When you are ready to use your Krazy Glue Pen, you will need to follow a few simple steps to open it up and get started. The first step is to unscrew the cap.
| Step 1: | Unscrew the cap |
To do this, simply hold on to the barrel of the pen with one hand and use the other hand to twist the cap counterclockwise until it comes off. Some Krazy Glue Pen caps may be tight, so you may need to use a little bit of force to get it started.
It’s important to note that you shouldn’t try to pull off the cap or use any tools to help remove it, as this can damage the pen and cause the glue to dry out faster. Instead, just keep turning the cap until it comes off easily.
Once you have removed the cap, you will be able to see the tip of the pen where the glue will come out. From here, you can move on to the next step: removing the plug.
If you’re interested in learning more about how super glue works and what makes Krazy Glue unique, check out our What is Krazy Glue? article.
Step 2: Remove the Plug
After unscrewing the cap in the previous step, the next step is to remove the plug from the Krazy Glue Pen. This plug prevents the glue from leaking during transportation and storage.
Step 2: Remove the Plug
To remove the plug, gently pull it out from the tip of the pen using your fingers or a pair of pliers. Be sure to hold onto the pen securely to avoid breaking it.
Once you have removed the plug, you will notice that the glue has a small ball inside the tip. This ball helps ensure that the glue flows smoothly and consistently, providing a precise application.
It’s essential to remove the plug carefully to prevent any damage to the glue pen’s nozzle. Damaged nozzles can cause issues with the glue’s flow, resulting in a less precise application.
Now that you have successfully removed the plug, you can move on to the next step in the process, screwing on the nozzle. For more information on the benefits of Krazy Glue Pen or how to use Krazy Glue, check out our related articles on what does CA glue stand for and how to use Krazy Glue.
Step 3: Screw On the Nozzle
After removing the plug from the Krazy Glue Pen, you will now be able to see the nozzle located at the top of the pen. Take the nozzle, which is a small white attachment that fits in the hole where the plug previously sat. The nozzle is essential for applying the glue as it allows for precision application in tight spaces.
To attach the nozzle to the pen, you need to screw it onto the opening clockwise. It is critical to press the nozzle firmly to ensure it locks in place. You will know that you have successfully secured the nozzle when you feel a slight click. Make sure to tighten the nozzle properly to prevent any leakage of the glue.
Note: Before attaching the nozzle, it is essential to ensure that the pen’s tip is clean. If there is any glue residue at the tip, use a clean cloth to wipe it off before attaching the nozzle.
Once you have successfully attached the nozzle, you are now ready to use your Krazy Glue Pen for various applications. It is important to read the instructions and safety precautions before using the glue to prevent any accidents.
Make sure to check out our article on “How to Use Krazy Glue Maximum Bond” to learn more about using the glue for industrial and heavy-duty purposes.
Opening the Krazy Glue Pen is a simple process that involves unscrewing the cap, removing the plug, and finally attaching the nozzle. With careful attention to detail, you can ensure that your glue pen will be ready for all your adhesive needs.
Tips and Tricks for Using Krazy Glue Pen
As you become more familiar with the Krazy Glue Pen, there are some tips and tricks that can help you use it even more effectively. Here are some helpful hints to make your experience with this powerful adhesive even better. Whether you want to know more about precision, storage or anything in between, we’ve got you covered. Let’s dive in and explore how to maximize the potential of your Krazy Glue Pen!
Tips for Precision
When using a Krazy Glue Pen, precision is key. Here are some useful tips to keep in mind for achieving precise application:
- Use a small amount: Krazy Glue is known for its strong bond, so applying just a small amount can go a long way. Avoid overusing it, as it can cause excess glue to seep out and ruin your project.
- Apply on a clean surface: The surface you are gluing should be clean and free of any dust or debris. This will ensure the glue adheres properly and creates a strong bond.
- Hold the pieces together: If you are gluing two pieces together, hold them firmly in place for at least 30 seconds. This will give the glue enough time to bond and create a strong hold.
- Use the precision tip: The precision tip of the Krazy Glue Pen allows for precise application. Use this to your advantage by placing the glue exactly where you need it.
- Be patient: After applying the glue, give it time to dry and set. This can take anywhere from a few seconds to a few minutes, depending on how much glue you used and the materials you are bonding together. Patience is key to achieving a strong hold.
Using these tips will help ensure your Krazy Glue Pen application is precise and results in a strong bond. For more information on Krazy Glue and its capabilities, check out How Much Weight Can Krazy Glue Hold?.
How to Store the Pen
Proper storage of the Krazy Glue Pen is crucial for extending its life and ensuring that it remains effective. Here are some tips on how to store the pen:
| Tip | Description |
|---|---|
| Keep it Upright | Ensure that the pen is stored upright to prevent any leaks or spills. Placing it upside down can cause the glue to clog the nozzle and dry out faster. |
| Avoid Exposure to Air and Moisture | Seal the cap tightly after use to prevent air and moisture from entering the pen. Exposure to air can cause the glue to harden, while moisture can dilute the glue, making it less effective. |
| Store in a Cool, Dry Place | Avoid storing the pen in areas with high temperatures or humidity, as this can also cause the glue to dry out or become less effective. |
| Keep Away from Children | Store the Krazy Glue Pen in a safe place out of reach of children or pets. |
By following these simple tips, you can ensure that your Krazy Glue Pen remains in good condition and ready to use whenever needed. For more information on the science behind super glue, check out How Super Glue Works.
Conclusion
In conclusion, with this step-by-step guide, opening a Krazy Glue pen becomes a breeze. By following the simple steps, you can use the glue pen for various purposes such as fixing household items, arts and crafts, or even for medical purposes. The benefits of Krazy Glue pen are numerous and it is a reliable, effective, and affordable option for all your bonding needs.
Remember to store the pen properly and keep it away from reach of children. With precision and care, you can make the most out of your Krazy Glue pen and achieve amazing results. If you want to experiment with making your own glue, be sure to check out our article on how to make crazy glue. Alternatively, for those who are interested in the history of super glue, we have an interesting read about who made super glue. And if you’re looking for something fun to read, check out our article The Cat Who Sniffed Glue.
Frequently Asked Questions
What is the difference between Krazy Glue Pen and regular Krazy Glue?
The main difference is in the application method. Krazy Glue Pen is designed for precise and controlled application, while regular Krazy Glue comes in a tube and requires a separate applicator.
How long does it take for Krazy Glue Pen to dry?
Krazy Glue Pen typically dries within 10-30 seconds, depending on the material and amount of glue applied.
Can Krazy Glue Pen be used on plastic?
Yes, Krazy Glue Pen can be used on a variety of surfaces, including plastic. However, it is important to test a small area first to ensure compatibility.
Is Krazy Glue Pen waterproof?
Yes, once it is fully cured, Krazy Glue Pen is waterproof and can withstand exposure to water. However, it is not recommended for constant immersion or exposure to extreme heat or cold.
Can Krazy Glue Pen be used for bonding metal?
Yes, Krazy Glue Pen can be used for bonding metal. However, it may not be the best choice for heavy-duty or load-bearing applications.
How long does Krazy Glue Pen last?
Krazy Glue Pen can last for several uses, depending on the amount of glue applied and frequency of use. It is important to keep the cap on tight to prevent drying out.
Can Krazy Glue Pen be used to fill gaps?
No, Krazy Glue Pen is not designed for filling gaps. For larger gaps, it is recommended to use a filler or putty in conjunction with the glue.
What should I do if Krazy Glue Pen gets on my skin?
If Krazy Glue Pen comes into contact with skin, soak the affected area in warm water and gently massage the glue until it begins to loosen. Do not pull or force the glue off, as this can damage the skin.
Can I use Krazy Glue Pen on food contact surfaces?
No, Krazy Glue Pen is not recommended for use on food contact surfaces due to potential health hazards.
Can Krazy Glue Pen be used to bond fabric?
Krazy Glue Pen can be used to bond fabric, but it may not be the best choice for all types of fabric. It is recommended to test a small area first and make sure the glue will not discolor or damage the fabric.