Have you ever found yourself with a deflated inflatable on your hands and no clue what to do about it? It can be frustrating to navigate the world of glues and adhesives, especially when it comes to inflatables that require a specific type of bonding material. But fear not! We have compiled a comprehensive guide to help you choose the right glue for your inflatable. From the type of inflatable to the application method and drying time, we’ve got you covered. So, grab a seat and let’s find the best method for you to fix your inflatable once and for all.
Factors to Consider When Choosing a Glue

When it comes to repairing inflatables, one of the most important factors to consider is the type of glue to use. Not all adhesives are created equal, and choosing the right one can make all the difference in ensuring a successful repair. Several factors should be taken into account when considering which glue to use for your inflatable. The type of inflatable, the application method, the drying time, and the strength and durability of the glue are all important factors to consider. By taking the time to select the right glue for your inflatable, you can help ensure a long-lasting repair.
Type of Inflatable
Type of Inflatable
When choosing a glue for inflatables, it is important to consider the type of inflatable you are working on. Different types of materials may require different types of glue, so it’s important to do your research before starting the repair.
Below is a table outlining some common types of inflatables and the corresponding recommended glue type:
| Type of Inflatable | Recommended Glue Type |
|---|---|
| Pool Liner | PVC or Vinyl adhesive |
| PVC Inflatables | PVC glue |
| Heavy Duty Inflatables | Strong Urethane adhesive |
It’s important to note that this is not an exhaustive list, and different brands or models of inflatables may require different types of glue. Always check with the manufacturer or do thorough research before starting a repair.
Additionally, it’s important to consider the condition of the inflatable. If the material is heavily degraded or weathered, it may not be able to hold a repair. In this case, it may be more cost-effective to replace the inflatable rather than attempting a repair that may not last.
By taking the time to research the recommended glue type for your specific inflatable, you can ensure a strong and long-lasting repair.
Application Method
Application Method
Once you’ve chosen the right glue for your inflatable, it’s essential to apply it correctly. Below are some application methods that will help you achieve successful repairs.
| Method | Description |
|---|---|
| Brushing | This method involves applying glue with a brush. It’s ideal for cracks and seams that need to be resealed. Simply apply a thin layer of glue evenly across the affected area, and wait for it to dry. |
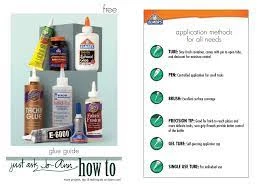
| Spraying | If you need to apply glue over a large area, spraying is the best method. You’ll need a sprayer or an aerosol can to apply the glue evenly. This method is best for vinyl and rubber inflatables. |
| Rolling | This method is best for large PVC inflatables that need resealing. You’ll need an adhesive roller to apply the glue evenly. Apply a thin layer of glue, and then roll over it with the adhesive roller to ensure even coverage. |
No matter which method you choose, it’s important to follow the instructions carefully. Each glue has a different set of instructions, so make sure you read them thoroughly before use. Also, be sure to work in a well-ventilated area and use protective equipment like gloves and masks.
If you’re not sure about the application method for your specific inflatable, refer to the manufacturer’s instructions or seek professional assistance. Improper application can lead to further damage or failure of the repair.
Pro tip: Before applying the glue, roughen the surface of the inflatable with sandpaper or a wire brush to help the glue adhere better.
For more information on PVC glue, check out “How to Glue PVC”, and for information about gluing ABS to PVC, see “How to Glue ABS to PVC”.
Drying Time
When it comes to choosing the right glue for inflatables, drying time is an essential factor to consider. The length of time it takes for the glue to dry will determine when you can use the inflatable again. Different types of glue have varying drying times, and the specific product you use will have instructions on the amount of time it will take to dry completely.
To give you a general idea, we’ve created a table of common types of glue used for inflatables and their respective drying times.
| Type of Glue | Average Drying Time |
|---|---|
| Epoxy Glue | 24-48 hours |
| Vinyl Adhesive | 2-4 hours |
| Urethane Adhesive | 24 hours |
| Super Glue | 10-30 seconds |
As you can see, there is quite a difference in drying times between different types of glue. If you need to fix an inflatable quickly, super glue could be the best option due to its incredibly short drying time. However, it’s important to note that super glue may not be as strong or durable as other types of glue.
On the other hand, epoxy glue takes much longer to dry, but it provides excellent strength and durability. This type of glue should be used for a more significant repair since it can create a stronger bond.
Vinyl adhesive and urethane adhesive fall between these two extremes, with drying times of a few hours to a full day. These adhesives provide a balance of strength and convenience, making them suitable for most inflatable repairs.
Keep in mind that the drying time can be affected by various factors like humidity, temperature, and the amount of glue used. Thus, it’s best to follow the instructions on the product label carefully and wait for the glue to dry completely before using the inflatable again.
Consider drying time (among other factors) when selecting the appropriate glue for your inflatable repair needs. While it may be tempting to choose a fast-drying glue, remember that it may not provide the necessary strength and durability for larger repairs. Make sure to follow the necessary precautions and steps when using glue to repair inflatables.
Strength and Durability
When it comes to choosing a glue for your inflatable, strength and durability are crucial factors to consider. After all, you wouldn’t want your inflatable to deflate just a few days after repair. Here are some of the strongest and most durable types of glue for inflatables:
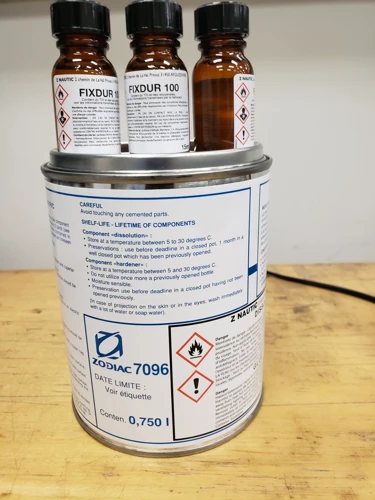
- Epoxy Glue: Epoxy glue is known for its strength and durability. It is a two-part adhesive that consists of a resin and a hardener. When combined, they create a chemical reaction that produces a very strong bond. Epoxy glue is great for repairing tears or holes in inflatables made of PVC or vinyl.
- Vinyl Adhesive: Vinyl adhesive is specially formulated to bond with PVC and vinyl materials. It is waterproof and provides a strong and durable bond, even on inflatable items that are frequently exposed to water. It is ideal for repairing small holes or tears in inflatable boats, pool toys or air mattresses.
- Urethane Adhesive: Urethane adhesive is another strong and durable option for repairing inflatables. It has a long curing time, which allows it to seep into the fibers and create a strong and permanent bond. It is ideal for repairing tears and punctures in materials such as neoprene, rubber or nylon.
- Super Glue: Super glue, or cyanoacrylate adhesive, is known for its quick-drying and bonding capabilities. It can bond almost any material, including rubber and plastic, in just a few seconds. Super glue is great for small inflatable repairs where a strong bond is needed quickly.
Of course, even the strongest glue won’t be effective if the application process is not done correctly. It’s important to follow the manufacturer’s instructions carefully, and give the glue ample time to dry and cure. Remember, investing in a quality and durable glue will save you the hassle of having to repair your inflatable over and over again.
If you’re looking for more information and tips on gluing PVC materials, check out our article on how to glue PVC pipe without primer.
Types of Glue for Inflatables
When it comes to repairing inflatables, using the right type of glue is imperative for a long-lasting fix. There are several types of glues suitable for inflatables, but not all are created equal. Each type has its own unique properties and uses, making it important to choose the right one for your particular needs. In this section of the article, we will discuss some of the most common types of glue used in inflatable repair and their strengths and weaknesses. Whether you’re fixing a pool toy or an air mattress, knowing the differences between these glues will help you make the right choice for your specific repair job.
Epoxy Glue
Epoxy glue is a two-part adhesive that consists of a resin and a hardener. It’s known for its tremendous bonding strength and versatility, making it suitable for use on various inflatable materials. When applying epoxy glue on inflatables, it’s crucial to follow the manufacturer’s instructions carefully to ensure optimal results. Here are some important things to consider when using epoxy glue for inflatable repairs:
– Surface Preparation: Before applying epoxy glue, make sure the inflatable surface is clean, dry, and free from dust, grease, or any other contaminants that can affect the bond. Use a cleaner appropriate for the material to be glued and a clean cloth. Let the surface dry completely before applying the adhesive.
– Mixing Ratio: Epoxy glue consists of a resin and a hardener that have to be mixed in the right proportions for optimal results. It’s important to read the instructions on the packaging carefully and follow the recommended mixing ratio.
– Application: Apply the epoxy glue evenly to the surface using a brush or spatula. Be sure to apply enough to cover the entire area adequately.
– Press and Hold: After applying the adhesive, press the parts together firmly and hold for the recommended drying time. This step ensures that the adhesive cures properly and creates a strong bond.
Epoxy glue is suitable for inflatables made of various materials, including vinyl, nylon, rubber, and polyester. However, it’s not recommended for use on polystyrene foam or polyethylene plastics. If you’re unsure whether epoxy glue is suitable for your inflatable, check the manufacturer’s instructions or contact the adhesive’s manufacturer.
Epoxy glue is an excellent option for repairing inflatables. It’s strong, versatile, and easy to use if you follow the correct application procedures. Note that epoxy glue can be challenging to remove, so be sure to use it sparingly and on small areas to avoid making the repair area too stiff.
Vinyl Adhesive
When it comes to repairing inflatables made of vinyl, the best adhesive to use is vinyl adhesive. This type of glue is specially formulated to bond with vinyl, making it a great choice for inflatables such as pool toys, air mattresses, and boats.
Advantages:
- Vinyl adhesive is easy to use. Simply apply the glue to the damaged area and press it firmly together until it dries.
- This adhesive is strong and durable, ensuring a long-lasting repair.
- It dries clear, allowing for a seamless repair that won’t be noticeable.
Disadvantages:
- The drying time can vary depending on the brand, so be sure to check the label for specific instructions.
- It can be difficult to find vinyl adhesive in some stores, so you may need to order it online.
- Vinyl adhesive can be messy and difficult to work with if you’re not careful.
To use vinyl adhesive, start by cleaning the damaged area with soap and water, and then drying it thoroughly. Apply a generous amount of glue to the area, making sure to spread it evenly. Press the damaged area firmly together and hold it in place until the glue dries completely.
If you’re looking for a stronger bond, you can use a heat gun to melt the glue and create an even stronger seal. However, this technique requires some practice and should only be attempted by experienced DIYers. You can learn more about using a heat gun with PVC glue here.
Vinyl adhesive is a great choice for repairing vinyl inflatables. Just be sure to read the label and follow the instructions carefully to ensure a successful repair.
Urethane Adhesive
Urethane adhesive, also known as polyurethane glue, has become a popular choice for inflatable repair due to its excellent bonding capabilities. Its strong bond makes it perfect for repairing tears, punctures, and leaks in inflatables. What sets urethane adhesive apart from other adhesives is its ability to adhere to a wide variety of surfaces, including hard plastics, metals, and fabrics.
Advantages:
- Very strong and durable bond
- Can adhere to a variety of surfaces
- Flexible when cured, allowing fabric to stretch and bend without compromising the bond
Disadvantages:
- Requires longer drying time than other adhesives, typically around 24 hours
- Slightly more expensive than other adhesives
When using urethane adhesive, it is important to note that it can expand as it dries, so it is necessary to apply it sparingly. A little bit goes a long way with this type of glue. It is also important to follow the manufacturer’s instructions carefully in terms of drying time and application temperature.
To use urethane adhesive on inflatables, follow these steps:
| Steps | Instructions |
|---|---|
| Step 1 | Clean the surface of the inflatable and make sure it is dry |
| Step 2 | Apply a small amount of urethane adhesive to one side of the repair patch, spreading it evenly with a spatula or similar tool |
| Step 3 | Press the repair patch onto the damaged area, making sure that all edges are firmly sealed |
| Step 4 | Hold the repair patch in place for the recommended drying time, which is typically 24 hours |
Urethane adhesive is an excellent choice for repairing inflatables due to its strength, flexibility, and ability to adhere to various surfaces. However, its longer drying time and higher cost may not be suitable for everyone. It’s worth noting that choosing the right adhesive for your inflatable depends on a variety of factors, and it’s important to consider them all before making your choice.
Internal link: If you are looking for information on how to glue PVC to metal, check out our article How to Glue PVC to Metal.
Super Glue
Super Glue is a fast-acting adhesive that is commonly used in inflatable repairs. It works well on small tears or punctures in vinyl inflatables and can be used for both indoor and outdoor inflatables. Super glue can handle temperatures up to 200 degrees Fahrenheit and has a drying time of about 10 to 15 seconds.
One of the benefits of using super glue is that it is easy to apply. Simply clean the surface of the inflatable, apply the super glue, and hold it in place for a few seconds. However, it’s important to note that super glue may not be suitable for larger tears or holes. It also lacks the flexibility required for inflatables that will be subjected to constant movement or folding.
Below is a table summarizing the pros and cons of using super glue on inflatables:
| Pros | Cons |
|---|---|
| Easy to apply | Not suitable for larger tears or holes |
| Fast-drying | May not be flexible enough for constant movement/folding of inflatable |
| Can handle high temperatures |
If you need information about gluing Traxxas tires, be sure to check out our article on “How to Glue Traxxas Tires” for a step-by-step guide. Or, if you want to know about gluing PEX pipe, head over to “What Glue to Use on PEX Pipe” for more information.
Application Techniques
When it comes to repairing inflatable items, choosing the right glue is one crucial consideration. But knowing how to apply the glue correctly is just as important to ensure a successful repair. Proper application techniques not only ensure that the glue sets and bonds effectively, but they also help prolong the life of the repaired inflatable. In this section, we will discuss some essential tips for applying glue to inflatables for long-lasting repairs.
Clean the Surface
Before applying any glue to the inflatable, it is important to clean the surface first. This will ensure that the glue adheres properly and the repair will be long-lasting. Here are some steps that you can follow to clean the surface:
| Step | Description |
|---|---|
| 1 | Deflate the inflatable – Make sure that the inflatable is completely deflated before cleaning the surface. This will ensure that you can access all parts of the surface without any hindrance. |
| 2 | Remove any dirt or debris – Use a soft brush or cloth to remove any dirt or debris that may be on the surface. This is important because dirt and debris can prevent the glue from adhering properly. |
| 3 | Clean the surface with alcohol – Dampen a clean cloth with rubbing alcohol or acetone and wipe the surface of the inflatable. This will remove any oil, grease, or other contaminants that may be present on the surface. Allow the surface to dry completely before proceeding. |
| 4 | Sand the surface – If the surface of the inflatable is smooth or shiny, you may need to roughen it up a bit using sandpaper. This will help the glue to adhere better. Use a fine-grit sandpaper and sand lightly in a circular motion. |
| 5 | Clean the surface again – Once you have sanded the surface, clean it again with alcohol to remove any dust or debris that may have accumulated during sanding. Allow the surface to dry completely before proceeding with the repair. |
By following these steps, you can ensure that the surface of the inflatable is properly cleaned and prepared for the application of glue. This will help to ensure a strong and long-lasting repair.
Apply Glue
Once the surface of the inflatable is clean and dry, it’s time to apply the glue. Follow these steps to ensure a successful repair:
- Apply the glue: Depending on the type of glue you’re using, the application process may vary. For epoxy glue, mix equal parts of the two components and apply the mixture to the area that needs repair. Vinyl adhesive can be applied directly from the tube using a nozzle. Urethane adhesive should also be applied directly from the tube. Super glue comes in small tubes and can be applied directly to the surface.
- Spread the glue: Use a brush or spatula to spread the glue evenly over the surface. Make sure to get complete coverage of the area that needs repair.
- Apply pressure: Firmly press the two surfaces together, being careful not to shift or move them. Apply pressure for the recommended amount of time, which can vary depending on the type of glue being used.
- Follow drying time instructions: Allow the glue to dry according to the instructions on the packaging. Drying time can vary from a few hours to a full day, so make sure to check the instructions and plan accordingly.
It’s important to carefully follow the instructions for the glue you’re using to ensure a successful repair. Make sure the surfaces are clean and dry before applying the glue, and be sure to spread it evenly and apply pressure for the recommended amount of time. Waiting for the glue to dry completely is also crucial for a long-lasting repair.
Press and Hold
Once you have applied the glue to the surface of the inflatable and positioned the patch in place, it’s time to press and hold until the glue dries. The amount of time needed for the glue to dry will depend on the specific type of glue you are using, as well as the environmental conditions of where you are working.
Table:
| Type of Glue | Average Drying Time |
|---|---|
| Epoxy Glue | 24-48 hours |
| Vinyl Adhesive | 2-4 hours |
| Urethane Adhesive | 24-48 hours |
| Super Glue | 10-30 seconds |
During this time, it is important to apply pressure to the patch to ensure a good bond between the patch and the inflatable. You can use your hands to apply pressure or place a heavy object on top of the patch.
It is crucial to avoid moving the patch or inflatable during this time, as this can compromise the adhesive’s bond and lead to a failed repair. Additionally, be sure to follow the manufacturer’s recommended drying time to ensure a proper cure.
By pressing and holding during the drying process, you can ensure a strong and durable repair that will get your inflatable back in action in no time.
Tips for Successful Inflatable Repairs
When it comes to inflatable repairs, the task can seem daunting. However, with the right techniques and tips, you can successfully repair your inflatable without having to purchase a new one. In this section we will provide some valuable advice on how to ensure successful repairs so you can get back to enjoying your inflatable equipment in no time. From checking for leaks to knowing how to properly fix small holes, keep reading to learn the tips that will make all the difference.
Check for Leaks
Before attempting to repair your inflatable, it’s important to first check for leaks. This will help you to determine the extent of the damage and what type of repair is needed. Here are some steps for checking for leaks:
Step 1: Inflate the inflatable to its maximum capacity.
Step 2: Use a spray bottle with soapy water to spray the entire surface of the inflatable.
Step 3: Look for bubbles that form on the surface of the inflatable. These bubbles indicate the location of a leak.
Step 4: Mark the location of the leaks with a marker or tape.
Step 5: Deflate the inflatable and clean the surface where the repair will be made.
It’s important to check for leaks before making any repairs, as repairing a leak that is not the main source can result in more damage to your inflatable. By following these simple steps, you’ll be able to accurately identify where the leaks are and make the necessary repairs.
Fix Small Holes First
When repairing inflatable items, it’s important to fix small holes first before moving on to larger ones. Small holes can be easier to repair and prevent further damage from occurring. Here are some steps to follow when fixing small holes on your inflatable:
- Locate the hole: Inflate the item and look for any holes or leaks. Sometimes it can be difficult to find the exact location of the hole, so you may need to submerge the inflatable in water and look for any air bubbles.
- Clean the surface: Once you’ve located the hole, clean the area around it with a damp cloth or sponge. Make sure the area is dry before moving on to the next step, as moisture can affect the effectiveness of the glue.
- Apply glue: Apply a small amount of vinyl adhesive or urethane adhesive to the hole using a toothpick or small brush. Be careful not to use too much glue, as this can cause the area to become stiff and brittle.
- Smooth it out: Use your finger or a flat tool to smooth out the glue and make sure it covers the entire hole. This will help ensure a secure bond and prevent air from leaking out.
- Let it dry: Allow the glue to dry completely before using the inflatable again. The drying time will vary depending on the type of glue you use, so be sure to follow the instructions carefully.
By fixing small holes first and following these steps, you can ensure that your inflatable stays in good condition and is ready for use whenever you need it.
Don’t Over Inflate
When it comes to inflatables, one of the simplest yet most important tips for ensuring their longevity is to avoid over inflating them. Over inflating can stretch the material beyond its capacity and cause it to weaken and ultimately tear. It’s important to follow the manufacturer’s recommended inflation level or use a pressure gauge to ensure that you’re not exceeding the maximum pressure for your inflatable.
Here are a few reasons not to over inflate your inflatable:
- Increased Risk of Puncture: Overinflating your inflatable puts it at a higher risk of punctures because it’s stretched tauter than it should be.
- Reduced Lifespan: Over inflating your inflatable can shorten its lifespan by causing the material to weaken and tear prematurely.
- Decreased Performance: Over inflating an inflatable can lead to decreased performance and decreased stability, making it more difficult to use and potentially dangerous.
It’s essential to find the right balance of inflation for your inflatable. If you’re not sure what the recommended pressure is, do some research or contact the manufacturer to ensure your inflatable is inflated to its optimal level. Remember to check the inflation regularly and adjust as needed, especially if you plan on using the inflatable in a variety of conditions or if it sits unused for an extended period of time.
Conclusion
After considering the factors mentioned above and exploring the different types of glue for inflatables, it’s important to emphasize the importance of carefully assessing the damage to determine the best course of action for repair.
Selecting the appropriate glue for your inflatable can make all the difference in having a repair that holds up over time. It is crucial to choose a glue that is specifically designed to work with the type of material your inflatable is made of.
Additionally, the application technique used will also affect the success of the repair. Taking the time to properly clean the surface, apply the glue evenly, and firmly press and hold the repaired area together will lead to a more durable result.
By following these guidelines and tips for successful inflatable repairs, you can have confidence in your ability to repair your inflatable, whether it’s a water float, camping mattress, or pool toy.
In conclusion, it’s worth emphasizing that using the appropriate glue and application techniques is crucial for maximizing the durability of your inflatable repair. By following the tips outlined in this article, you can confidently repair your inflatable and extend its life for more fun in the sun.
Frequently Asked Questions
What type of glue should I use for inflatable boats?
Epoxy glue or vinyl adhesive are both great options for repairing inflatable boats as they provide strong and durable bonds.
Can I use super glue on my inflatable pool?
Yes, super glue can be used on inflatable pools for small repairs. However, it may not provide the strength and durability needed for larger repairs.
Does the type of inflatable affect the type of glue I should use?
Yes, different types of inflatables require different types of glue based on their materials and construction.
How long does it typically take for glue to dry on inflatables?
The drying time for glue on inflatables can vary based on the type of glue and the environmental conditions, but it usually takes anywhere from a few minutes to a few hours.
Can I repair an inflatable with a puncture larger than 2 inches?
It is possible to repair an inflatable with a puncture larger than 2 inches, but it may require a more specialized repair technique and may not be possible for all types of inflatables.
Can I use regular household glue for inflatable repairs?
No, regular household glue is not recommended for inflatable repairs as it may not provide a strong and durable bond and may even damage the inflatable further.
Should I repair the inside or outside of my inflatable?
It is generally recommended to repair the inside of the inflatable when possible as it provides a more seamless repair and better protects the repair from outside elements.
Can I use a hair dryer to speed up the glue drying process?
Yes, a hair dryer set to a low heat setting can be used to speed up the glue drying process. However, be sure not to overheat the inflatable and to follow the manufacturer’s instructions for the specific type of glue being used.
How can I find a leak in my inflatable?
A common technique for finding a leak in an inflatable is to mix water and dish soap and apply it to the surface of the inflatable. Air bubbles will form at the location of the leak.
Can I use inflatable repair patches on any type of inflatable?
Inflatable repair patches are designed for use on specific types of inflatables and may not be suitable for all types. Be sure to check the manufacturer’s instructions and recommendations before using a repair patch.