When it comes to hot tub plumbing, the importance of using the right glue cannot be overstated. After all, a leak can cause significant damage to your hot tub and the surrounding area. But with so many types of glue available, how do you know which one to choose? In this comprehensive guide, we will outline the different types of glue for hot tub plumbing, the factors to consider when choosing one, a step-by-step guide on how to glue the plumbing, as well as some tips and tricks to help you along the way. Whether you’re a seasoned DIYer or a novice, this guide will equip you with the knowledge you need to make an informed decision and tackle any plumbing task with confidence.
Types of Glue for Hot Tub Plumbing
When it comes to hot tub plumbing, using the right type of glue is crucial to ensure a safe and leak-free system. There are various types of glue available in the market for different types of pipes and materials used in hot tub plumbing. It’s essential to choose the right one to ensure a strong and long-lasting bond. In this section, we’ll explore some of the most commonly used types of glue for hot tub plumbing and their unique features. Whether you’re looking for PVC, ABS, CPVC cement, or even epoxy for hot tub plumbing, we’ve got you covered. Let’s dive in and find out which one suits your needs best. Don’t forget to check out how much pipe glue you need for your project.
1. PVC Cement
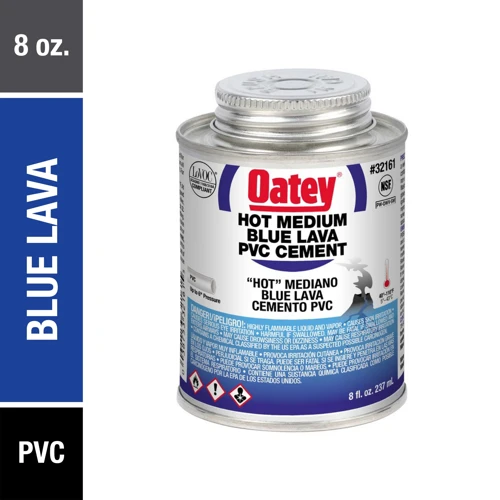
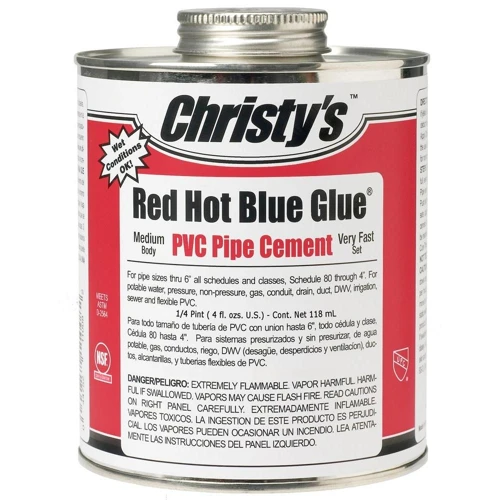
PVC cement is one of the most commonly used types of glue for hot tub plumbing. It is specifically designed to work with PVC pipes and fittings, creating a strong and permanent bond. PVC cement is often used in plumbing projects because it has a low viscosity, which means it can easily penetrate the small crevices between PVC pipes and fittings.
Here are some of the key features of PVC cement:
| Drying Time | Quick-drying – Typically dries within a few minutes of application, but can take up to an hour to fully cure. |
| Strength | Creates a strong and permanent bond that will last for many years. |
| Application Method | Applied using a small brush that is included with the cement. The cement is applied to both the pipe and fitting before they are joined together. |
| Temperature Resistance | Can withstand temperatures of up to 200 degrees Fahrenheit. |
| Chemical Resistance | Highly resistant to chemicals and other harsh substances, making it a good choice for hot tub plumbing. |
It is important to note that PVC cement typically only works with PVC pipes and fittings. If you are trying to glue PVC to another material, such as metal, you will need to use a specialized glue that is designed for that specific combination of materials.
If you want to learn more about the best super glue for wood or how to glue PVC to metal, check out our other articles on these topics to expand your knowledge.
2. ABS Cement
ABS cement is a popular type of glue used for hot tub plumbing repairs. ABS cement is specifically designed for use with ABS (Acrylonitrile Butadiene Styrene) pipes, which are commonly used in hot tub plumbing. ABS cement has a strong bond that can withstand high-pressure water flow and extreme temperatures.
Here are some features and benefits of ABS cement:
| Features | Benefits |
|---|---|
| Specifically formulated for ABS pipes | Ensures the strongest bond possible |
| Quick drying time | Repairs can be made quickly and easily |
| Chemical resistant | Ensures the bond will not deteriorate over time |
| Easy to apply | Repairs can be made without the need for a professional plumber |
| Waterproof bond | Ensures that the repair will be long lasting |
When using ABS cement, it is important to ensure that the pipes are clean and dry before applying the glue. Additionally, it is recommended to use an ABS cement primer before applying the glue for stronger bonding. ABS cement can be found at most hardware stores, and it is relatively inexpensive.
If you need to purchase ABS cement, consider checking out this site for more information on how to use it.
3. CPVC Cement
CPVC cement is specially formulated for use with Chlorinated Polyvinyl Chloride (CPVC), a plastic material that is commonly used for hot water plumbing. It is essential to use a CPVC cement when working with CPVC pipes to ensure a proper bond and avoid leaks. Here are some important details you should know about CPVC cement:
- CPVC cement is solvent-based and works by chemically melting the surface of the CPVC pipe and fitting to create a fused joint.
- One major advantage of CPVC cement is that it can be used in wet conditions, making it ideal for hot tub plumbing.
- The drying time for CPVC cement is faster than that of PVC cement, usually taking around 30 minutes to set and six hours for full cure.
- CPVC cement is also more expensive than PVC cement, but it is necessary to use the appropriate cement for the type of pipe to achieve a secure seal.
- When using CPVC cement, it is important to follow the manufacturer’s instructions carefully, as it can be hazardous if inhaled or comes into contact with skin or eyes.
If you need more information on CPVC, or if you want to learn about the best super glue for wood /what-is-the-best-super-glue-for-wood/, or perhaps how to glue tile to plastic /how-to-glue-tile-to-plastic/, you can check out our other articles for a more comprehensive guide.
4. Epoxy
When it comes to hot tub plumbing, epoxy is another option to consider. Epoxy is a two-part adhesive that creates a strong, durable bond when mixed together. It is often used for repairing leaks in hot tub plumbing. One advantage of using epoxy is that it can be used on both wet and dry surfaces.
However, before using epoxy on hot tub plumbing, it is important to note that it may not be compatible with all pipe materials. It is important to do some research or consult with a professional to ensure that the epoxy will create a strong bond with the specific material you are working with.
Here are the steps to use epoxy for hot tub plumbing repairs:
- Step 1: Clean the surface. Make sure the surface where the epoxy will be applied is clean and dry. Remove any dirt or debris that may prevent the epoxy from bonding properly.
- Step 2: Mix the epoxy. Follow the instructions on the epoxy packaging carefully. Typically, epoxy is packaged as two separate parts that must be mixed together before use.
- Step 3: Apply the epoxy. Using a putty knife or a similar tool, apply the mixed epoxy to the area that needs to be repaired.
- Step 4: Give the epoxy time to cure. Epoxy typically takes several hours to cure, but be sure to follow the instructions on the packaging for the specific product you are using.
While using epoxy can be a good solution for minor leaks in hot tub plumbing, it is important to keep in mind that it may not be a suitable long-term solution for larger or more severe leaks. It is also important to note that it may be difficult to remove epoxy once it has been applied. If you’re struggling to remove old glue from PVC, check out our article on how to un-glue PVC.
It is important to consider all factors and options before deciding which glue to use for hot tub plumbing repairs. While epoxy can be a viable solution, it’s always best to consult with a professional before making any decisions.
Factors to Consider When Choosing Glue for Hot Tub Plumbing
When it comes to hot tub plumbing, using the right glue is crucial. But with so many options on the market, it can be perplexing to choose the best one. To make it easier, here are some factors to consider when choosing glue for hot tub plumbing. By keeping these factors in mind, you can ensure that you choose the right glue for your hot tub plumbing needs. Whether you’re wondering about the compatibility of CPVC glue with wet conditions, the best adhesive for inflatables, or how to glue PP plastic, this guide will assist you in making the right choice.
1. Type of Pipe Material
When it comes to hot tub plumbing, it is crucial to use the right type of glue based on the pipe material. Using the wrong type of glue can cause the plumbing to leak and potentially damage the surrounding area.
PVC Pipes are the most common type of pipe used in hot tubs. PVC cement is the best type of glue to use with PVC pipes, as it chemically bonds to the plastic. This creates a strong, permanent hold that is resistant to leaks and damage. For more information on PVC glue, check out What is PVC Glue.
ABS Pipes are also used in hot tub plumbing but are less common than PVC pipes. ABS cement is the best type of glue to use with ABS pipes, as it chemically reacts with the plastic to create a strong bond.
CPVC Pipes, which are made of chlorinated polyvinyl chloride, are more heat-resistant than PVC pipes and are used in some hot tub models. When it comes to gluing CPVC pipes, it is important to use a cement that is specifically designed for CPVC. For more information on using CPVC glue when wet, check out Will CPVC Glue Work When Wet?.
PP (Polypropylene) Pipes may also be used in hot tub plumbing. Epoxy is the best type of glue to use with PP plastic, as it chemically bonds to the plastic to create a strong hold. For more information on gluing PP plastic, check out How to Glue PP Plastic.
It is important to note that not all glues work well with every type of plastic. Before purchasing glue for hot tub plumbing, make sure to check the label to ensure it is compatible with the type of pipe material.
2. The Severity of the Leak
When considering what type of glue to use on your hot tub plumbing, it’s important to take into account the severity of the leak. If the leak is minor, you may be able to get by with a quick fix using a temporary adhesive, but if the leak is more serious, you’ll want to choose a permanent solution.
Table: Severity of Leak and Recommended Glue Type
| Leak Severity | Recommended Glue Type |
|---|---|
| Minor | PVC cement |
| Moderate | ABS cement |
| Severe | CPVC cement or epoxy |
If the leak is minor, such as a small drip, PVC cement should suffice. PVC cement should also be used when repairing PVC pipes. If the leak is more moderate, such as a steady drip, ABS cement is a stronger adhesive to use. ABS cement is used for ABS pipes. In the case of a severe leak, such as a large hole, you’ll need a more heavy-duty adhesive. CPVC cement is used for CPVC pipes, and epoxy can be used as a quick fix for a variety of different materials.
It’s important to also keep in mind that the severity of the leak can impact the amount of time it takes for the glue to dry. The more serious the leak, the longer you’ll want to wait before using the repaired hot tub. If you’re dealing with a severe leak, it’s recommended to wait at least 24 hours before using the hot tub again.
Internal link: What Glue to Use on Inflatables: A Comprehensive Guide
It’s also important to note that while some leaks can be fixed with glue, there are some situations where replacement may be necessary. If the pipe or joint is badly damaged, it may be more cost-effective in the long run to replace the section of plumbing rather than constantly repairing it.
The severity of the leak plays a crucial role in determining what type of glue to use on hot tub plumbing. Taking this factor into account, alongside others such as pipe material and chemical resistance, will help ensure a strong and lasting repair.
Internal link: How to Melt PVC Glue: A Comprehensive Guide
3. Chemical Resistance
When considering what glue to use on hot tub plumbing, it’s important to take into account the chemical resistance of the glue. You want to make sure that the glue you choose can withstand exposure to the chemicals that are commonly used in hot tubs, such as chlorine and bromine.
PVC Cement is known for its chemical resistance to chlorine and other pool chemicals. This makes it a popular choice for hot tub plumbing repairs.
ABS Cement is also highly resistant to chemical exposure, including chlorine and bromine. This type of glue is commonly used for ABS plastic pipes.
CPVC Cement is specifically designed for use with CPVC plumbing systems, which are commonly found in hot tubs. This glue is resistant to most chemicals, including chlorine and bromine.
Epoxy is a two-part adhesive that is also highly resistant to chemicals and can be used on a variety of materials, including PVC, ABS, and CPVC pipes. However, it can be somewhat difficult to work with and may not be the best choice for beginners.
To simplify the comparison between these types of glue, take a look at the table below.
| Glue Type | Chemical Resistance | Best for |
|---|---|---|
| PVC Cement | Highly resistant to most pool chemicals, including chlorine | PVC pipes |
| ABS Cement | Highly resistant to most pool chemicals, including chlorine and bromine | ABS plastic pipes |
| CPVC Cement | Specifically designed for CPVC plumbing systems and resistant to most chemicals, including chlorine and bromine | CPVC pipes |
| Epoxy | Highly resistant to most chemicals and can be used on a variety of materials, including PVC, ABS, and CPVC pipes | Various pipe materials |
By choosing a glue with good chemical resistance, you can ensure that your hot tub plumbing repairs will stand up to the test of time and exposure to pool chemicals. However, it’s important to follow the manufacturer’s instructions carefully for best results.
4. Application Method
When it comes to the application method for gluing hot tub plumbing, there are a few things to keep in mind. Here are some key tips to ensure that the glue is applied correctly:
1. Clean and Dry the Surfaces: Before applying any glue, it is crucial to ensure that the surfaces are clean and dry. This will help the glue bond properly and ensure that there are no leaks.
2. Apply the Glue Liberally: When applying glue to the hot tub plumbing, it is important to apply it liberally. However, it is important not to overapply the glue, as this can cause the joint to weaken.
3. Use the Right Type of Brush: The type of brush that you use to apply the glue is also important. A small, disposable brush is recommended for applying the glue to the joints.
4. Twist and Hold for a Few Seconds: After applying the glue to the surfaces, it is important to twist and hold the joints for a few seconds. This will help ensure that the glue bonds properly and that there are no leaks.
5. Avoid Moving the Joint: Once the joint is in place, it is important to avoid moving it until the glue has fully dried. This will help ensure that the joint remains in place and that there are no leaks.
By following these tips for application method, you can ensure that your hot tub plumbing is properly glued and that there are no leaks. Remember, the key to successful gluing is preparation, patience, and attention to detail.
5. Drying Time
Regardless of the type of glue you choose for your hot tub plumbing, drying time is an important factor to consider. In this section, we will take a look at the expected drying times for each type of glue.
| Type of Glue | Recommended Drying Time |
|---|---|
| PVC Cement | Approximately 15 minutes |
| ABS Cement | Approximately 30 minutes |
| CPVC Cement | Approximately 2 hours |
| Epoxy | Varies by brand and type; can range from 5 minutes to 24 hours |
Keep in mind that these are recommended drying times. Depending on the humidity and temperature in your area, the drying time may be shorter or longer than the recommended time. It’s important to wait until the glue is completely dry before using your hot tub to avoid leaks and potential damage to your plumbing system.
Pro tip: Before using your hot tub, run some water through the plumbing system and check for leaks. This can help you catch any potential issues before they become bigger problems.
Step-by-Step Guide: How to Glue Hot Tub Plumbing
Are you a hot tub owner looking to fix some plumbing issues on your own? Gluing hot tub plumbing may seem challenging, but with the right tools and guidance, you can do it yourself. In this segment, we’ll provide you with a step-by-step guide on how to glue hot tub plumbing. Follow these instructions carefully to ensure a successful hot tub repair. Let’s dive in!
1. Preparation
Before you begin gluing your hot tub plumbing, it’s important to prepare the area properly. Follow these steps to ensure the best results:
1. Clean the Surface: Use a rag and some rubbing alcohol to thoroughly clean the area where you’ll be applying the glue. This will remove any dirt, dust, or debris that could hinder the bonding process.
2. Sand the Pipes: Use a fine-grit sandpaper to lightly sand the area where you’ll be gluing the pipes. This will help the glue adhere better and create a stronger bond.
3. Mark the Pipes: Use a pencil or marker to mark where you’ll be gluing the pipes. This will help ensure that you apply the glue evenly and in the correct locations.
4. Gather Materials: Make sure you have all of the necessary materials on hand before you begin. This includes the appropriate type of glue, primer (if necessary), a brush or applicator, and safety equipment like gloves and goggles.
5. Plan Your Work: Think about the order in which you’ll be gluing the pipes and plan accordingly. You want to work quickly and efficiently to ensure a strong bond and avoid any mistakes.
By following these essential preparation steps, you’ll be well on your way to successfully gluing your hot tub plumbing. Remember to take your time and work carefully for the best results.
2. Cut the Pipe and Dry-fit
Before you start applying glue to the hot tub plumbing, it’s important to properly cut the pipes and dry-fit them to ensure a snug fit. Here are the steps to follow:
Step 1: Measure and mark the pipe where you need to make the cut. Use a measuring tape and a pencil to mark the pipe.
Step 2: Use a pipe cutter or hacksaw to cut the pipe squarely on the marked line.
Step 3: Once you have cut the pipe, use a utility knife or emery cloth to remove any burrs or rough edges.
Step 4: Dry-fit the pipes and fittings to ensure a snug fit. This will help you identify if any adjustments or additional cuts need to be made before applying the glue.
It’s important to note that when dry-fitting the pipes and fittings, you should not force them together. They should easily slide together without much effort, but still be snug. If you have to force them, then it may not be the correct fit.
Additionally, it’s important to have a clean work area and proper tools for cutting the pipes. A clean work area will ensure that there are no dust or debris particles that could affect the glue’s effectiveness. Proper tools, such as a pipe cutter or hacksaw, will ensure a clean, straight cut on the pipe.
By following these steps and ensuring a proper fit before applying glue, you can prevent any leaks or issues with the hot tub plumbing.
3. Apply the Glue
Once you have prepared the joint and the pieces to be glued, it’s time to apply the glue properly. Follow these steps for a successful hot tub plumbing repair:
Step 1: Open the lid of the glue container. With a brush, apply a thin layer of glue to the outside of the pipe end.
Step 2: Apply another thin layer of glue to the inside of the fitting.
Step 3: Twist the pipe a quarter turn as you insert it into the fitting, making sure the glue covers the entire circumference of the pipe’s end. Hold it there for about five seconds to allow the joint to set.
Step 4: Use the same method to glue any additional pipes to the fitting.
Step 5: Wipe off any excess glue with a rag.
It’s important to follow the manufacturer’s instructions closely when applying the glue, as different types of glue may require different application methods. Also, avoid applying too much glue, as excess glue can cause the joint to fail. When in doubt, it’s always better to err on the side of caution and use less glue rather than too much.
Remember that you only have a few seconds to position the pieces together before the glue sets. Make sure that all connections are lined up correctly before inserting the pipes into the fittings. If you make a mistake and need to separate the pieces, do so immediately before the glue dries.
Finally, once you have finished gluing all the pipes and fittings, check for any leaks before allowing the hot tub to refill and test the entire plumbing system. If you see any leaks or gaps, repeat the gluing process until you achieve a tight seal.
4. Assemble the Pieces
Now that you’ve applied the glue to both the pipe and fitting, it’s time to assemble the pieces. Before doing so, make sure that you have the correct orientation and alignment for optimal results. Double-check that the angle is correct and that all pieces will fit together snugly.
To help with alignment, you may want to use an alignment jig or a clamp to hold everything in place while the glue sets.
Here are the steps to assemble the pieces:
| Step | Action |
|---|---|
| 1 | Insert the pipe into the fitting |
| 2 | Twist the pipe slightly, about a quarter turn, to spread the glue evenly throughout the joint |
| 3 | Hold the pieces together for about 30 seconds to allow the glue to set |
It’s important not to move the pieces too much as the glue sets, as this can disrupt the bond created by the glue. Once the glue has set, you can move on to the next joint and begin the process again.
Remember to work quickly and confidently during this step, but also be careful not to rush the process. Taking the time to ensure correct alignment and allowing sufficient time for the glue to set will help to ensure a strong and durable joint.
5. Allow Time to Dry
Ensuring that you give the glue enough time to dry is crucial for the success of your hot tub plumbing repair. Rushing the drying process can result in leaks and a failed repair job. Typically, the drying time will vary depending on the type of glue that was used and the temperature and humidity levels in the room.
To ensure that the drying process goes smoothly, follow these guidelines:
- Refer to the Glue Manufacturer’s Recommendations: Each glue type has a different recommended drying time, which is usually noted on the product packaging. Refer to these instructions and make sure that you give ample time for the glue to set.
- Avoid Disturbing the Connection: After you have assembled the pieces, avoid any contact or movement until the glue has completely set. Touching or moving the connection can disrupt the gluing process and compromise the integrity of the repair.
- Allow More Drying Time in Cooler Temperatures: Cooler temperatures generally result in slower drying times, so it is important to adjust your expectations accordingly. You may need to allow extra drying time if the temperature in the area is below average.
- Ensure That the Pipes Are Secured: Make sure that the pipes are clamped down or supported in a secure manner during the drying process. This will help avoiding any accidental movement and prevent the pipes from shifting during the drying period.
- Test the Connection: After the recommended drying time has elapsed, it is important to test the connection for any leaks. Both visual inspection and water pressure testing can be used to detect leaks. If you find any leaks, disassemble the connection and start the gluing process again.
By following these guidelines, you can ensure that your hot tub plumbing repair is a success. Allowing enough drying time is key to ensuring that the repair lasts for a long time and remains leak-free.
Tips and Tricks for Gluing Hot Tub Plumbing
As with any DIY project, even with the most thorough planning and careful execution, there are always small tips and tricks that can help you achieve the best results. When working with hot tub plumbing, this is especially true. The smallest mistake or oversight can cause leaks that can be incredibly inconvenient and costly to fix. It’s essential to know some tricks and tips that can help you avoid these issues. In this section, we’ll share some pro tips that can make a real difference in the quality of your hot tub plumbing project. So, let’s dive in and see what tricks await!
1. Use Primer
Using primer is an important step to ensure a strong bond between the glue and the pipe material. The primer works by cleaning the surface of the pipes and creating a surface for the glue to adhere to. Here are some tips for using primer in your hot tub plumbing glue:
- Choose the right primer: Make sure to choose a primer that is compatible with both the pipe material and the glue you are using. The primer should also be designed for use in hot water applications.
- Apply the primer properly: You only need to apply a thin layer of primer to both the pipe and fitting surfaces. Allow the primer to dry completely before applying the glue.
- Use the correct drying time: The drying time for primer can vary depending on the manufacturer and the temperature and humidity of your environment. Check the label for specific instructions and make sure to allow enough time for the primer to dry before gluing.
- Avoid touching primed surfaces: Once you have applied the primer, avoid touching the primed surfaces as oils from your skin can interfere with the bonding process.
By taking the time to properly use primer in your hot tub plumbing glue, you can ensure a strong and long-lasting bond between the pipes and fittings. This is especially important in hot tubs where water temperatures can reach high levels and put extra stress on the plumbing system.
2. Don’t Overapply Glue
When it comes to gluing hot tub plumbing, it’s important to use the right amount of glue. Using too little can result in a weak bond, while using too much can cause excess glue to fill the pipe and create blockages. In addition to that, overapplying the glue can cause the joint to deform and weaken over time. It’s crucial to follow the manufacturer’s instructions and apply the glue in the right quantity.
Here are some tips to avoid overapplying glue:
- Read the instructions: Different types of glue require different amounts to be effective. Reading the instructions before applying the glue can help you understand how much glue you need to use.
- Use a brush or applicator: It’s easier to control the amount of glue applied to the joint by using a brush or applicator rather than applying the glue directly from the tube.
- Apply glue only to the inside of the fitting: Applying glue to the outside of the pipe can cause excess glue to drip inside, leading to clogs and blockages.
- Wipe off excess glue: After applying the glue, use a clean rag or cloth to remove any excess glue. This can prevent it from dripping inside the pipe and creating blockages.
Remember, using the right amount of glue is crucial to ensure a strong and lasting bond. Overapplying the glue won’t make it stronger, but it might cause more harm than good. So, always follow the manufacturer’s instructions and use the right amount of glue for your hot tub plumbing.
3. Check for Leaks
After assembling the pipes with glue, it’s imperative to check for any potential leaks. Failure to detect leaks can result in significant water loss and cause significant damage to your hot tub’s plumbing system.
Here are some steps to take when checking for leaks:
| Step 1: | Turn off the hot tub’s power and empty it of water. A dry pipe will provide a better indication of leaks. |
| Step 2: | Use a flashlight to inspect all the glued joints and look for any visible signs of moisture. |
| Step 3: | Apply a small amount of soapy water to all the joints, including the valves, pump connections, and unions, making sure to cover the surface entirely. |
| Step 4: | Turn on the hot tub’s power and pressurize the system with water. Check for any bubbles, which can indicate leaks in the joints. |
| Step 5: | If there are any visible leaks, turn off the power and drain the water from the system. Wait for the pipes and joints to dry before repairing the affected areas. |
Checking for leaks is an essential step to ensure the proper functioning of your hot tub’s plumbing system. Despite taking precautions and using the correct type of glue, accidents can happen, and leaks can occur. Regularly inspecting the system and looking for signs of leaks can prevent significant damage and save you both time and money in the long run.
4. Be Mindful of Temperature and Humidity
When you are gluing hot tub plumbing, it is important to consider the temperature and humidity of the environment. Here are some things to keep in mind:
- Avoid extreme temperatures: The temperature of the environment should be within the recommended range specified by the manufacturer of the glue you are using. Extreme temperatures can affect the bonding strength, and the glue may not hold correctly.
- Low humidity: High humidity can affect the drying time of the glue. On the other hand, low humidity can cause the glue to dry too quickly, leaving no time for adjustment.
- Provide ventilation: Proper ventilation is essential when using glue. This helps to maintain a stable temperature and humidity level.
You should also avoid using glue in direct sunlight or other environmental factors that can affect bonding strength. By being mindful of the temperature and humidity of the environment, you can ensure that the glue holds the hot tub plumbing correctly and effectively.
Conclusion
After considering the different types of glue available for hot tub plumbing, and the factors to consider when choosing the right one, you should now feel more confident in approaching any plumbing issues you may come across. Remember to always choose the correct type of glue for your specific pipes, taking into account the material and any chemical resistance requirements.
When gluing hot tub plumbing, careful preparation and application are critical to ensuring a secure and long-lasting seal. Always check for leaks after assembly, and be mindful of the temperature and humidity when applying the glue. By following the step-by-step guide and tips and tricks provided, you will be able to effectively glue your hot tub plumbing, saving you time and money on expensive repairs or replacements.
In conclusion, regardless of your level of experience in hot tub plumbing, with the right glue and approach, you can easily tackle any plumbing issues that may arise. By taking the time to understand the different types of glue available, and the factors to consider when choosing the right one, you can ensure a secure and long-lasting seal for your hot tub plumbing. Don’t hesitate to seek professional assistance if needed, but with this comprehensive guide, you can confidently approach any hot tub plumbing project with ease.
Frequently Asked Questions
1. Can PVC glue be used on hot tub plumbing?
Yes, PVC glue is a popular choice for hot tub plumbing as it works well on PVC pipes. However, make sure to use the appropriate primer and cement for the type of PVC pipe being used.
2. What is the difference between PVC and CPVC cement?
CPVC cement is designed specifically for use on CPVC pipes, which are able to withstand higher temperatures than PVC pipes. If your hot tub plumbing uses CPVC pipes, make sure to use CPVC cement for a secure bond.
3. Can ABS cement be used on PVC pipes?
No, ABS cement is specifically designed for use on ABS pipes, not PVC pipes. Using the wrong type of cement can result in a weak bond or even damage to the pipes.
4. Do I need to use primer before applying glue?
Yes, using primer before applying glue is important as it helps to clean and prepare the surfaces of the pipes. This ensures a strong bond and helps to prevent leaks.
5. How should I prepare the pipes before gluing?
Make sure the pipe surfaces are clean and dry before applying primer and cement. This can involve using sandpaper to roughen the surface slightly and wiping the pipes with a clean cloth or paper towel.
6. How long does it take for the glue to dry?
The drying time can vary depending on the type of glue used and the conditions in which it is being used. Generally, it takes around 12-24 hours for the glue to fully cure and set.
7. Can I use epoxy on hot tub plumbing?
Yes, epoxy can be a good choice for certain types of hot tub plumbing repairs. However, it is important to use a high-quality epoxy that is designed for use on PVC or CPVC pipes.
8. What should I do if I notice a leak after using glue?
If you notice a leak after using glue, shut down the hot tub and let the area dry completely. Then, inspect the area and determine the source of the leak. If needed, you can reapply glue or replace the affected pipes.
9. Can I reposition pipes after applying glue?
No, once glue has been applied and the pipes have been assembled, it is difficult to make adjustments. Make sure to dry-fit the pipes and plan the assembly carefully before applying glue.
10. Is it safe to use hot tub plumbing immediately after gluing?
No, it is important to allow the glue to fully cure and set before using the hot tub. Using the tub too soon can put stress on the newly glued pipes and result in leaks or other issues.