Woodworking can be a very fulfilling and enjoyable hobby, but it can also be frustrating when the pieces you’re working on don’t stay together as they should. That’s where Gorilla Wood Glue comes in. This strong and versatile adhesive is perfect for all your woodworking needs, from joining two pieces of wood together to repairing broken furniture. In this article, we’ll take an in-depth look at how to use Gorilla Wood Glue effectively, including tips and tricks for preparing your surfaces, applying the glue, clamping the wood, and cleaning up afterward. With this invaluable knowledge, you’ll be able to tackle any woodworking project with confidence and ease.
Why Choose Gorilla Wood Glue?
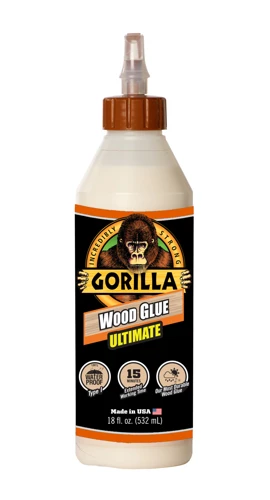
One of the most critical decisions in woodworking is choosing the right adhesive to bond your wood pieces. With a sea of options available, finding the best wood adhesive can be mind-boggling. However, if you are looking for a glue that provides an unmatched bond, is waterproof and dries a natural color, then Gorilla Wood Glue is your ideal choice. With its unique formula, Gorilla Wood Glue has earned a reputation for its superior strength and quality. In this section, we’ll discuss why Gorilla Wood Glue makes the perfect glue for your woodworking projects. However, if you would like to learn more about other Gorilla Glue products, such as how to store Gorilla Glue, click here.
Bonds Stronger
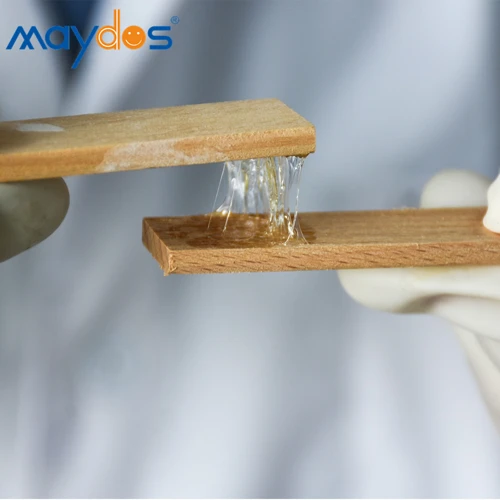
Gorilla Wood Glue is an excellent choice for wood bonding as it creates a bond that is much stronger than the wood itself. This means that the glue will actually hold the wood together instead of just sticking it together. When Gorilla Wood Glue dries, it forms a very strong and durable bond that can withstand a lot of pressure and stress.
One of the reasons why Gorilla Wood Glue is able to bond so strongly is because of its unique formula. Unlike other wood glues, Gorilla Wood Glue contains a foaming agent that causes the glue to expand slightly as it dries. This expansion allows the glue to penetrate deeper into the wood grain, which in turn creates a stronger bond.
Fun fact: According to gorilla glue inventor’s, he was inspired to create Gorilla Glue after seeing how strong the glue that was used to stick airplane wings together was.
To ensure that you get the most out of Gorilla Wood Glue’s bonding strength, it’s important to follow the proper application methods. This includes properly preparing the wood surface, applying the glue evenly, and using the right amount of clamping pressure.
If you want a wood glue that can provide a bond that is truly strong and durable, then Gorilla Wood Glue is an excellent choice. Its unique formula and foaming agent make it one of the most reliable and effective wood glues on the market today.
Dries Natural Color
Gorilla Wood Glue is an excellent choice for all your woodworking projects, especially if you are looking for a glue that dries to a natural color. Unlike some other glues that dry yellow or brown, Gorilla Wood Glue dries to the same color as the wood, making it virtually invisible.
One of the main benefits of using Gorilla Wood Glue is that it dries natural color. This is particularly important if you are working on a project where the glue lines are likely to be visible. The natural color of the glue means that once it dries, it blends in perfectly with the wood, leaving no visible traces of the glue line.
If you are planning on staining your project, the natural color of Gorilla Wood Glue makes it an excellent choice. Because it dries to the same color as the wood, it won’t affect the color of your stain. It is important to note, however, that you should always do a test on a scrap piece of wood before applying any stain to your project.
To get the best results when using Gorilla Wood Glue, it is important to apply it properly. You should apply a thin, even layer to one of the surfaces that you want to join together. Then, you should clamp the pieces together tightly and let the glue dry completely.
Here is a helpful table summarizing the benefits of using Gorilla Wood Glue:
| Benefits of Gorilla Wood Glue | |
|---|---|
| Bonds stronger | Learn more |
| Dries natural color | |
| Waterproof | Learn more |
| Can be sanded and painted | Learn more |
| Can be used on metal, ceramic, and plastic | Learn more |
| Can be thinned with water | Learn more |
| Flexible when dry | Learn more |
| Best for wood, but can be used on other materials | |
| Can be difficult to remove if applied incorrectly | Learn more |
If you are looking for a high-quality glue that dries to a natural color, Gorilla Wood Glue is an excellent choice. It bonds stronger, is waterproof, and can be sanded and painted, making it perfect for all your woodworking projects. Just be sure to follow the application instructions carefully for the best results.
Waterproof
Gorilla Wood Glue is waterproof, making it a superior adhesive of choice for both indoor and outdoor use. This feature is especially important when dealing with wooden items that are constantly exposed to moisture or water, such as outdoor furniture, decks, boats, and more.
When Gorilla Wood Glue dries, it creates a strong bond that can resist water and moisture, preventing it from weakening or breaking apart the glued materials. This is because Gorilla Wood Glue is made with a unique water-resistant formula that withstands exposure to the elements, ensuring the glue dries strong and durable every time.
Choosing Gorilla Wood Glue for waterproofing purposes is especially beneficial because it is heat-resistant, which means that it won’t melt or come undone under high temperatures or direct sunlight. This is a great feature for wooden items that are exposed to the sun, such as patio furniture, decks, or outdoor structures.
Gorilla Wood Glue’s waterproof feature stands out because it adds an extra layer of protection and durability to wooden items. It is able to resist moisture and water damage, which in turn helps prevent rotting and protects the glue from premature degradation. If you’re looking for a reliable wood glue that can hold up against the elements, Gorilla is the brand to choose.
Preparing for Gluing
Before applying Gorilla Wood Glue, it is crucial to properly prepare the surfaces and materials to be joined together. This will ensure the strongest possible bond and prevent any issues that may arise during the curing process. Proper preparation can ensure the success of any woodworking project using Gorilla Wood Glue. So, let’s dive into the key steps to take when preparing for gluing.
Surface Preparation
Before starting to glue, make sure that the surfaces you plan to bond are clean, dry, and smooth. Any dirt or debris will interfere with the adhesive properties of the glue. Here are the steps to prepare the surface for gluing:
- Cleanliness is key: Start by wiping the surfaces with a clean, dry cloth to remove any dust or loose particles. Then use a damp cloth to remove any remaining debris or oils. Allow the surface to dry completely before applying any glue.
- Sand surfaces: You may need to sand the surfaces to create a better bonding surface. Use sandpaper with a medium-grit (120-150 grit) to roughen the surface slightly without damaging the wood itself. This will create tiny grooves or valleys which will hold the glue, creating a stronger bond.
- Remove any previous glue: If there is any leftover glue residue from previous glue applications, use a scraper or sandpaper to remove it before gluing.
- Apply a primer: If you are gluing two different types of woods, you can use a primer to enhance the adhesion. Apply the primer and let it dry for the recommended time before using the Gorilla Wood Glue.
By following these surface preparation steps, you will ensure the best possible adhesion between the two surfaces. Once the surfaces are ready, you can move on to checking the wood’s moisture content before applying Gorilla Wood Glue.
Checking Wood Moisture Content
Before applying Gorilla Wood Glue, it’s essential to check the moisture content of the wood you’ll be gluing. Wood that is too wet or too dry can affect the strength of the bond and the curing time of the glue.
Checking the moisture content of wood is important for understanding how the wood will interact with the glue. Ideally, the moisture content should be between 6% and 10% for best results. You can use a moisture meter to measure the moisture content of the wood, which is placed in direct contact with the wood to provide an accurate reading.
| Moisture Content | Action |
|---|---|
| Above 12% | Avoid using the wood until it dries out or acclimates to the environment. The wood may split or warp as it dries. |
| Between 6% and 12% | Perfect moisture content for using Gorilla Wood Glue. |
| Below 6% | Bring the wood to a warmer, more humid environment to increase the moisture content. Otherwise, the bond may be weaker than desired. |
Checking the moisture content of the wood before using Gorilla Wood Glue is crucial to ensuring a strong bond that cures properly. Make sure to follow these guidelines to prevent any issues with the finished product.
If you want to learn more about differences between Gorilla Wood Glue and Krazy Glue, check out our article on which is better, Krazy Glue or Gorilla Glue.
Applying the Glue
When it comes to using Gorilla Wood Glue, the application process is crucial for achieving a strong bond. Before applying the glue, you need to make sure that the surfaces are prepared and ready to bond. In this section, we’ll explore the steps involved in applying the glue to ensure a successful glue-up. Let’s dive in and discover the tips and tricks that will help you get the most out of your Gorilla Wood Glue.
Dispensing the Glue
When it comes to dispensing Gorilla Wood Glue, there are a few tips and tricks that can make the process easier and more effective. Here is what you need to know:
- Squeeze the bottle gently: Gorilla Wood Glue comes in a plastic bottle with a pointed nozzle. To get the glue out, gently squeeze the bottle from the middle. Don’t squeeze too hard or too fast, or you may end up with too much glue in one spot.
- Start with a small amount: It’s always better to start with a small amount of glue and add more if needed. Use the pointed nozzle to apply the glue in a thin, even layer. For difficult-to-reach areas, you can use a brush or a toothpick to apply the glue.
- Avoid applying too much pressure: When dispensing the glue, avoid applying too much pressure or the glue will squish out of the joint. Place the nozzle close to the surface and let the glue flow out naturally.
- Apply glue to both surfaces: To ensure a strong bond, apply glue to both surfaces that you plan to join. This is especially important when gluing end grain or porous wood, as these surfaces tend to soak up more glue.
- Wipe off excess glue: After applying the glue, use a damp cloth to wipe off any excess glue. This will prevent the glue from drying and leaving a hard, crusty residue on your project. It’s important to do this step quickly, before the glue starts to set.
By following these simple tips, you can dispense Gorilla Wood Glue like a pro and ensure that your project bonds together securely. Remember to work carefully and patiently, and don’t rush the process. With a little bit of practice, you’ll be gluing like a pro in no time!
Spreading the Glue
When it comes to spreading the Gorilla Wood Glue, it’s important to understand that a thin and even layer will provide the best results. Here are some tips to help you properly spread the glue:
- Apply glue to both surfaces: The first step is to apply glue to both of the surfaces you plan to bond. Use a brush, roller, or even a scrap piece of wood to apply the glue.
- Spread the glue: Depending on the size of the surface you’re working on, you may need to spread the glue with your fingers or a spreader tool to ensure an even application. Be sure not to use too much pressure, as this can cause the glue to push out of the joint.
- Pay attention to the grain direction: If you’re gluing wood together, pay attention to the direction of the grain. Applying glue across the grain can weaken the joint, so make sure you’re applying the glue along the grain.
- Clean up excess glue: It’s important to clean up any excess glue before it dries, as it can be difficult to remove once it has cured. Use a damp cloth or paper towel to wipe away any excess glue.
By following these tips for spreading the Gorilla Wood Glue, you’ll be able to achieve a strong and durable bond between your wood pieces. Remember to always follow the manufacturer’s instructions and allow ample time for the glue to cure before using the bonded pieces.
Clamping the Wood
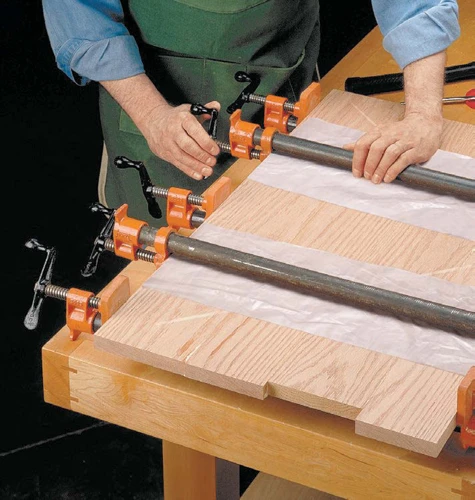
Once you have applied Gorilla Wood Glue to your project, it’s time to clamp the wood for optimal bonding. Clamping the wood allows the glue to dry under pressure, ensuring a strong hold. But with so many types of clamps available, it can be overwhelming to choose the right one. Let’s dive into the world of clamping and explore the best practices for securing your project with Gorilla Wood Glue.
Choosing the Right Clamps
When it comes to woodworking projects, choosing the right clamps is essential to achieve a successful bond. Using the wrong clamps may lead to weak or unevenly bonded joints. Here are some factors to consider when choosing the right clamps for your project:
| Clamp Type | Description | When to Use |
|---|---|---|
| Bar Clamps | Long steel bars with fixed jaws that can be positioned along the bar. | Great for larger projects where a lot of pressure is needed to clamp the wood together. |
| C-Clamps | Shaped like the letter “C” with a threaded adjustable screw. | Good for smaller projects where a moderate amount of pressure is needed to clamp the wood together. |
| Spring Clamps | Have two jaws, connected by a spring, which produces pressure. | Useful for holding two pieces of wood together while gluing. |
| Pipe Clamps | Adjustable metal clamps with a long pipe. | Ideal for larger glue-ups where a lot of pressure is needed to clamp the wood together. |
It’s also important to consider the size of the clamp in relation to the size of the wood being glued. Using a clamp that is too small may not provide enough pressure, while using a clamp that is too large may be difficult to position and apply pressure evenly.
Take the time to choose the right clamps for your project. Investing in quality clamps that are appropriate for the task at hand will help ensure that your woodworking projects are successful.
Clamp Placement
When it comes to clamping the wood after applying Gorilla Wood Glue, proper clamp placement is crucial to ensuring a strong and secure bond. Here are a few tips to help you get the most out of your clamping process:
- Clamp evenly. When clamping, make sure to apply equal pressure along the entire surface you are gluing. An uneven clamp can cause the wood to warp or bow, compromising the bond created by the glue.
- Place clamps strategically. Depending on the size and shape of the object you are gluing, you may need to strategically place your clamps in order to apply even pressure. Avoid placing clamps too close together, which can cause the wood to splinter, or too far apart, which can result in an uneven bond.
- Use cauls. Cauls are small blocks that can be placed between the clamps and the wood to help distribute pressure more evenly. This can be especially helpful when gluing round or curved pieces of wood, as it can be difficult to get a clamp to apply even pressure in these situations.
- Apply enough pressure. Gorilla Wood Glue works best when a significant amount of pressure is applied during the curing process. Make sure to tighten the clamps as much as possible without causing the wood to crack or split. If you find that the glue is squeezing out from between the wood panels, you are applying the right amount of pressure.
By following these tips for clamp placement, you can help ensure a strong and secure bond when using Gorilla Wood Glue on your woodworking projects. Proper clamp placement is just one of the many steps you can take to get the most out of this high-quality adhesive.
Curing and Cleanup
After patiently waiting for the Gorilla Wood Glue to dry, it’s now time to remove the clamps and start the process of curing and cleanup. This is a crucial step to ensure a successful bonding and a clean finished product. In this section, we will go through some tips on how to properly cure the glue and remove any excess residue that may have been left behind. Let’s dive into the details.
Curing Time
Once the clamped wood has been left undisturbed for the recommended time, it’s time to check the curing status of the glue. The curing time for Gorilla Wood Glue depends on various factors, such as the wood’s moisture content, temperature, and the amount of glue used.
For best results, wait at least 24 hours for the glue to cure completely.
One way to check whether the glue has fully cured is to try to remove the clamps. If the pieces loosen, it means that the glue has not yet fully cured. In that case, reapply the clamps and wait an additional 12-24 hours before checking again.
Keep in mind that low temperatures and high humidity can also affect the curing time. If the temperature is below 50°F or the humidity is above 75%, the curing process may take much longer than expected. So, it’s essential to work in a controlled environment that’s dry and at a reasonable temperature while using Gorilla Wood Glue.
After the glue has cured properly, it’s time to clean up any excess glue that may have seeped out. Use a damp cloth to wipe away any excess glue. If the glue has already dried, use sandpaper to remove the excess glue carefully. It’s important to clean up the glue before it dries entirely to avoid any unsightly residue left behind.
Gorilla Wood Glue is an excellent option for any woodworking project, and it’s crucial to follow the proper curing time to ensure optimal results. With the right environmental conditions, the glue will provide a strong, long-lasting bond that will withstand the test of time.
Cleanup
After completing the gluing process, it is important to ensure that the tools and surfaces used are properly cleaned to prevent any residue build-up or damage.
Clean up your tools: Gorilla Wood Glue can be easily cleaned up with water when it is still wet. So, clean your tools, clamps, and any excess glue from the surface as soon as possible after the clamping process is completed.
Remove excess glue: After the glue has dried, any excess glue can be carefully removed with a chisel or sandpaper. However, it’s important to take care while removing the excess glue so that the wood doesn’t get damaged.
Dispose of properly: Any remaining glue should be disposed of properly. It is always recommended to follow your local regulations for disposal of the glue bottle or container.
Here’s a simple cleanup table that you can use as a reference:
| Tools/materials | Cleanup Method |
|---|---|
| Wet glue residue | Clean with water |
| Excess glue after drying | Carefully remove with chisel or sandpaper |
| Glue bottle/container | Dispose of according to local regulations |
Note: Always store the glue in a cool, dry place and ensure the lid is tightly secured after each use. This will help to prolong the shelf life of the glue and ensure it is ready to use when needed.
Conclusion
In conclusion, using Gorilla Wood Glue for your woodworking projects is a smart choice for many reasons. Firstly, the glue bonds stronger than many other types of glue, so you can be confident that your project will stay together. Additionally, it dries a natural color, so you don’t have to worry about unsightly glue lines ruining the aesthetic of your finished project. Finally, it’s waterproof, so your project can hold up even in damp or humid conditions.
However, in order to get the most out of your Gorilla Wood Glue, it’s important to properly prepare your surfaces and choose the right clamps for your project. Make sure to check the moisture content of your wood before gluing and take the necessary steps to ensure a strong bond. Proper clamping can also greatly affect the strength of the bond, so take the time to choose the right clamps and place them correctly.
Lastly, keep in mind that Gorilla Wood Glue has a curing time, so be patient and allow enough time for the glue to fully dry and cure before using or handling your project. Once it’s dry, cleanup is easy with just soap and water.
Overall, with the right technique and preparation, using Gorilla Wood Glue can help you create strong and beautiful woodworking projects. So give it a try and see the difference it can make in your next project.
Frequently Asked Questions
Can I use Gorilla Wood Glue on plastic or metal surfaces?
No, Gorilla Wood Glue is specifically formulated for wood surfaces and will not adhere properly to plastic or metal.
Do I need to use clamps when using Gorilla Wood Glue?
Yes, clamps are necessary to ensure a strong bond between the pieces of wood being glued together.
How long does it take for Gorilla Wood Glue to dry?
Gorilla Wood Glue typically dries within 20-30 minutes, but full curing can take up to 24 hours.
Is Gorilla Wood Glue waterproof?
Yes, Gorilla Wood Glue is waterproof and can be used for outdoor projects.
How do I clean up excess glue?
Wipe away excess glue with a damp cloth before it dries. If the glue has already dried, use a scraper or sandpaper to remove it.
Can Gorilla Wood Glue be sanded or painted?
Yes, once the glue has fully cured, it can be sanded or painted over like regular wood.
What is the best way to store Gorilla Wood Glue?
Store Gorilla Wood Glue in a cool, dry place with the lid tightly closed to prevent air exposure.
Can I use Gorilla Wood Glue for furniture repair?
Yes, Gorilla Wood Glue is great for repairing furniture as it creates a strong and durable bond.
Is Gorilla Wood Glue safe to use?
Yes, Gorilla Wood Glue is non-toxic and safe to use for DIY projects.
Why is it important to check wood moisture content before gluing?
If the wood is too wet, it can affect the bonding strength of the glue. Checking the moisture content ensures that the wood is at the appropriate level of dryness for gluing.